
Ensuite bathroom renovation - before and after!
In this post I am sharing the renovation of my own ensuite bathroom including all the before and after images, the design drawings and the products used.
About the project
This is a project in my own home and was undertaken as part of a larger renovation we were doing on the house about 18 months ago. I have other posts on my blog about some of the other areas we have renovated - so make sure you check them out over here.

Before Photos and Floor Plan
To orient you to the space and how it fits in to the overall floor plan of the house, I have included the full floor plan below. You can find the ensuite (in its original condition pre-renovation) circled in red. This floor plan was from when we purchased the house so has since changed a bit.

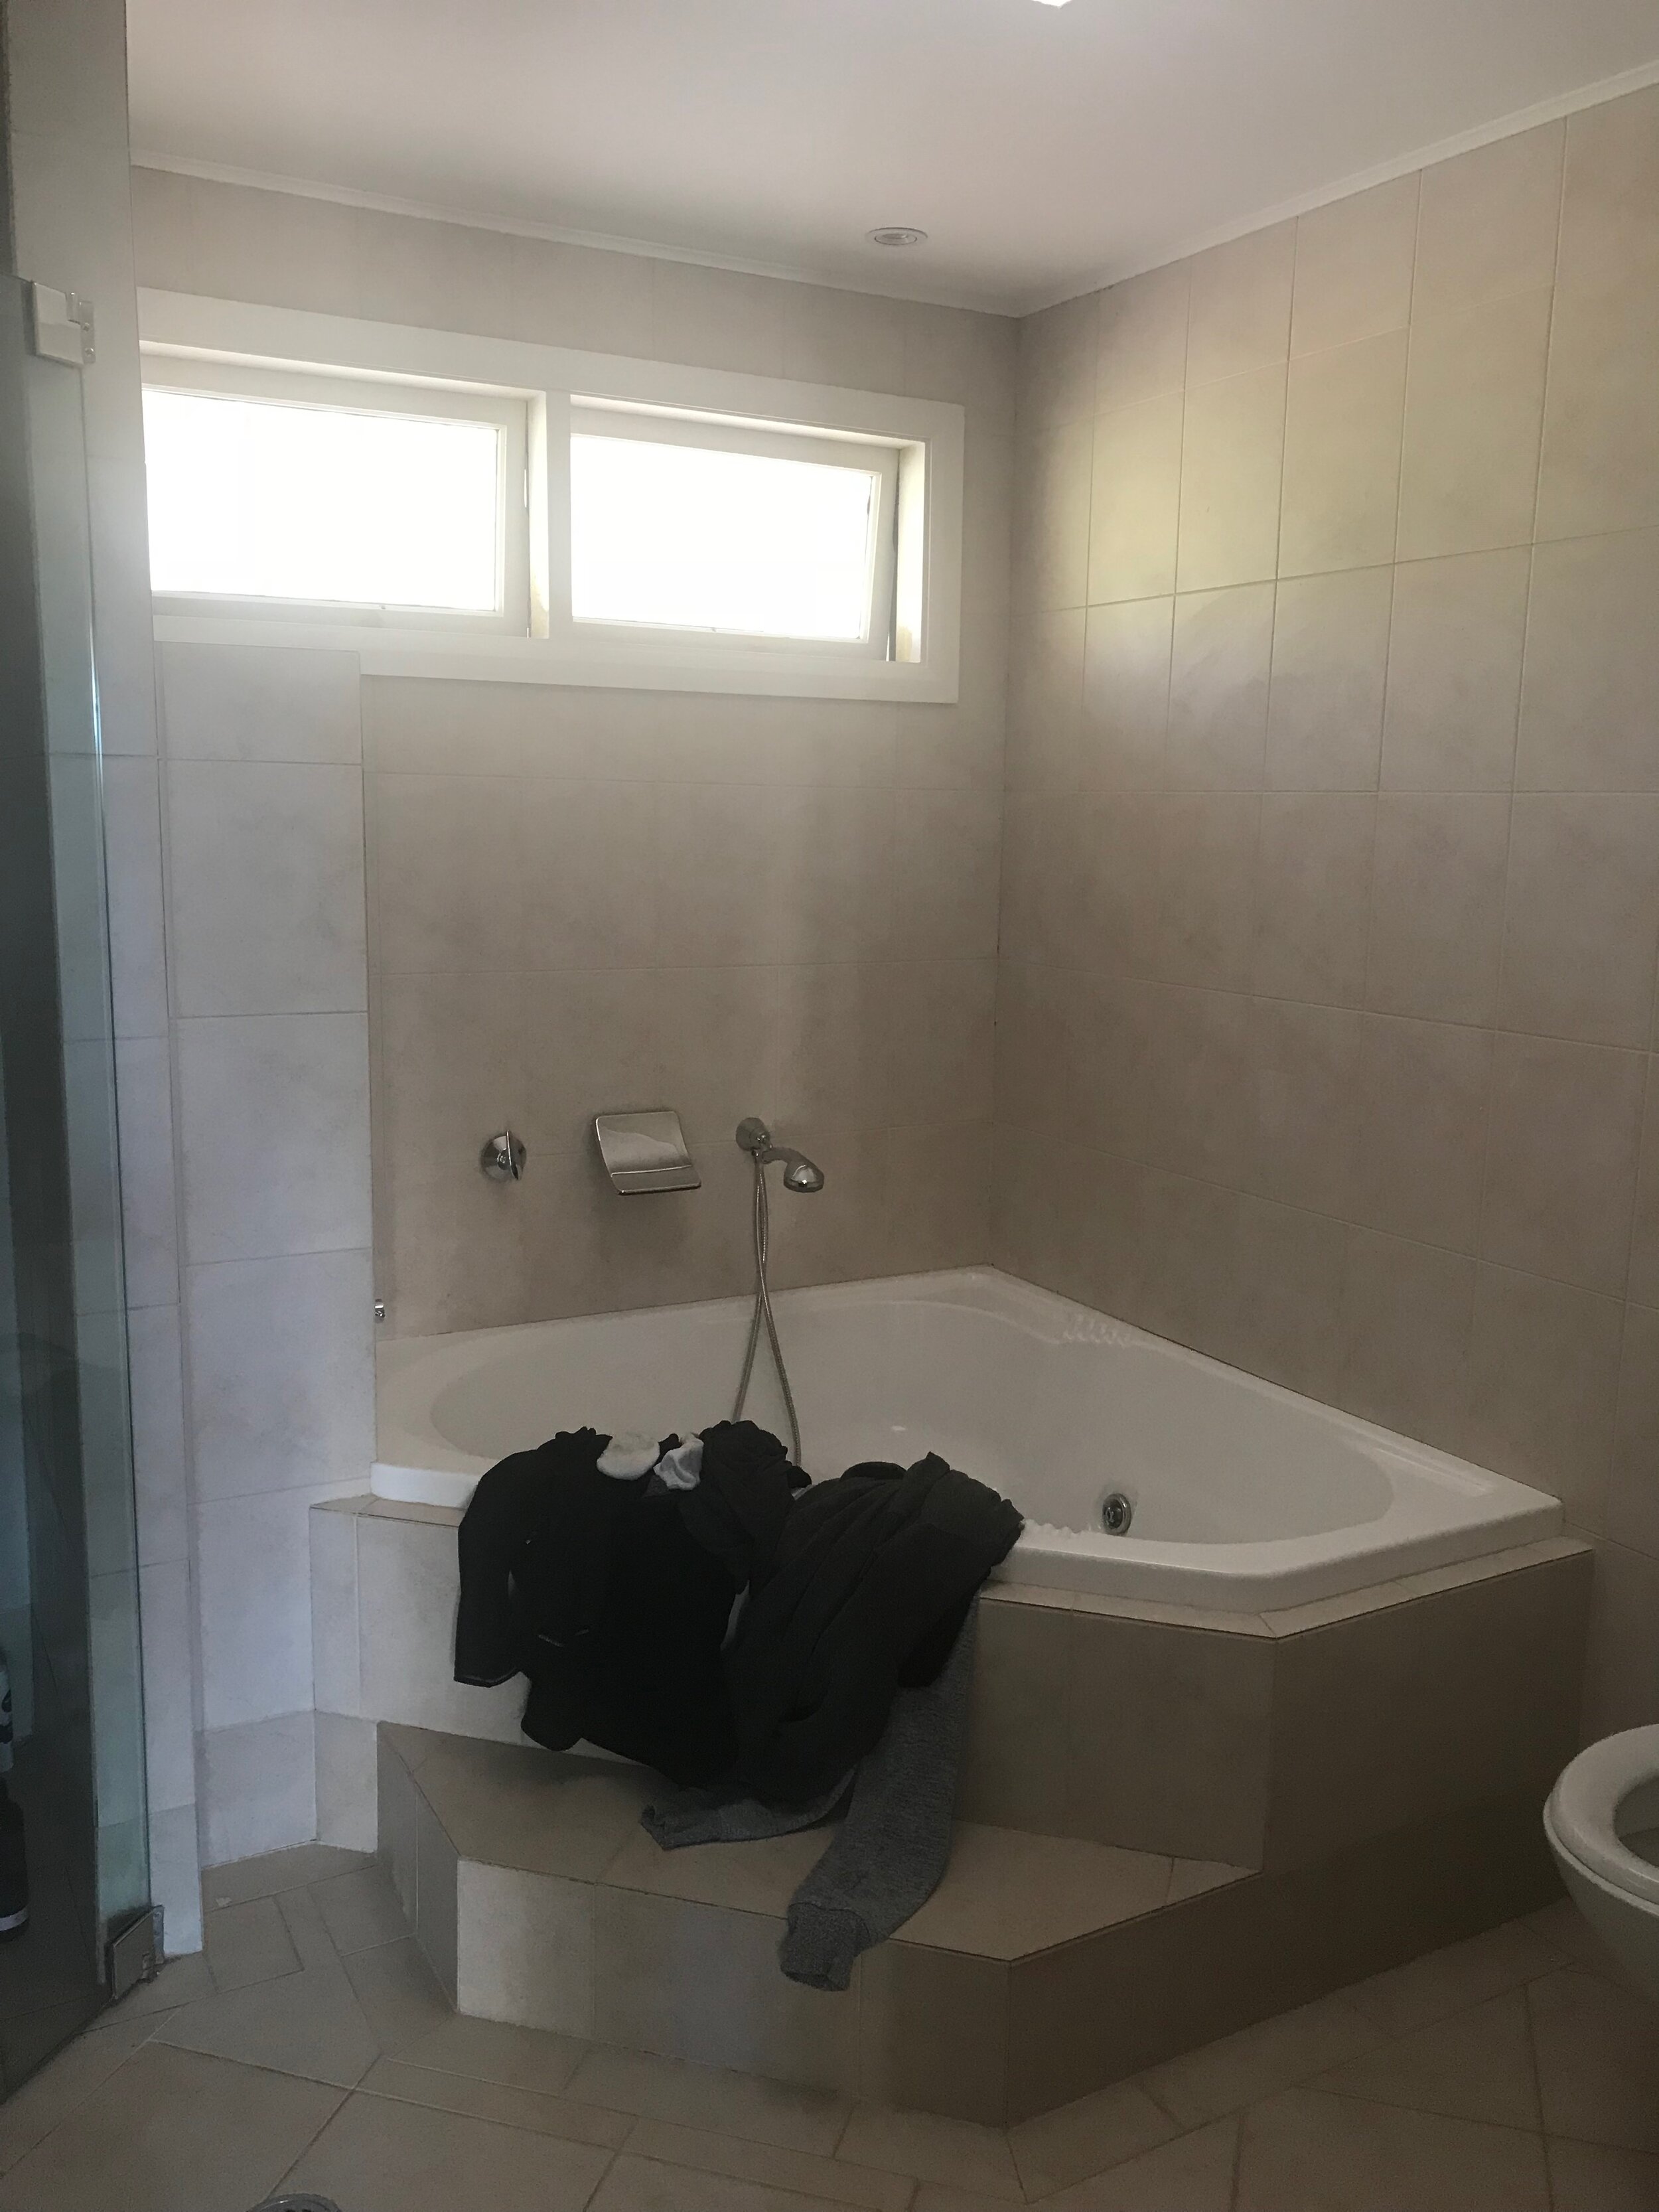
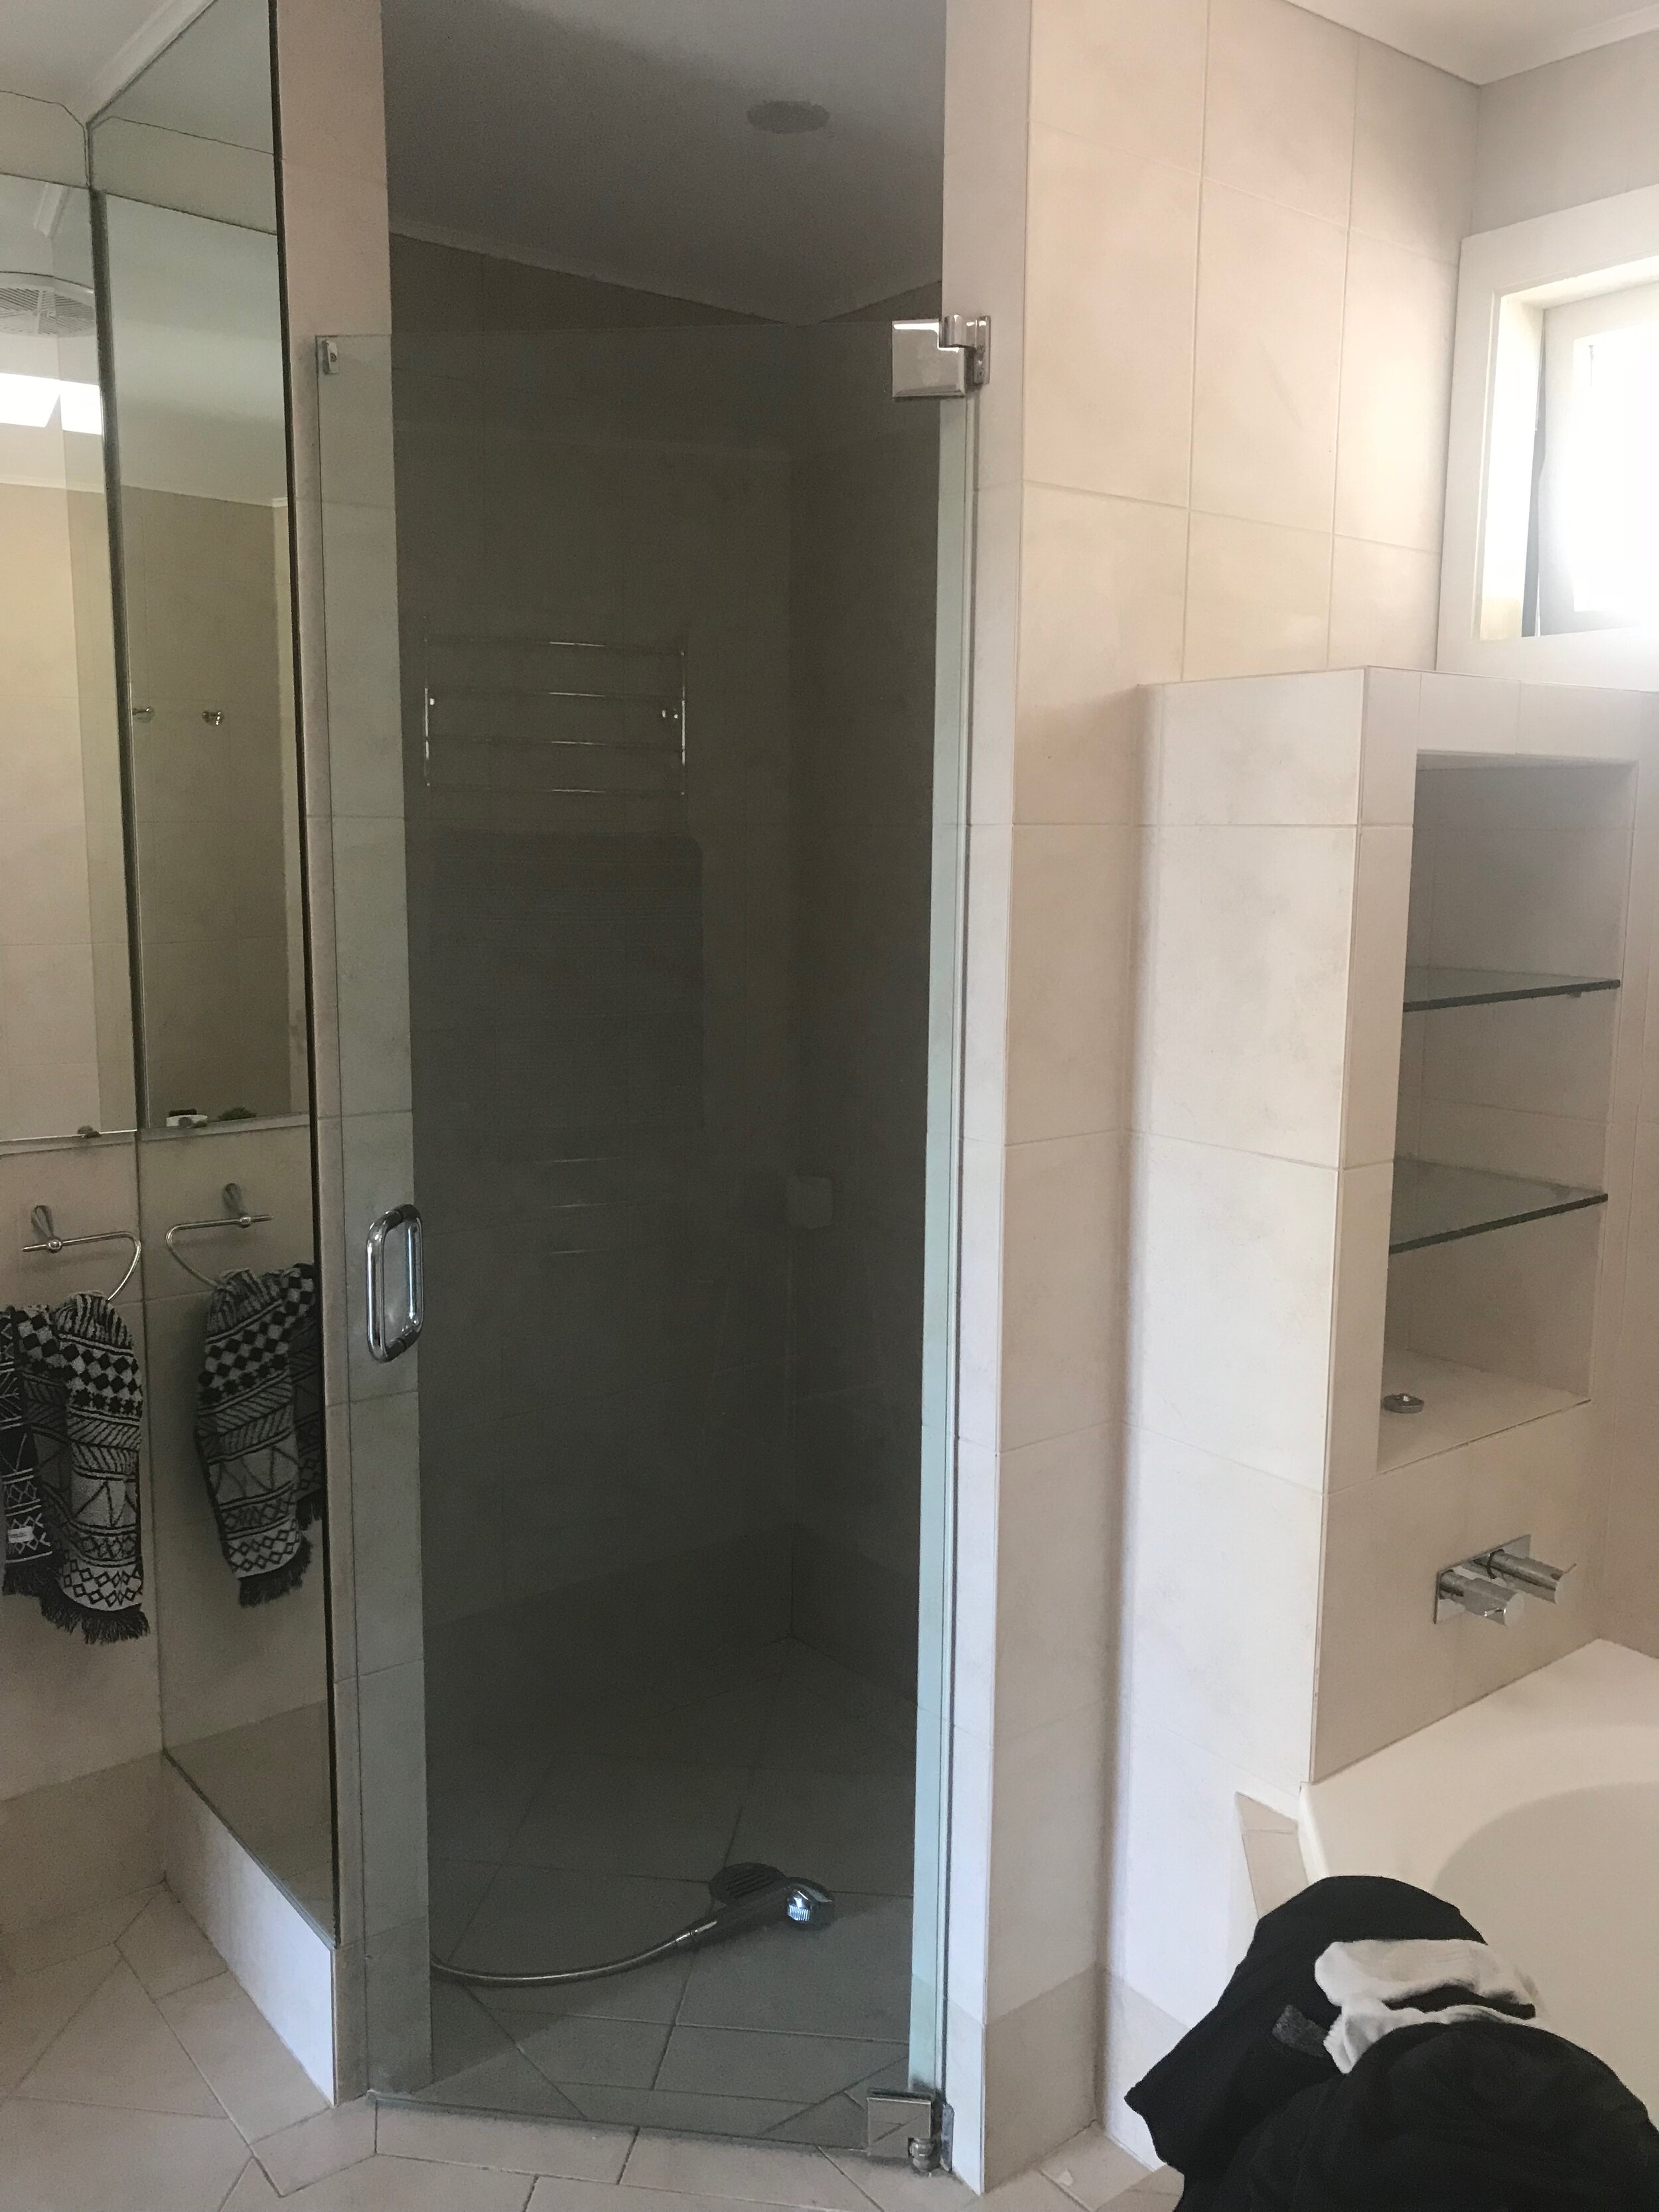
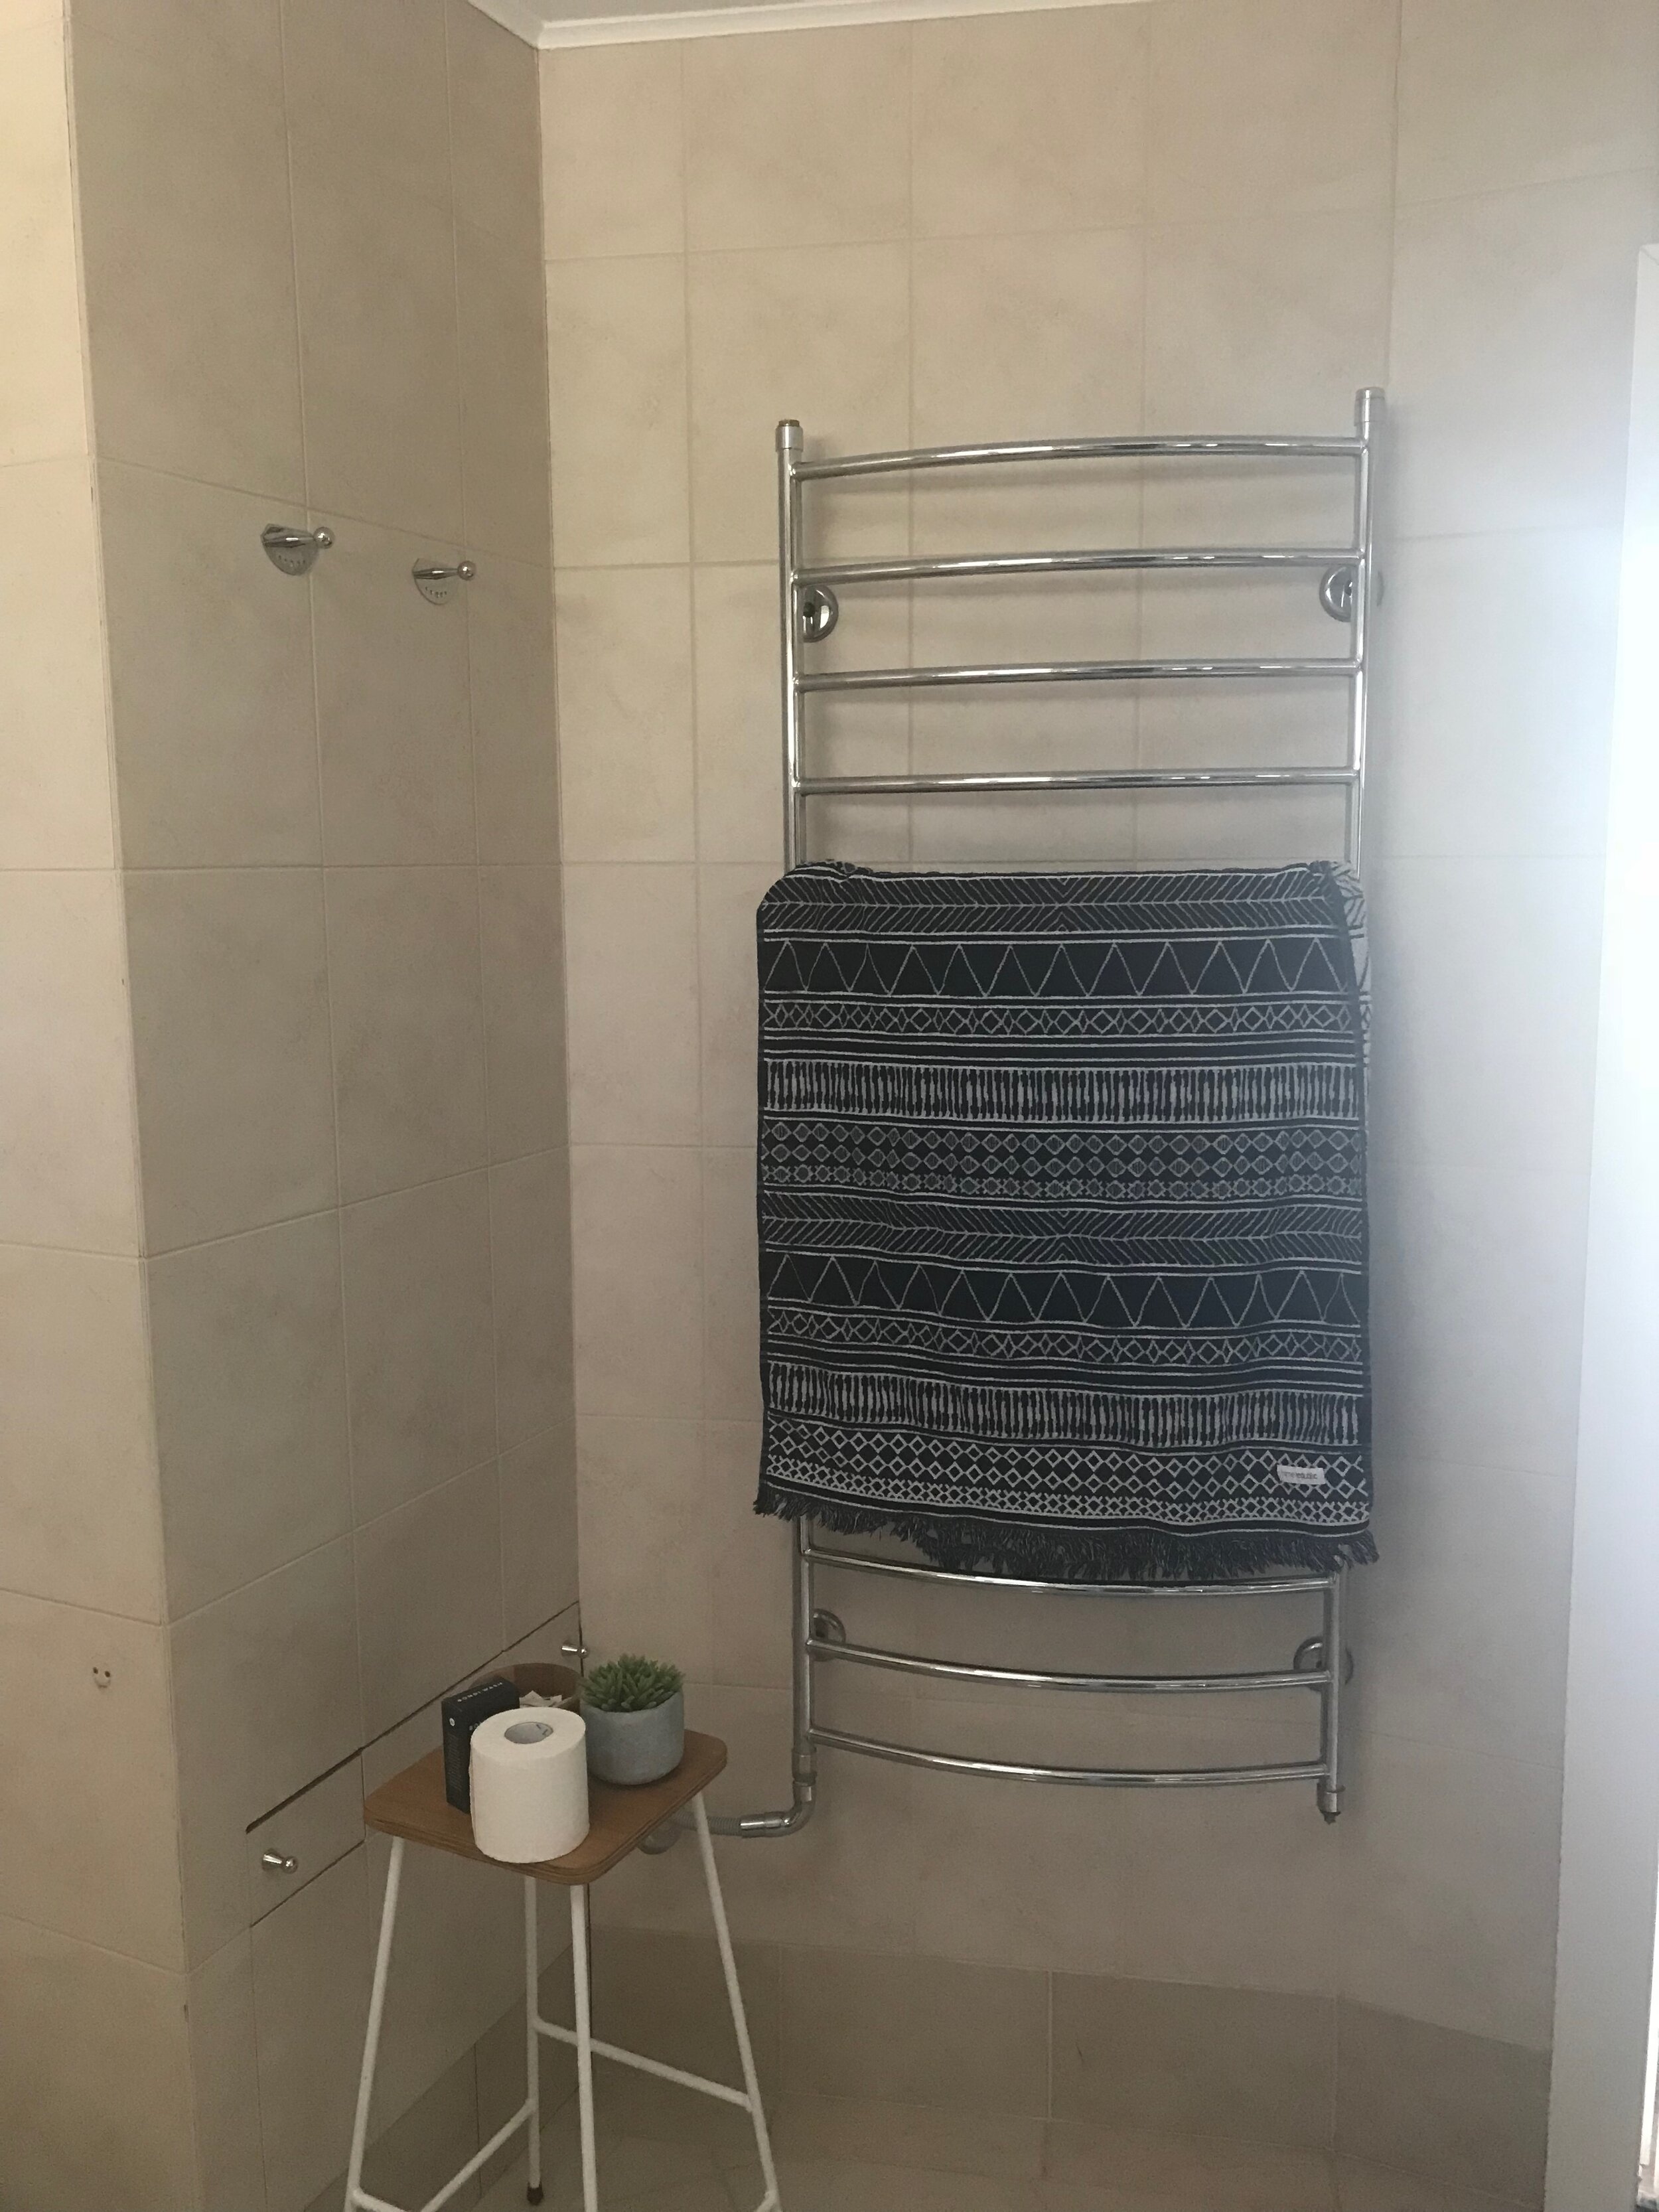
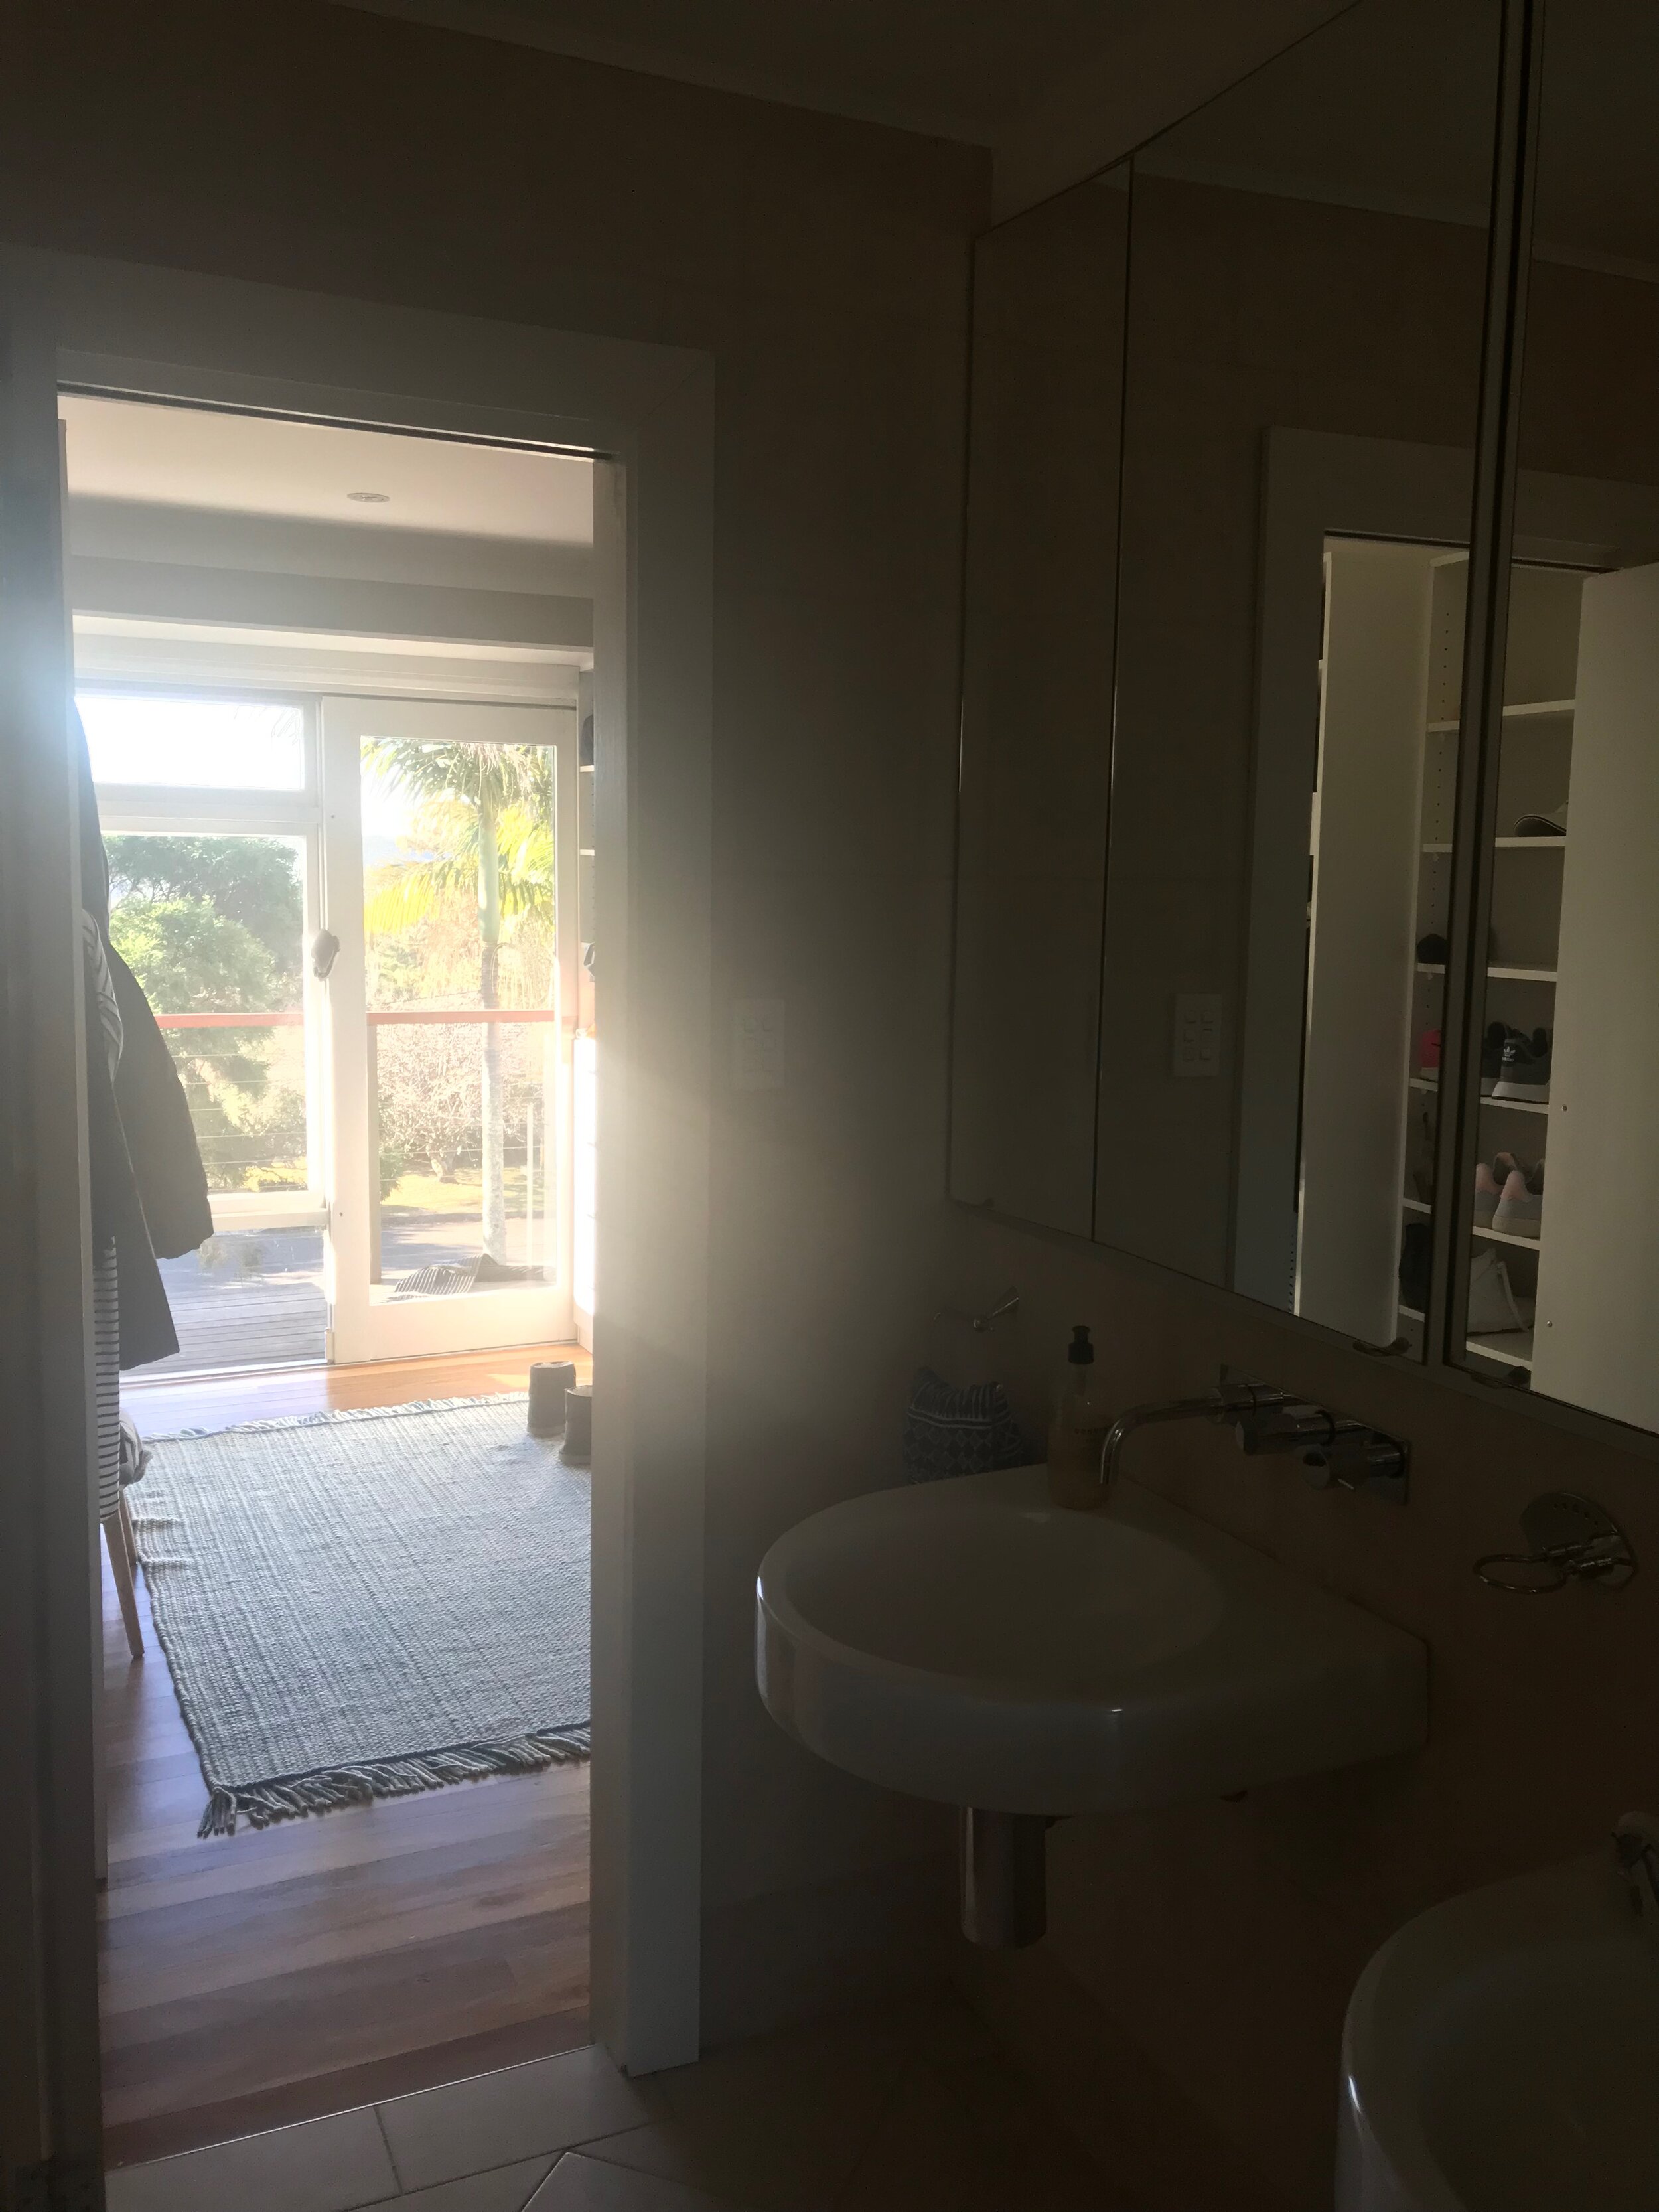
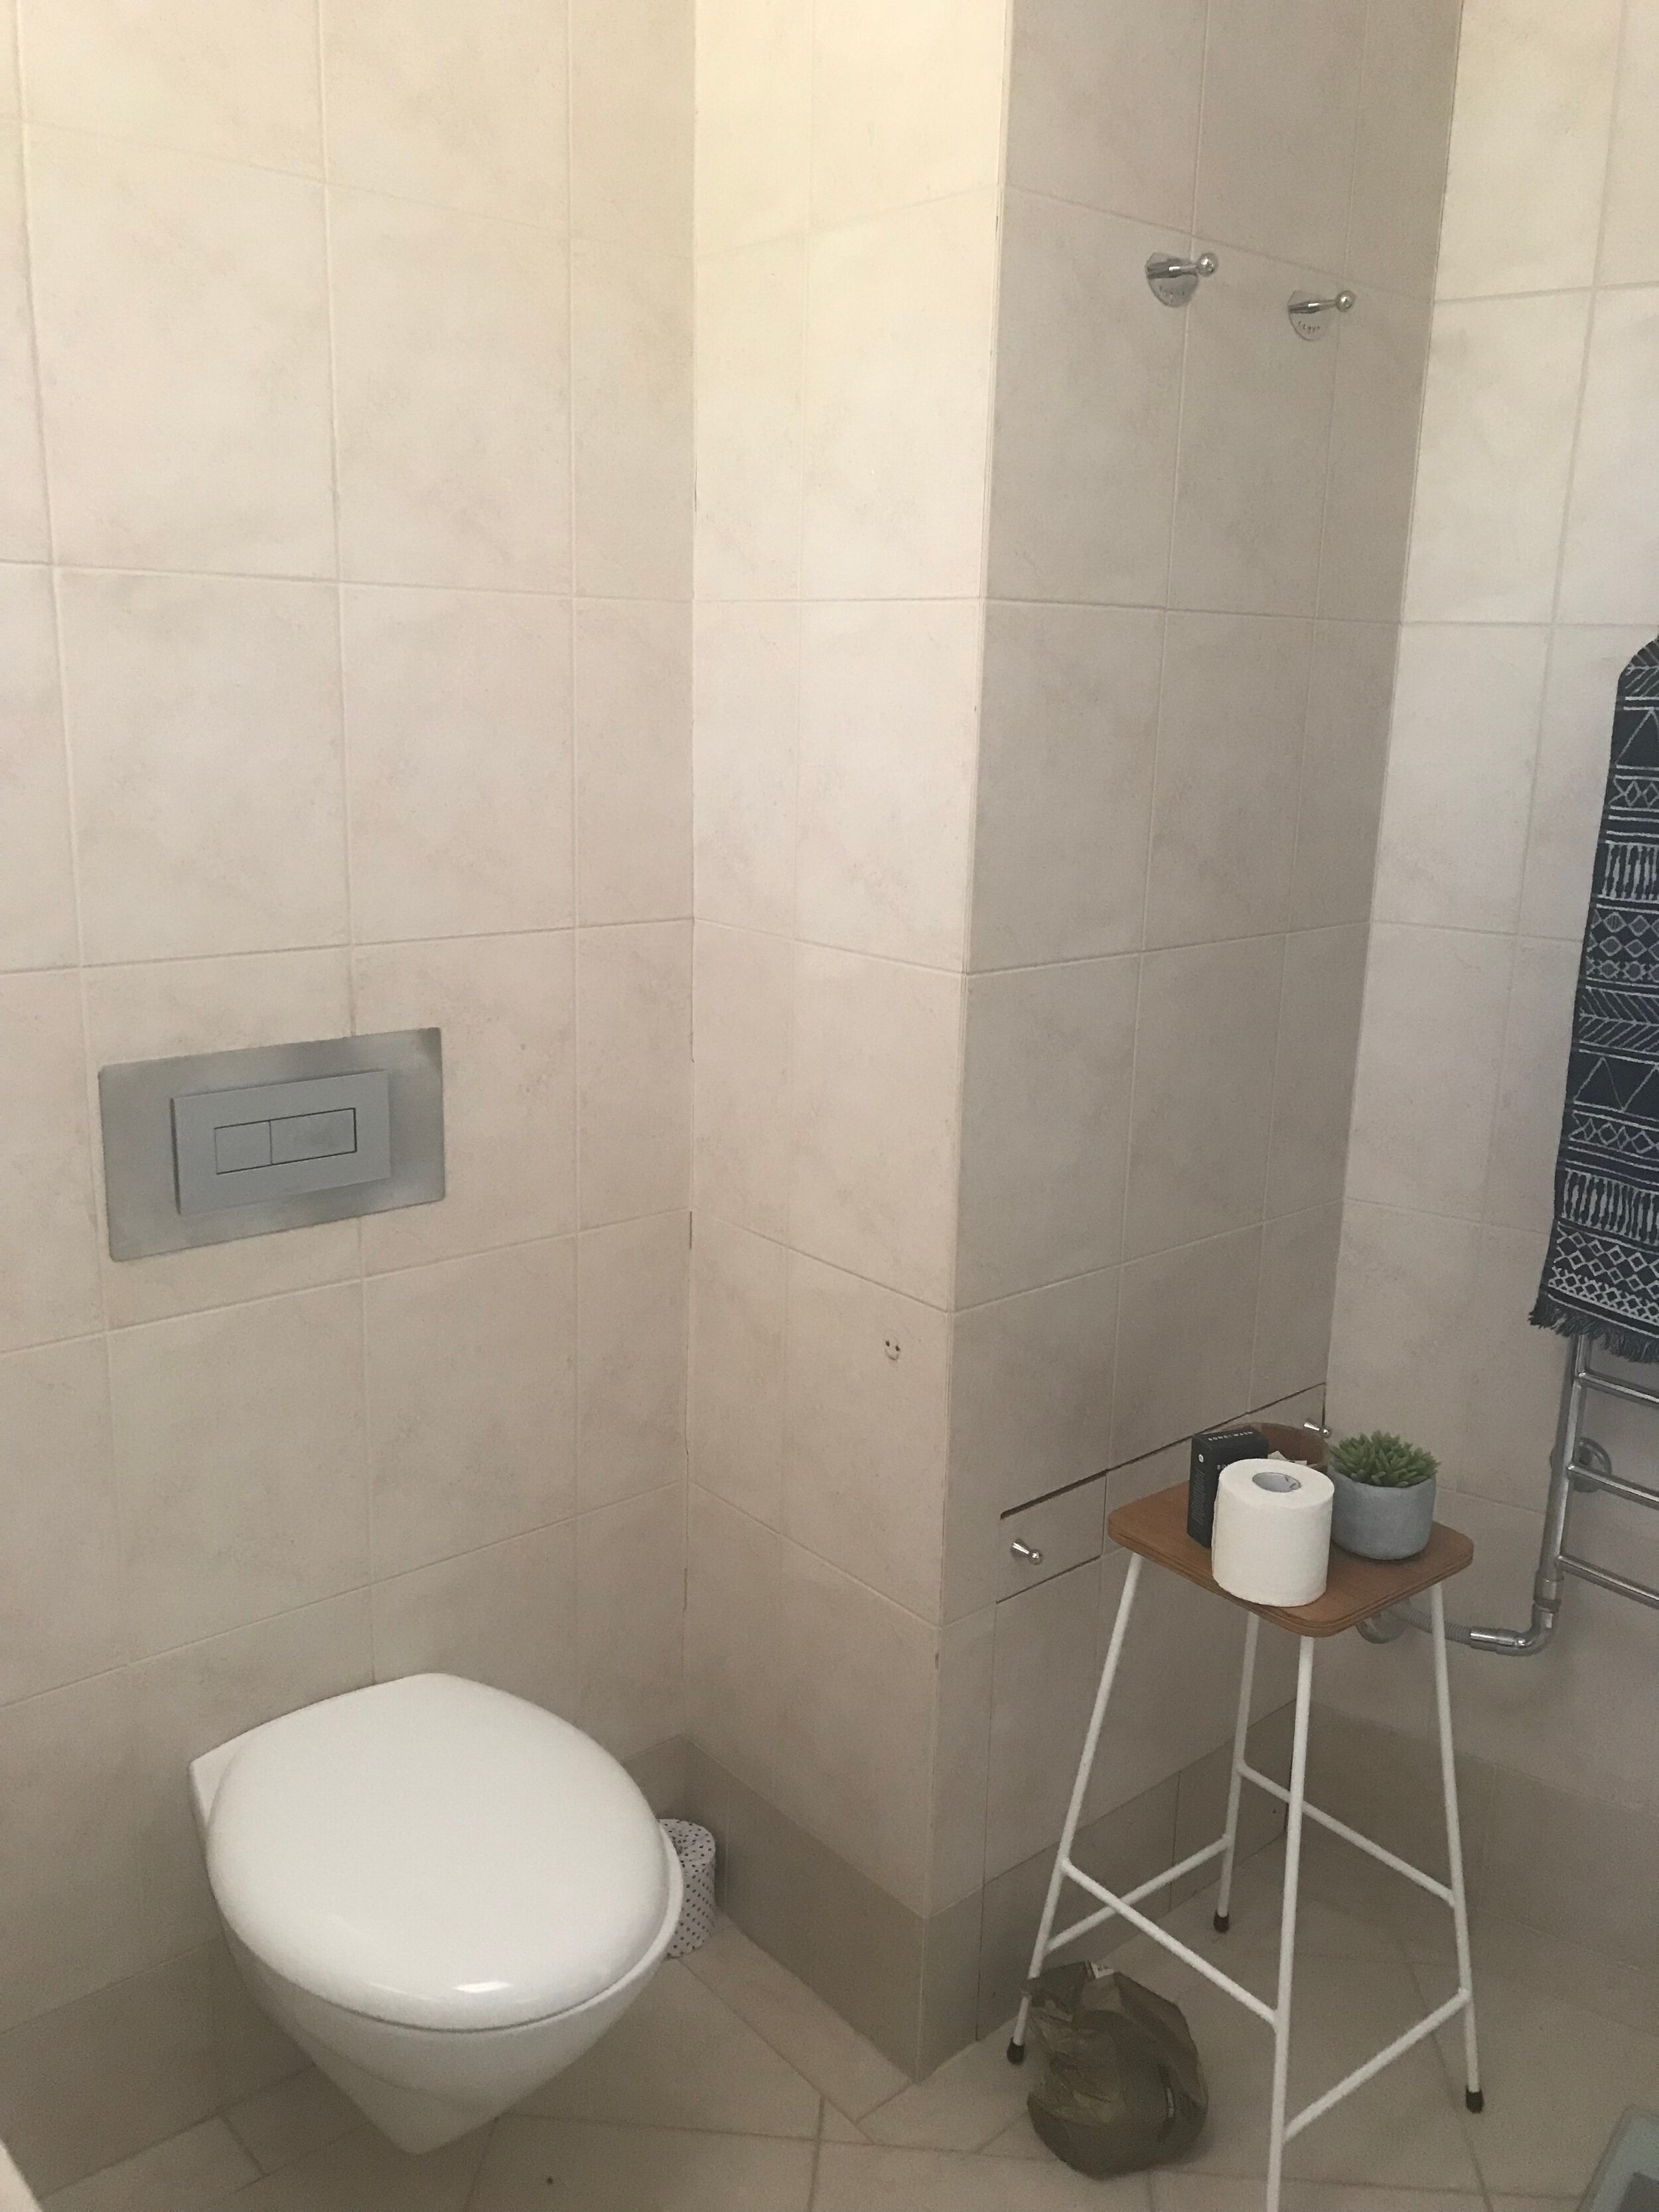
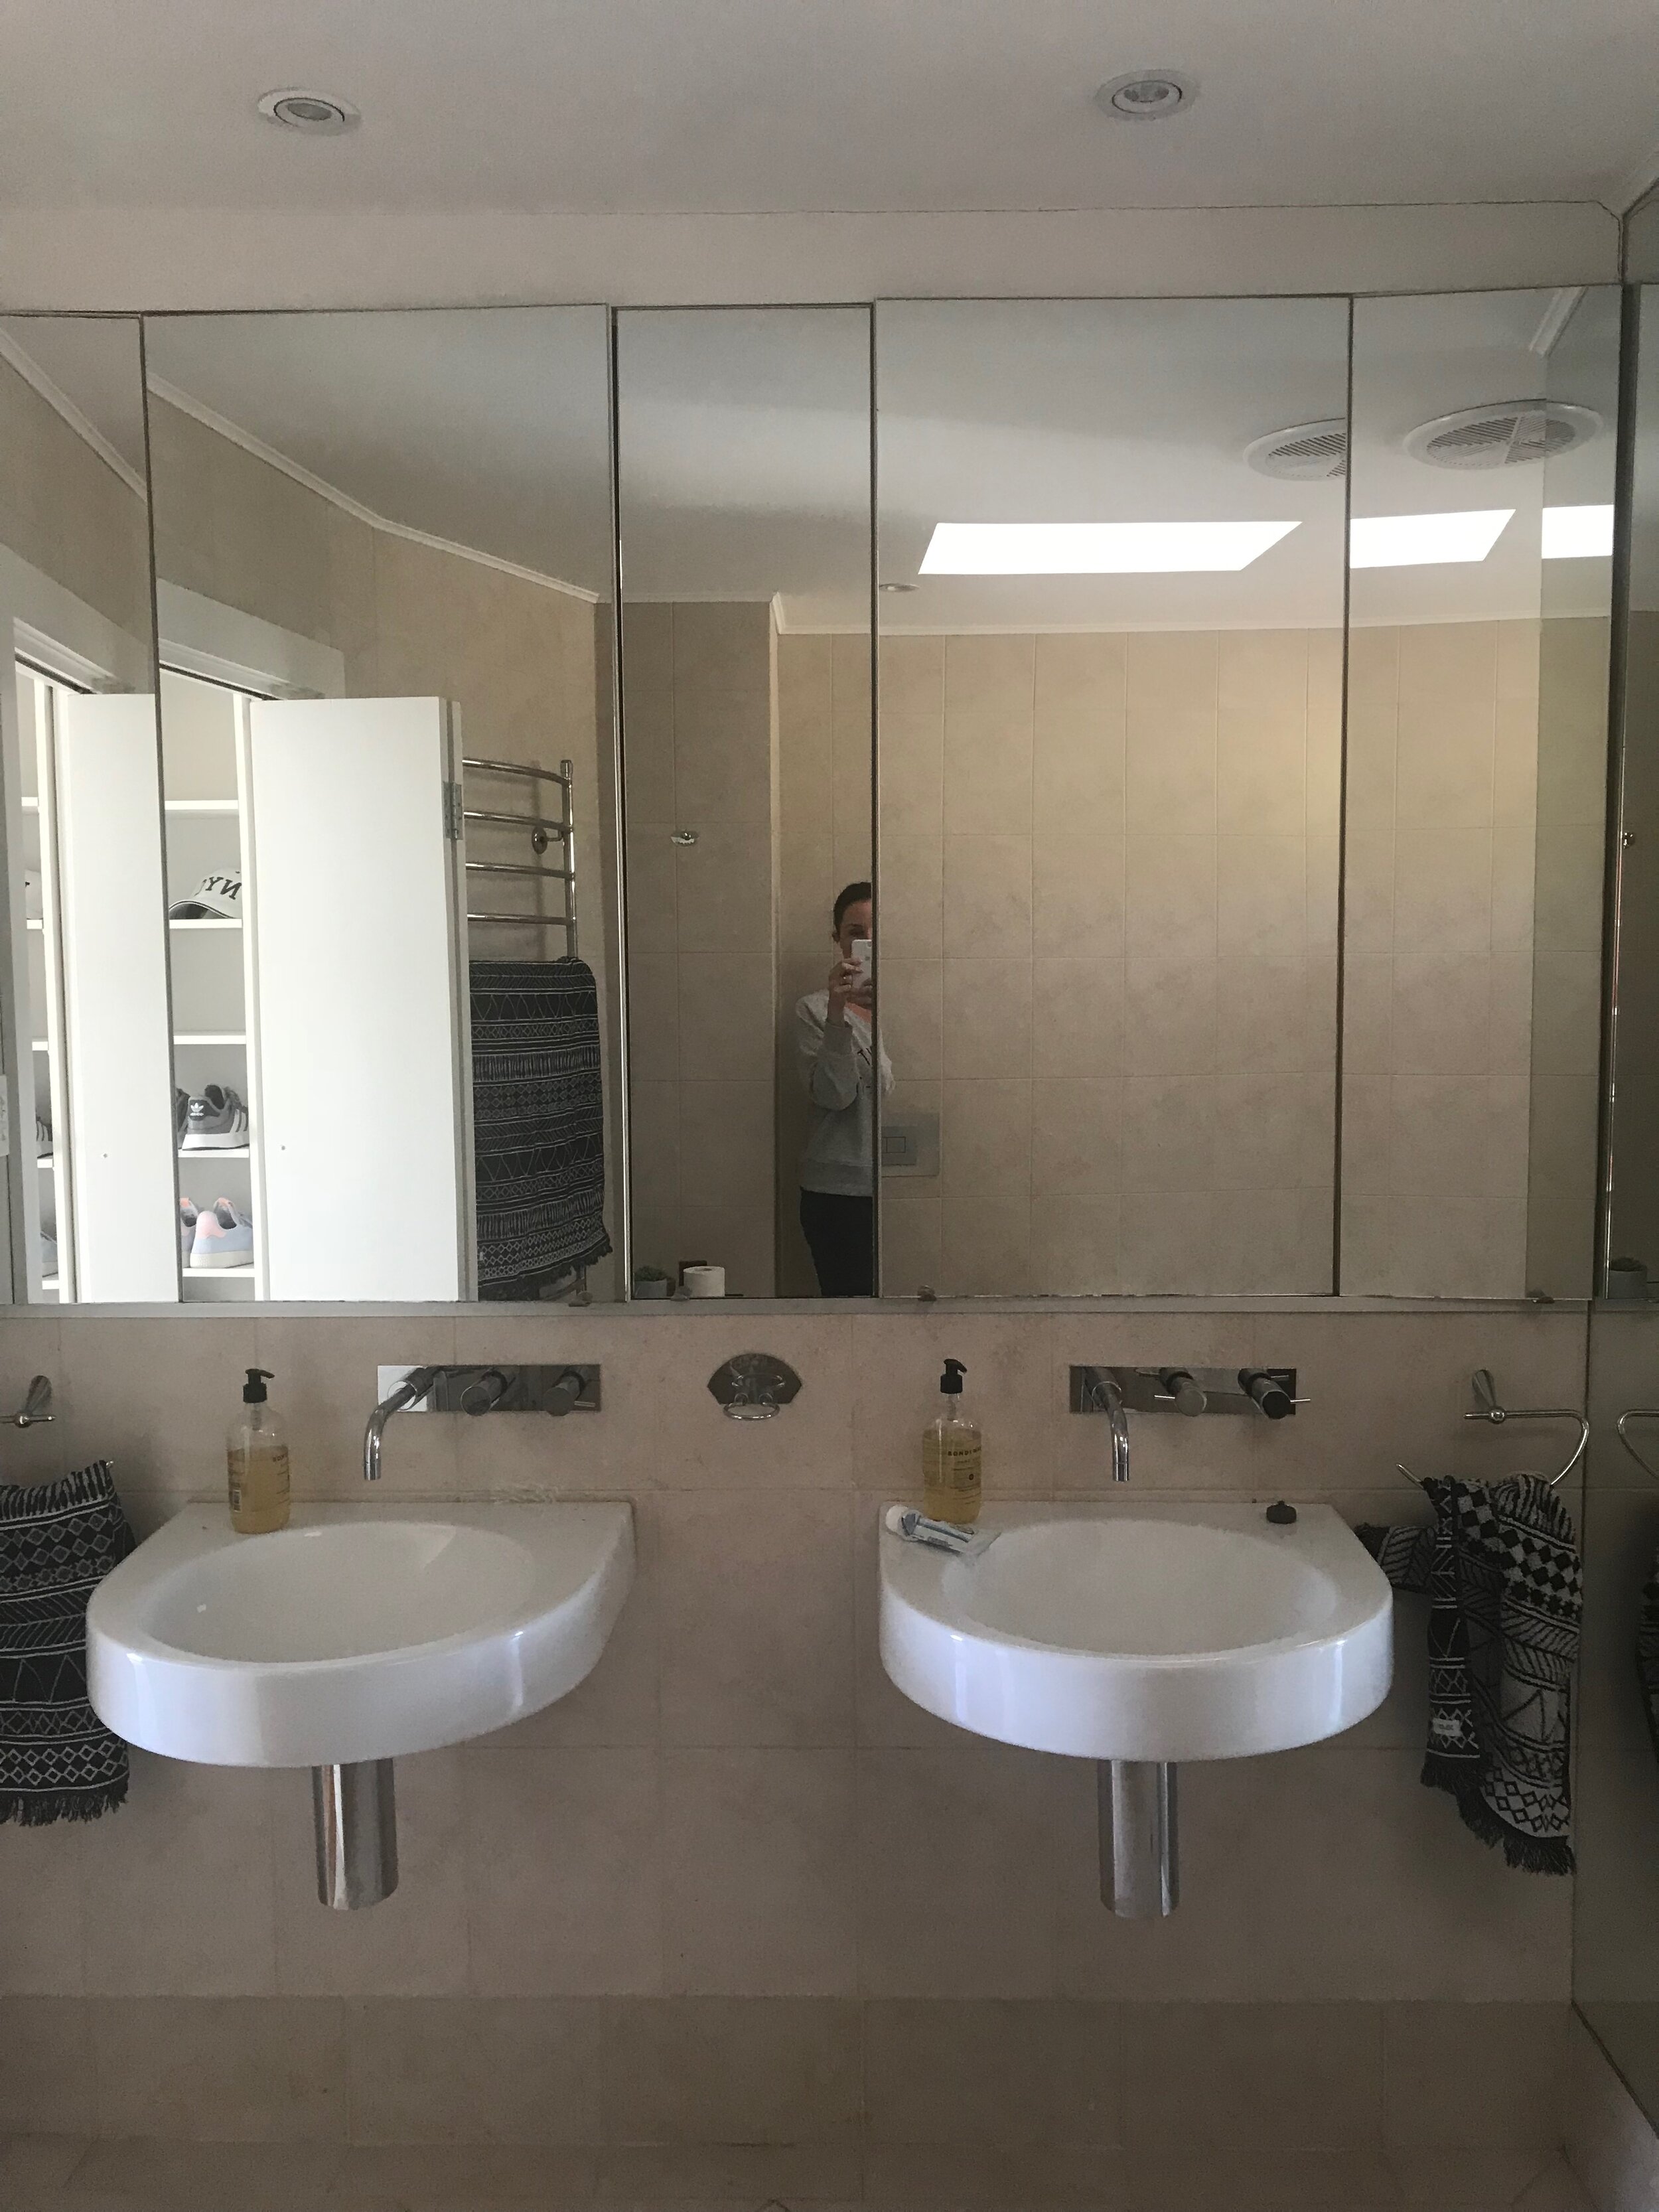
Here you can see a number of the before photos of the project. As you can see the bathroom was quite dark and extremely outdated! Corner bath anyone??! :)
The design
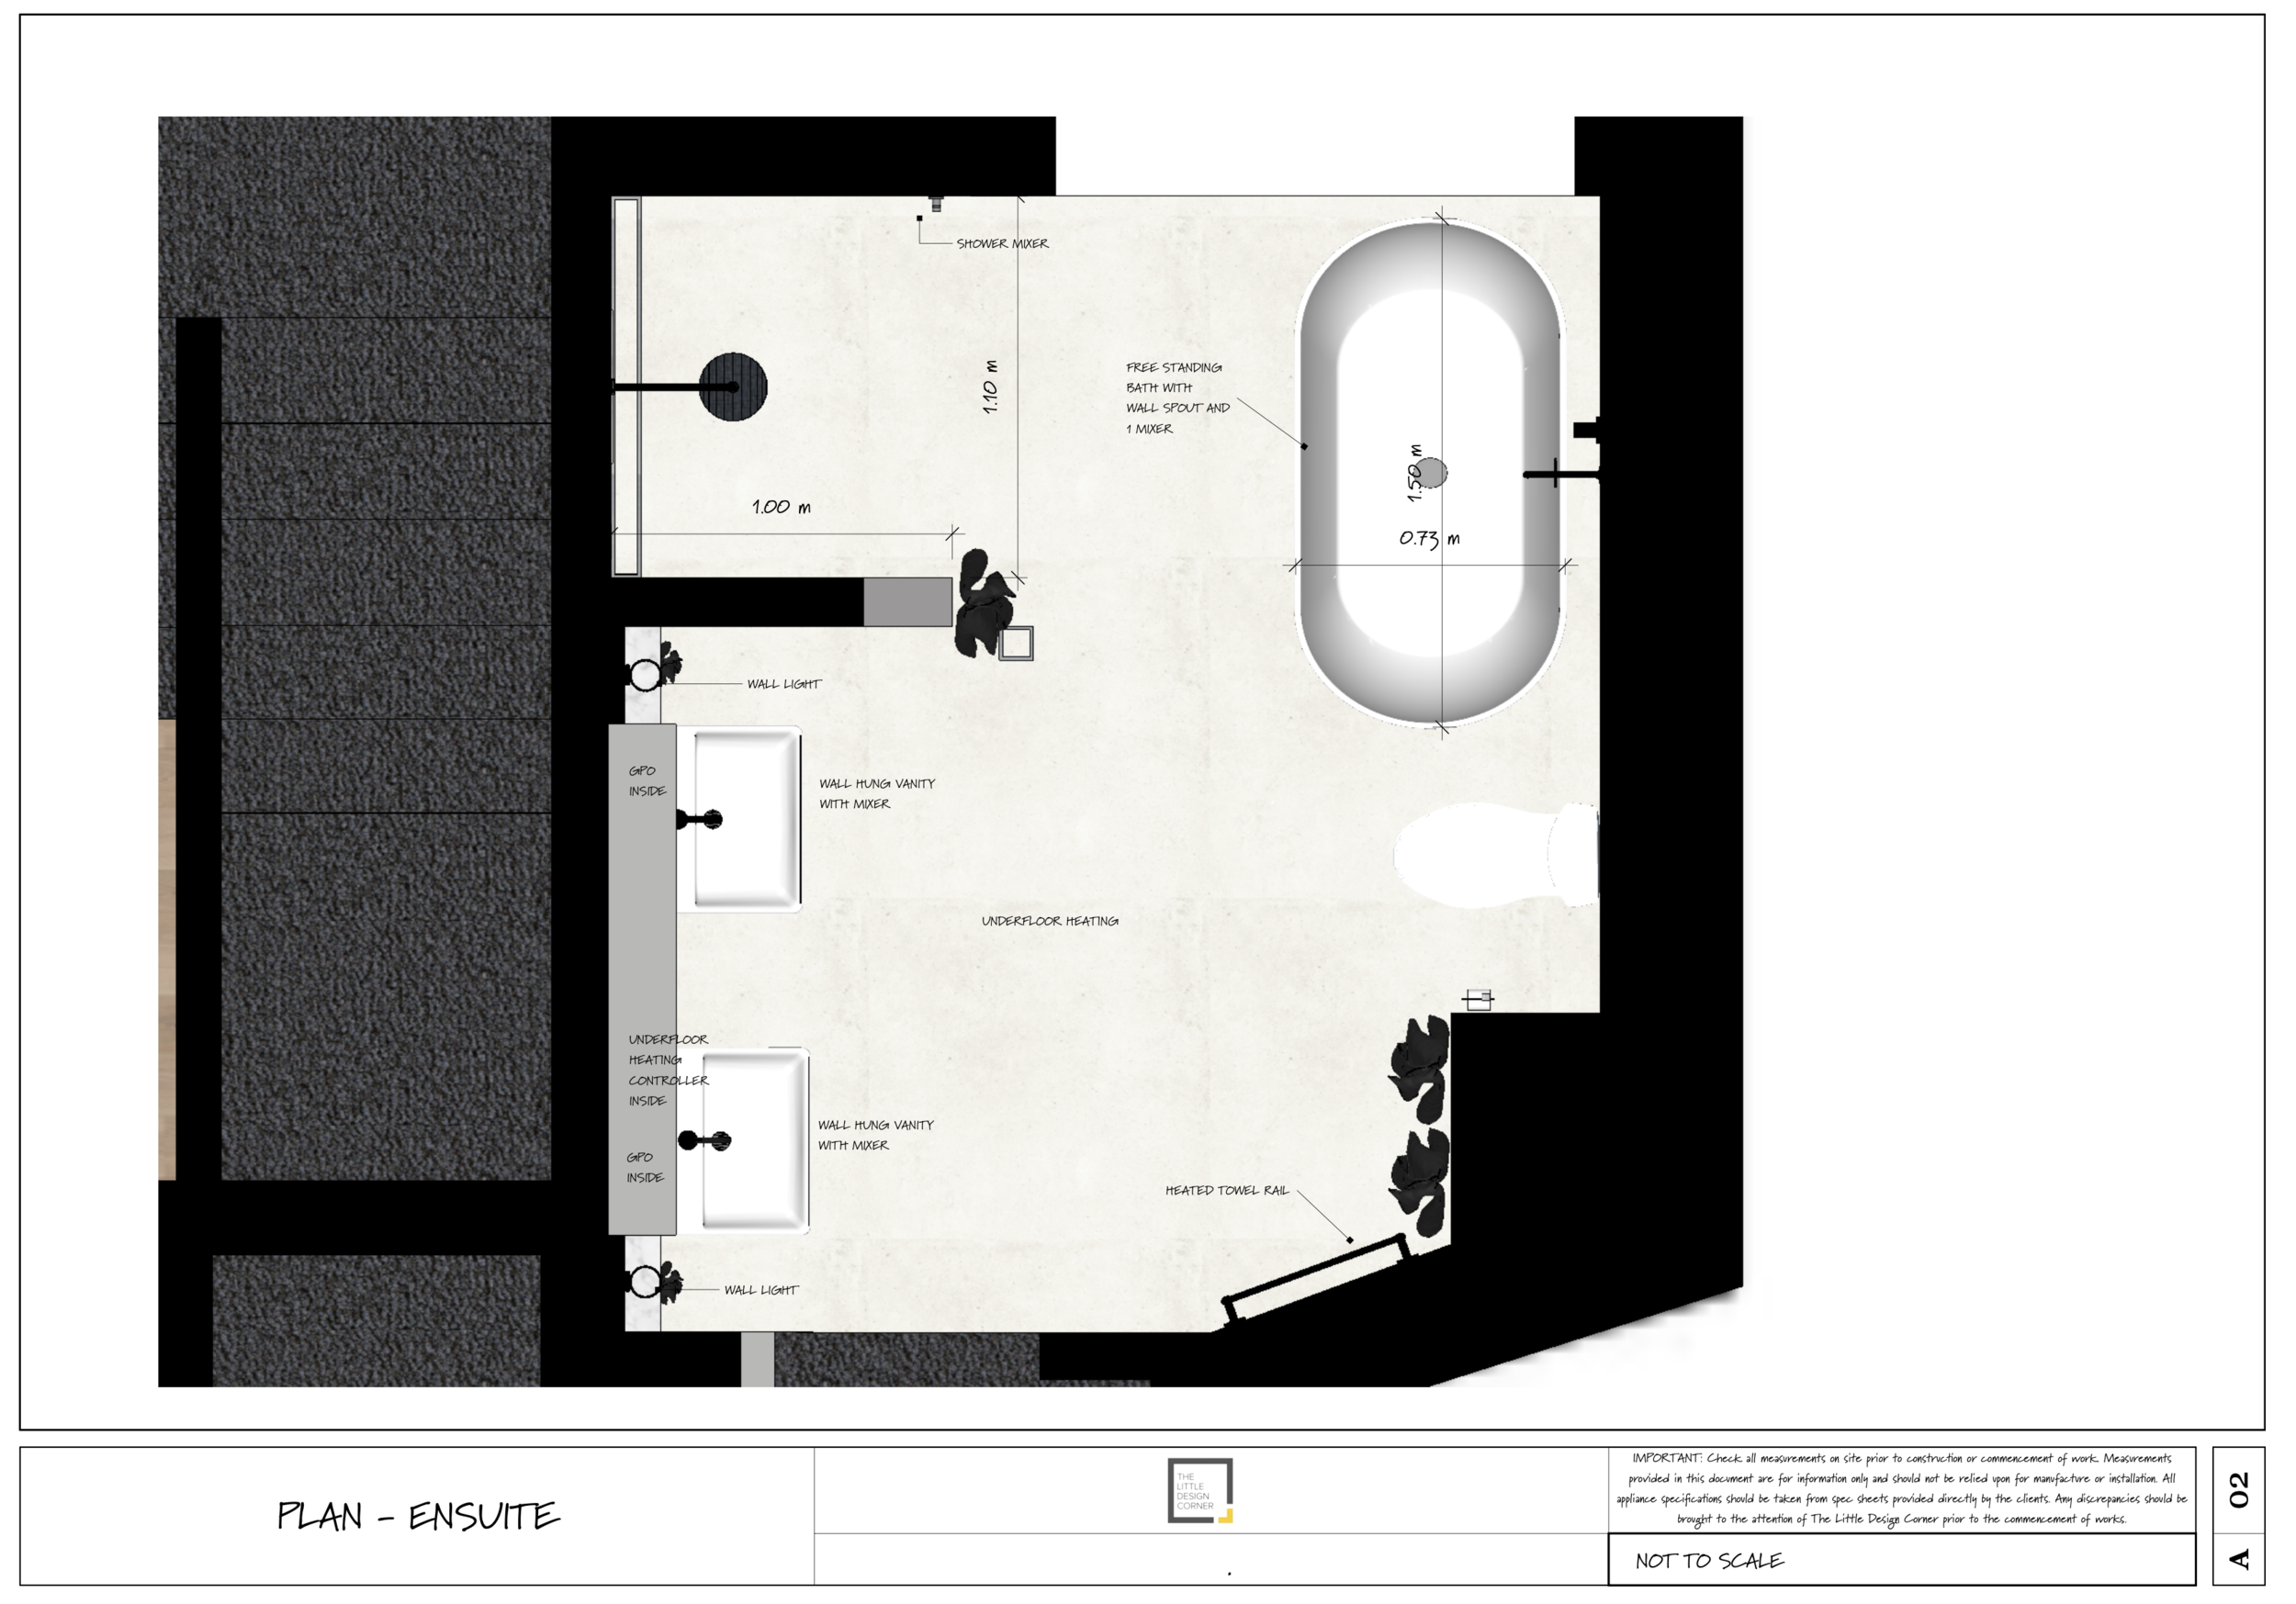
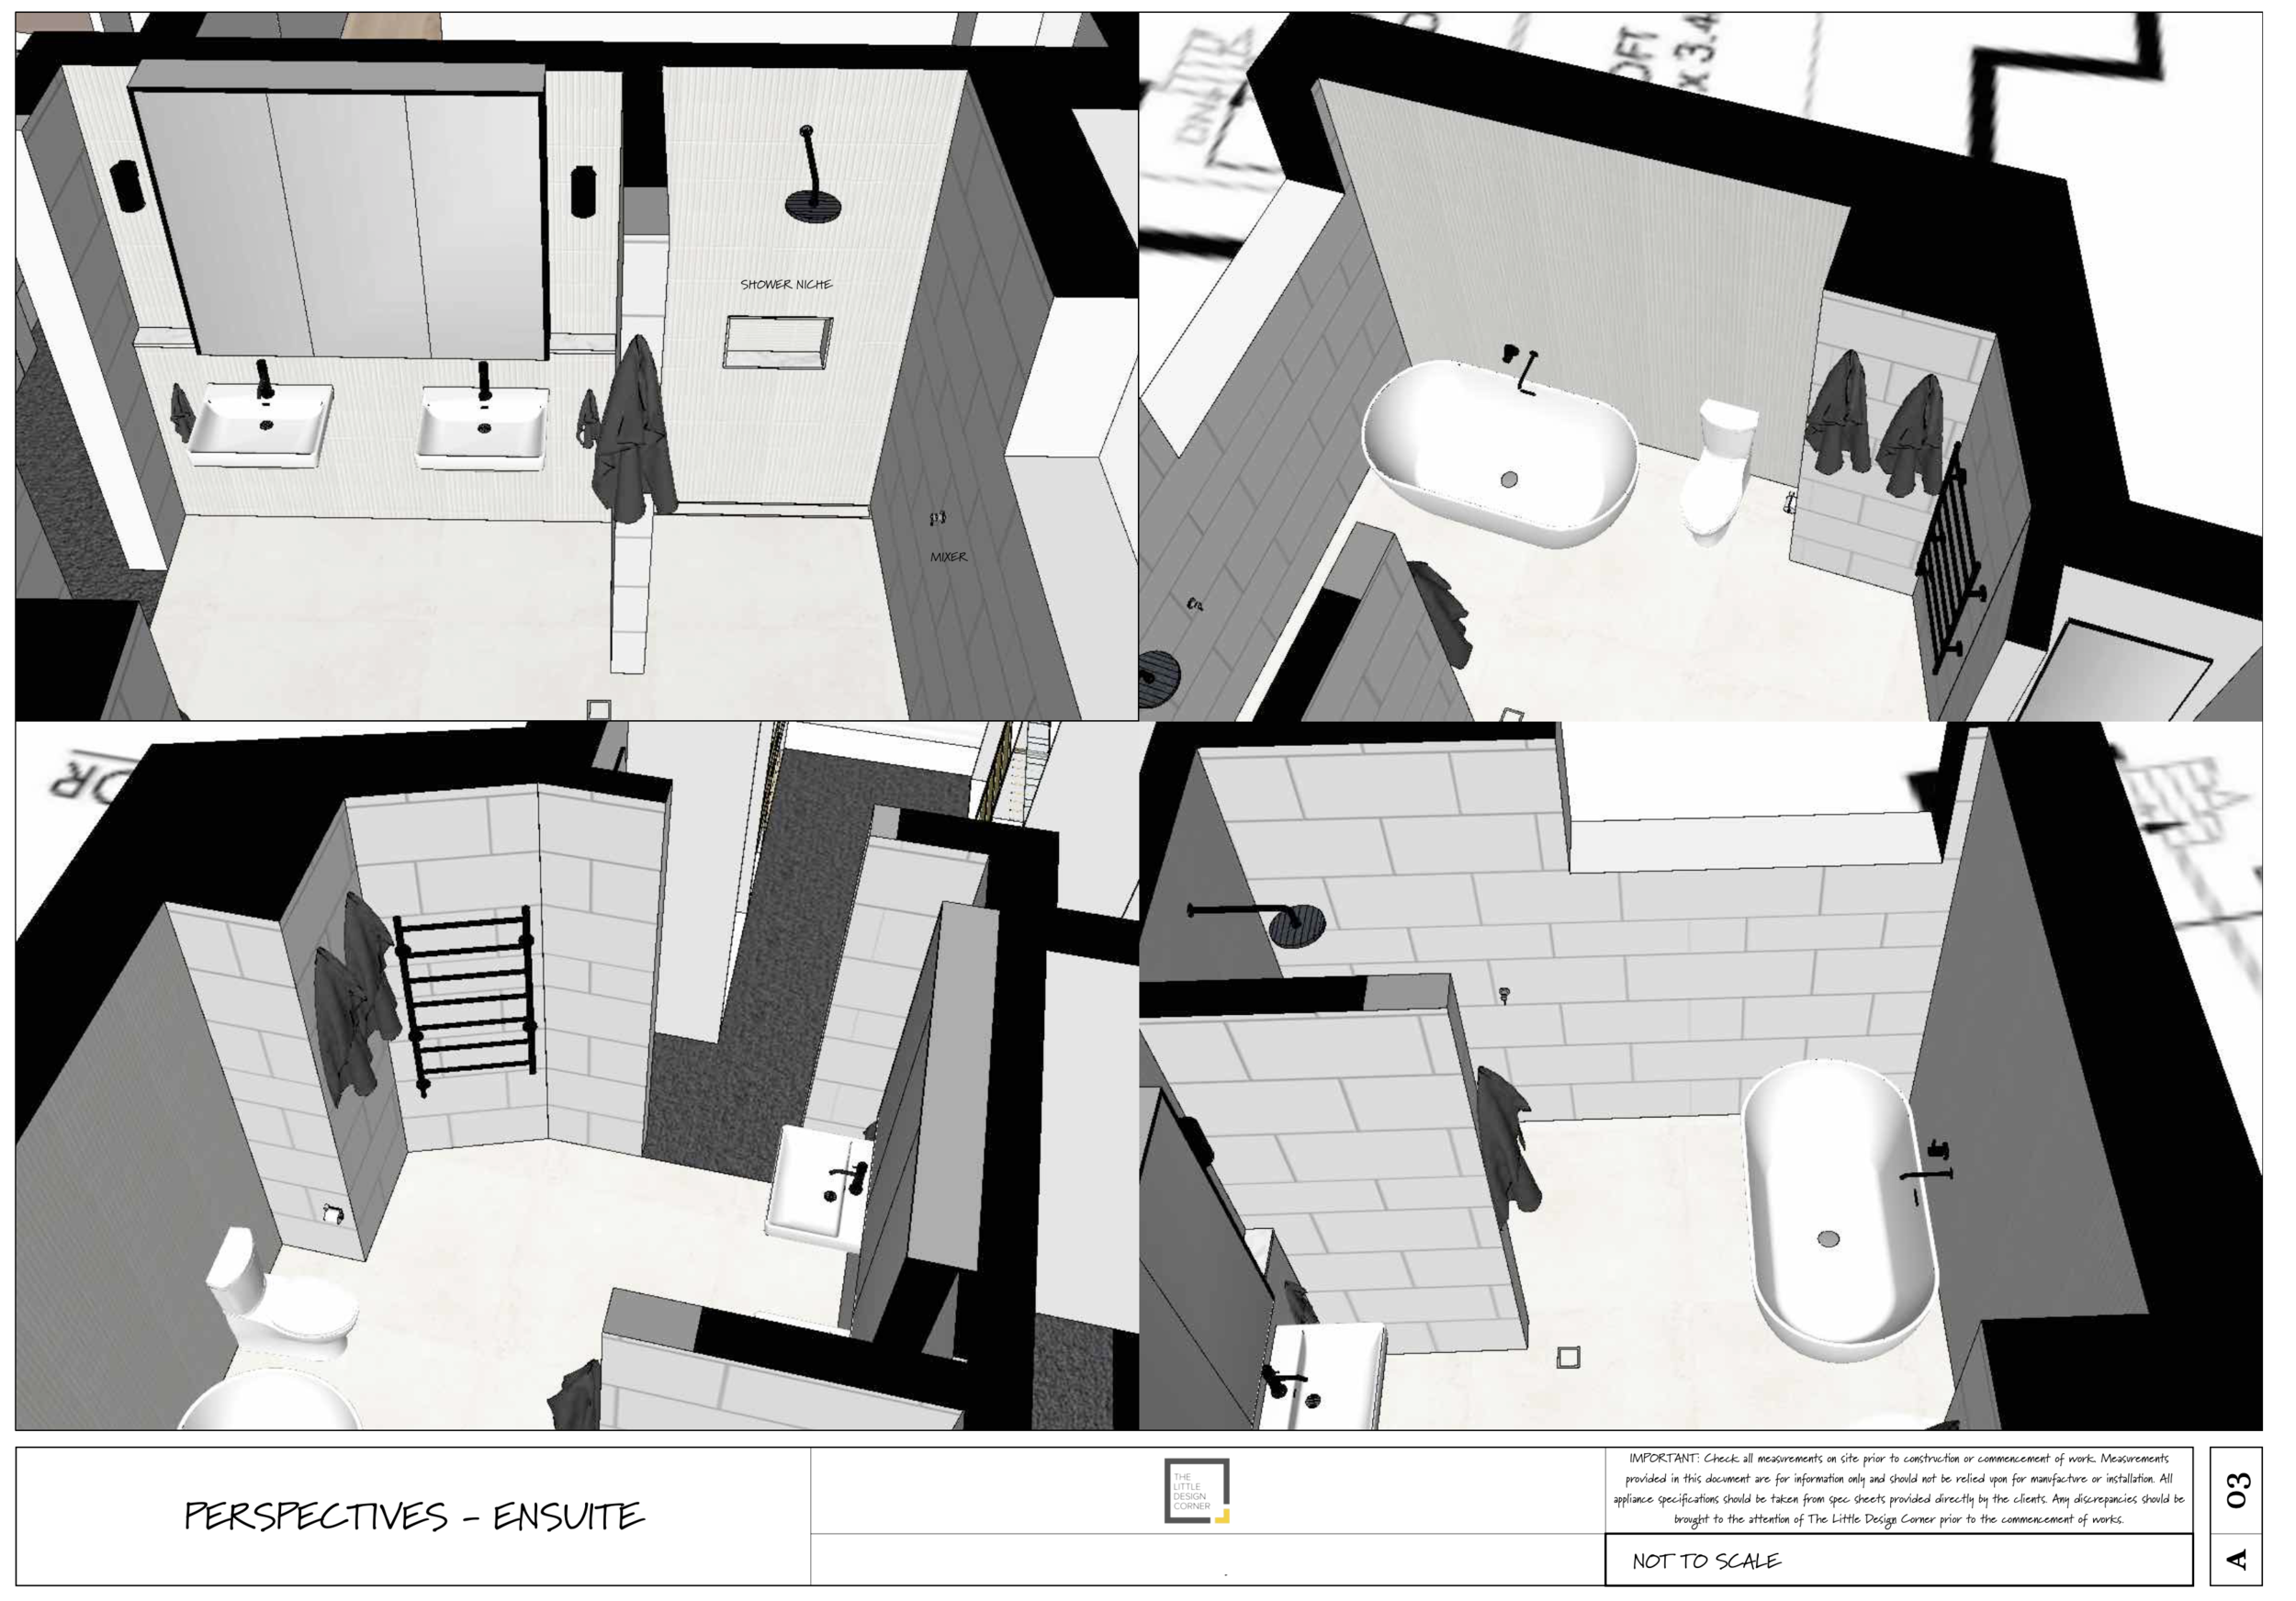
Below you can find images of the design I created for the new bathroom in SketchUp. SketchUp is a piece of software that is commonly used in the design industry and with it you are able to create 2D floor plans, 3D renderings and then technical drawings as well. I actually teach designers, decorators and home renovators how to use SketchUp for their own design projects so if this is something that interests you then you can find out more information here.
To keep costs down I decided to pretty much keep the configuration of the bathroom the same - although you’ll see that the corner bath was removed (obviously!!) as was the corner shower, to make room for a spacious walk in shower.
Other than that the remaining fixtures were kept in the same place - the double wall hung basins and the toilet as well as the location of the heated towel rail.
We also installed a large new skylight, which has made a dramatic difference to the brightness of the space. Believe it or not there was actually a skylight already in the old bathroom but it was not very effective and in dramatic need of an upgrade.
After Photos
And here are the after photos of the space. As you can see it’s quite a dramatic transformation.
In terms of products, here’s what I used:
Bath and Basins - Reece
Fixtures (tapware) - Sussex Scala range in Brushed Gunmetal
Tiles - Di Lorenzo
Wall lights and wall hooks - Anchor Ceramics
Towels - Country Road
Basket - Adairs
Stool - Industria X
Toilet Paper rolls - Who Gives a Crap
Hand soap - Thank You
One of the things I love most about the bathroom are the ceramic wall lights and wall hooks that I got from Anchor Ceramics. These add a luxury element to the bathroom, which was otherwise pretty simple and plain.
We also changed the concertina door that was in the original bathroom to a standard size door. The swing of the door impacted what I was able to do with the basins as I had to make sure they would clear the door as it opened. But the sinks chosen turned out to be the perfect depth.
The basket above is used to store our dirty clothes normally - but I figured that wouldn’t make for a very nice after photo :) So instead you’ll see I’ve put some of our toilet rolls from Who Gives a Crap in them. If you haven’t heard of this company then check them out. They send you toilet rolls on subscription and for part of the cost of your subscription they build toilets and other sanitation systems in developing countries. A great initiative that I am extremely happy to support. Plus the are a really fun company and the designs they wrap the toilet rolls in looks great too!
I also included a hook next to the walk in shower (as you can see below). This is handy for hanging your towel while you are in the shower and saves having to drip all over the floor to get to the other side of the room after a shower (where the heated towel rail is located).
I hope you’ve enjoyed the tour of this space and that you’ve got some ideas from it!
Learn SketchUp with our fun online course for beginners…

If you want improve your work with design clients or you are about to start renovating or remodeling then you will love SketchUp.
With this software you can mock up an entire home in 2D (floor plans, joinery/millwork elevations, lighting and electrical plans and more) and 3D (renderings and perspective drawings) so you can picture exactly what it will look like when it is finished plus prepare your technical drawings for use with your clients, trades and contractors.
Learning SketchUp will save you time, money, mistakes and so much more! It is a well known piece of software in the interior design and architecture industries and will give you a solid technical drawing skill that will immediately upgrade the professionalism of the work you are doing.
I teach an online course for beginners that is focused specifically on using SketchUp for interior design purposes. We have had more than 10,000 students come through the course with so many fantastic projects designed and built!
We have all sorts of students in the course including designers and architects, cabinet makers, home renovators/remodelers, kitchen and bathroom designers, event planners, landscape designers and design enthusiasts.
To get started watch my free inso session via the link below
Enjoy the rest of your day!
Clare x