SketchUp to Real Life Case Study #2
In this post I am going to be sharing the before and after photos, plus 3D renderings, of one of my old houses in Sydney’s upper north shore suburb of Roseville. I will share the before photos, floor plans, SketchUp drawings and some after photos as well.
I have also done a full 5-part video series about this renovation project so check that out over on my YouTube channel if you’re interested.
SketchUp is a great tool for creating designs of your renovation projects (or those of your design clients). It helps people visualise the finished spaces before they spend hundreds of thousands of dollars renovating. And you can play around with all the different real life textures and finishes inside SketchUp, to avoid making mistakes on these aspects of your project in real life.
In my SketchUp Course the project I am featuring in this post is the exact one that you’ll learn to draw up yourself!
Read on to see this project come to life!
The project brief
My husband and I do up houses and then sell them and this is the one that we did a number of years ago. We also lived in it for a while as well, which is a tax effective way of flipping houses (i.e. avoiding capital gains tax).
We bought the house with the intention of undertaking a renovation over two phases.
The first phase involved the renovation of the existing Californian Bungalow. We then moved in to the house and lived in it for a few years.
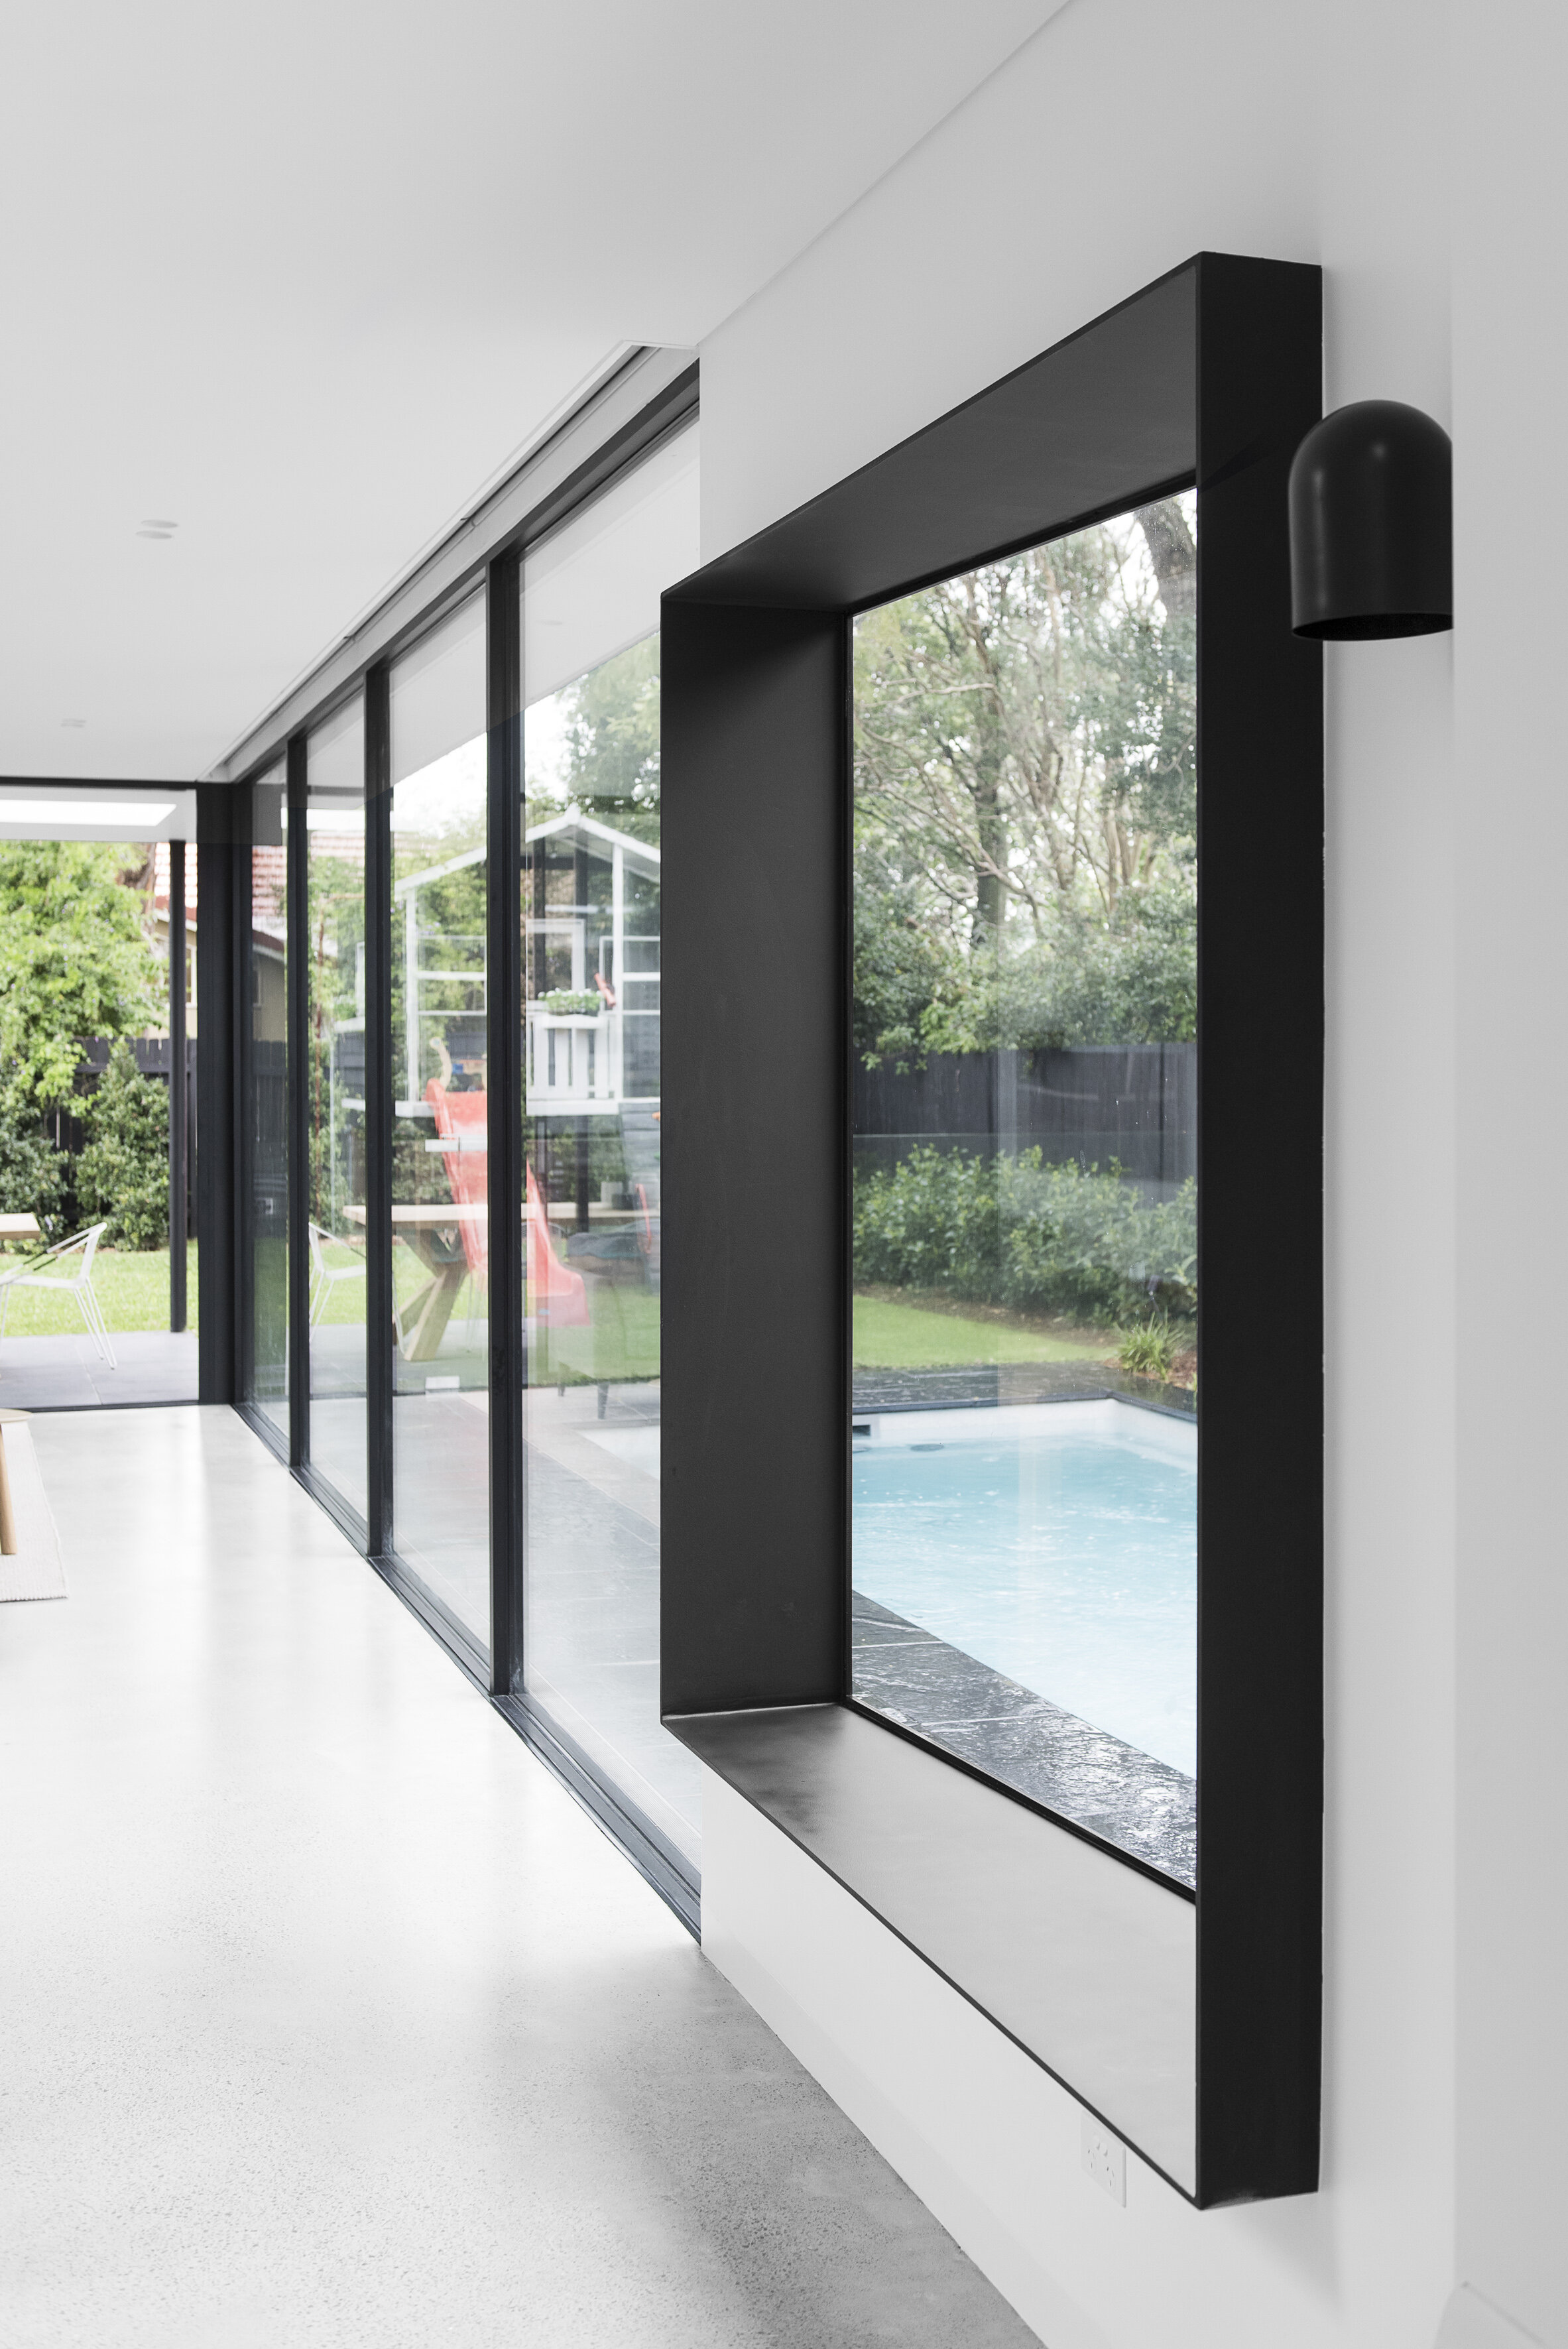
After that we moved to phase 2 where we added a large modern extension and pool to the back of the house. We lived in the house for about four years all up and then sold it.
As one of our three boys is profoundly disabled and lives in a wheelchair, the house was designed with his needs in mind and plenty of circulation space for his wheelchair.

Before Photos and Floor Plan Changes
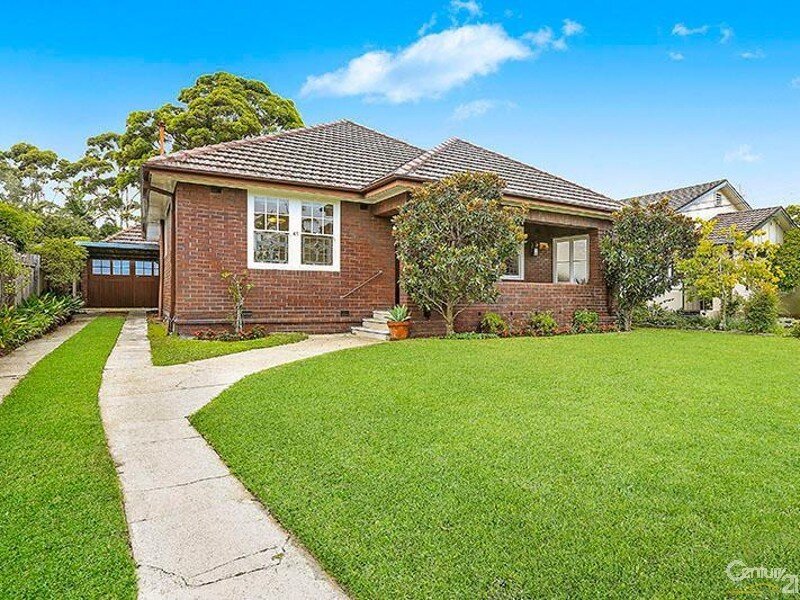
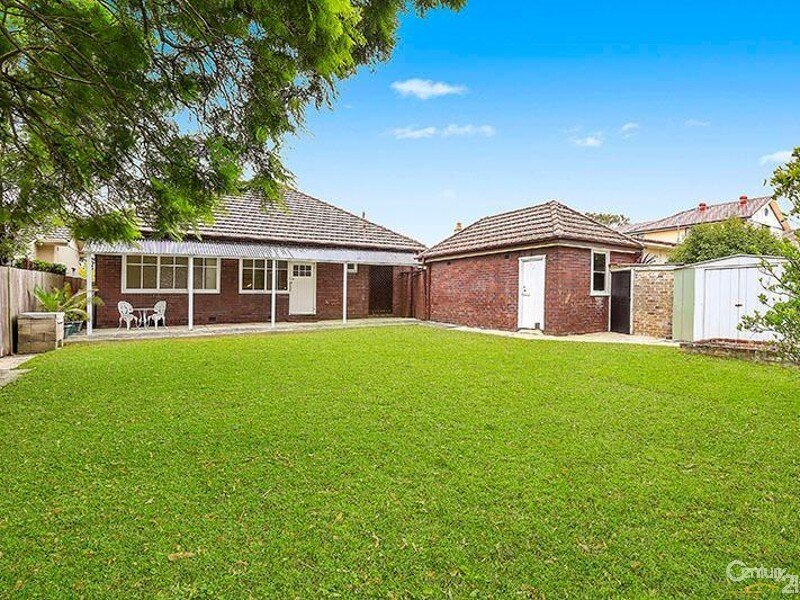
The house was a Californian Bungalow in Sydney’s upper north shore suburb of Roseville.
The renovation was extensive and involved a floor plan change in the existing bungalow as well as an extensive addition to the rear of the existing home. You can see the before and after floor plans in the images below.
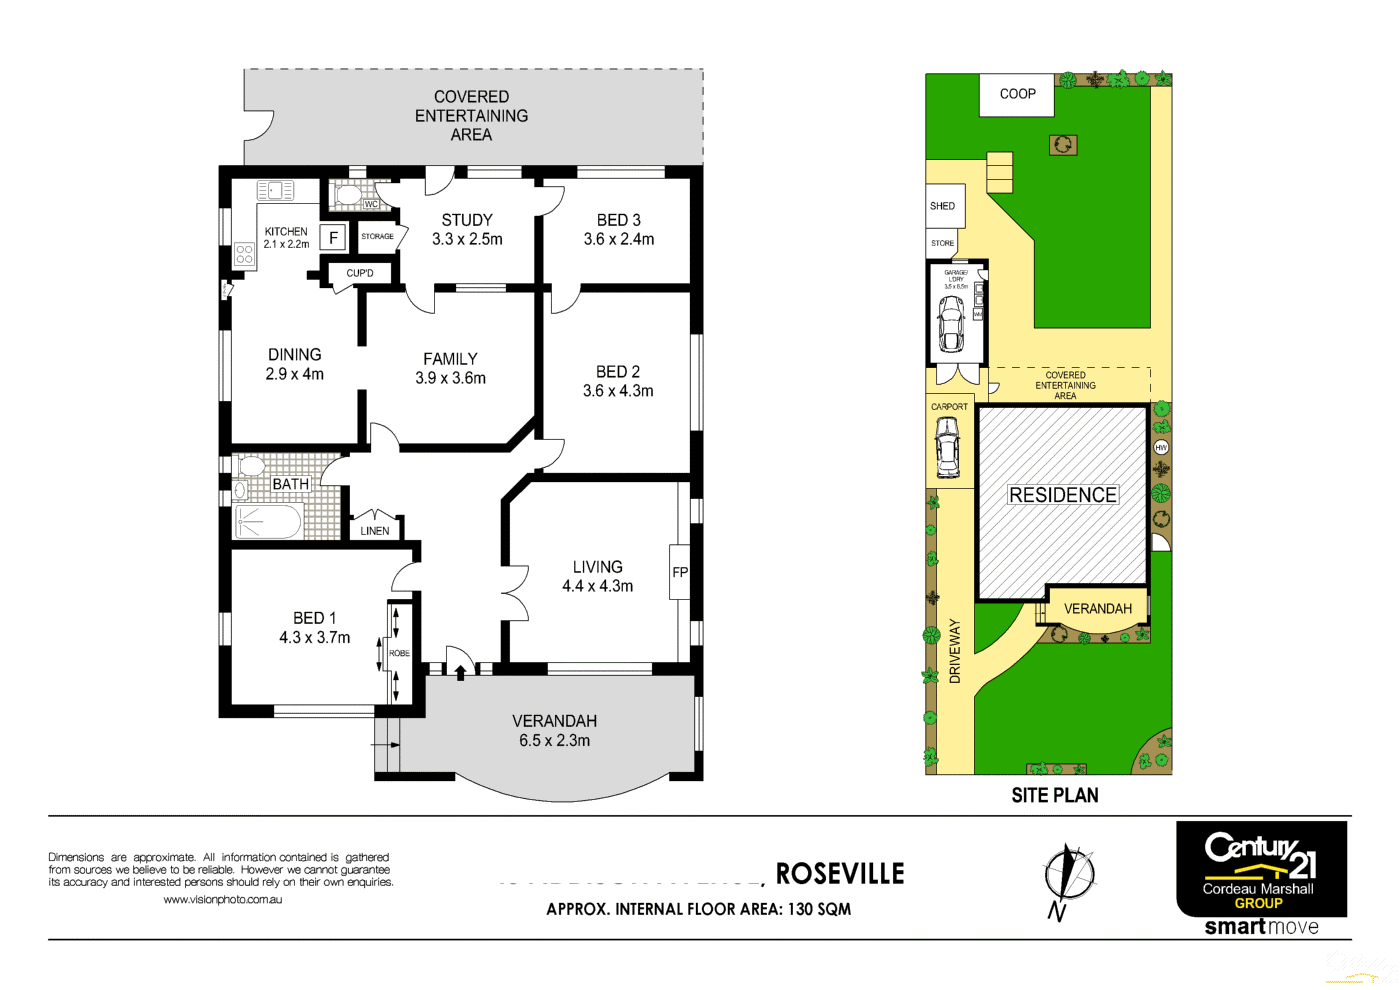
FLOOR PLAN - BEFORE

FLOOR PLAN - AFTER (Architect: Thodey Designs)
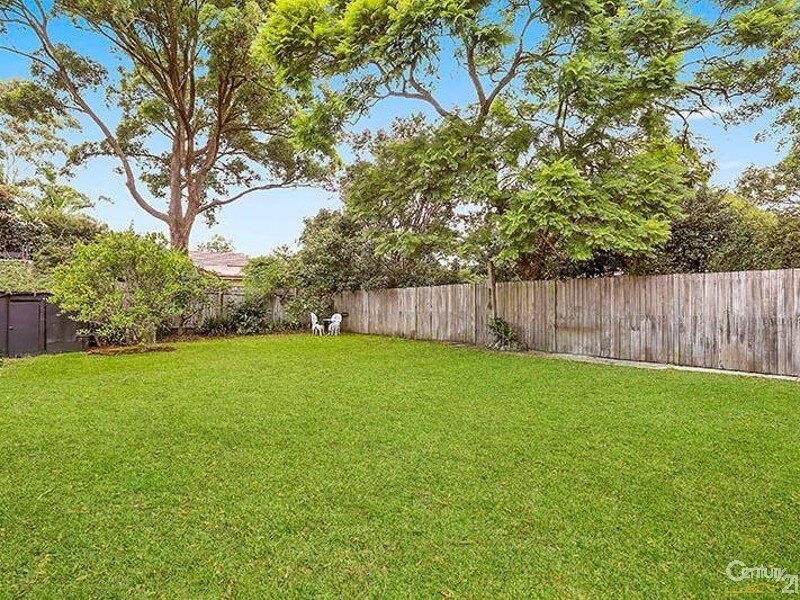
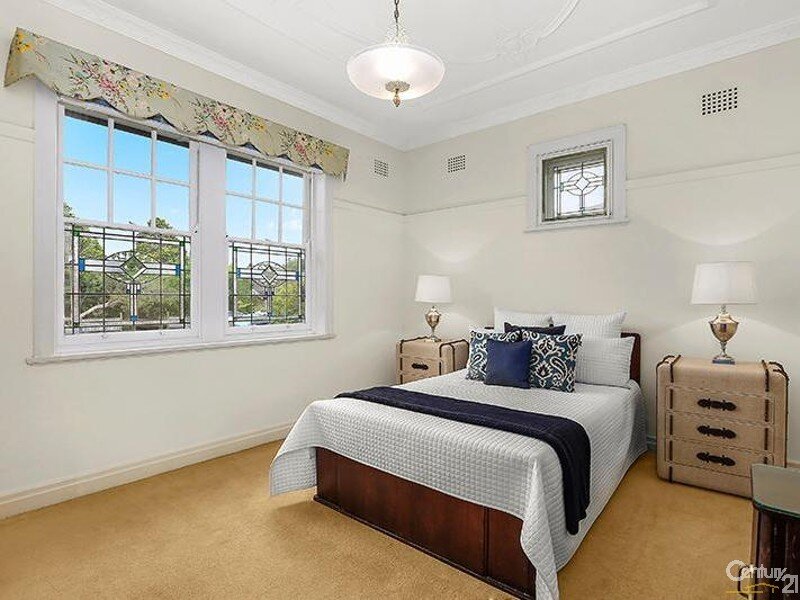
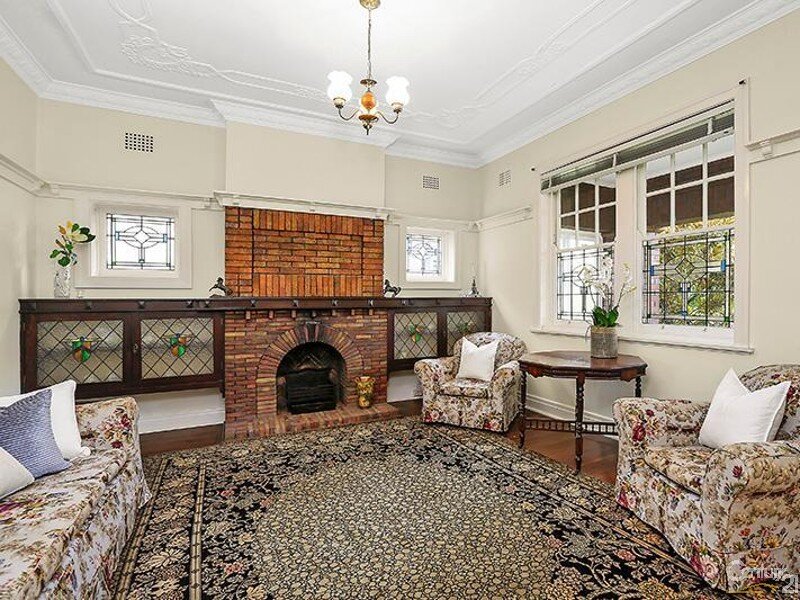
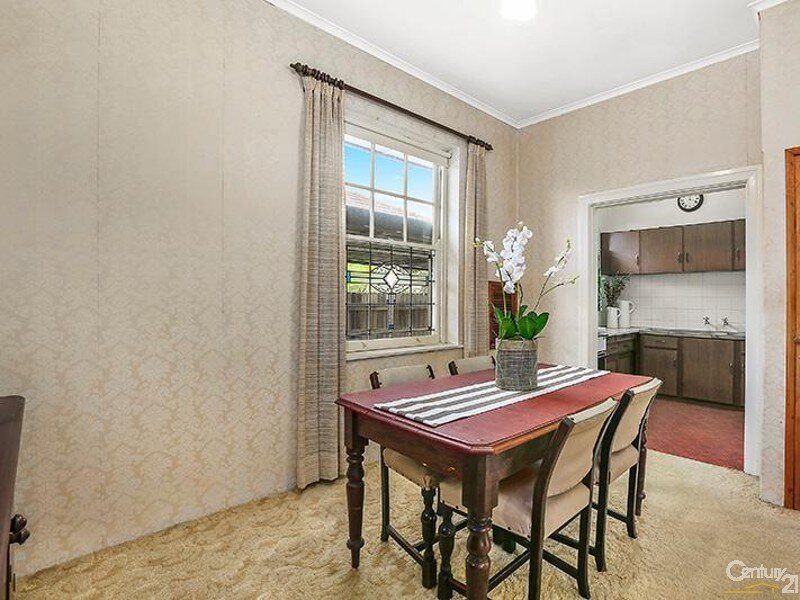
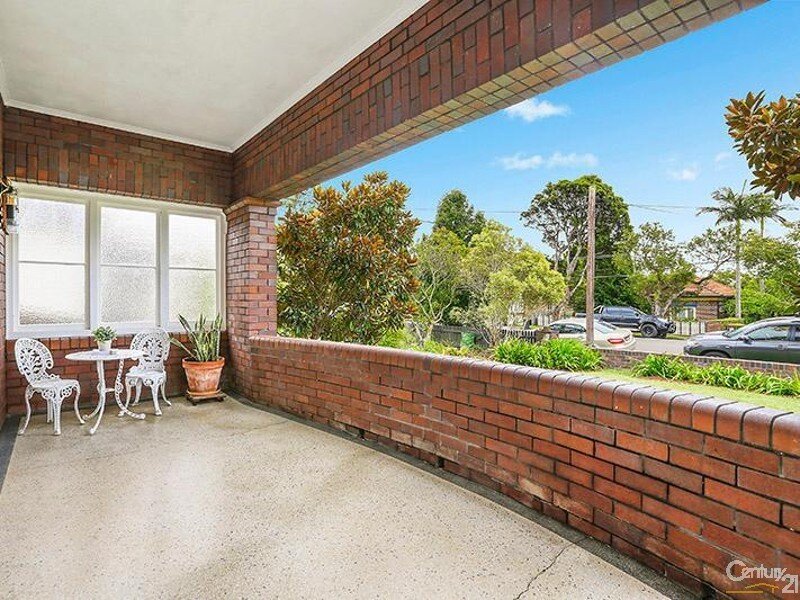
And here are some before photos of the project - as you can see the home was in pretty much original condition.
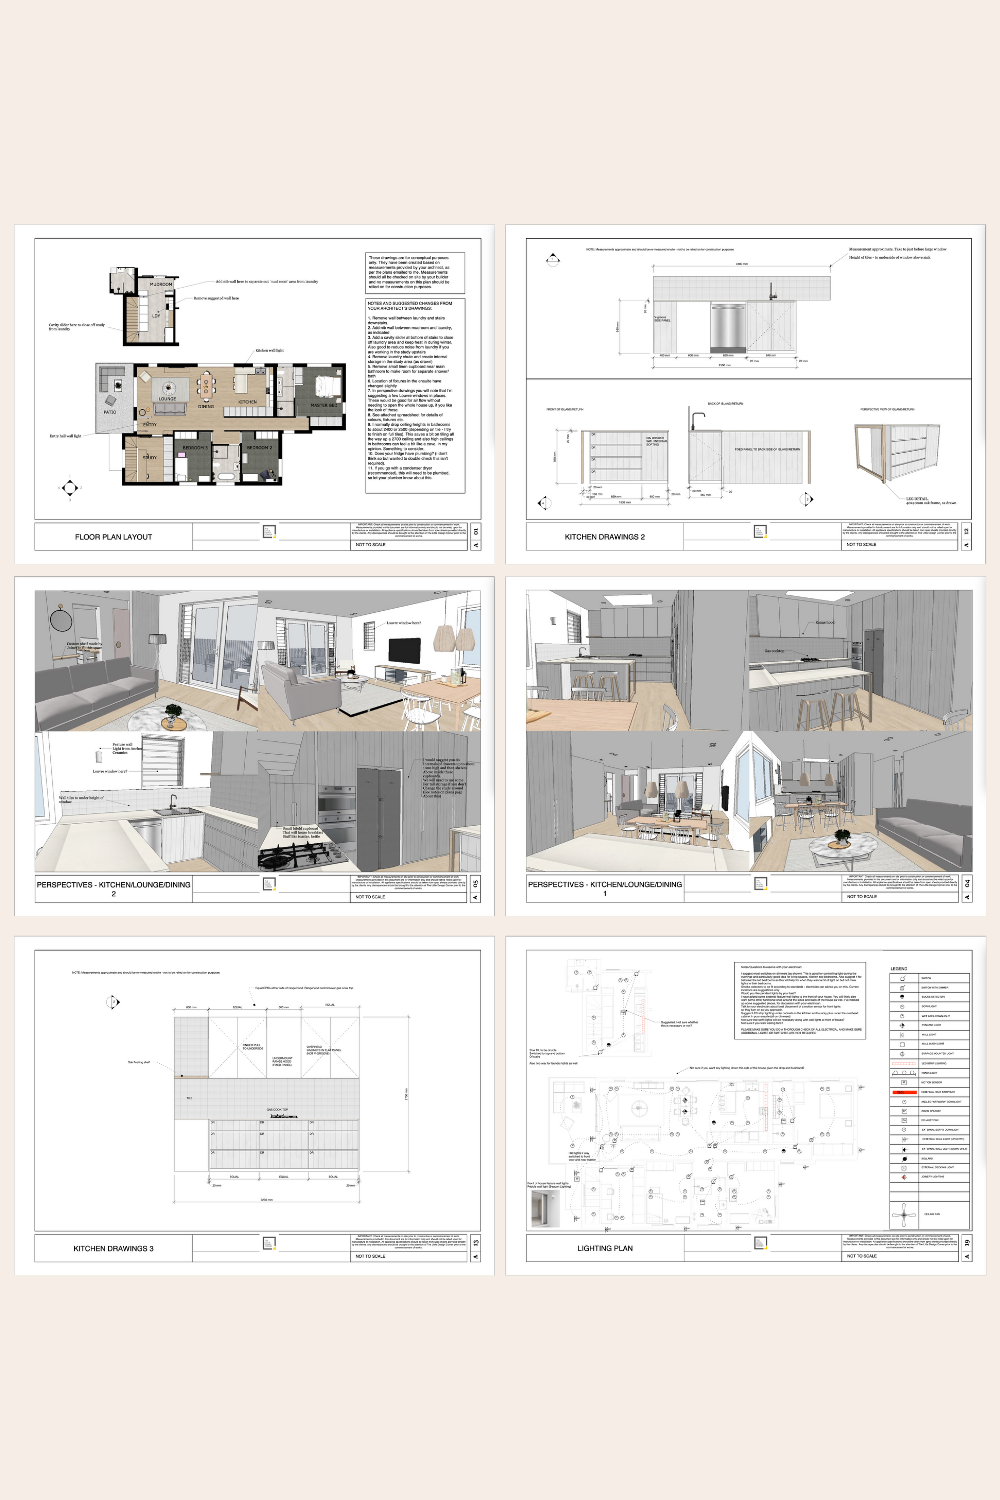
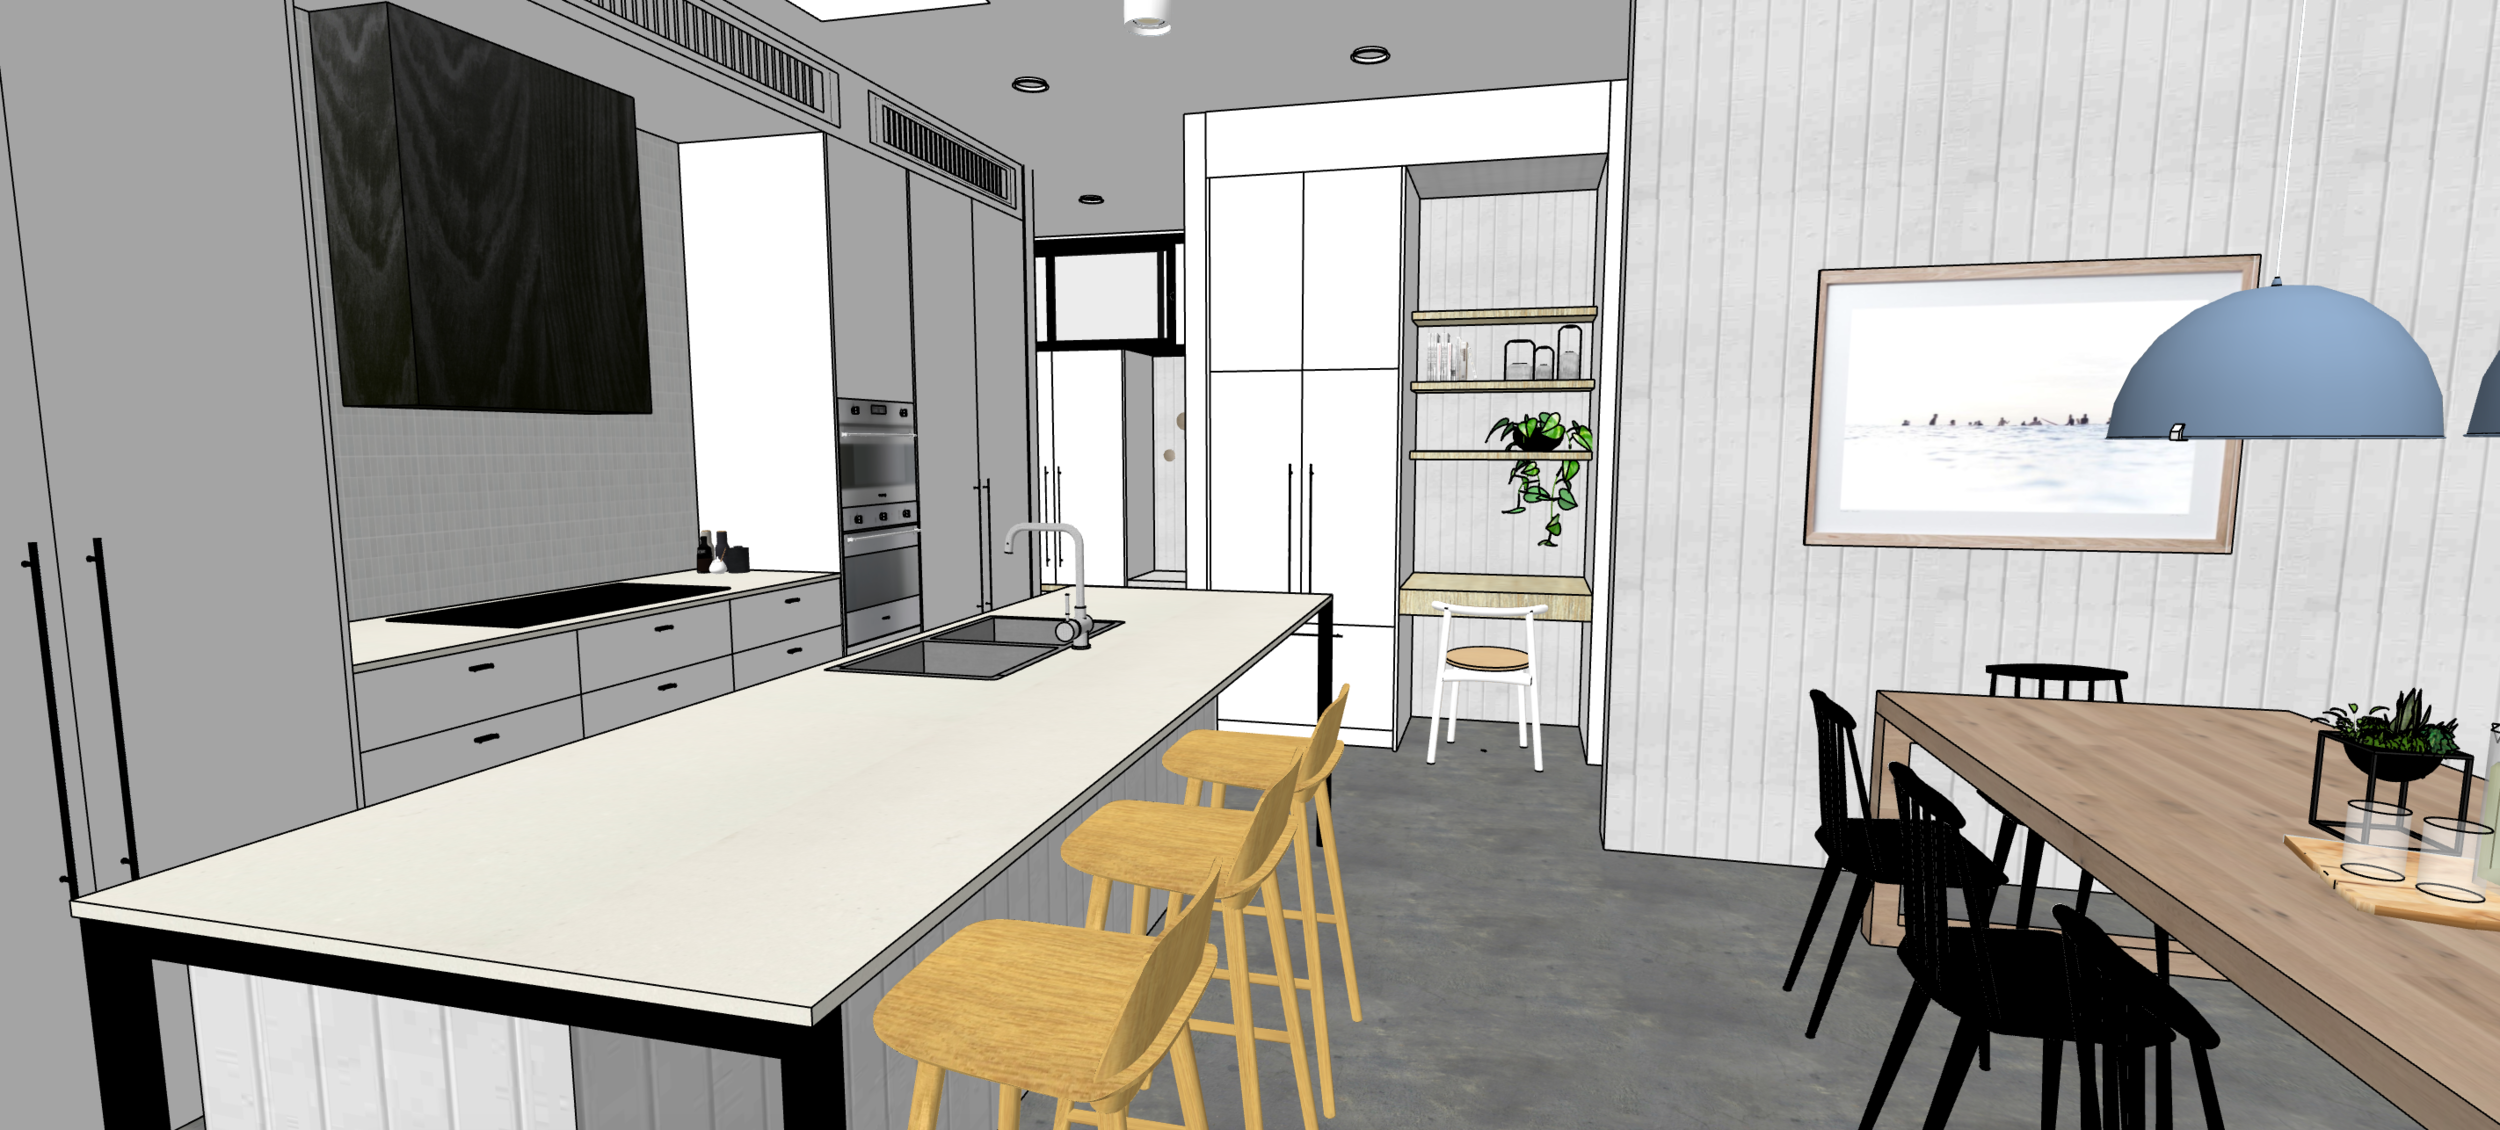
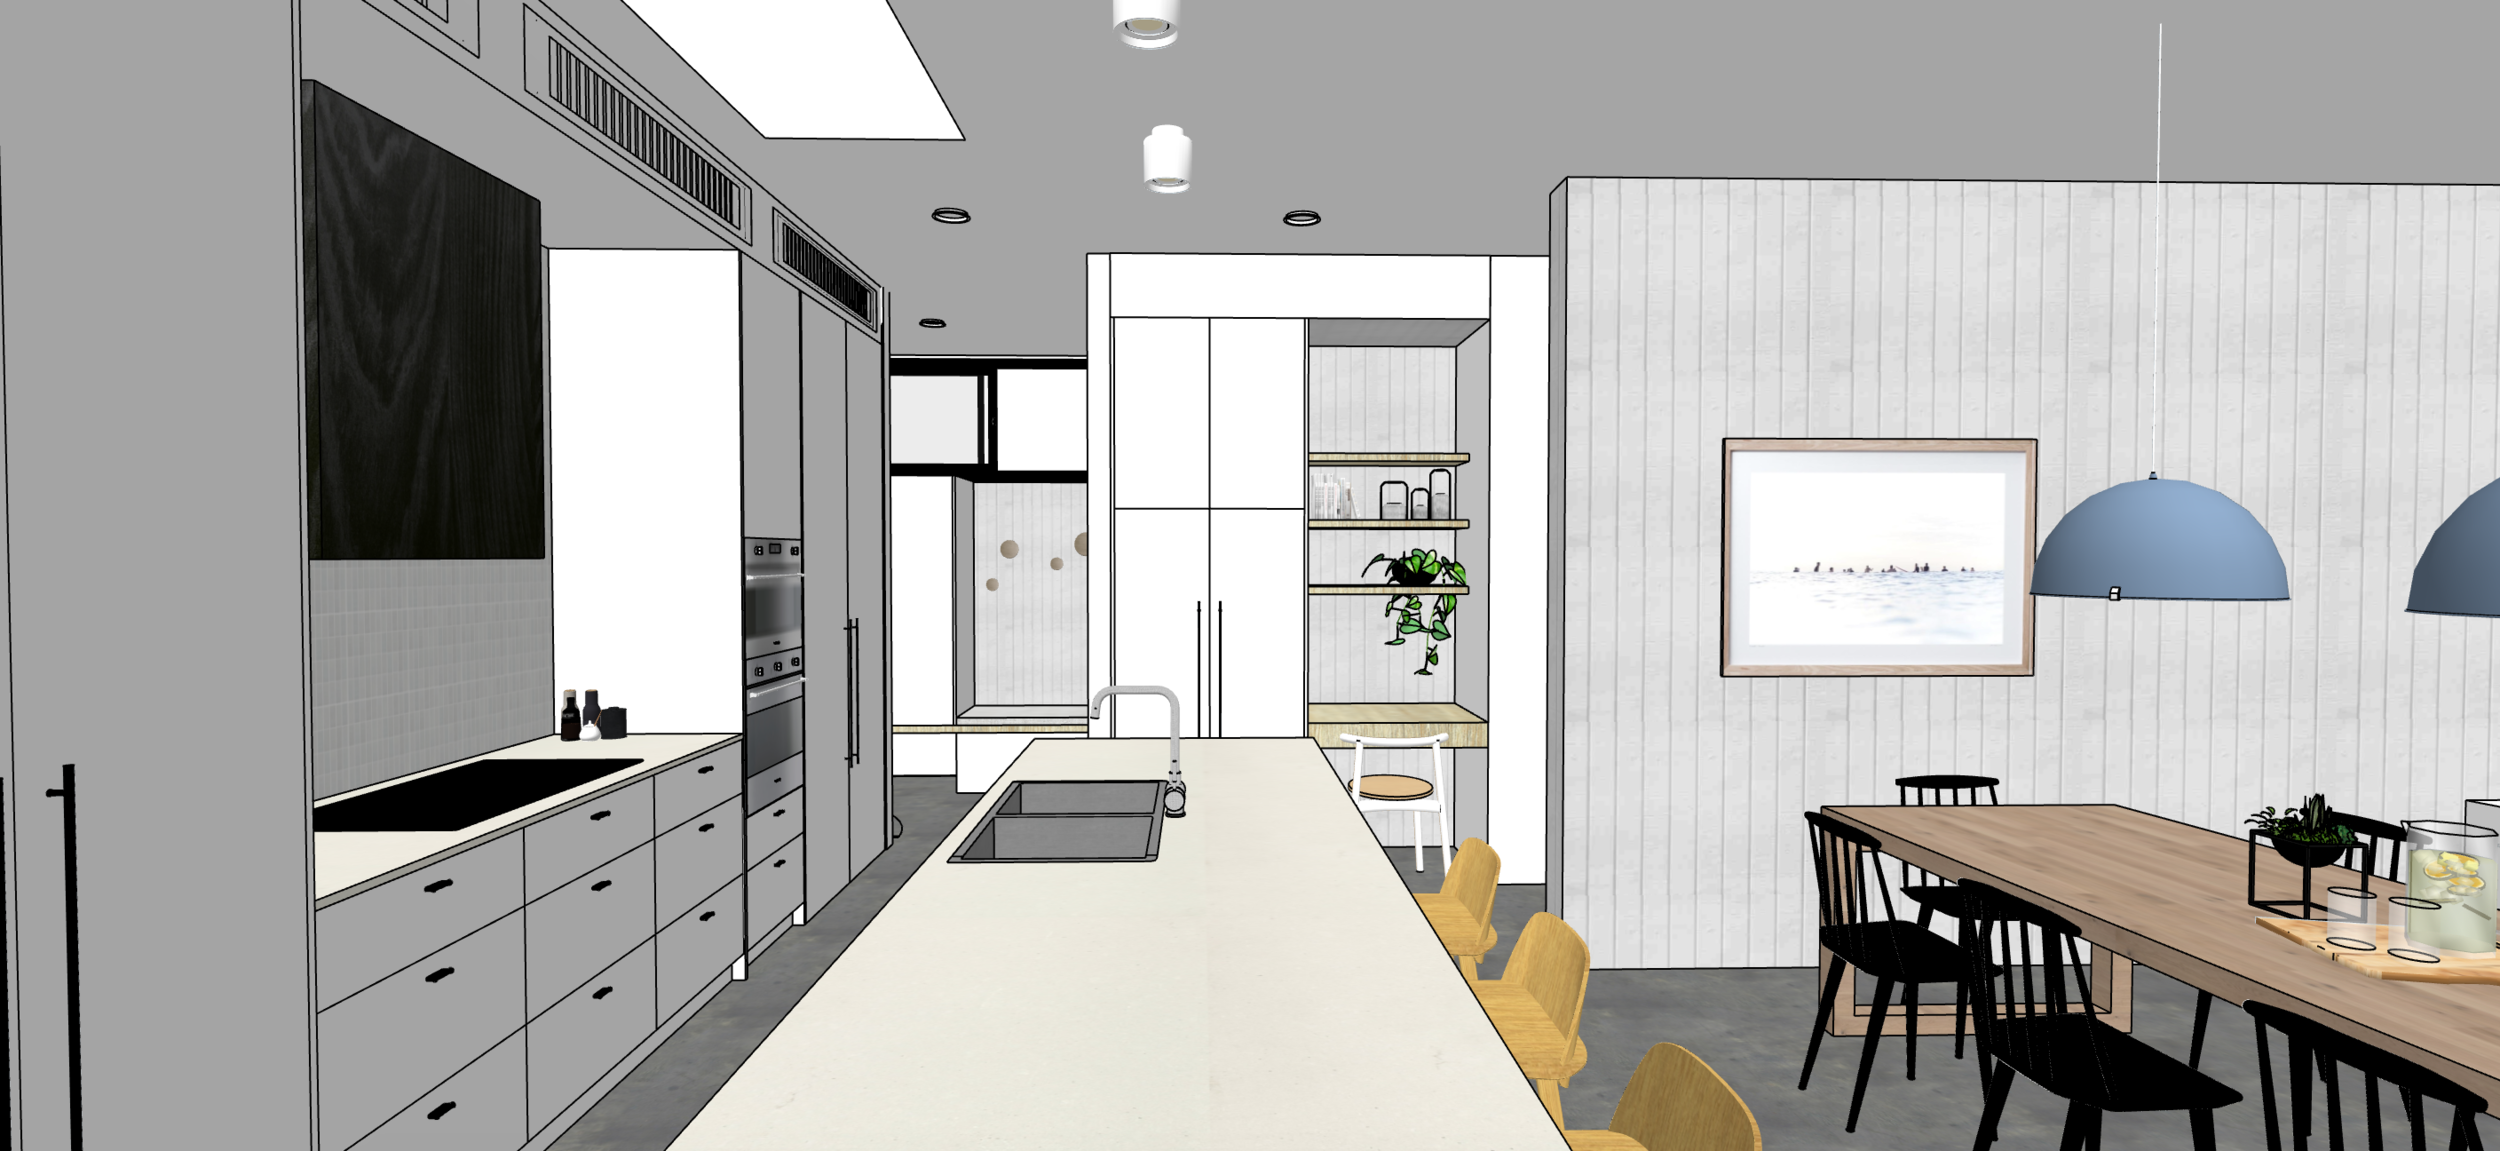
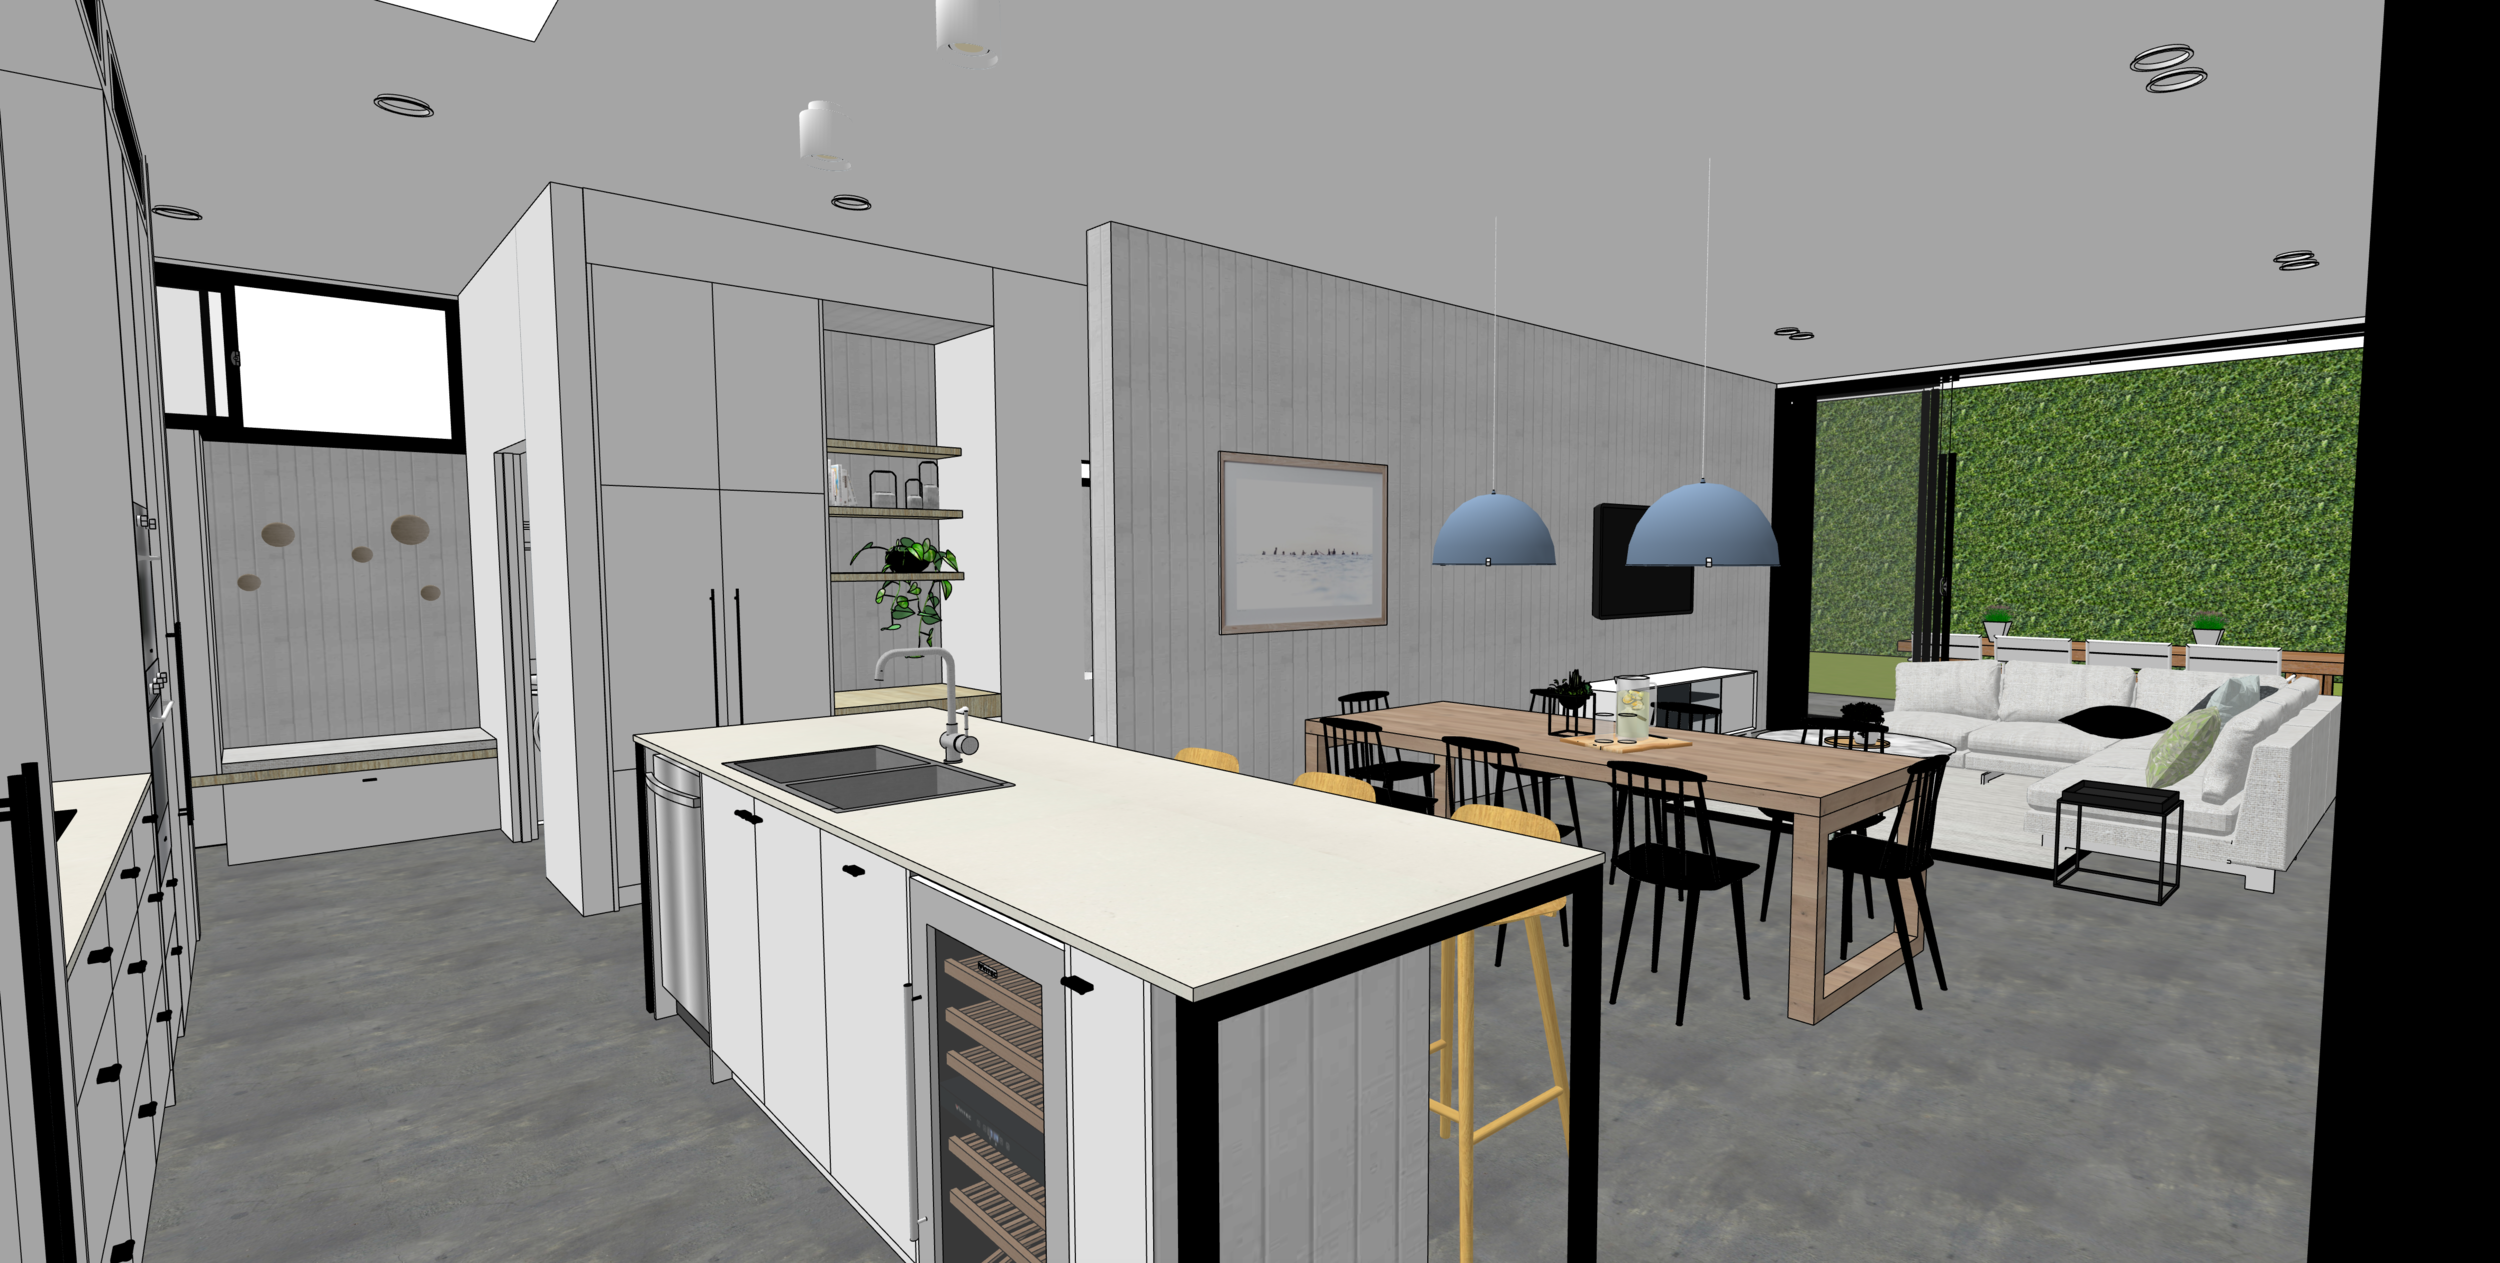
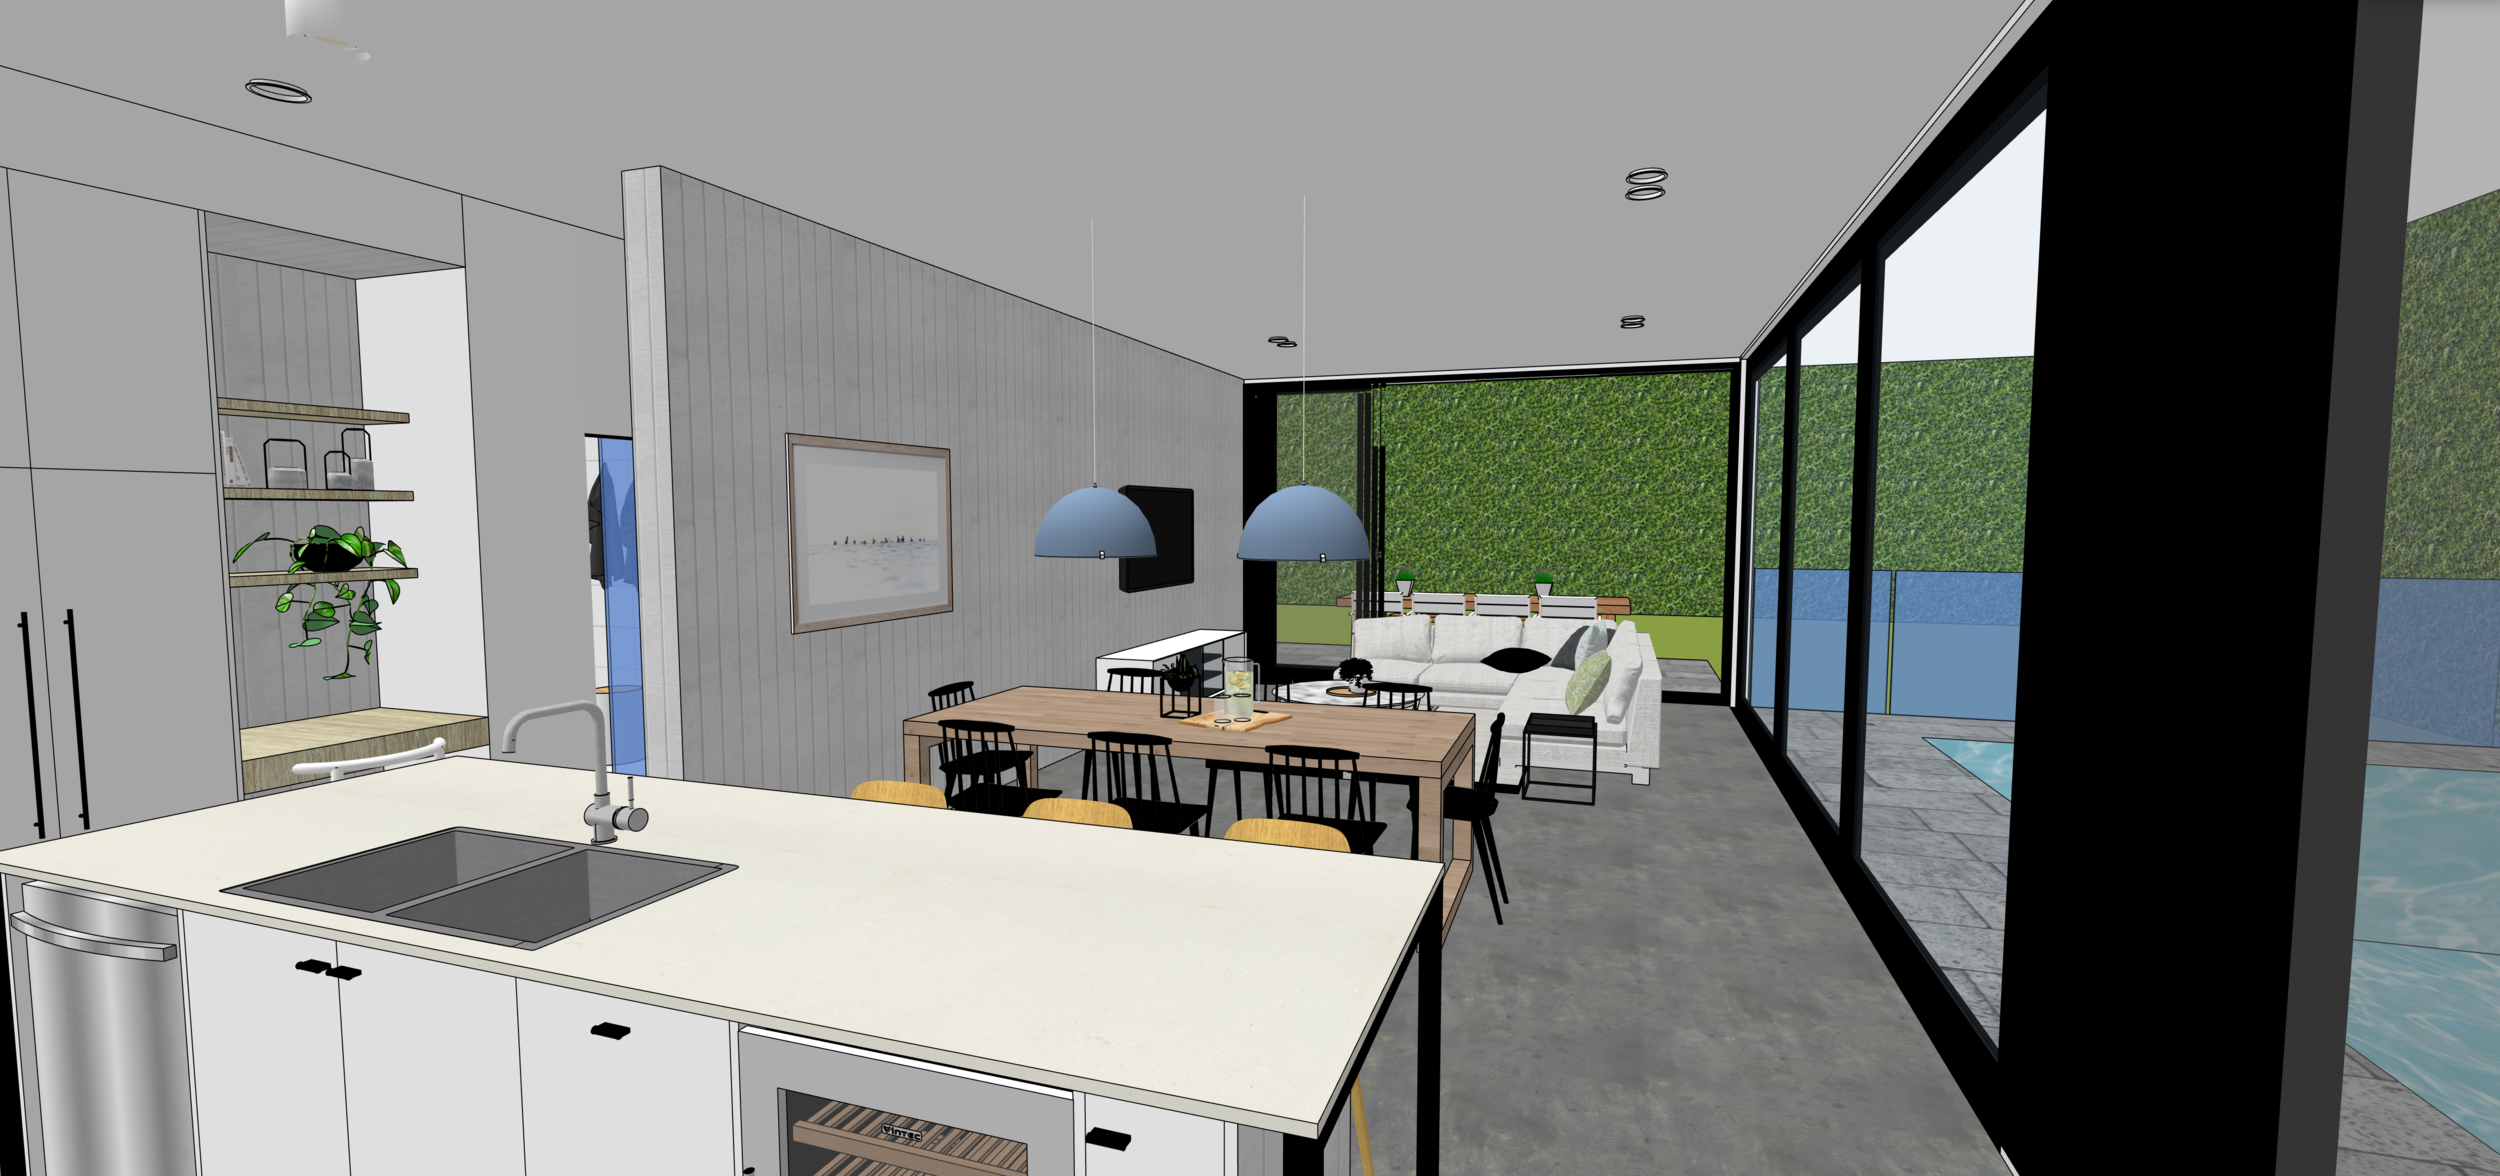
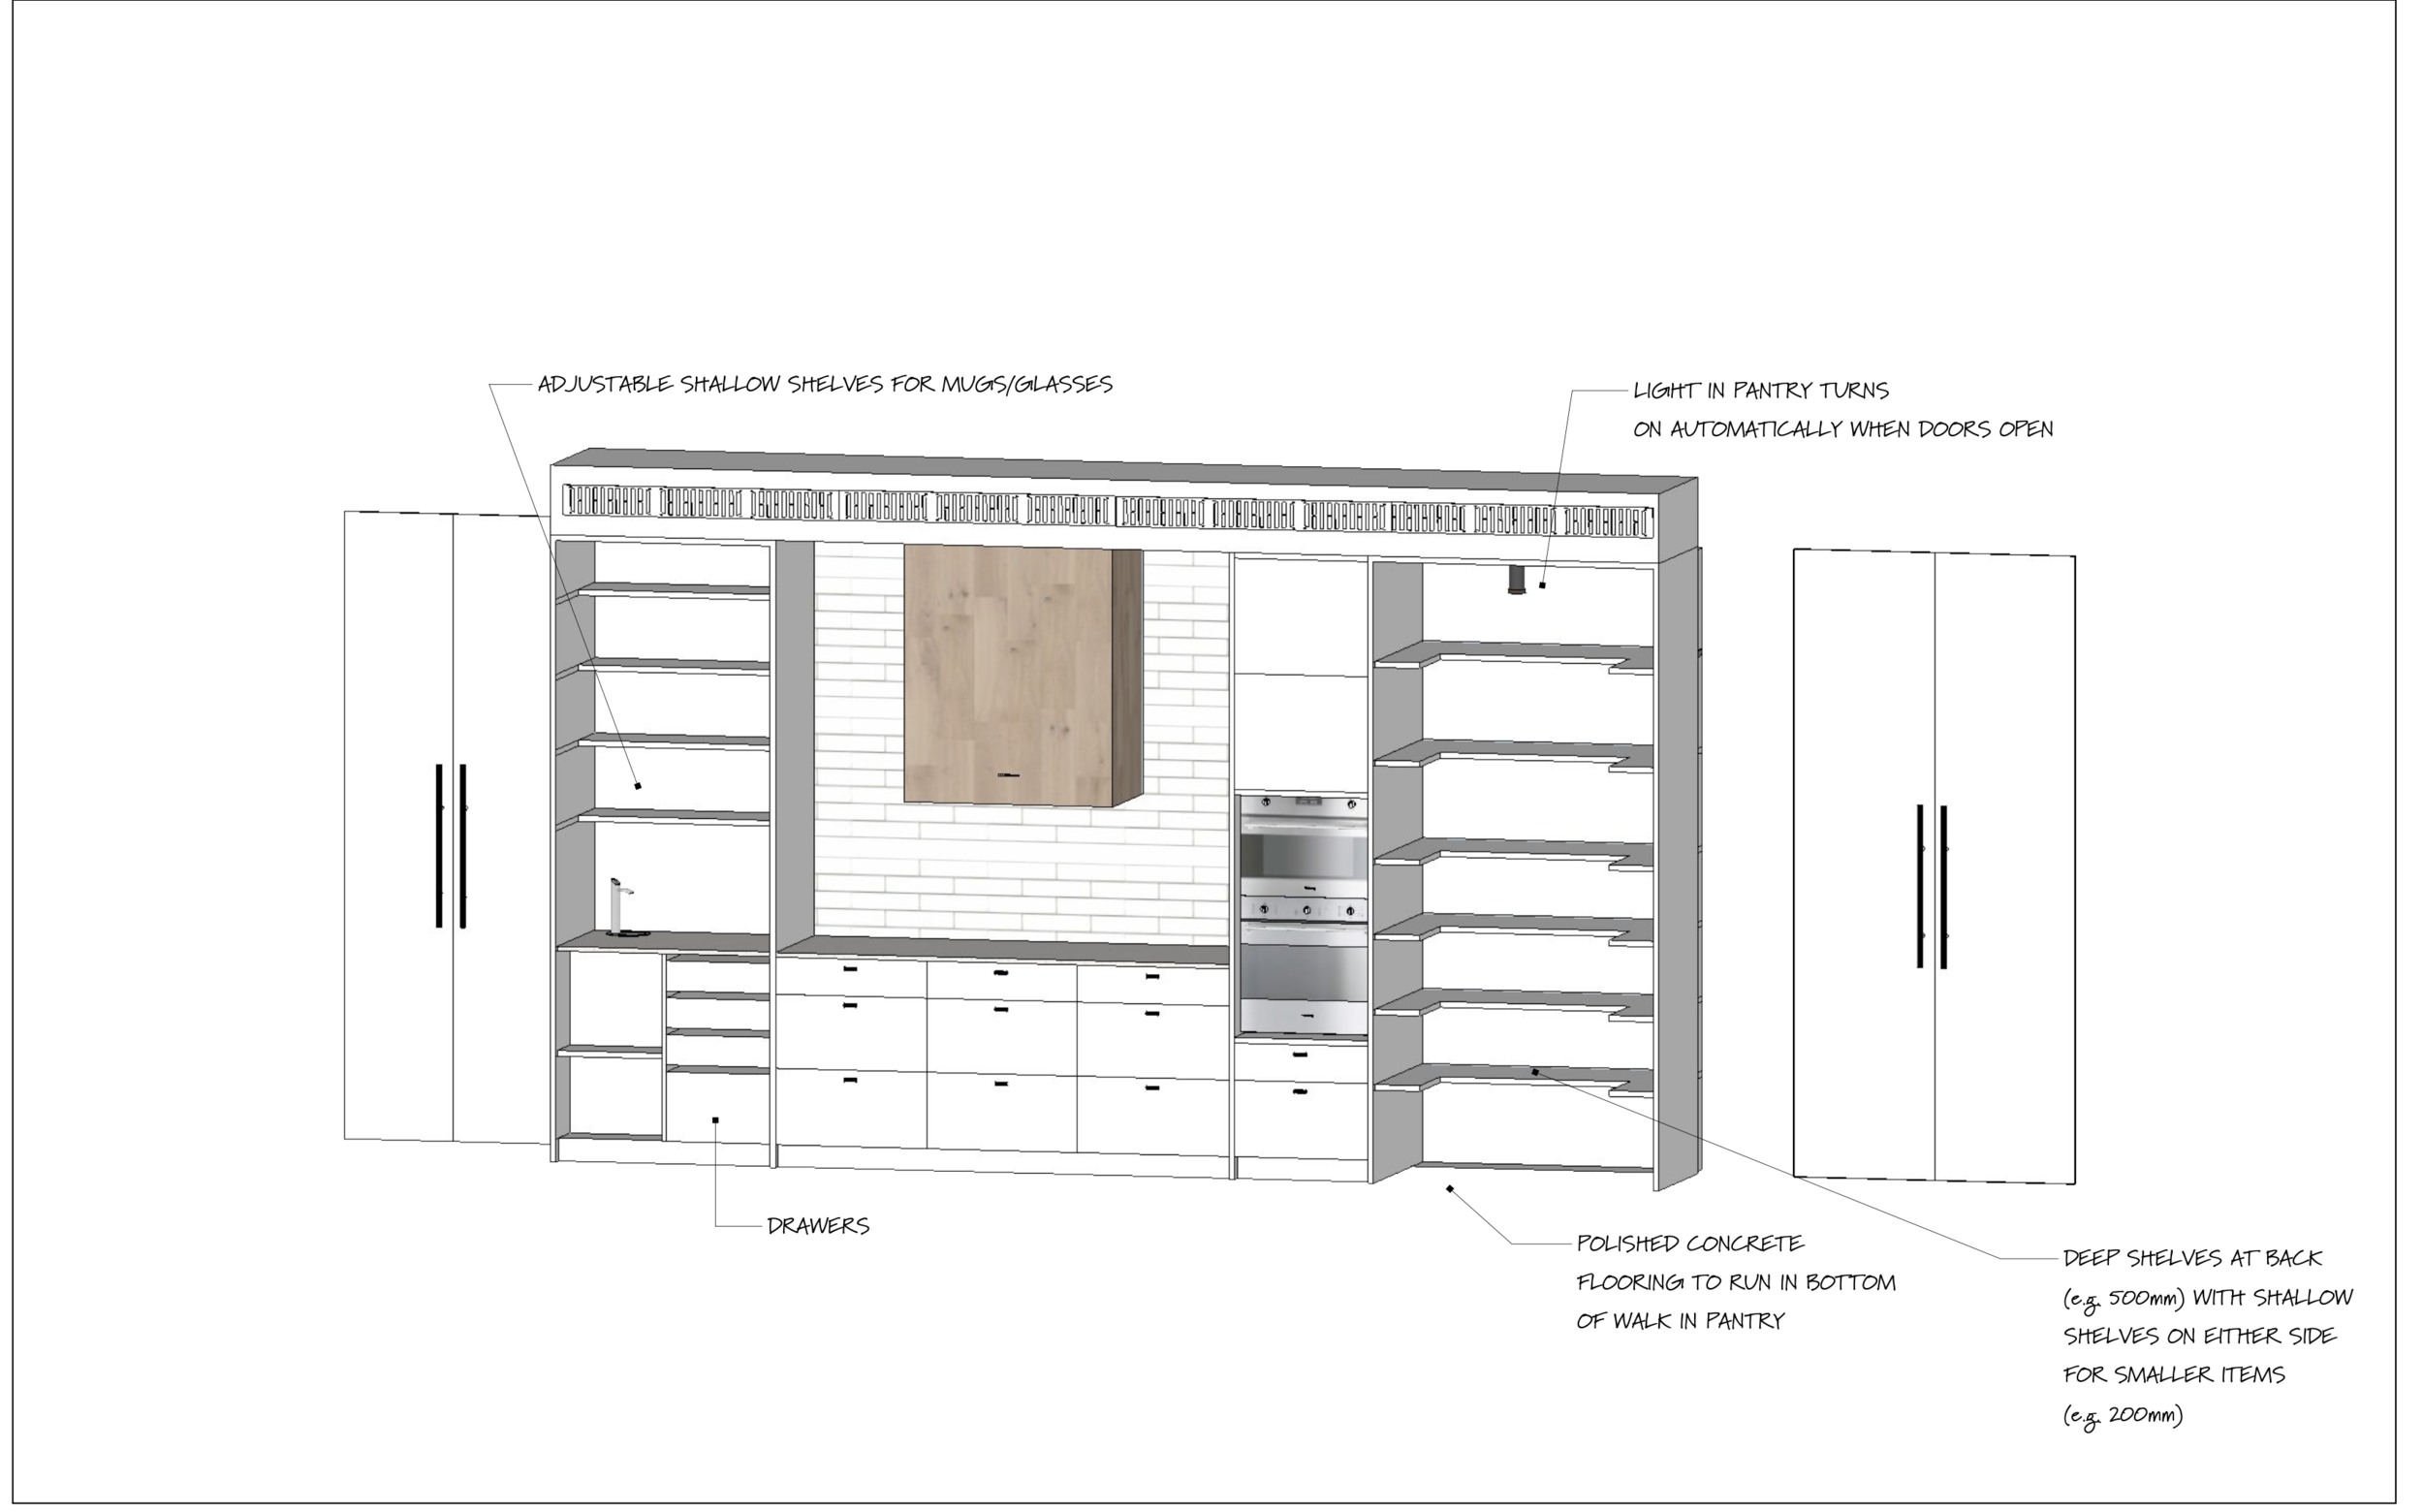
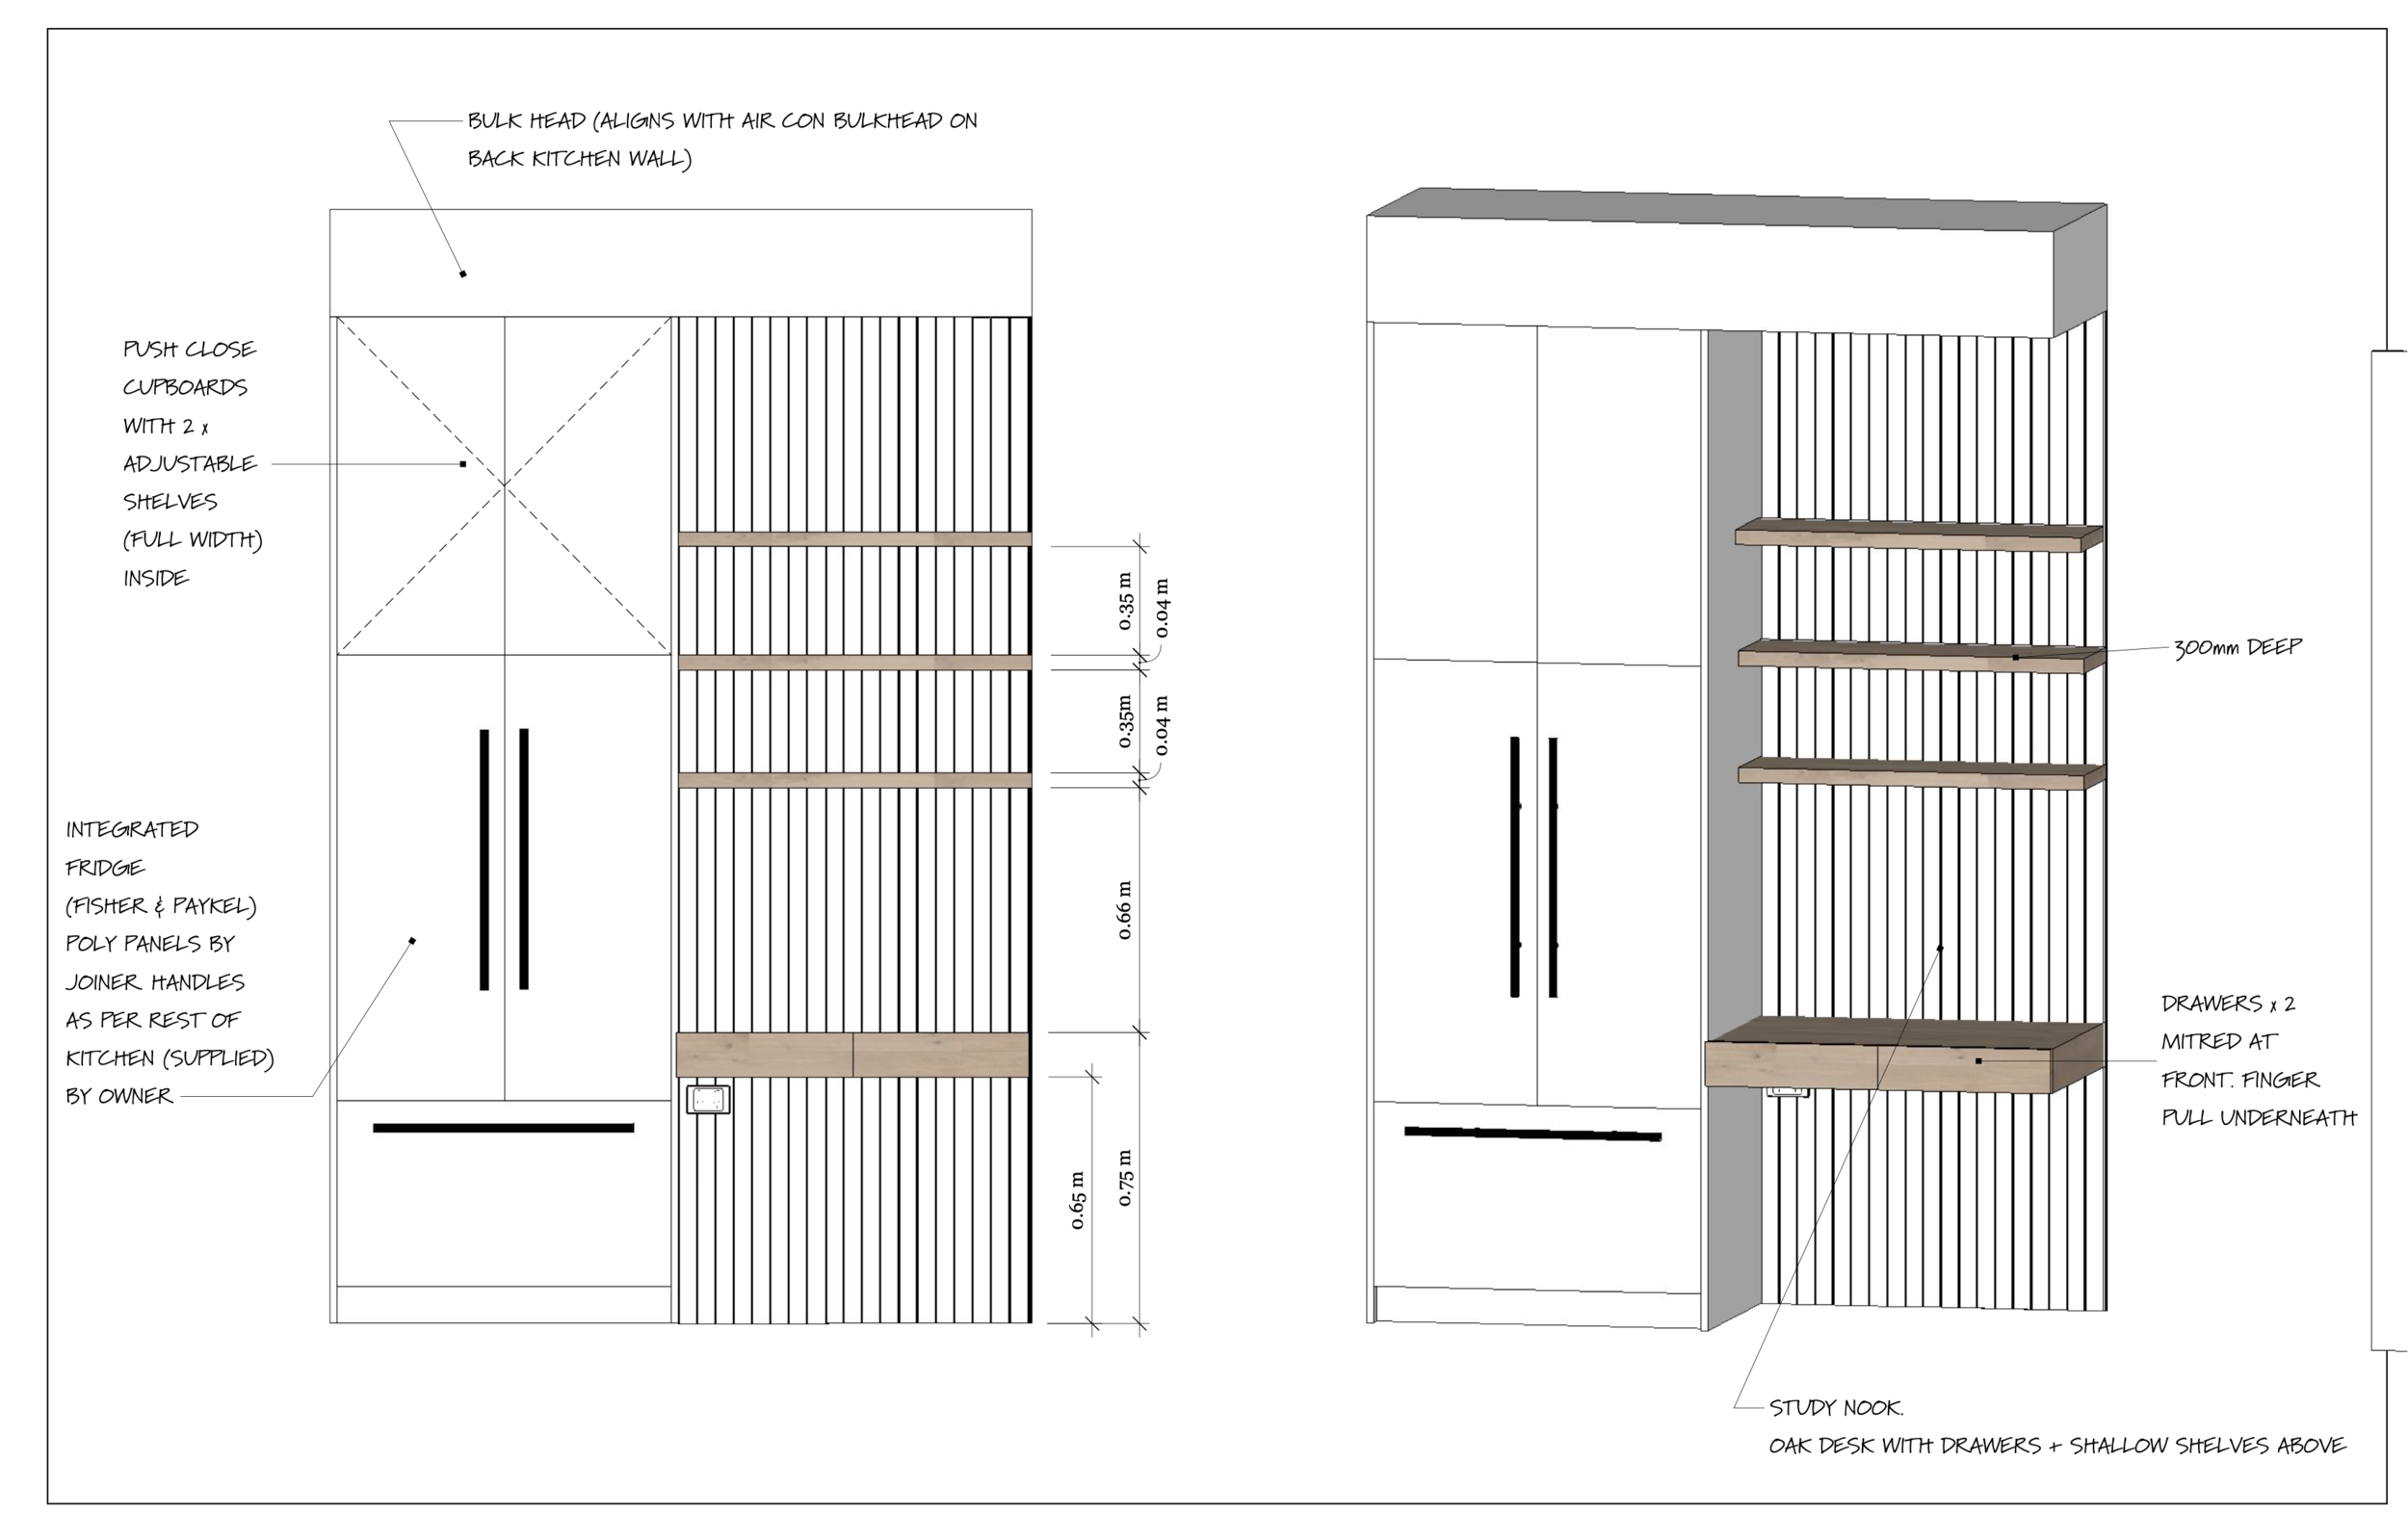
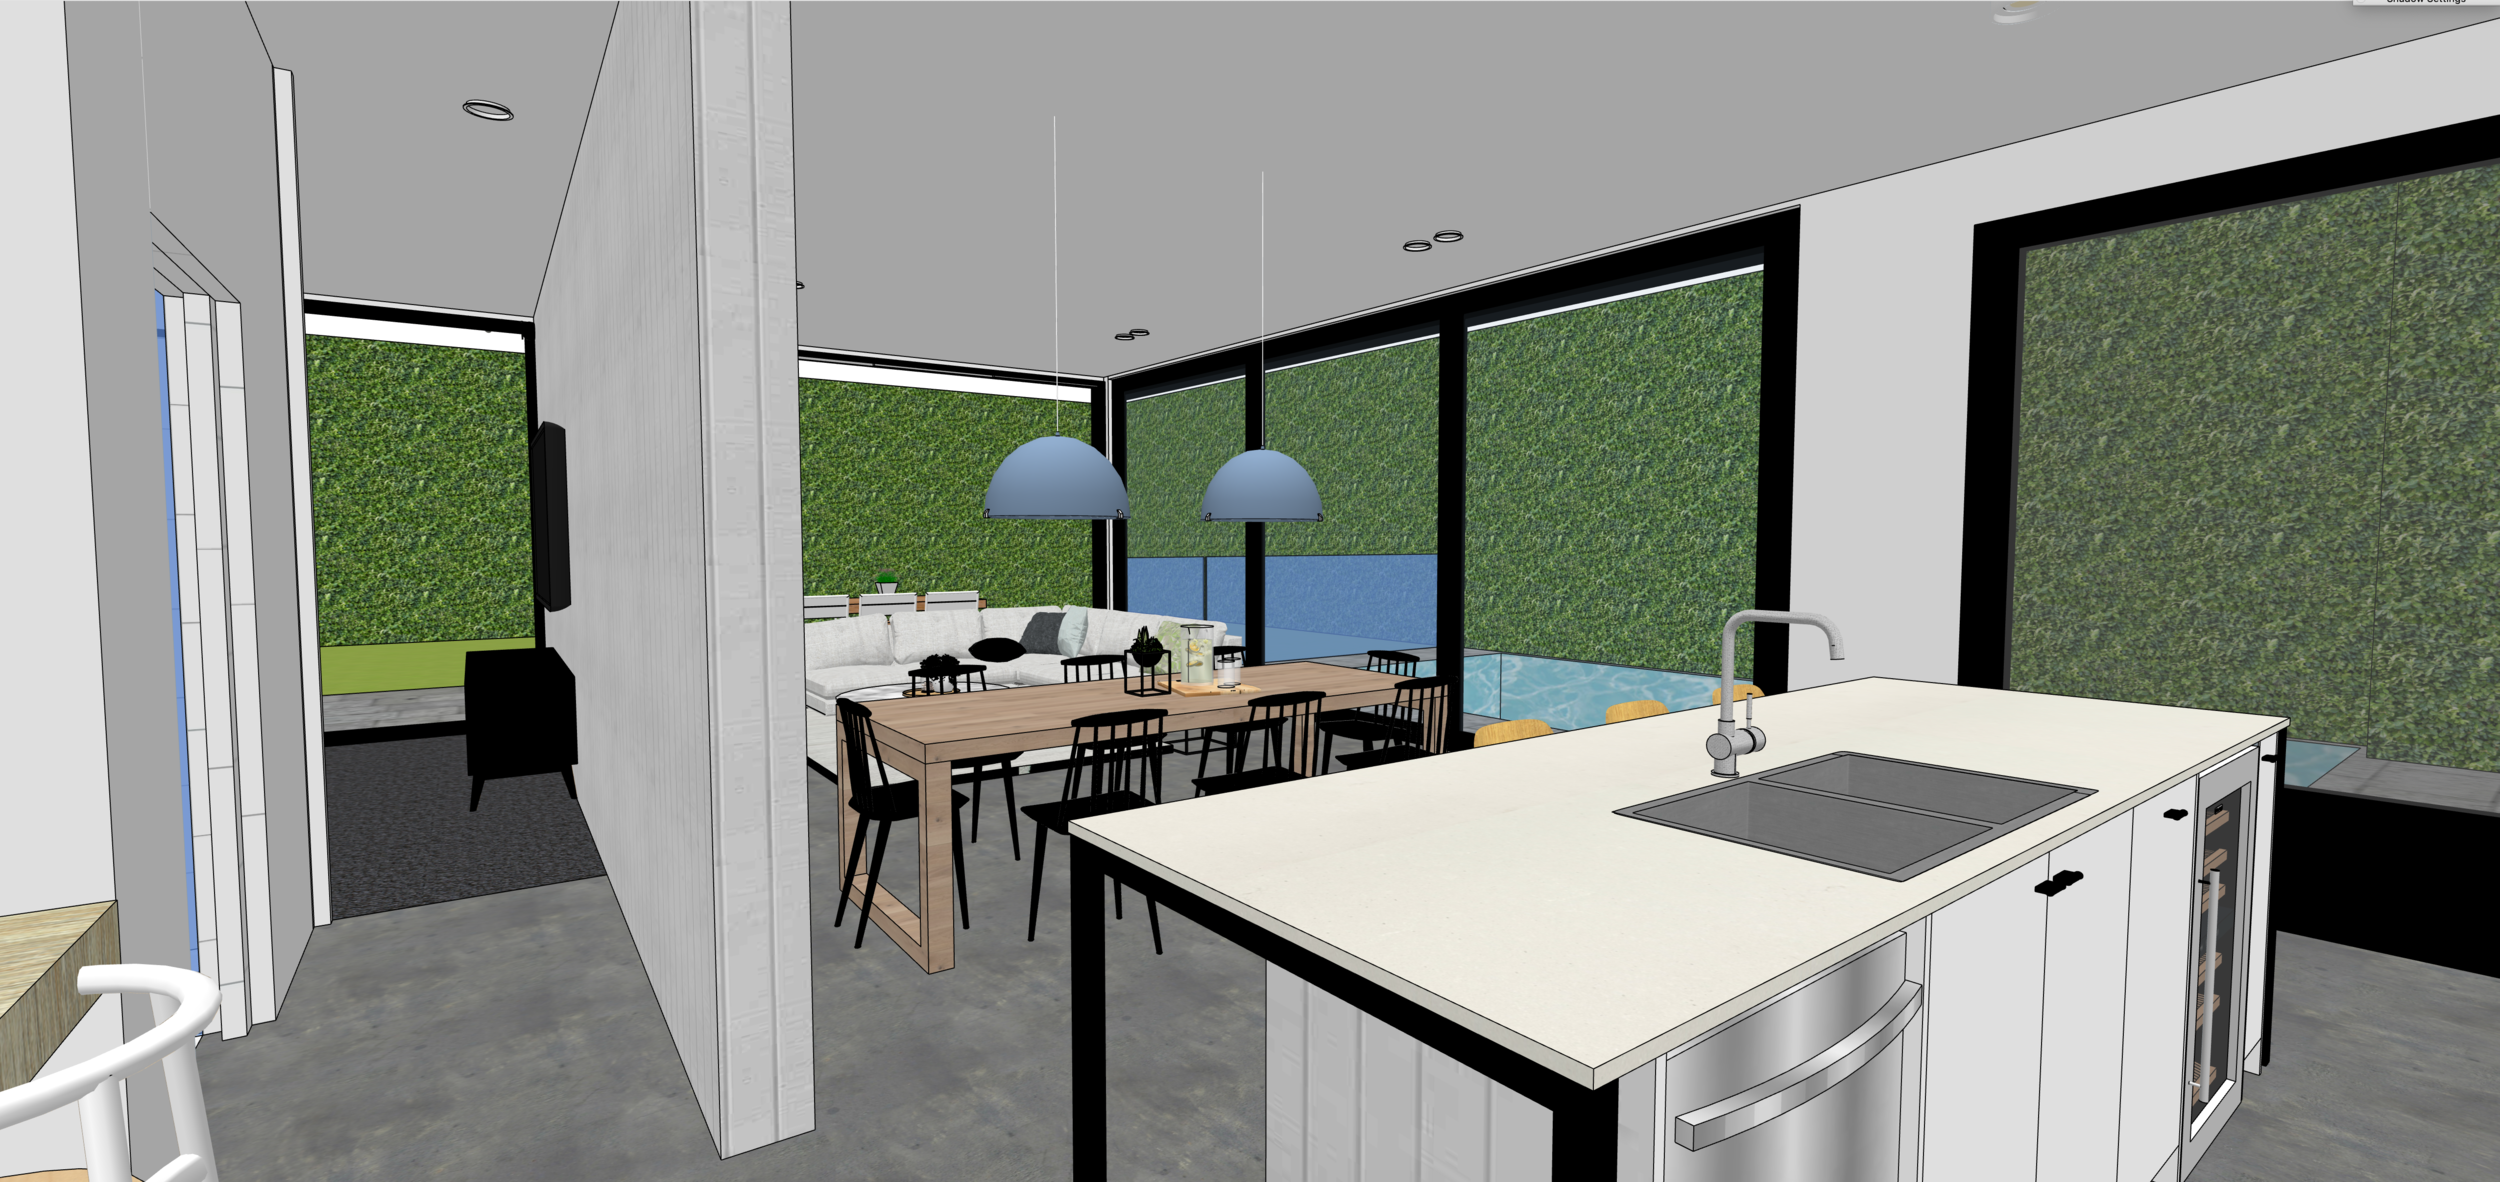
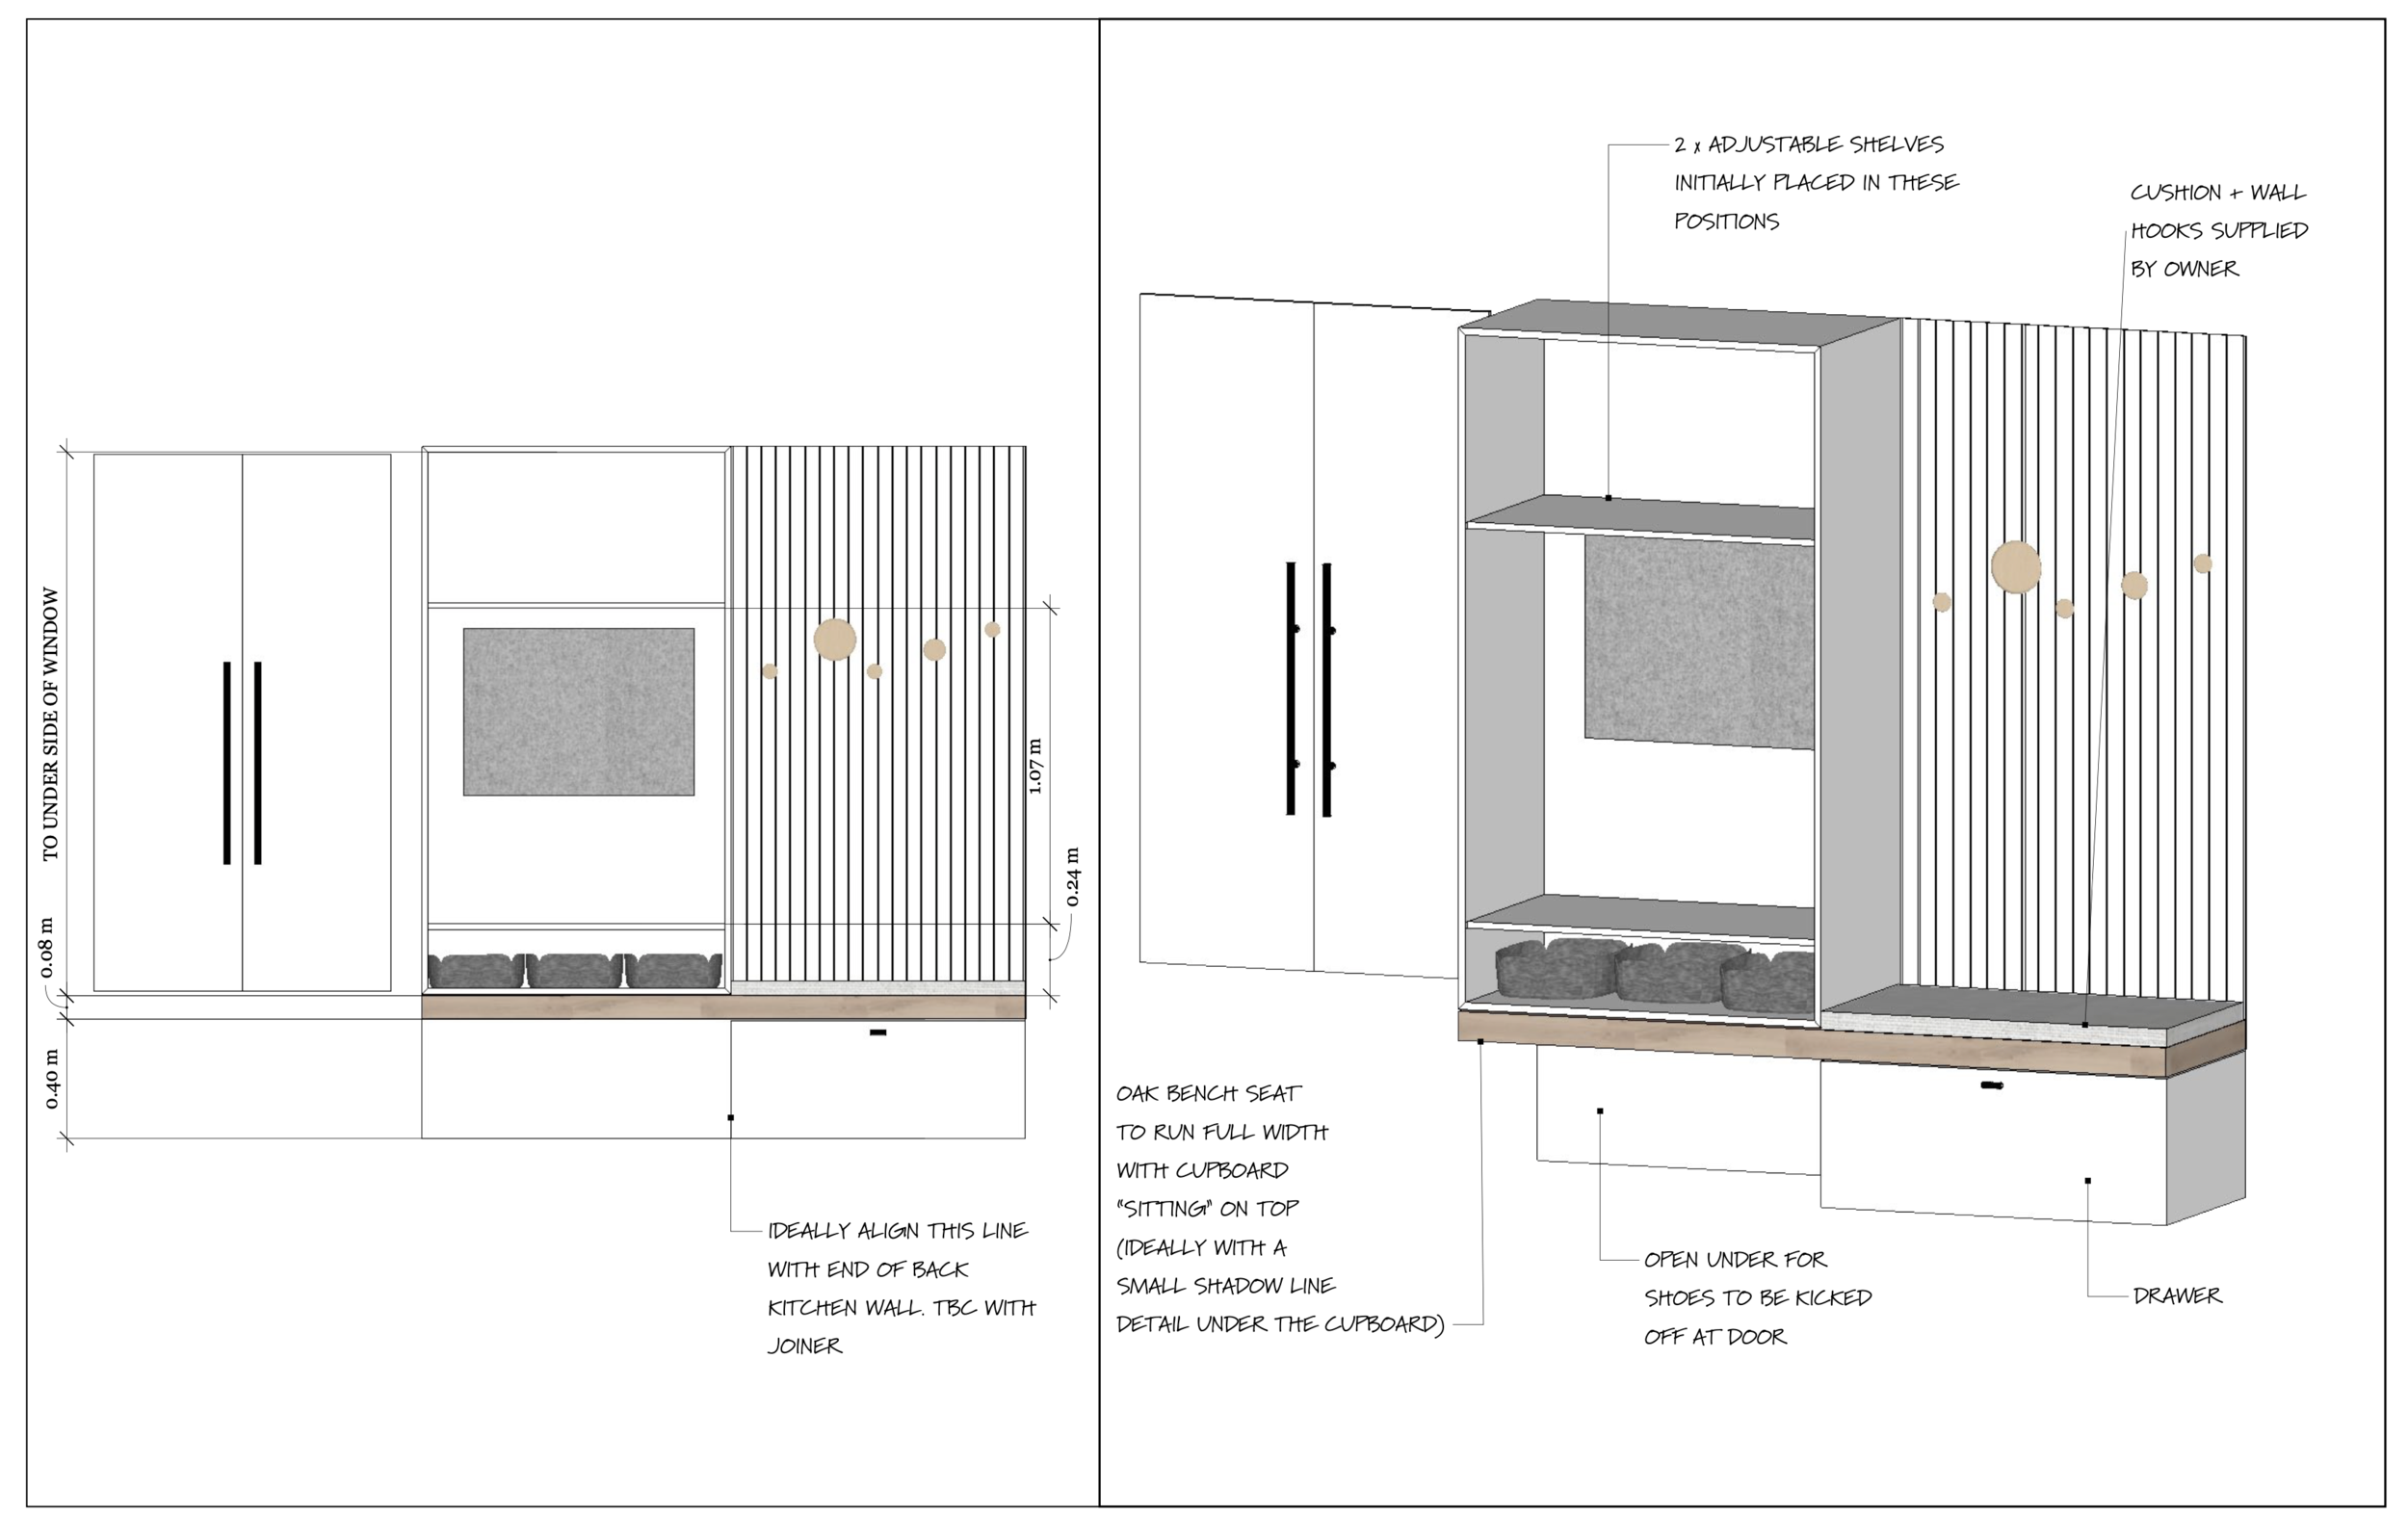
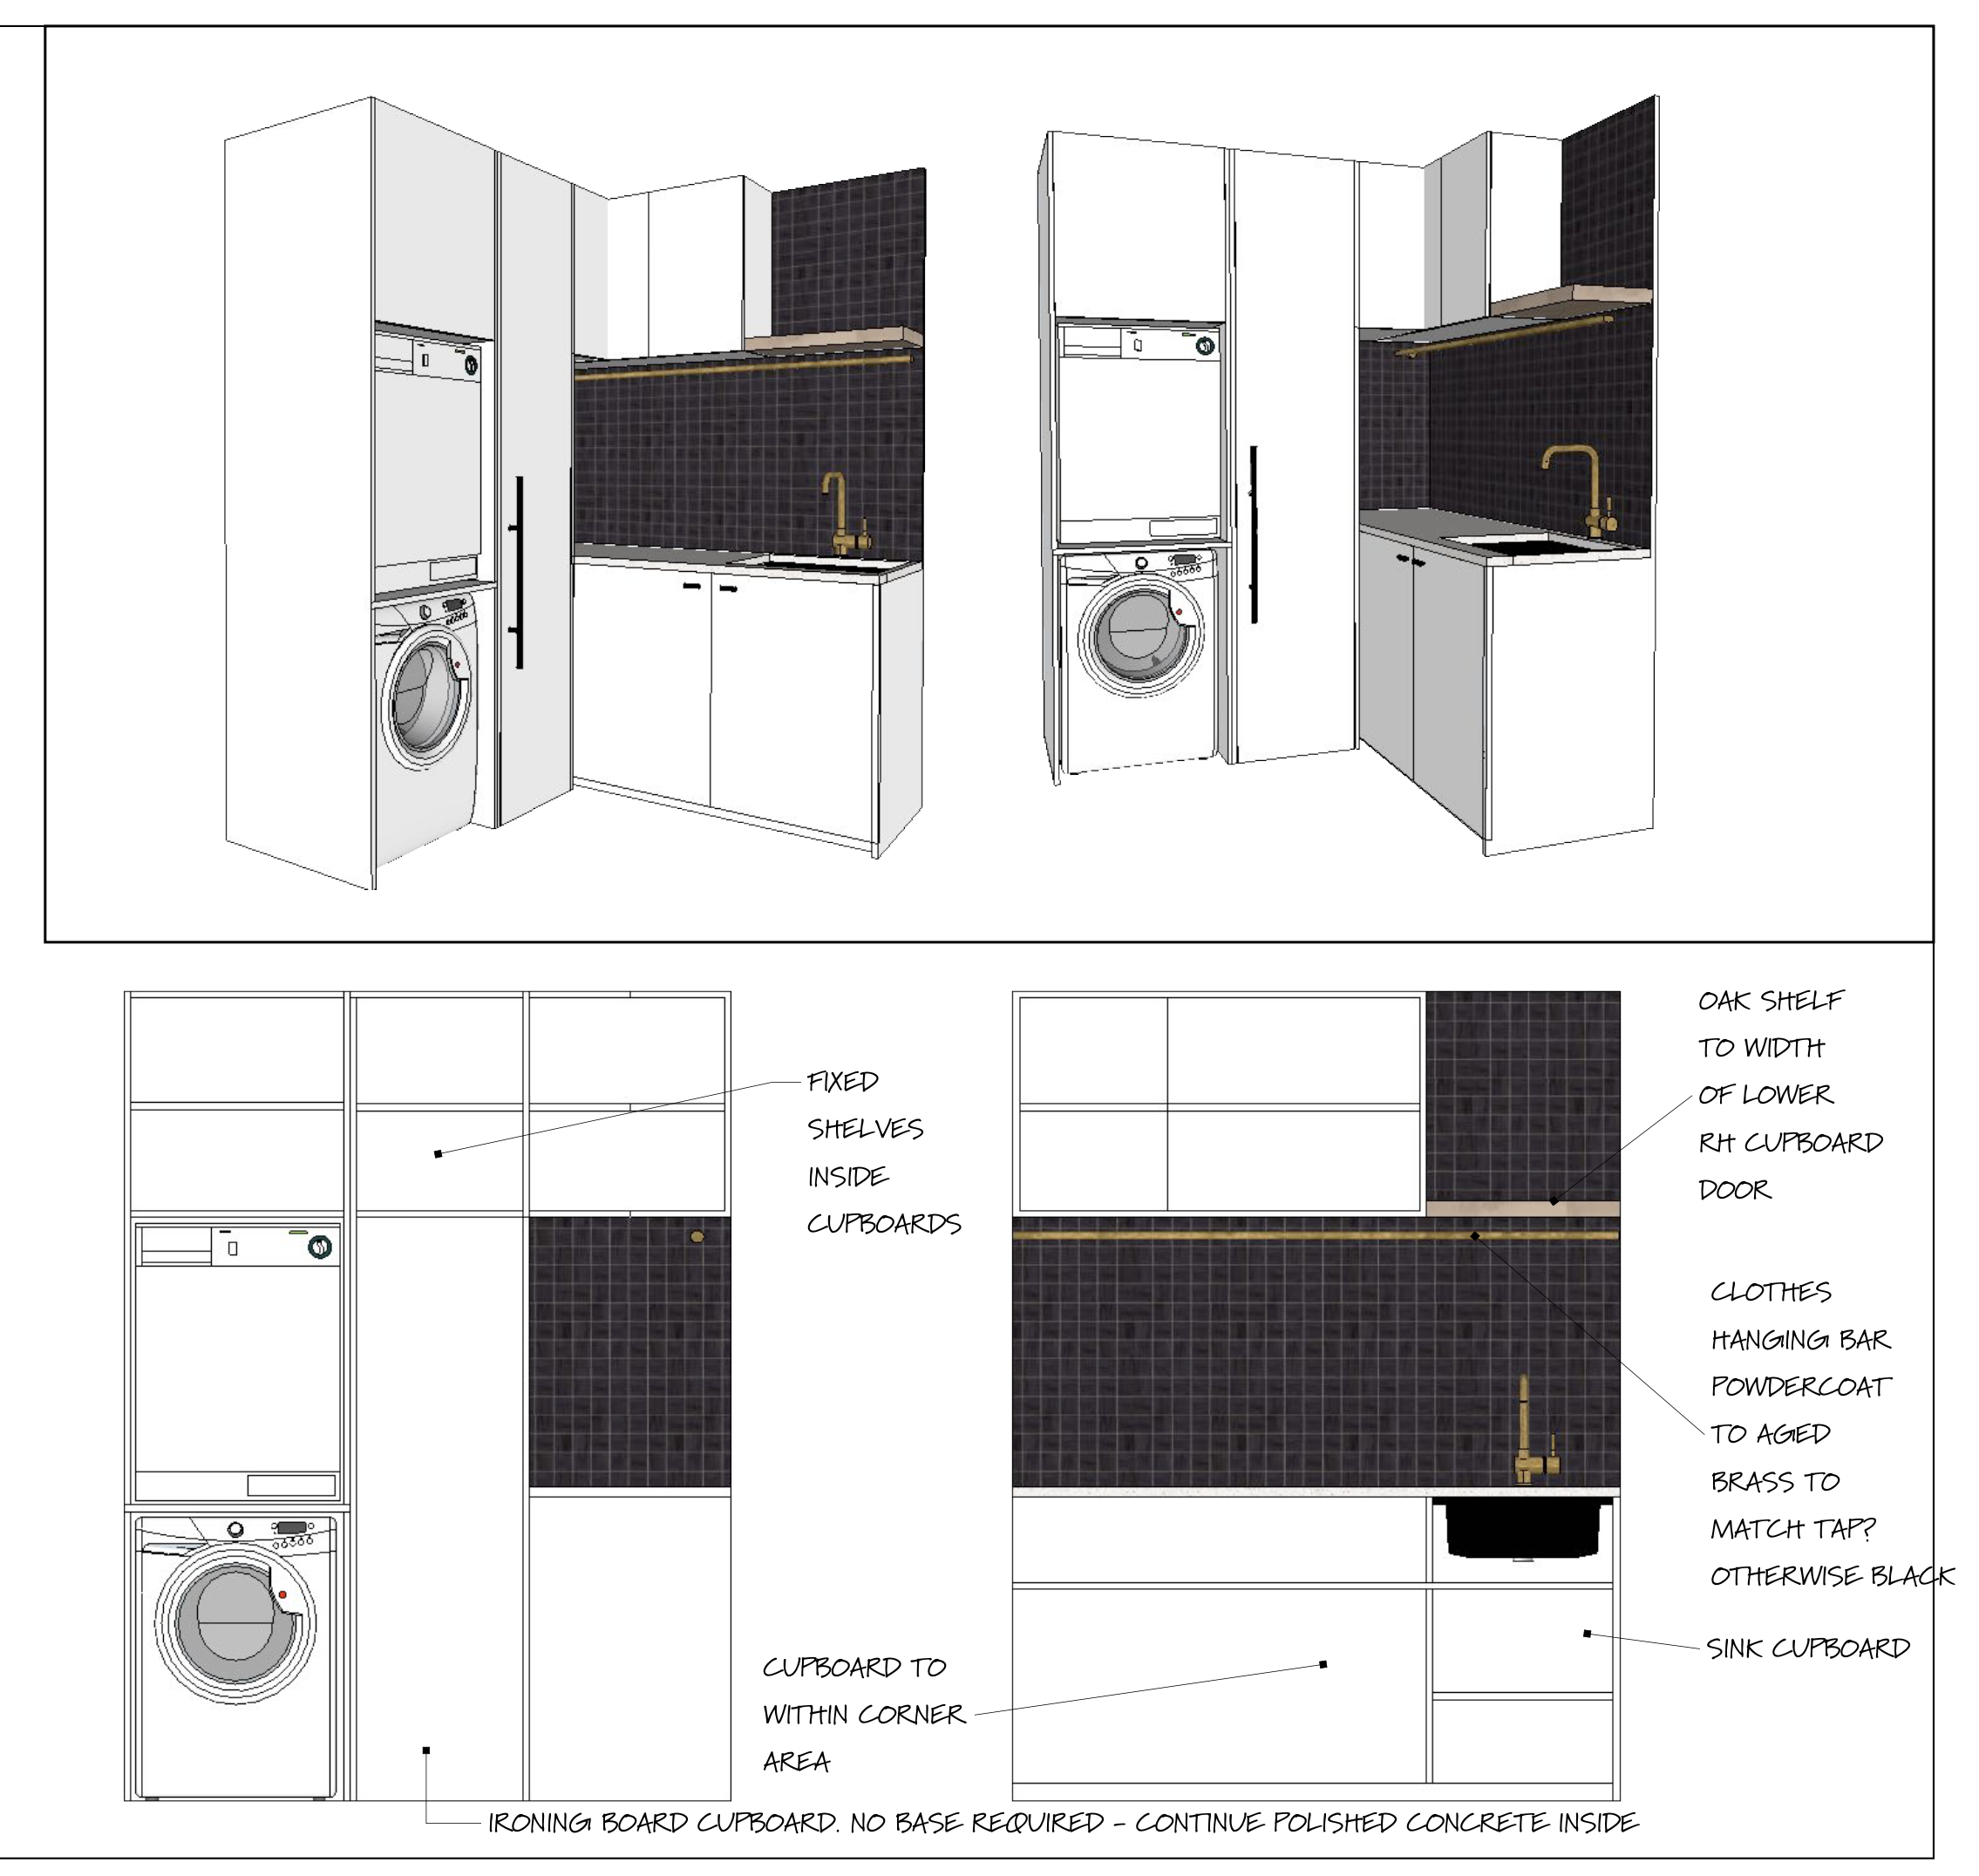
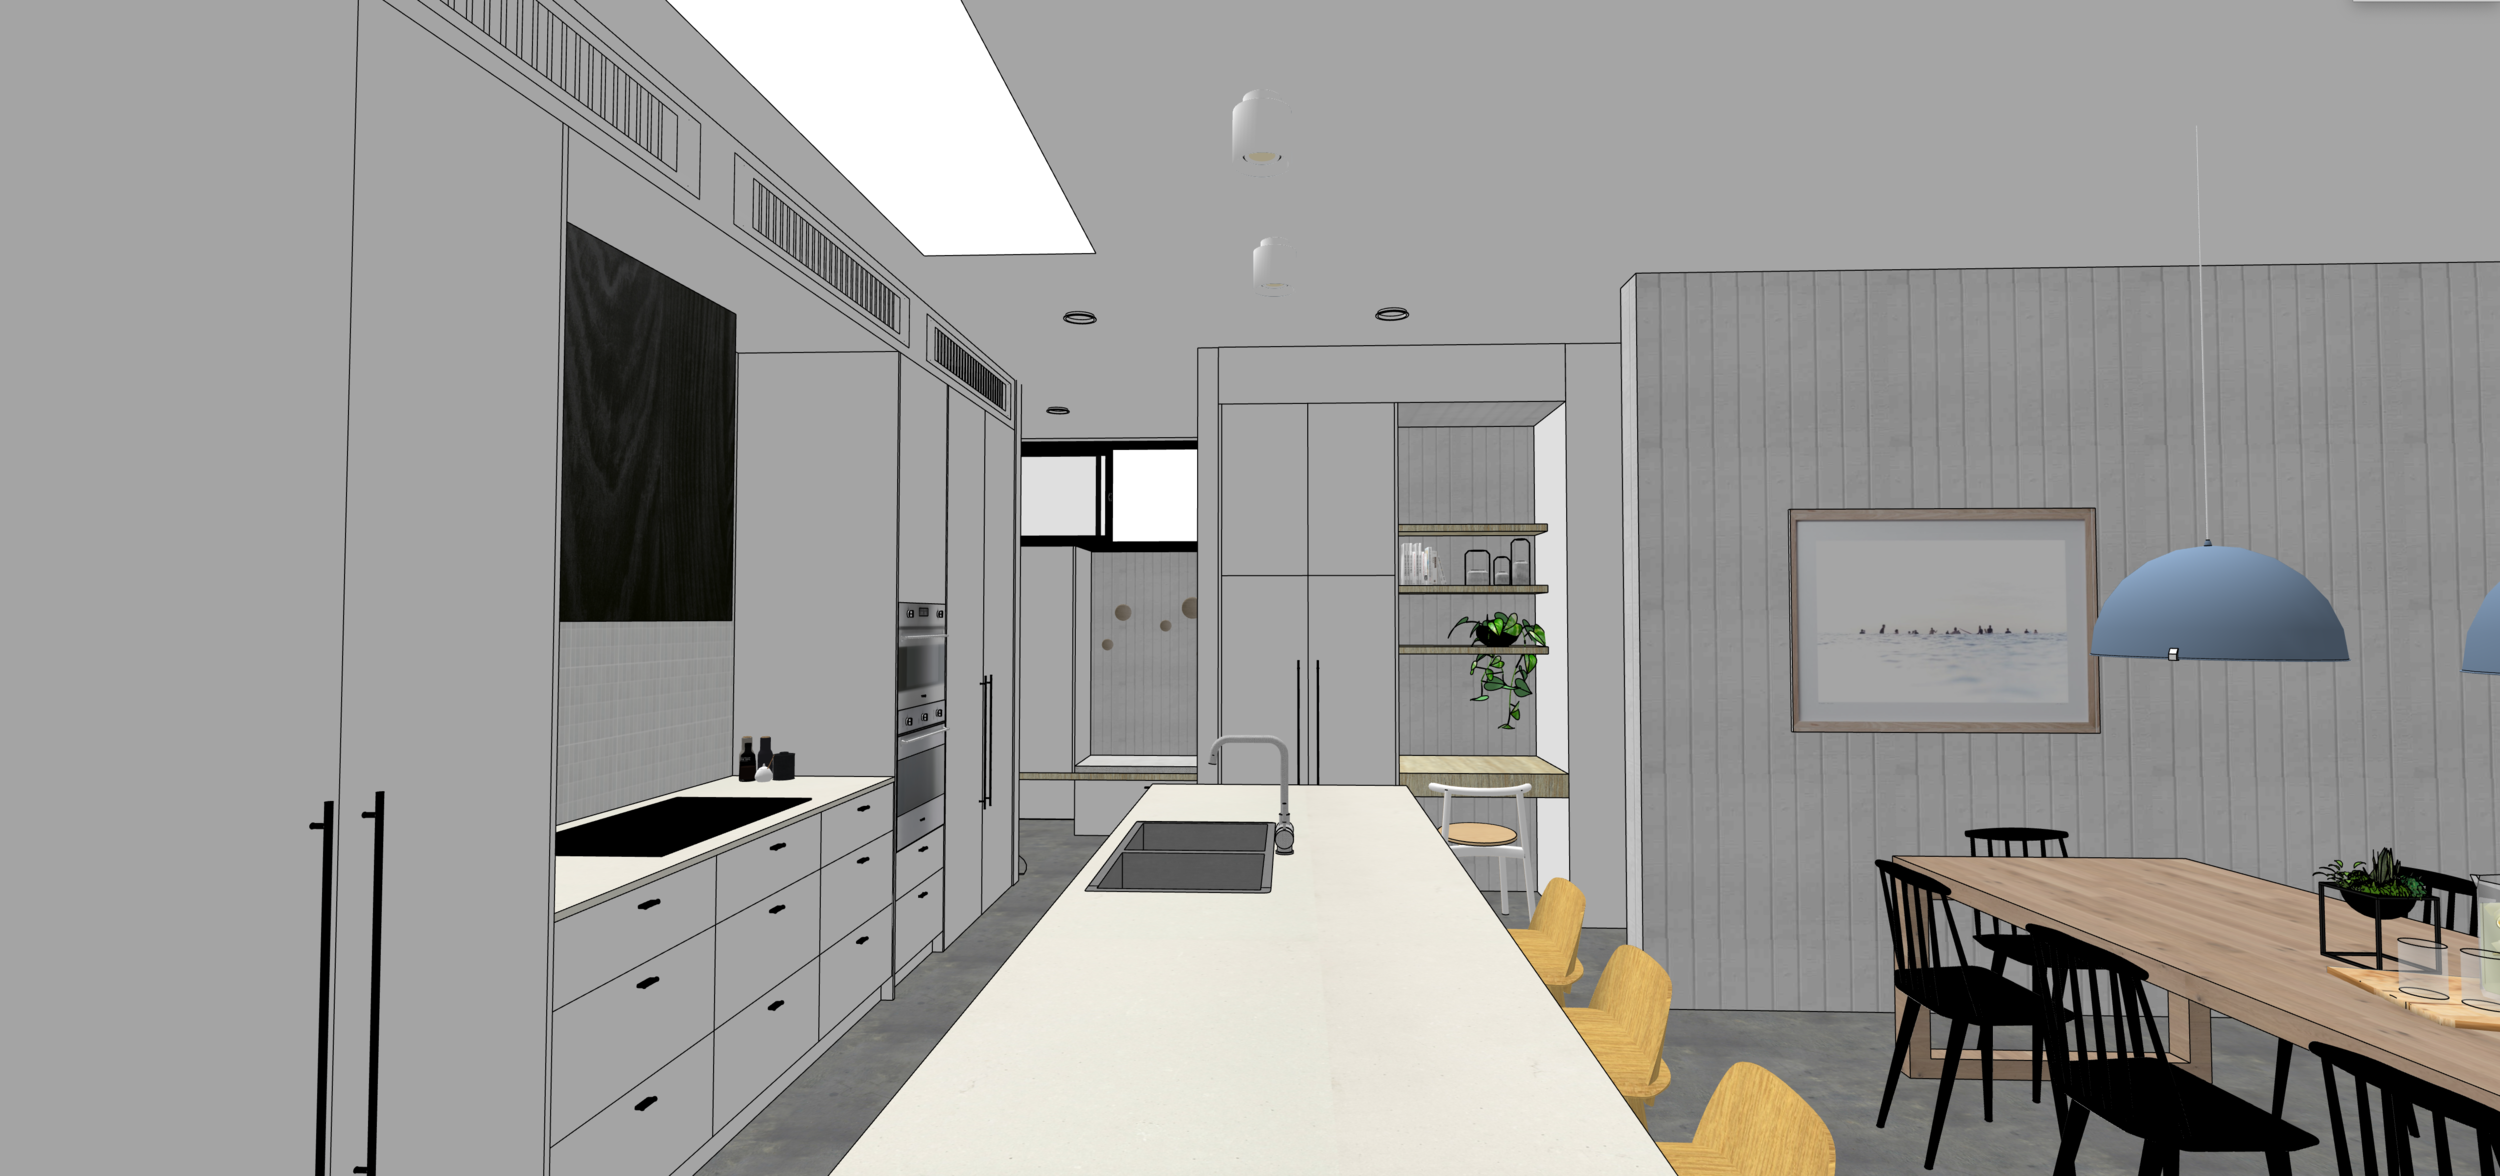
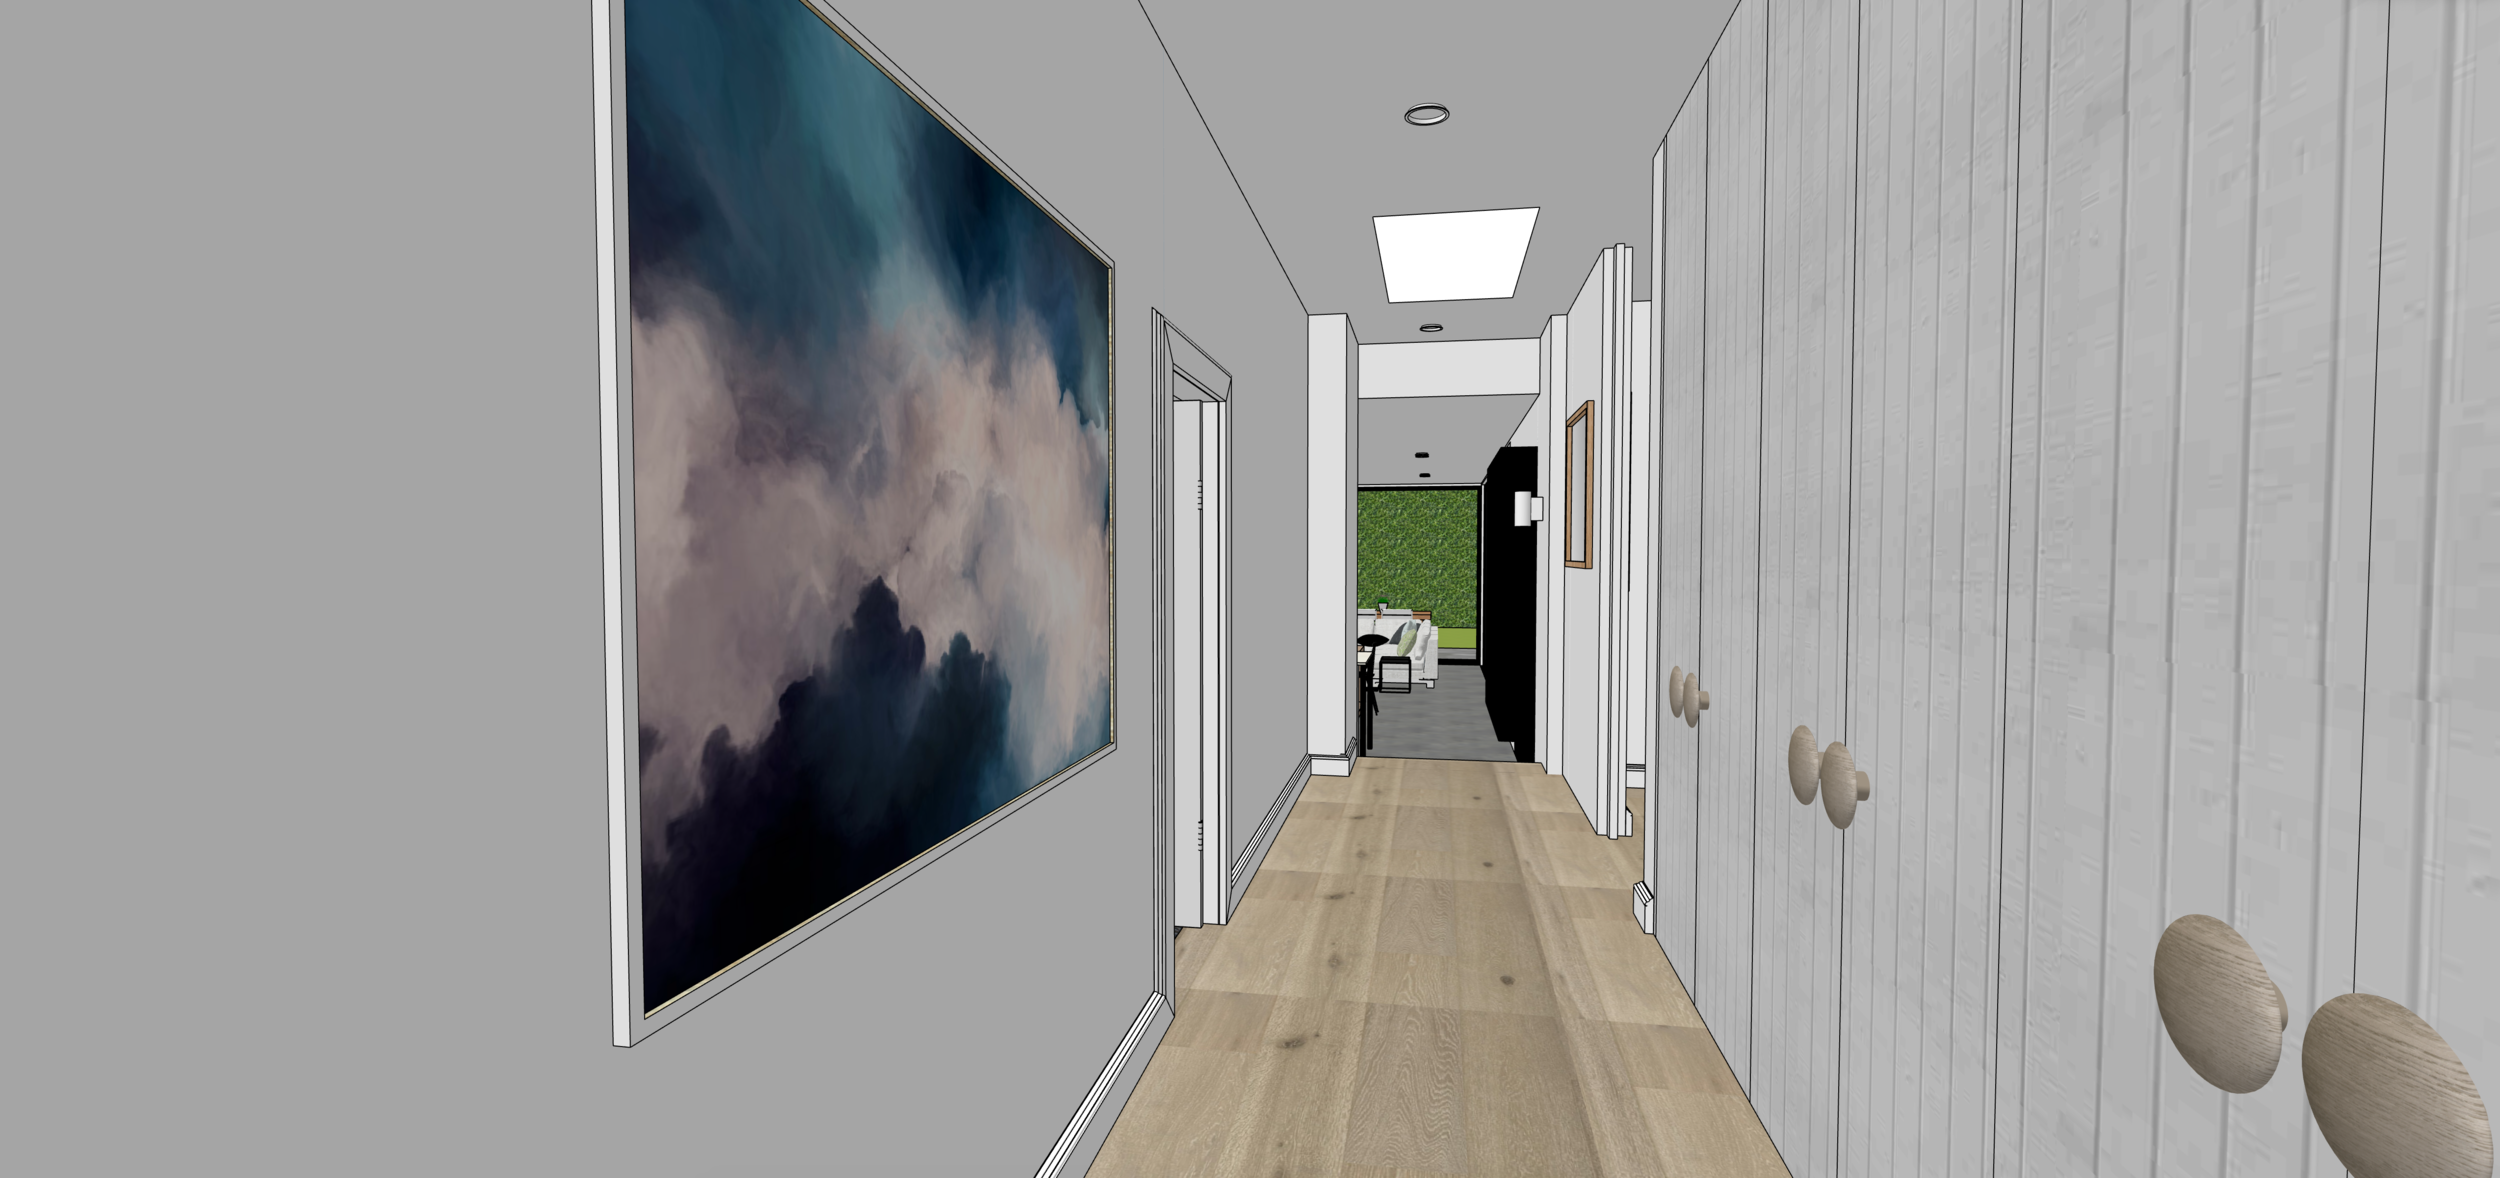
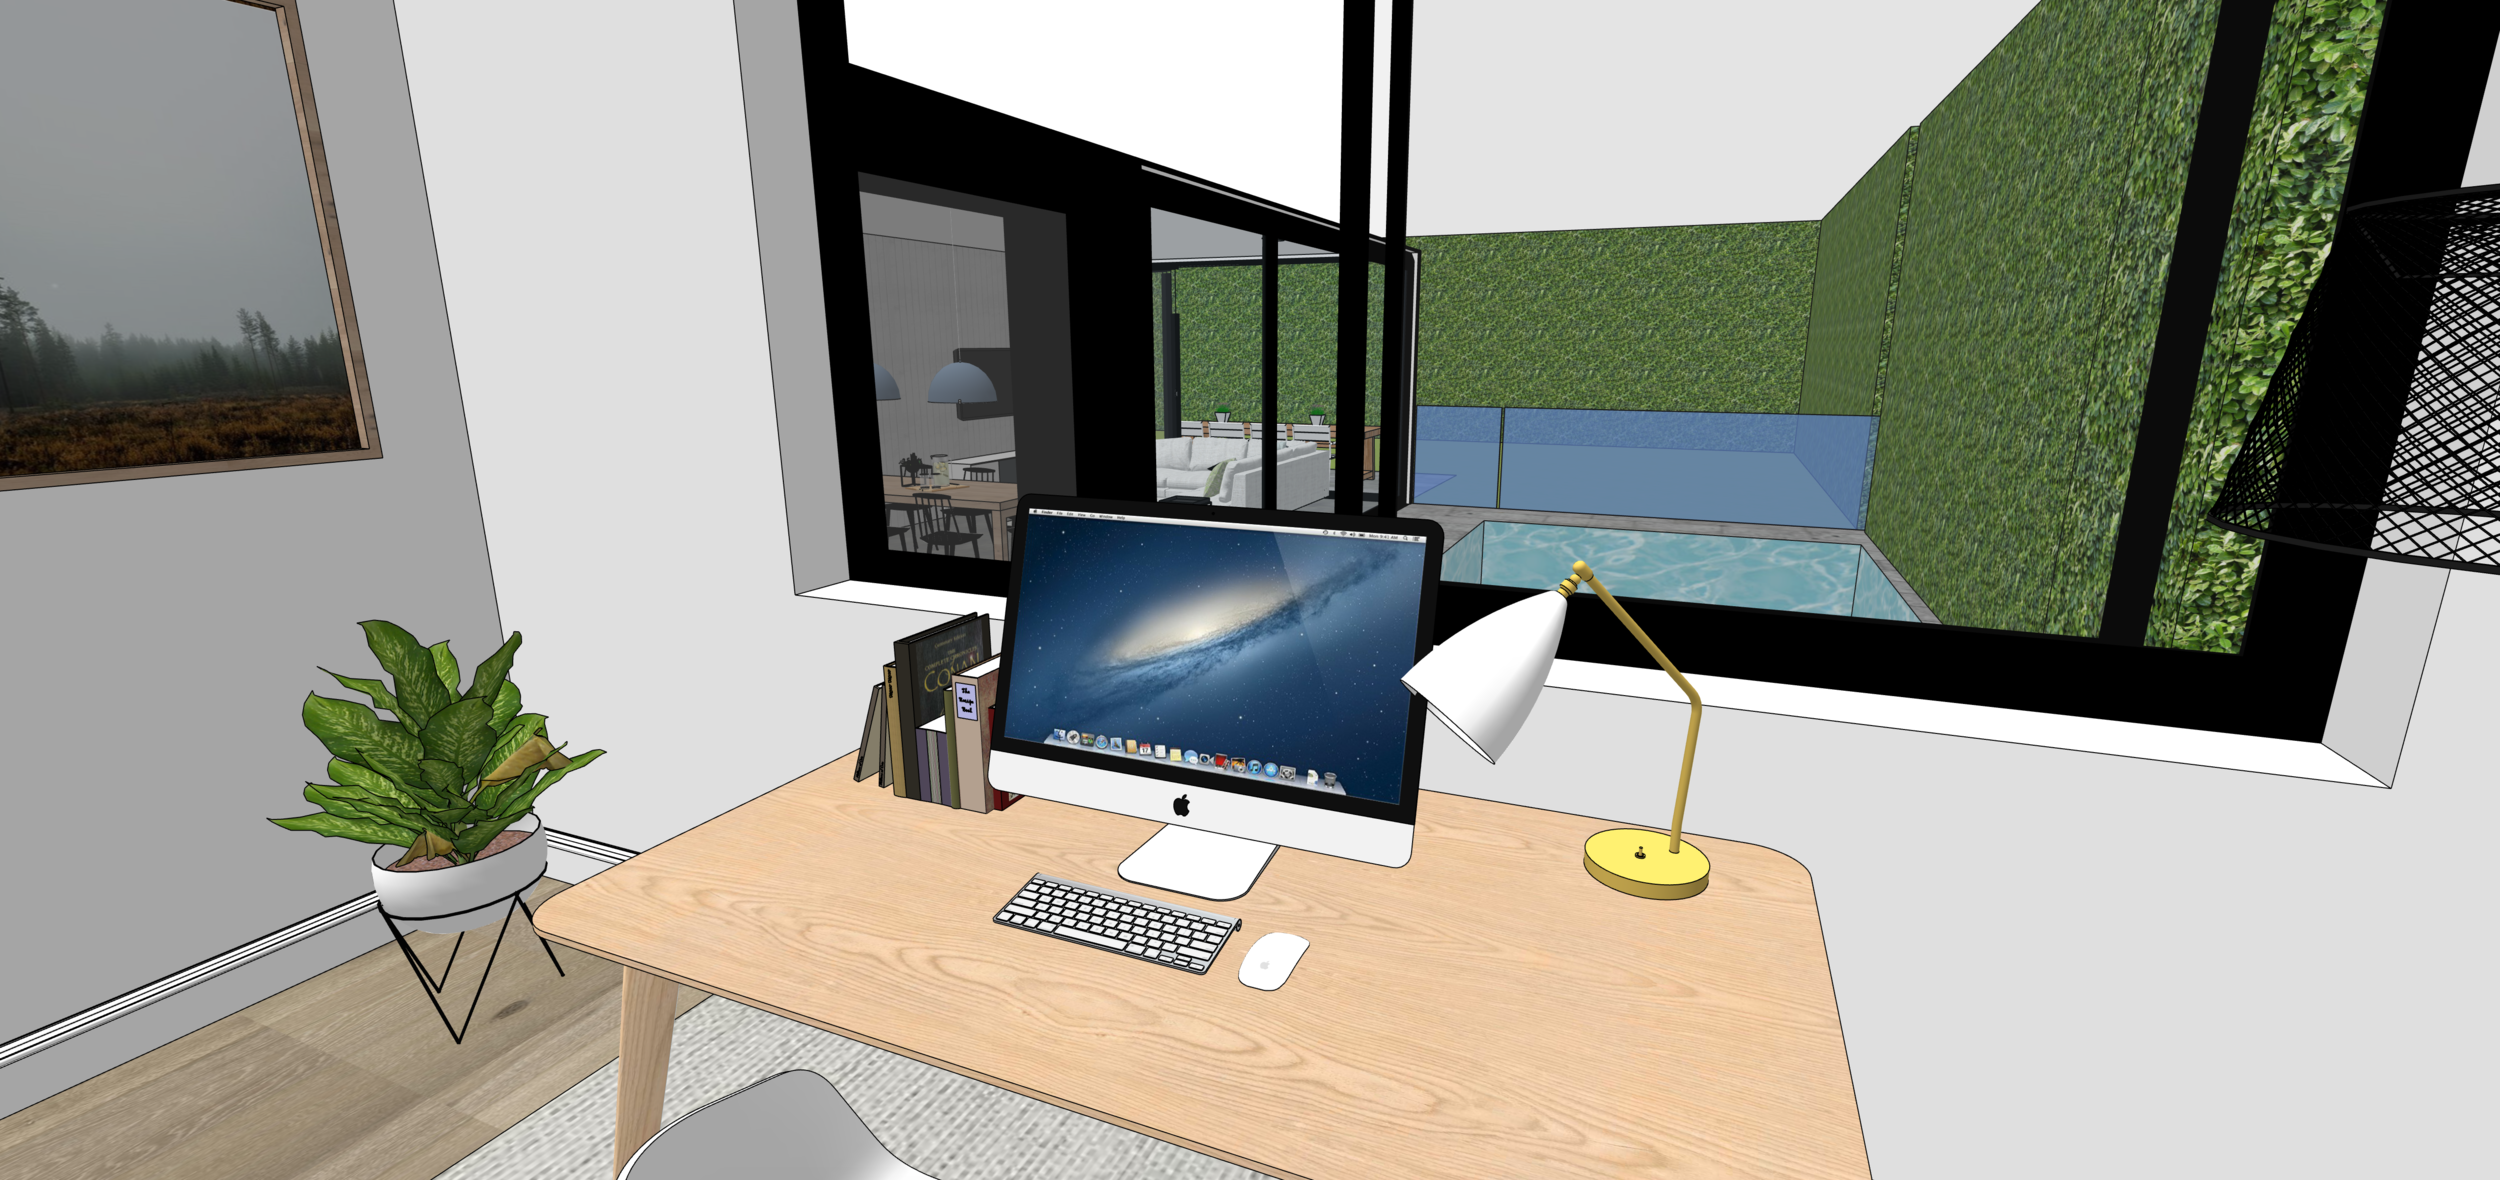
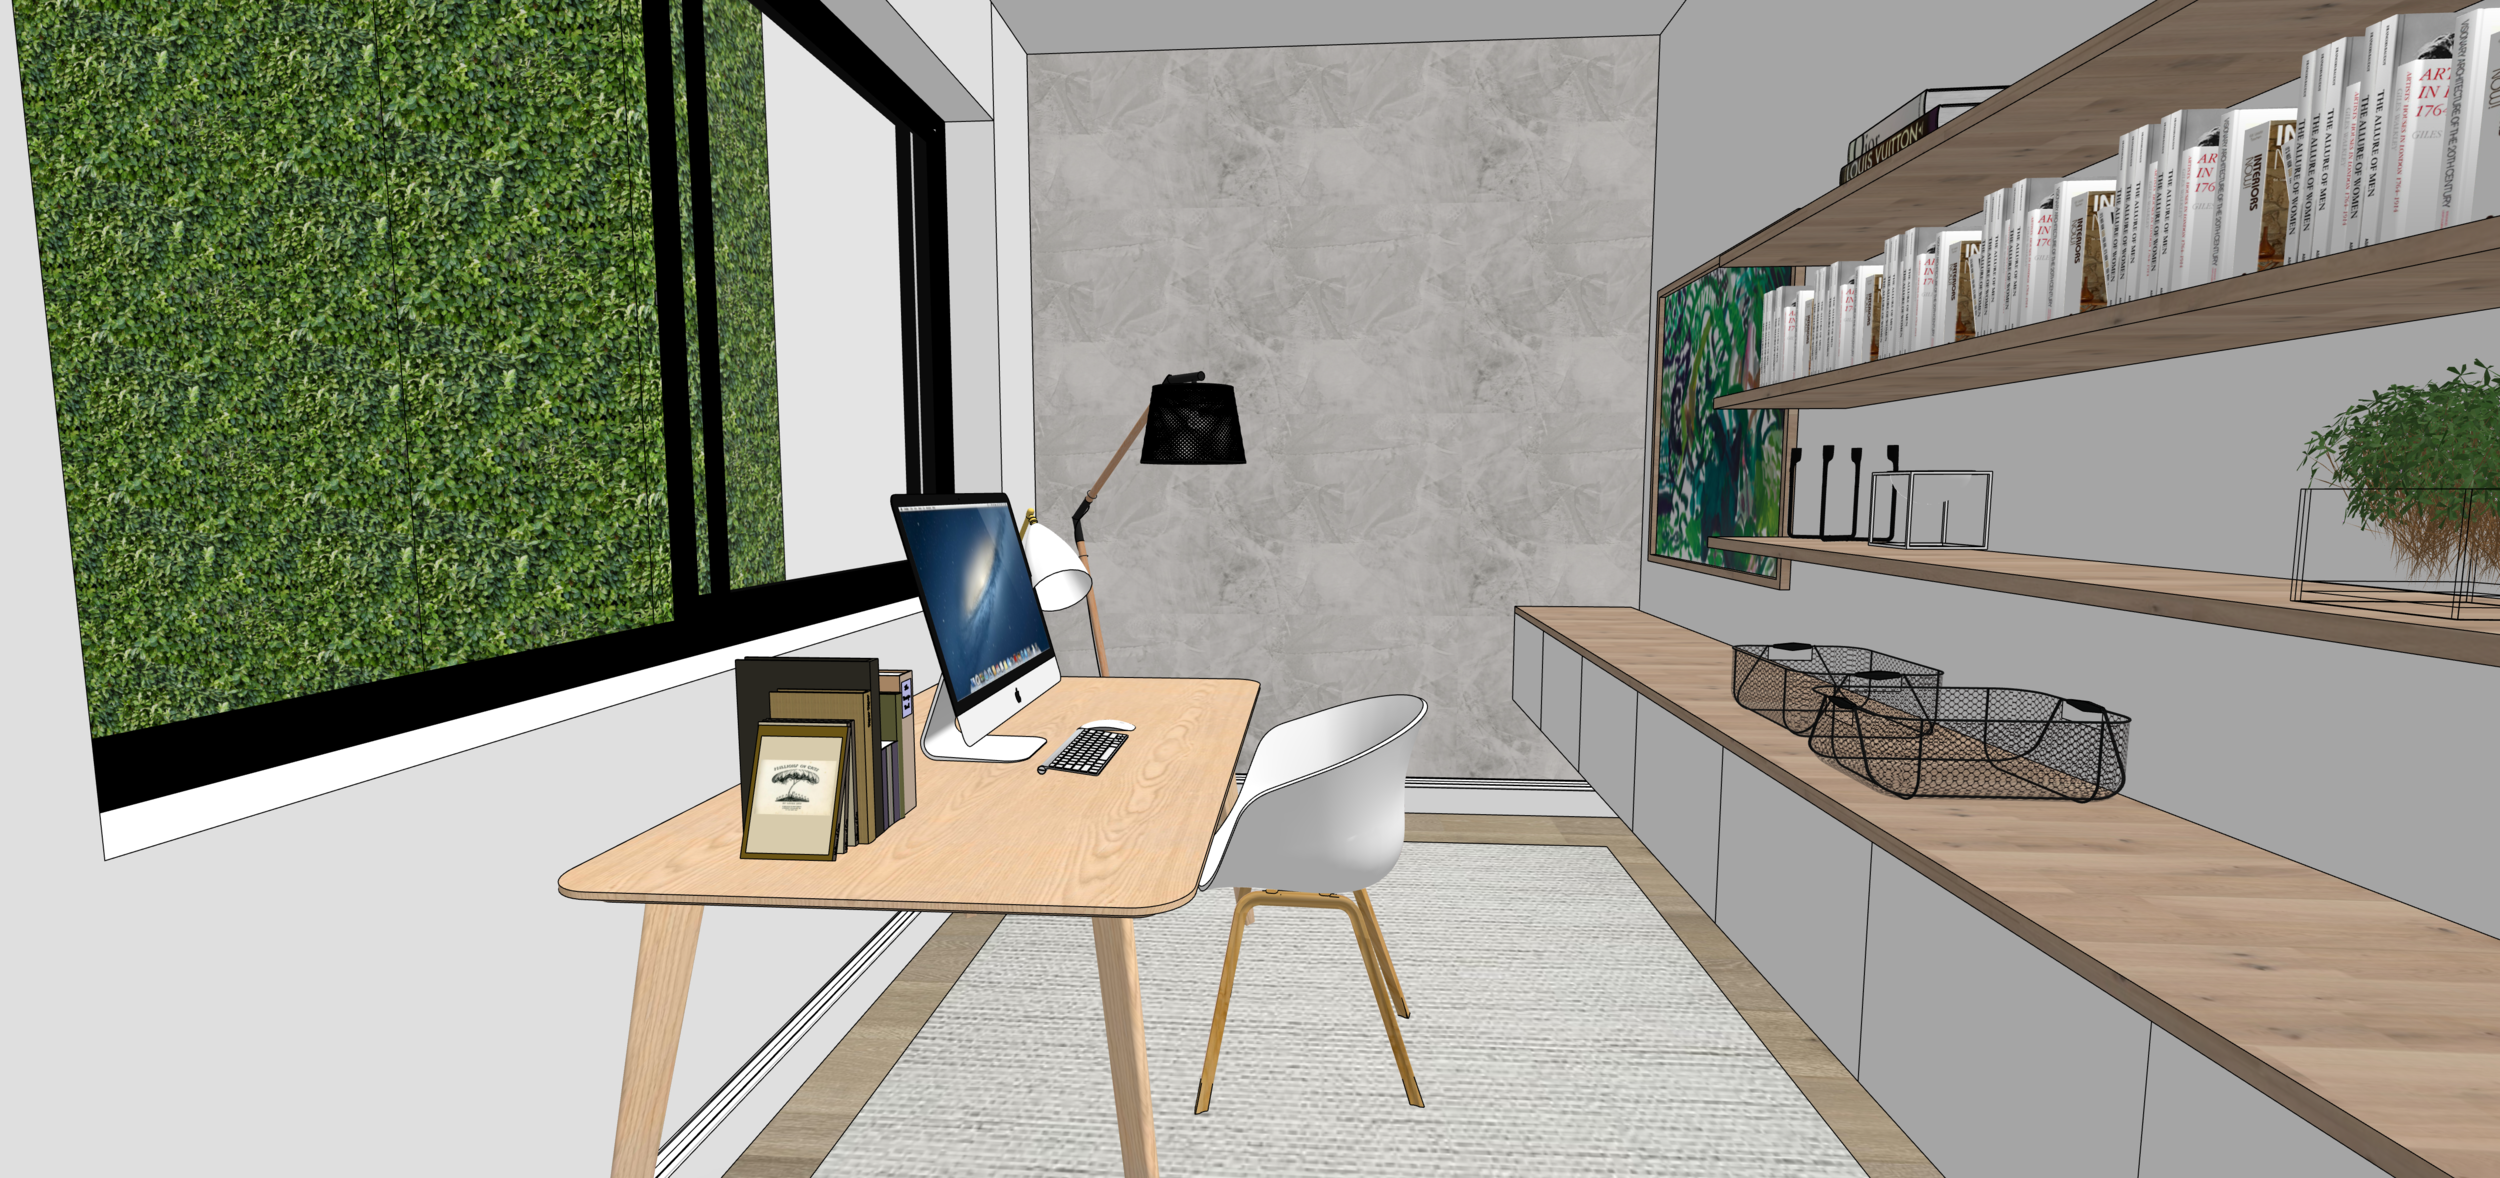
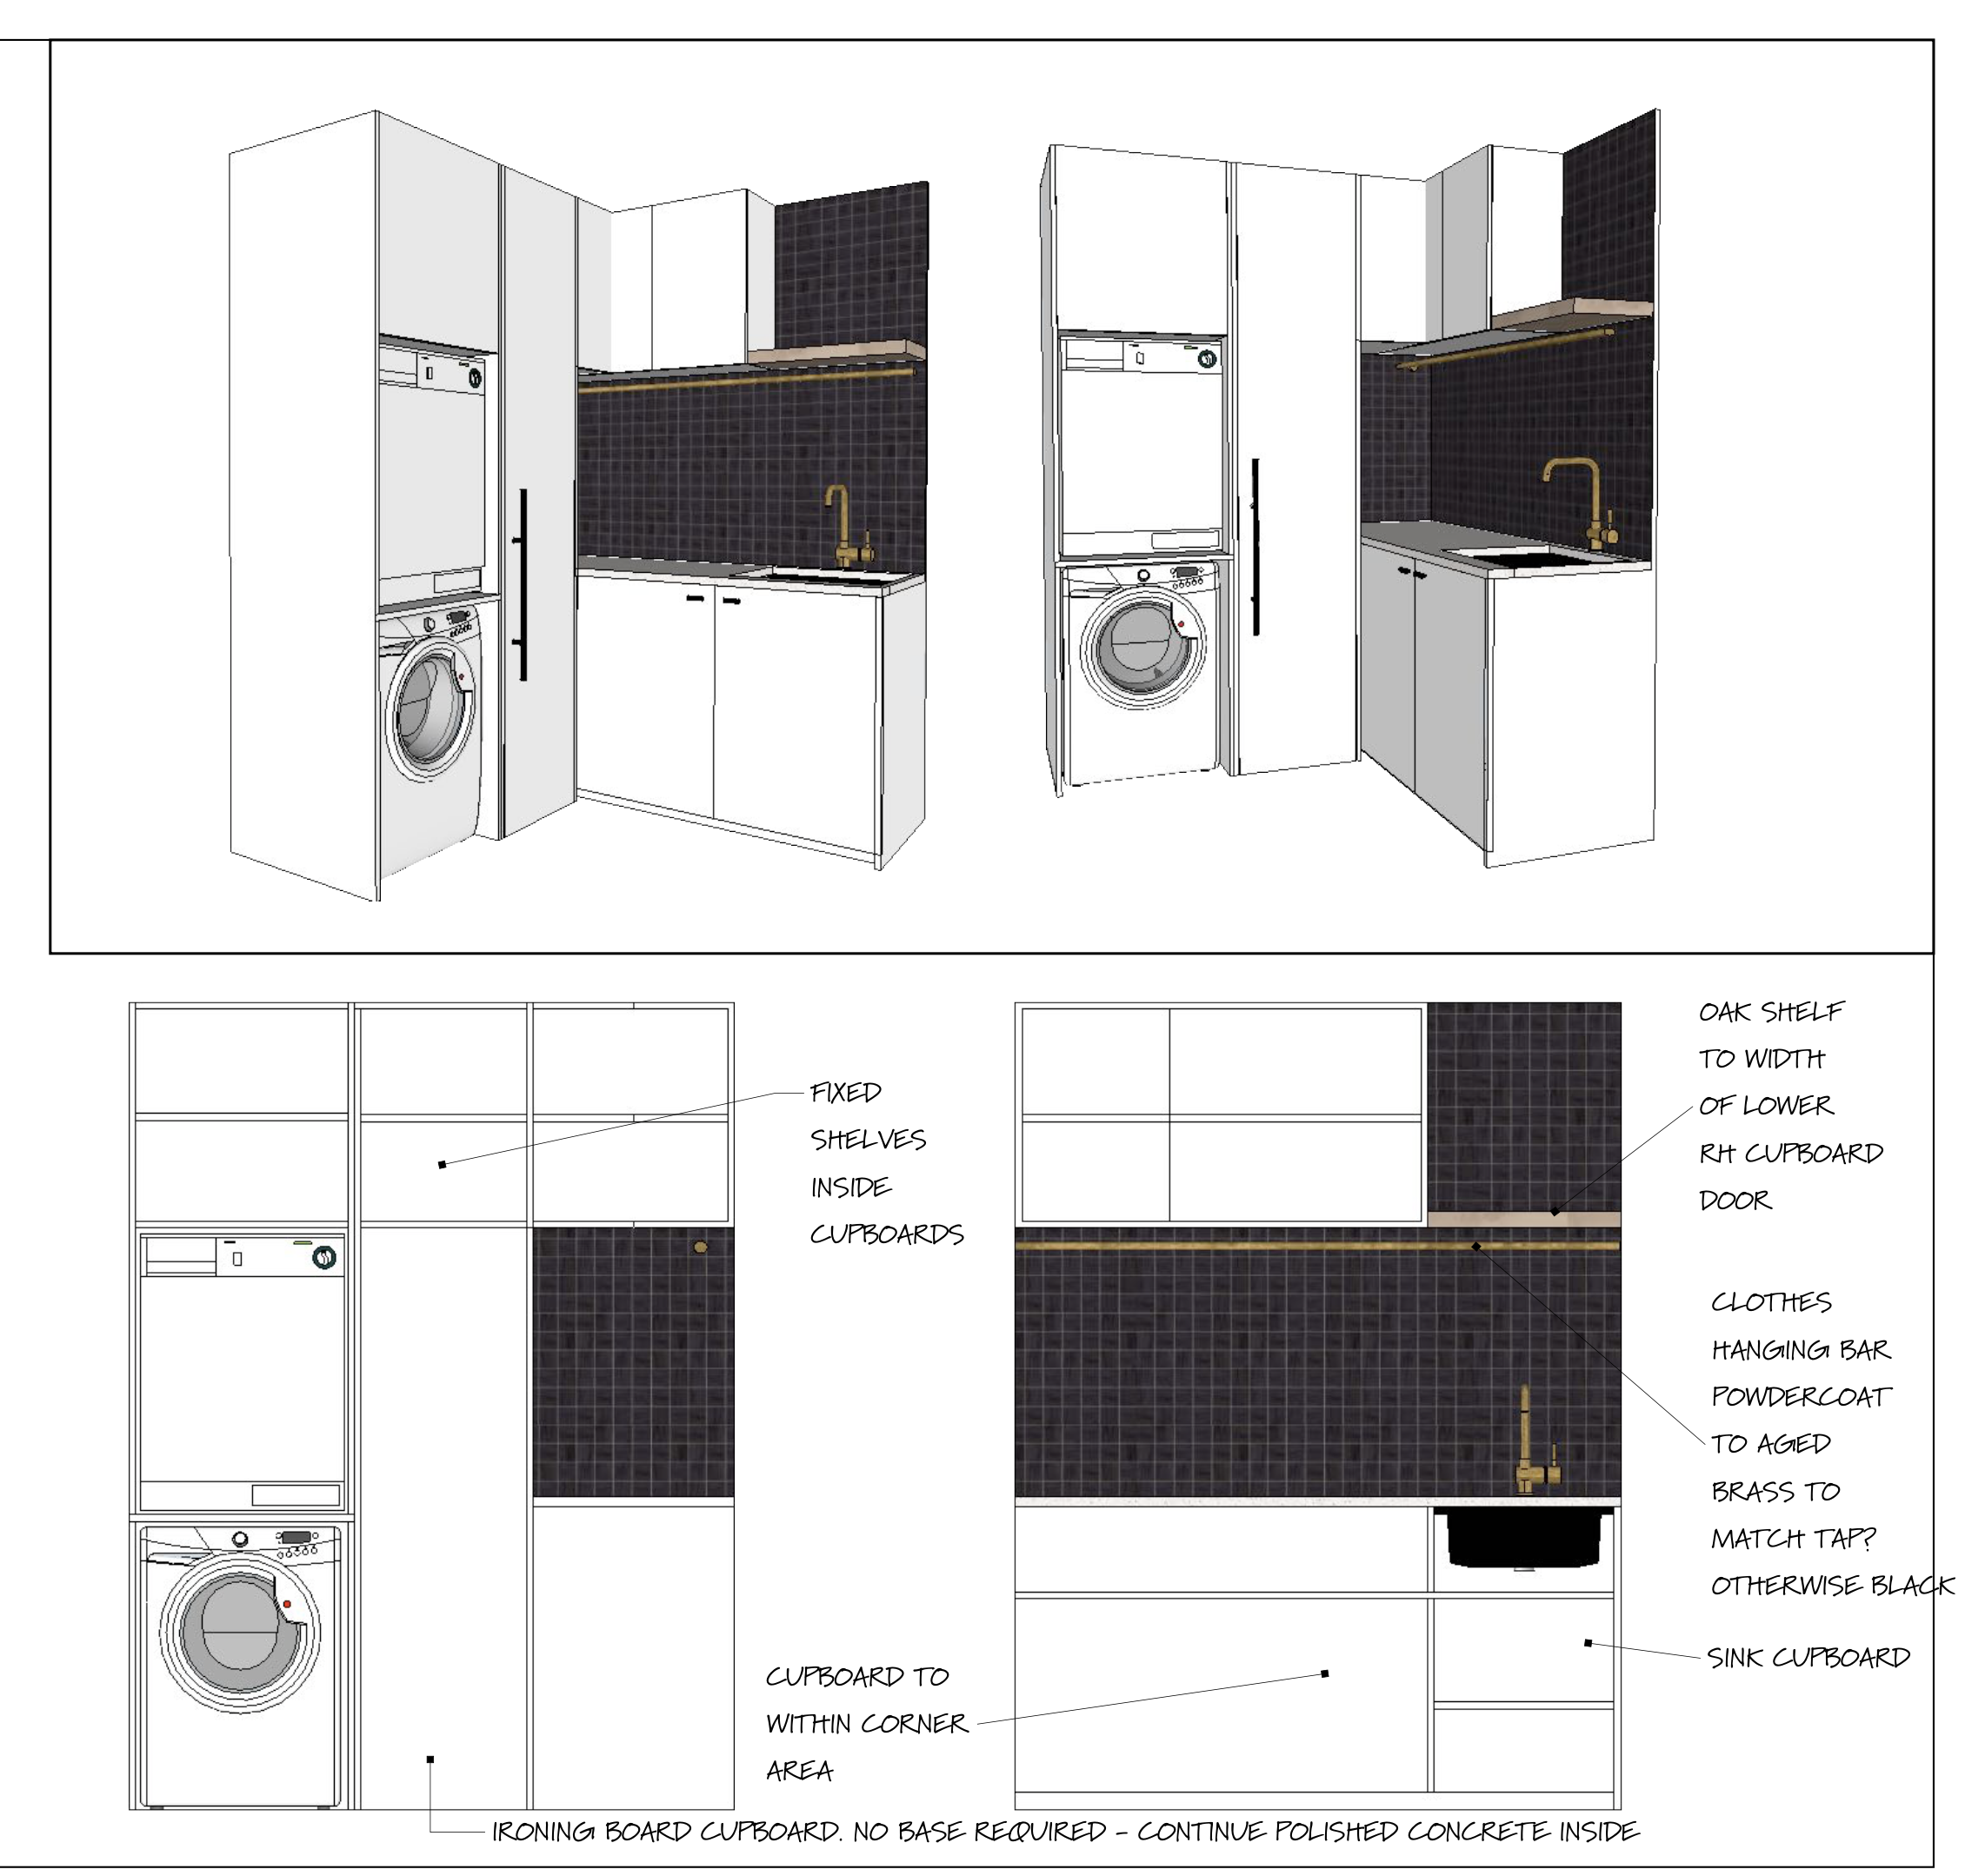
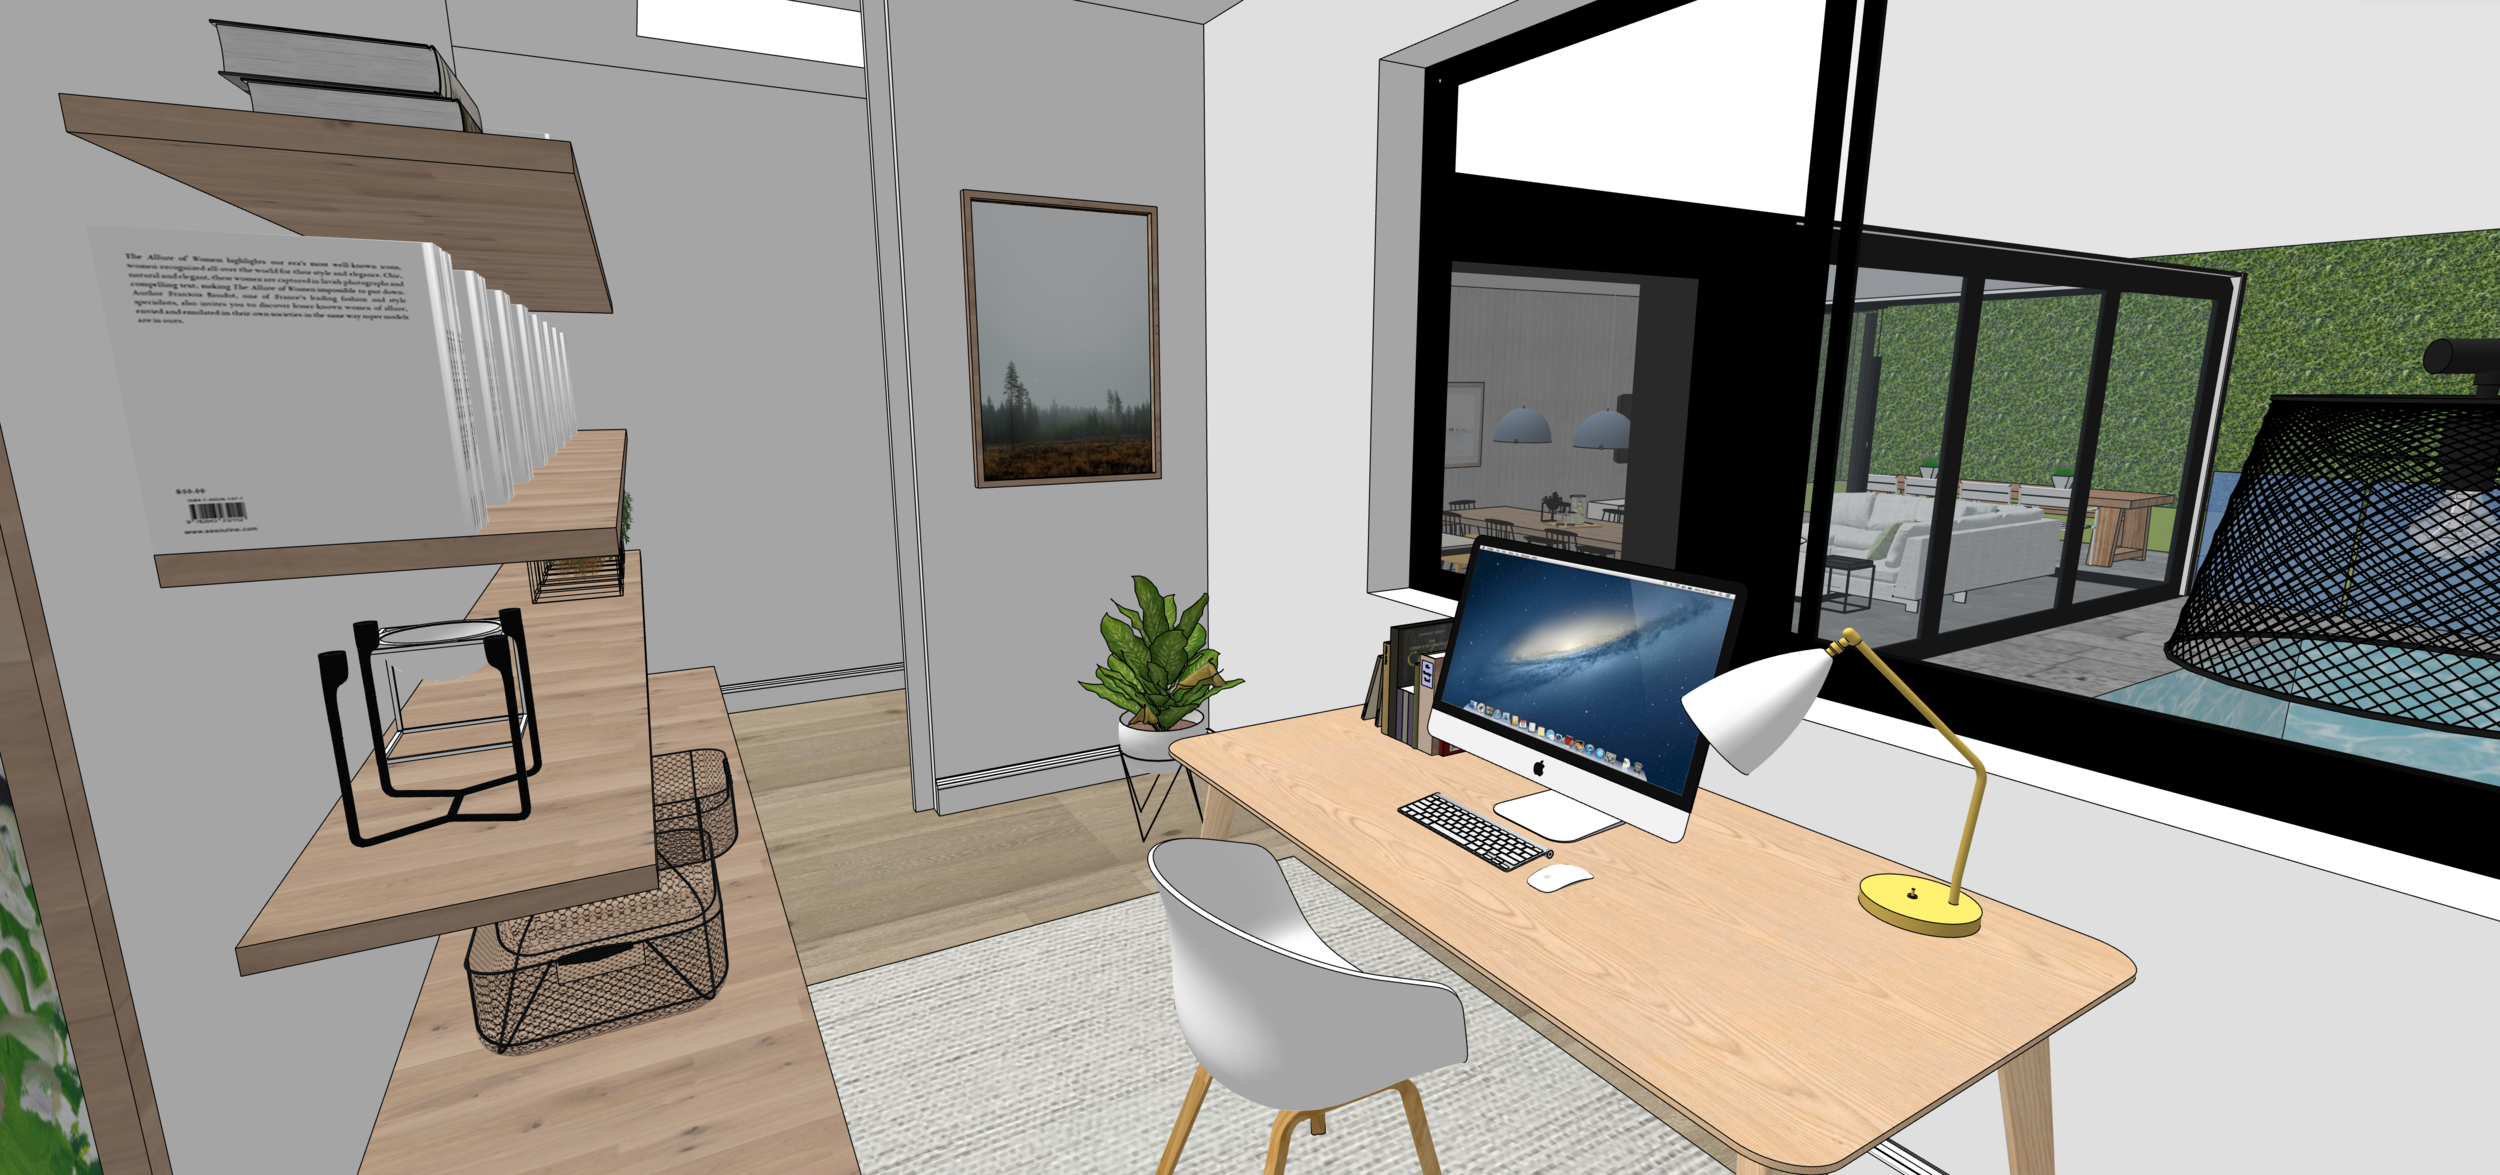
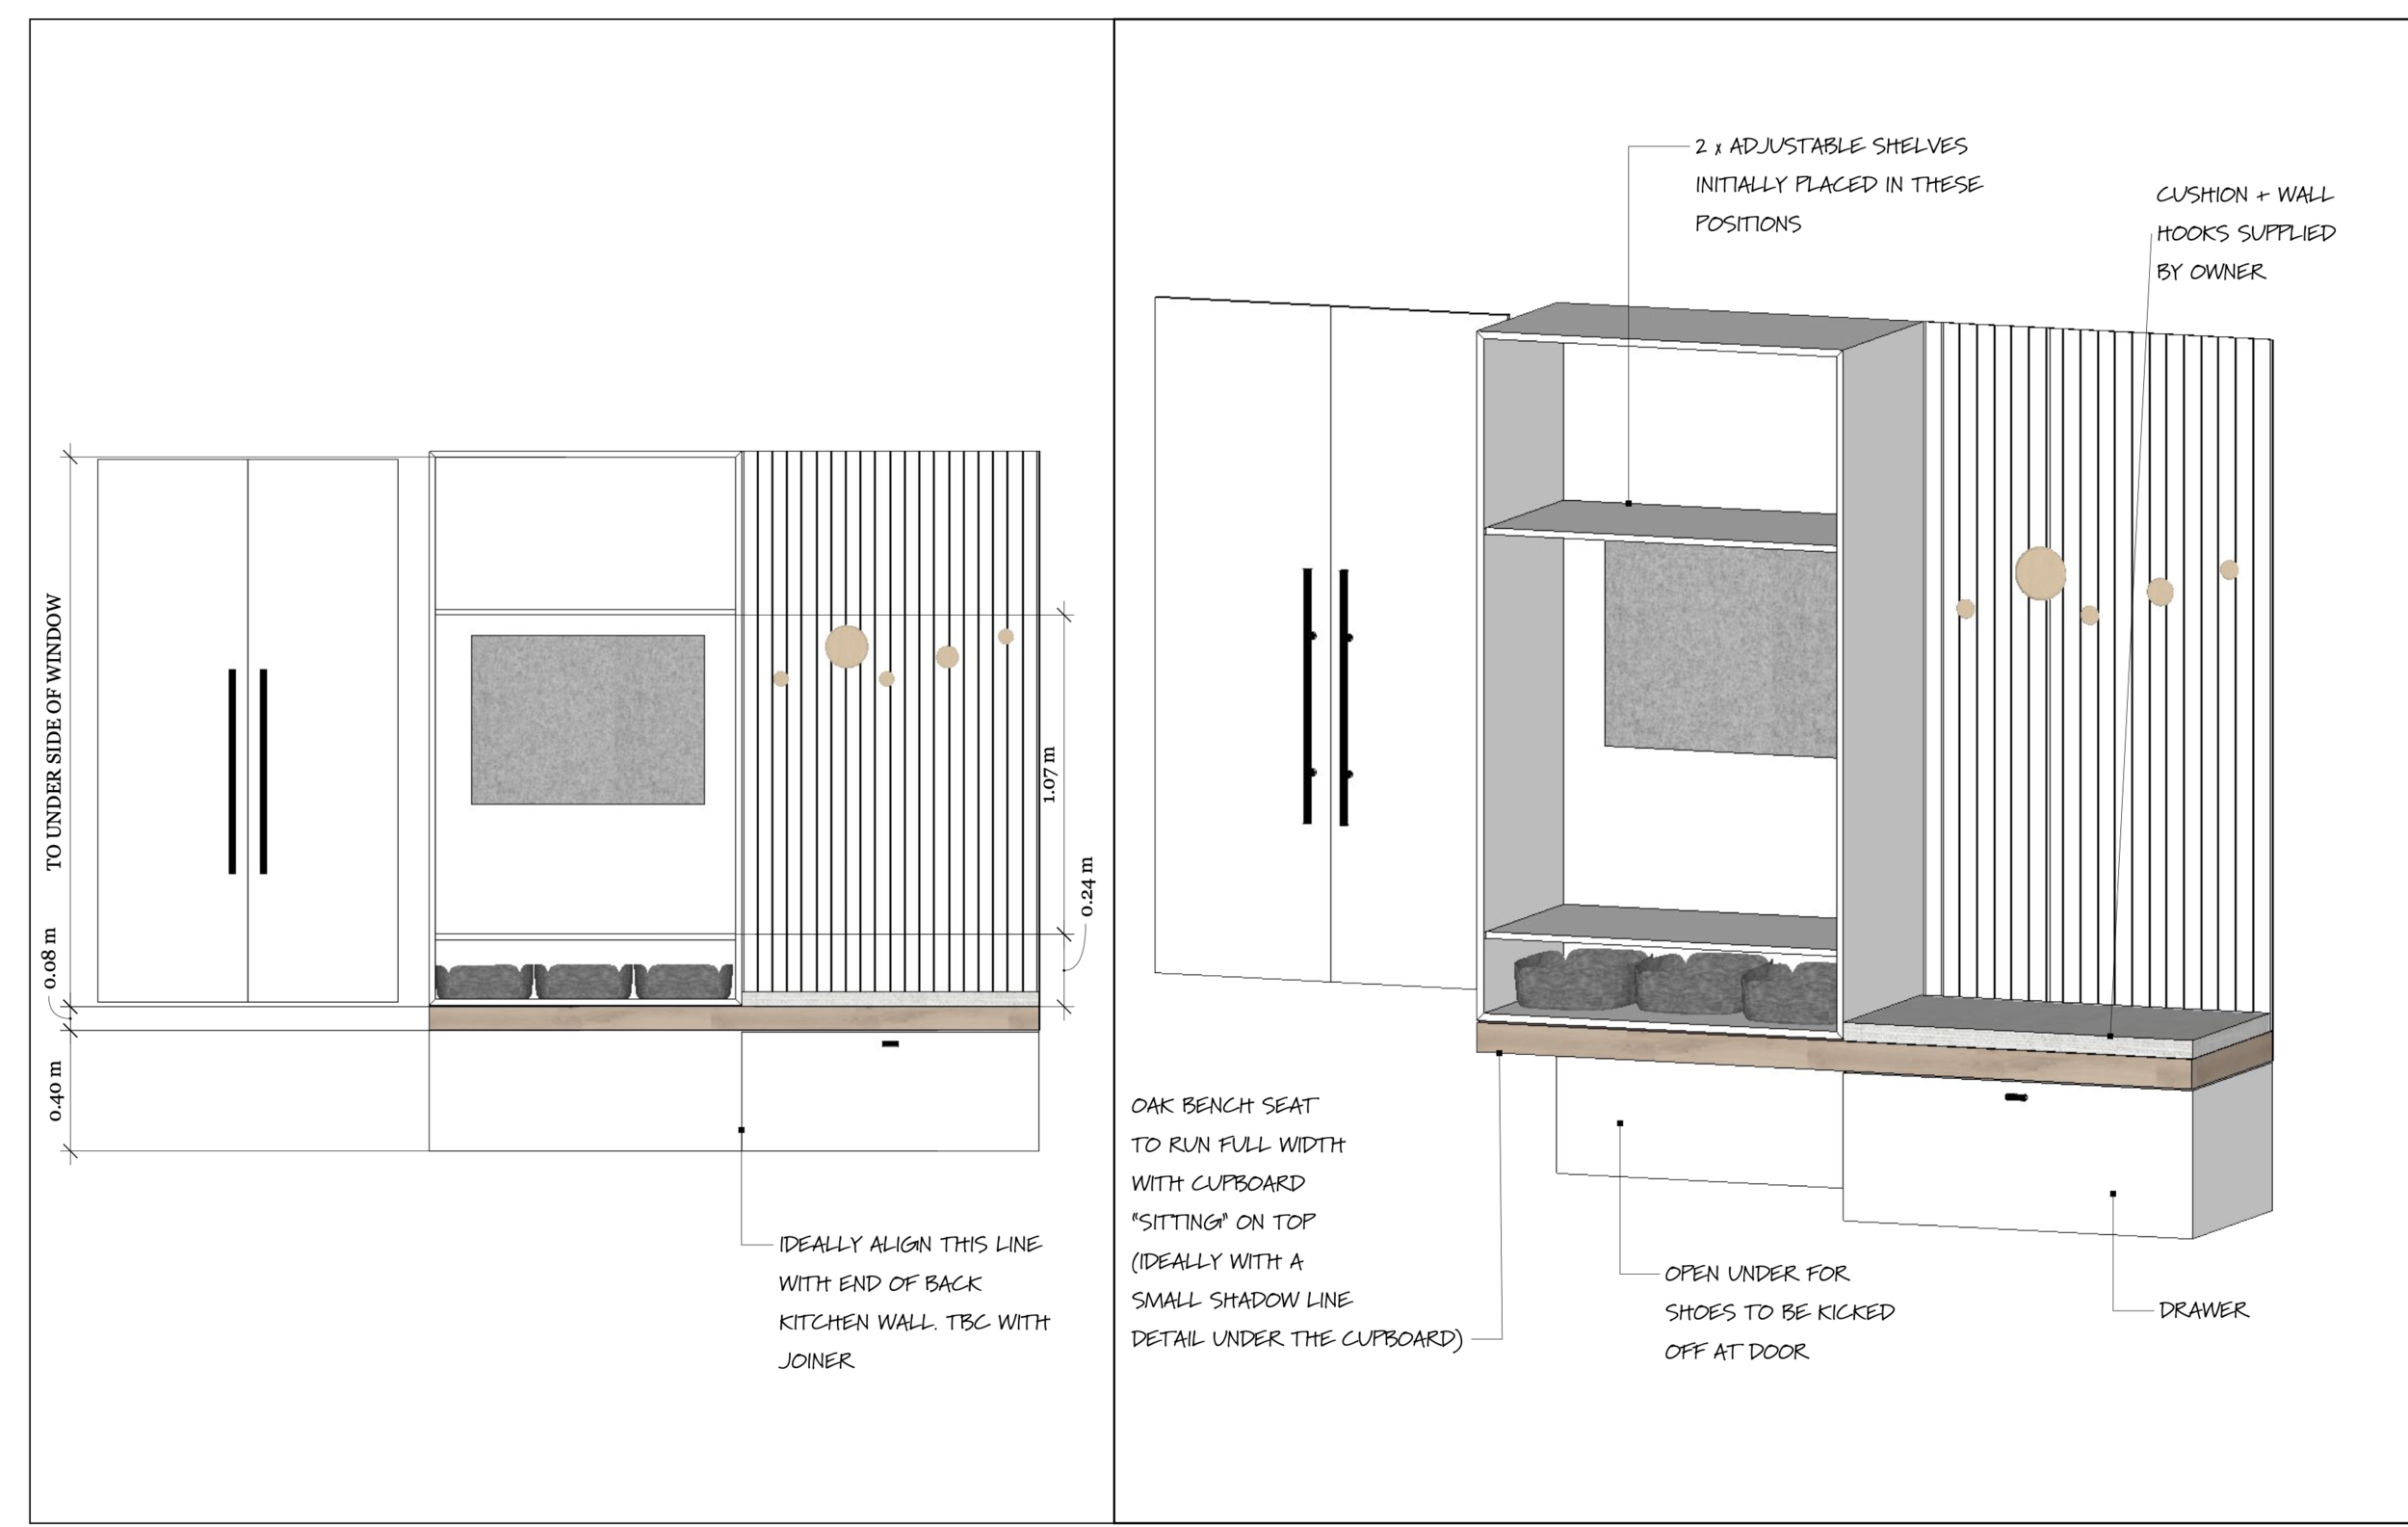
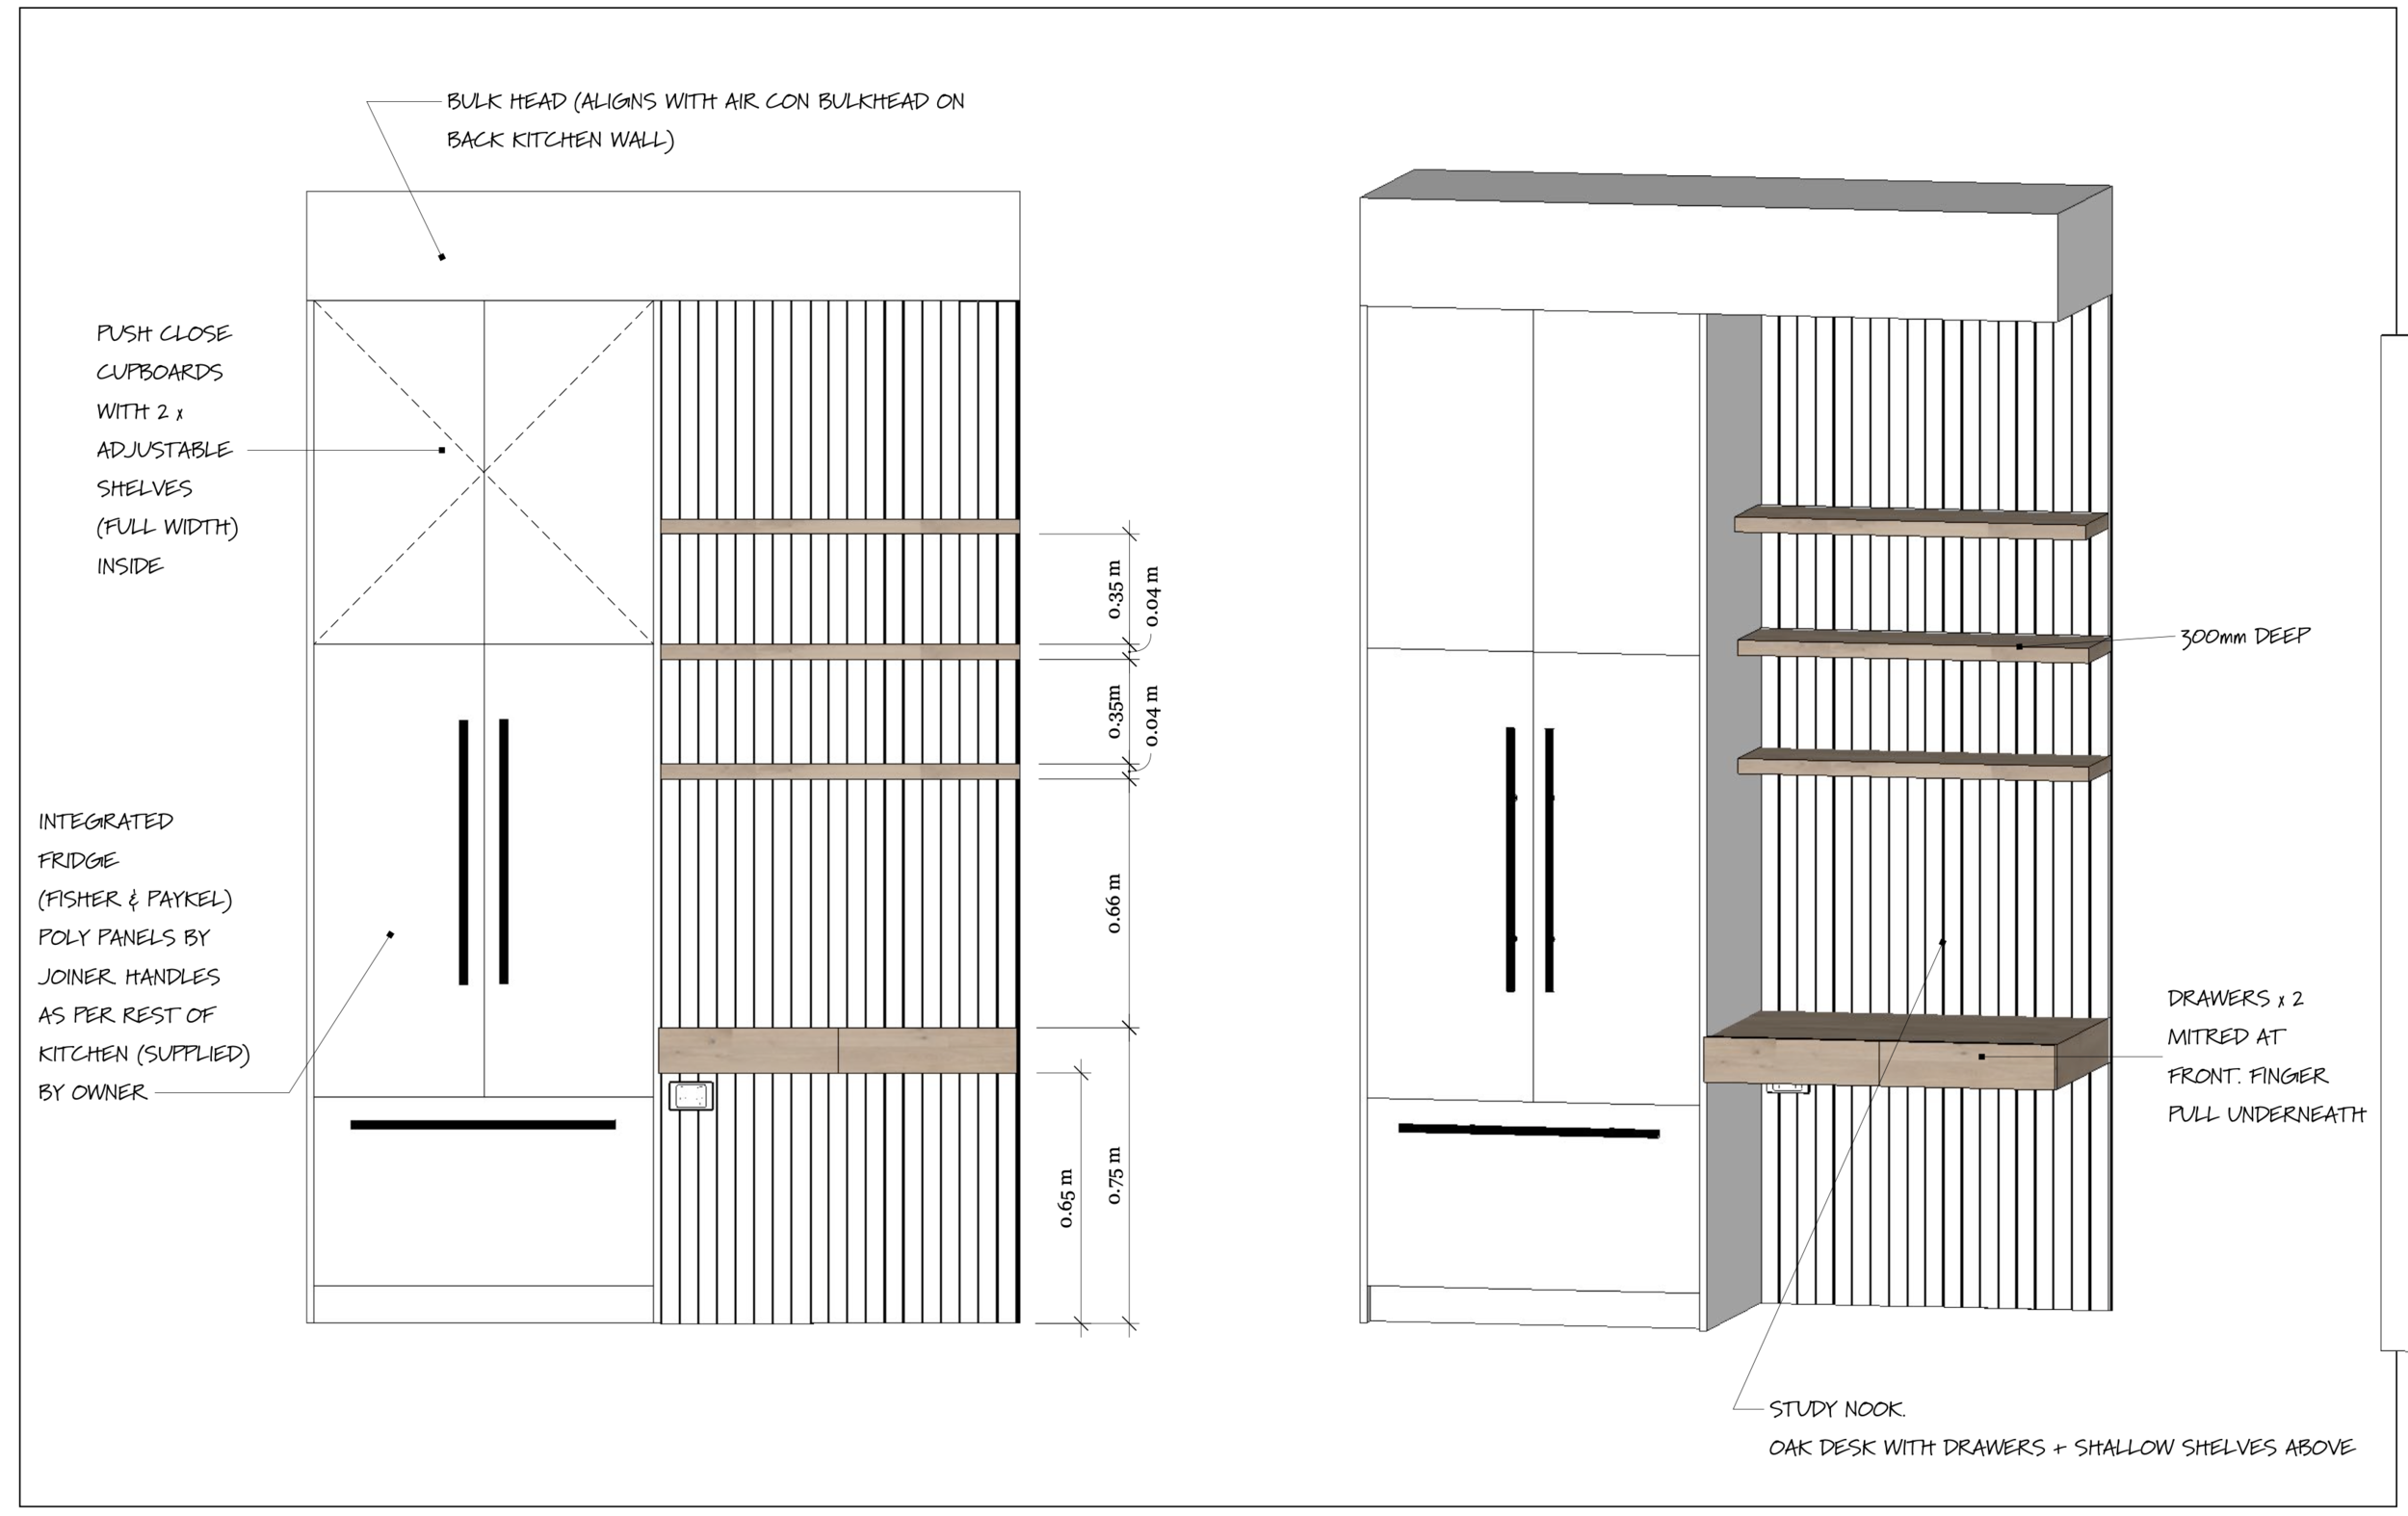
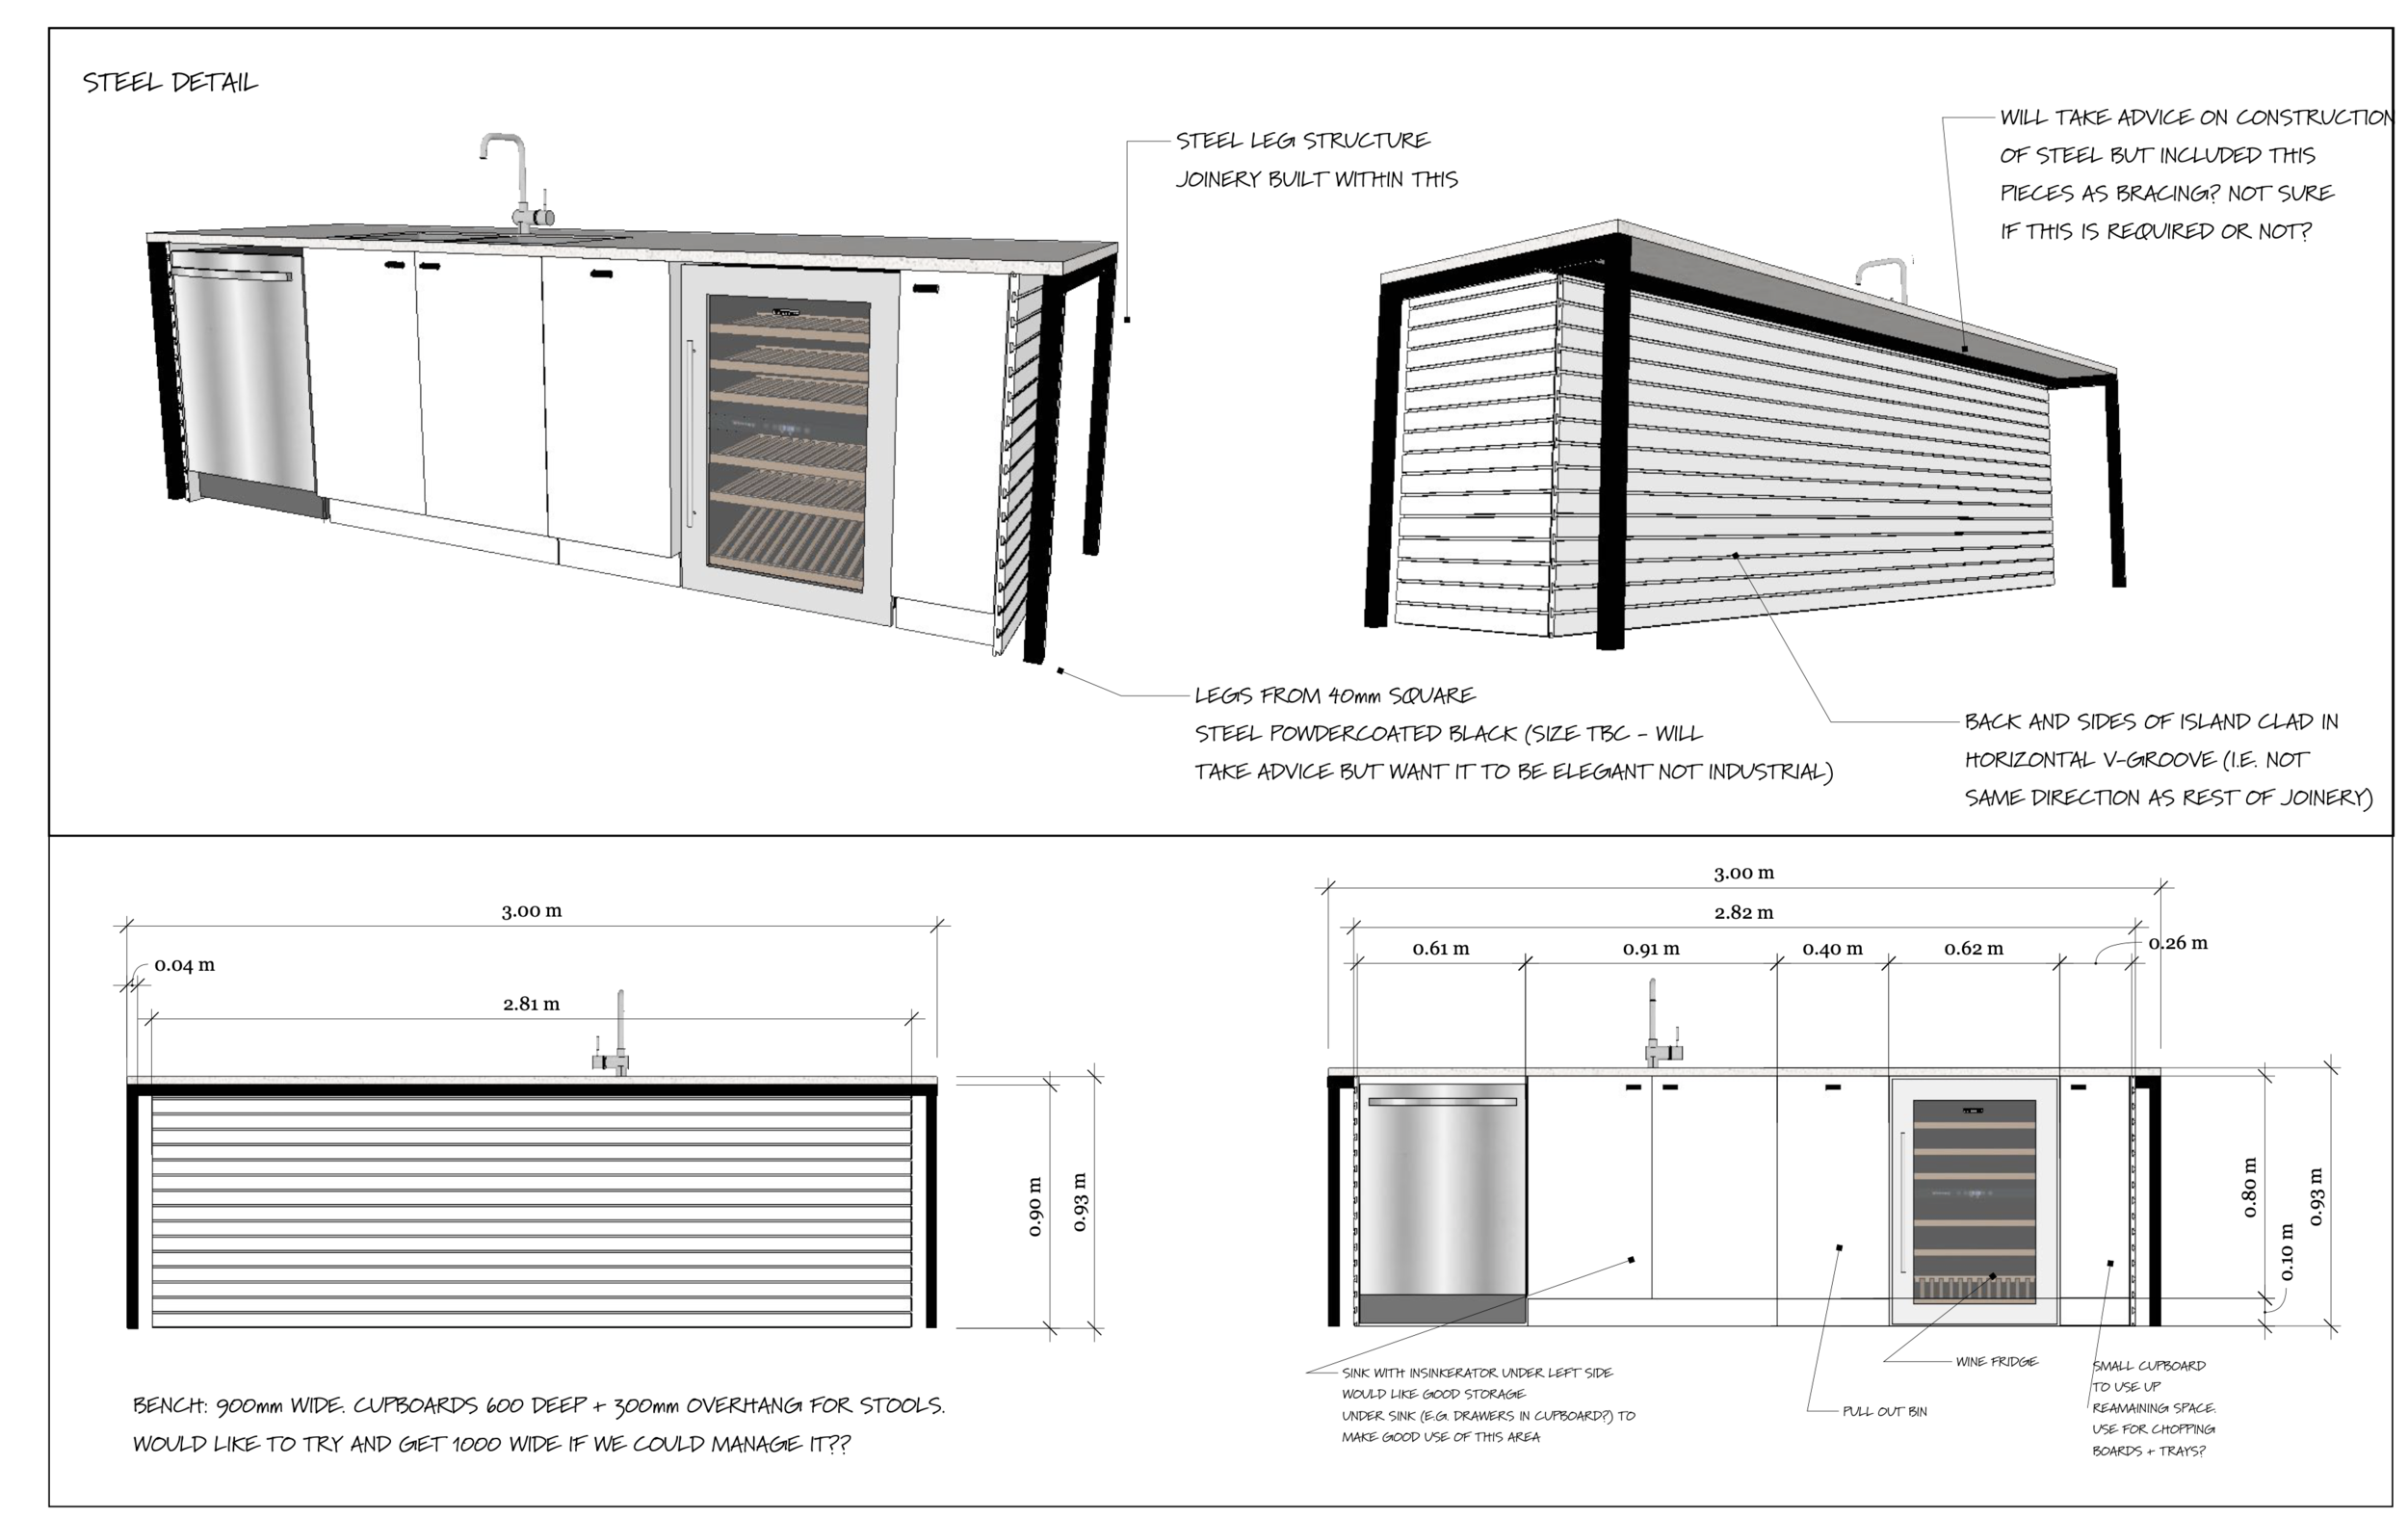
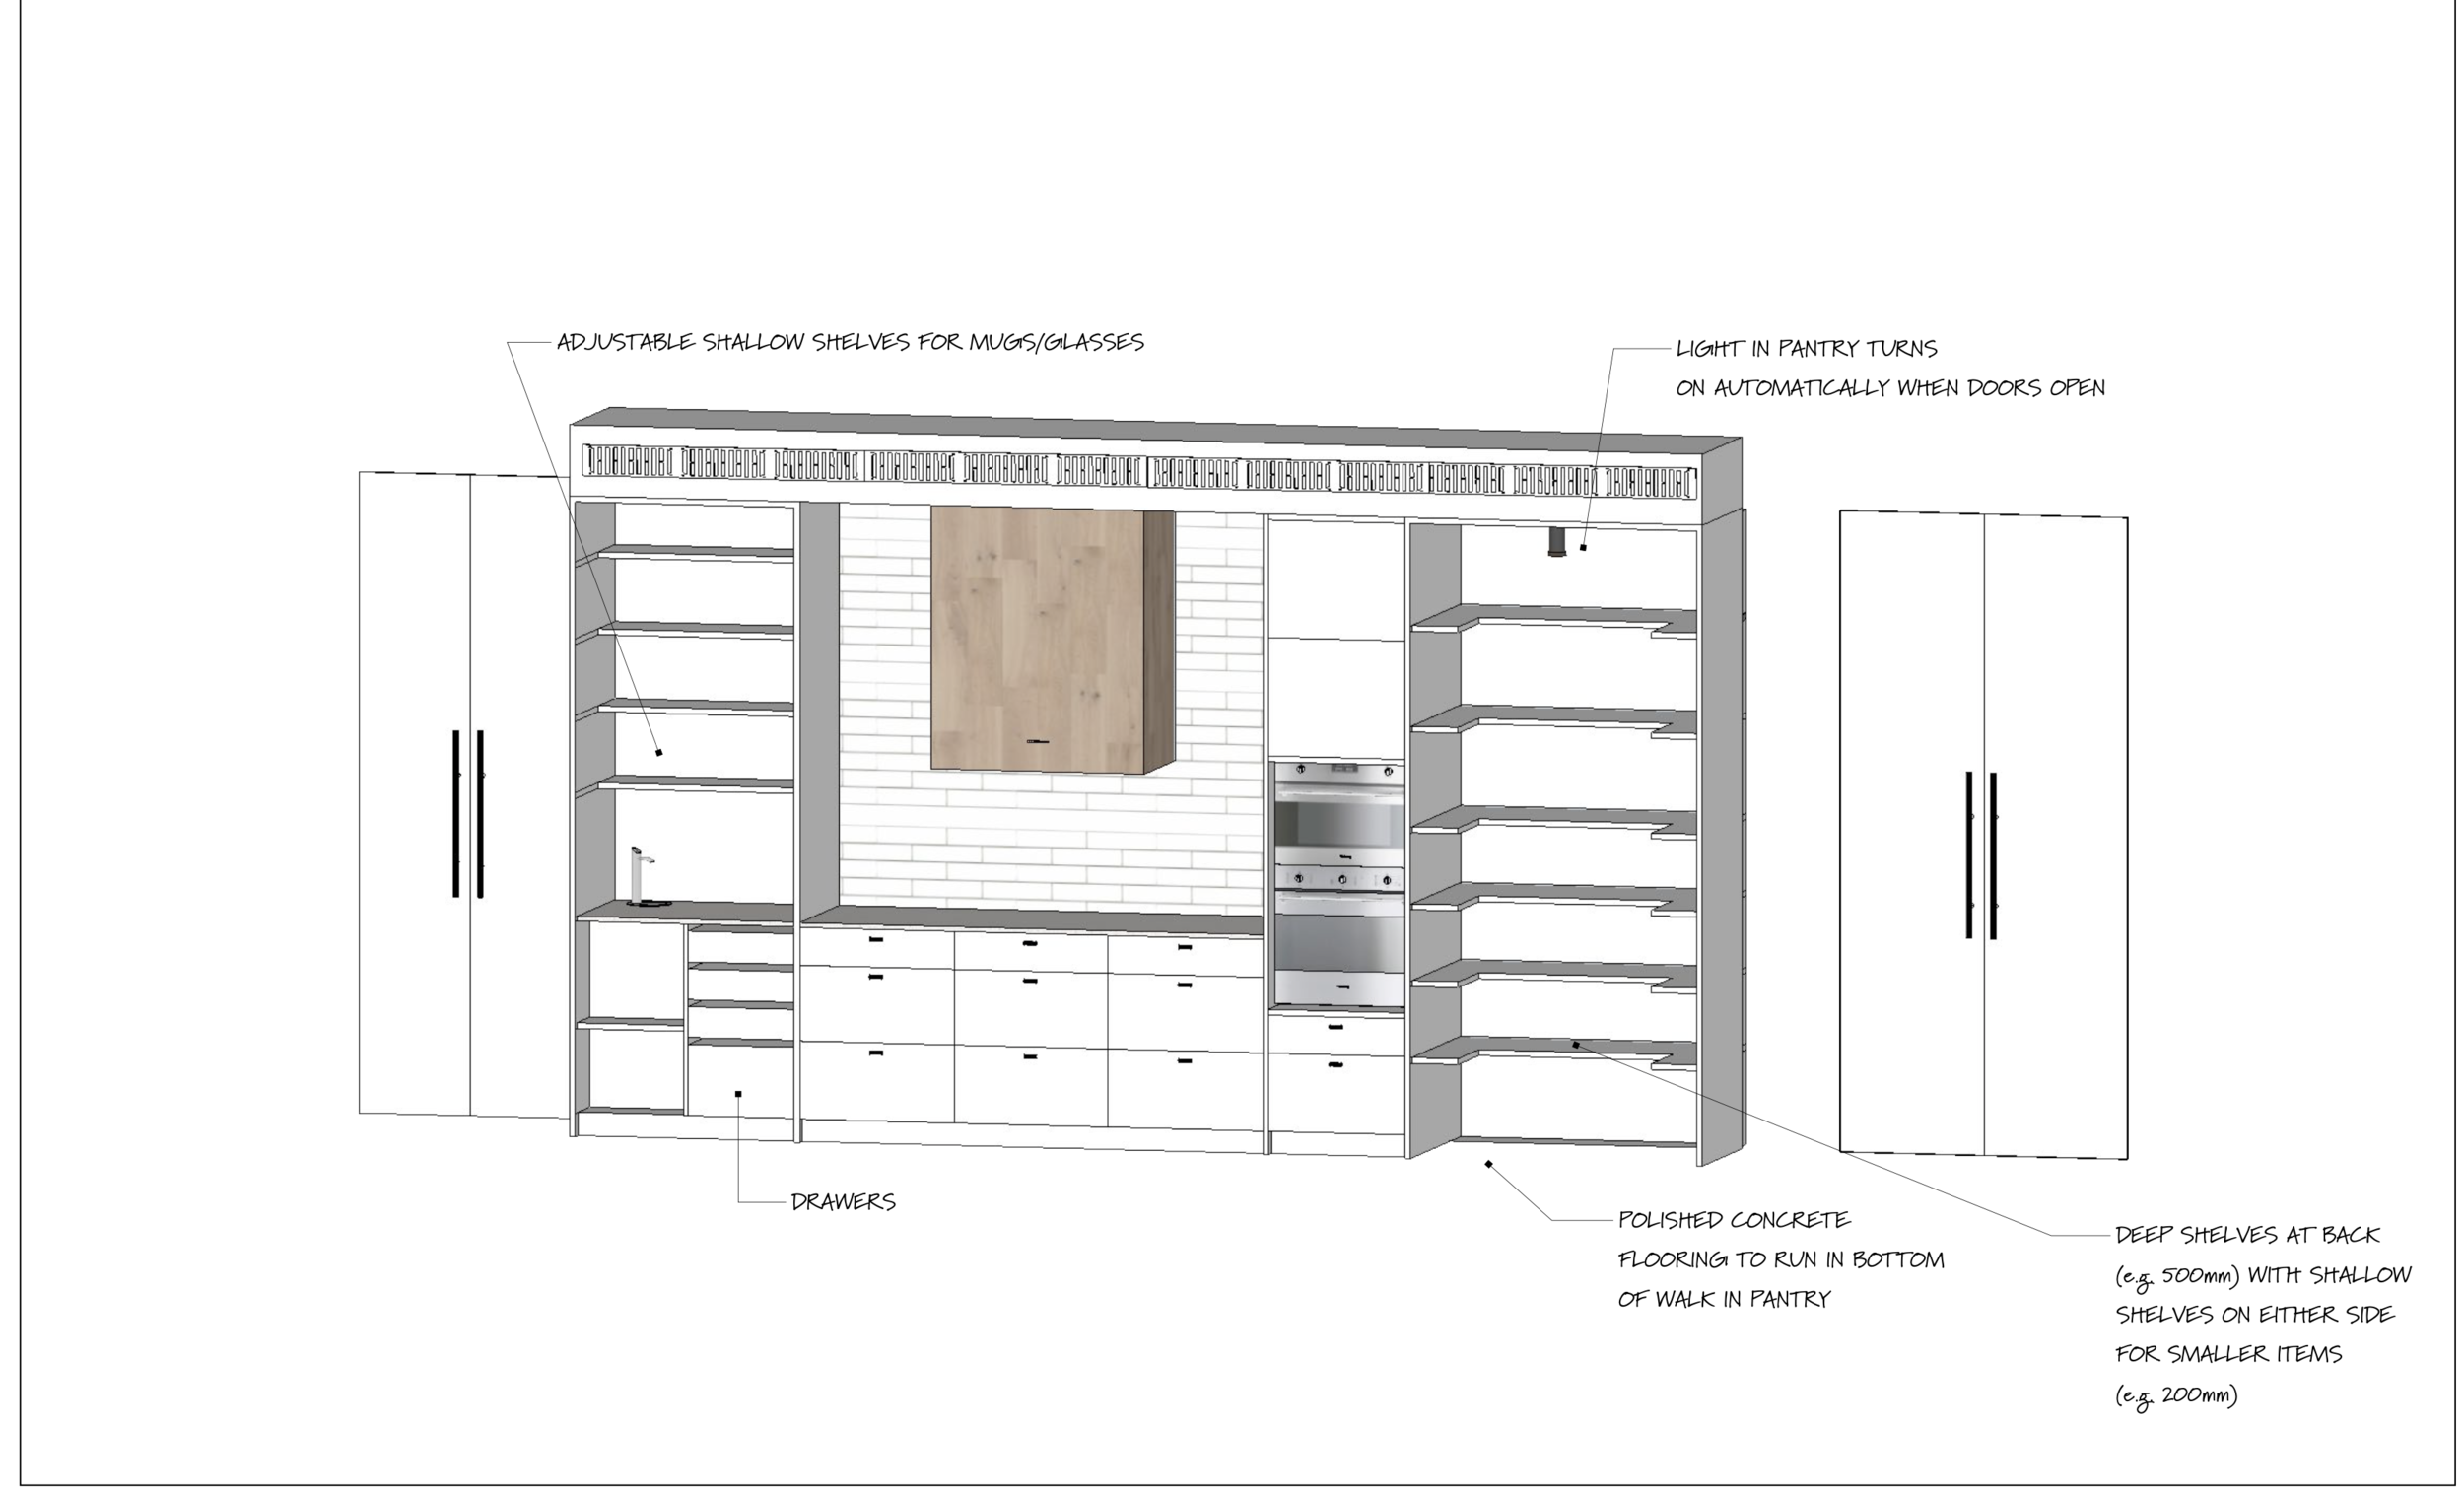
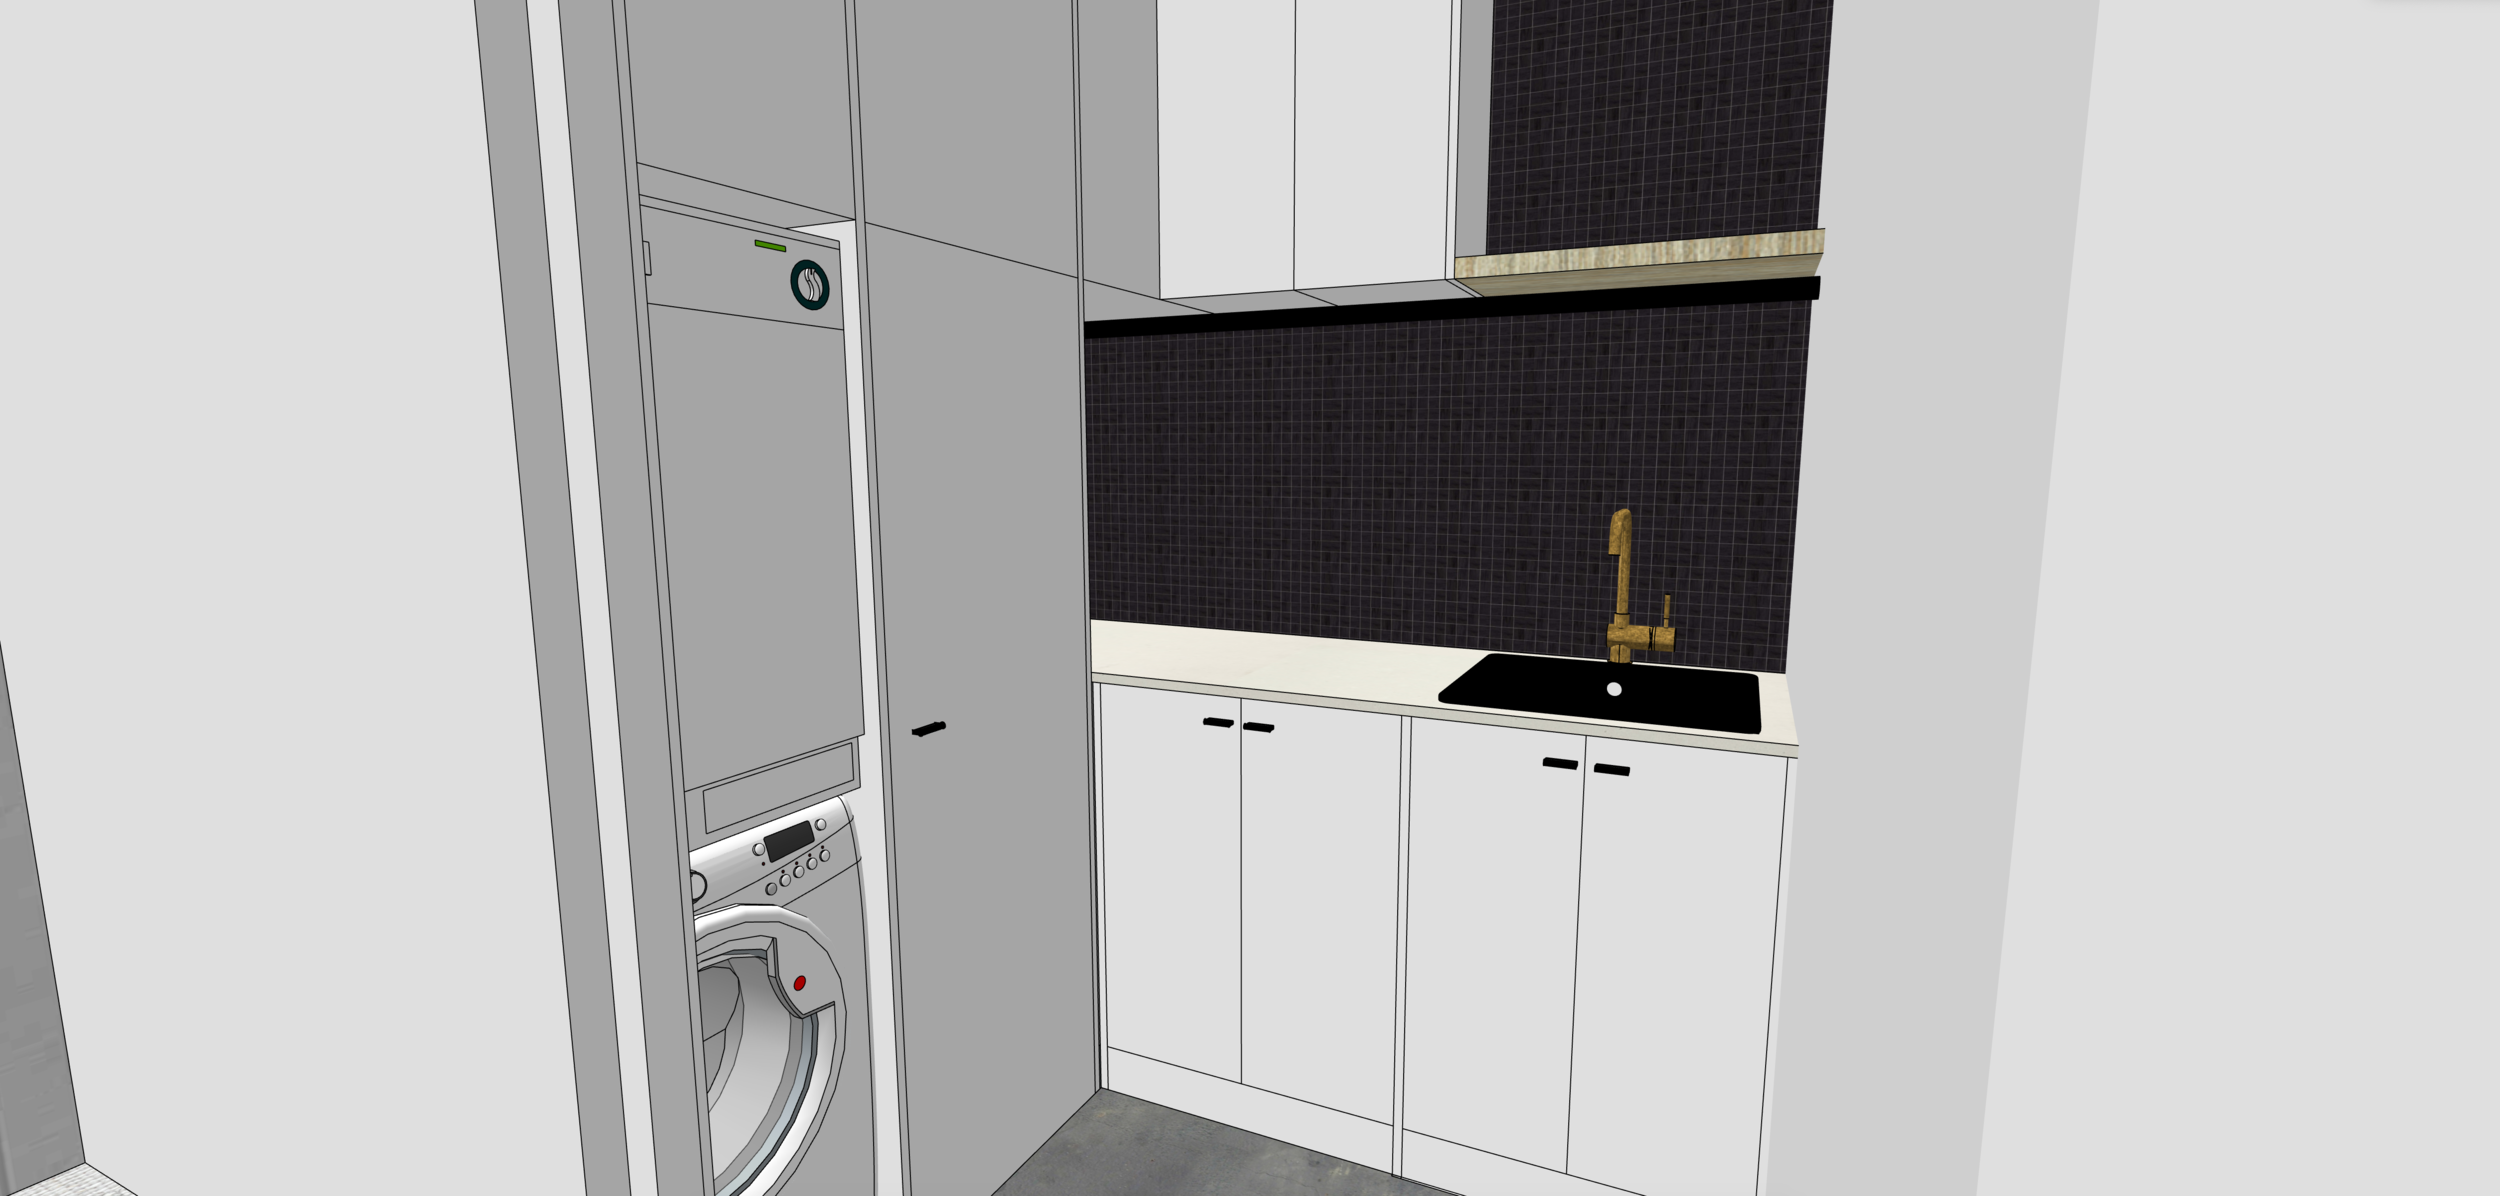
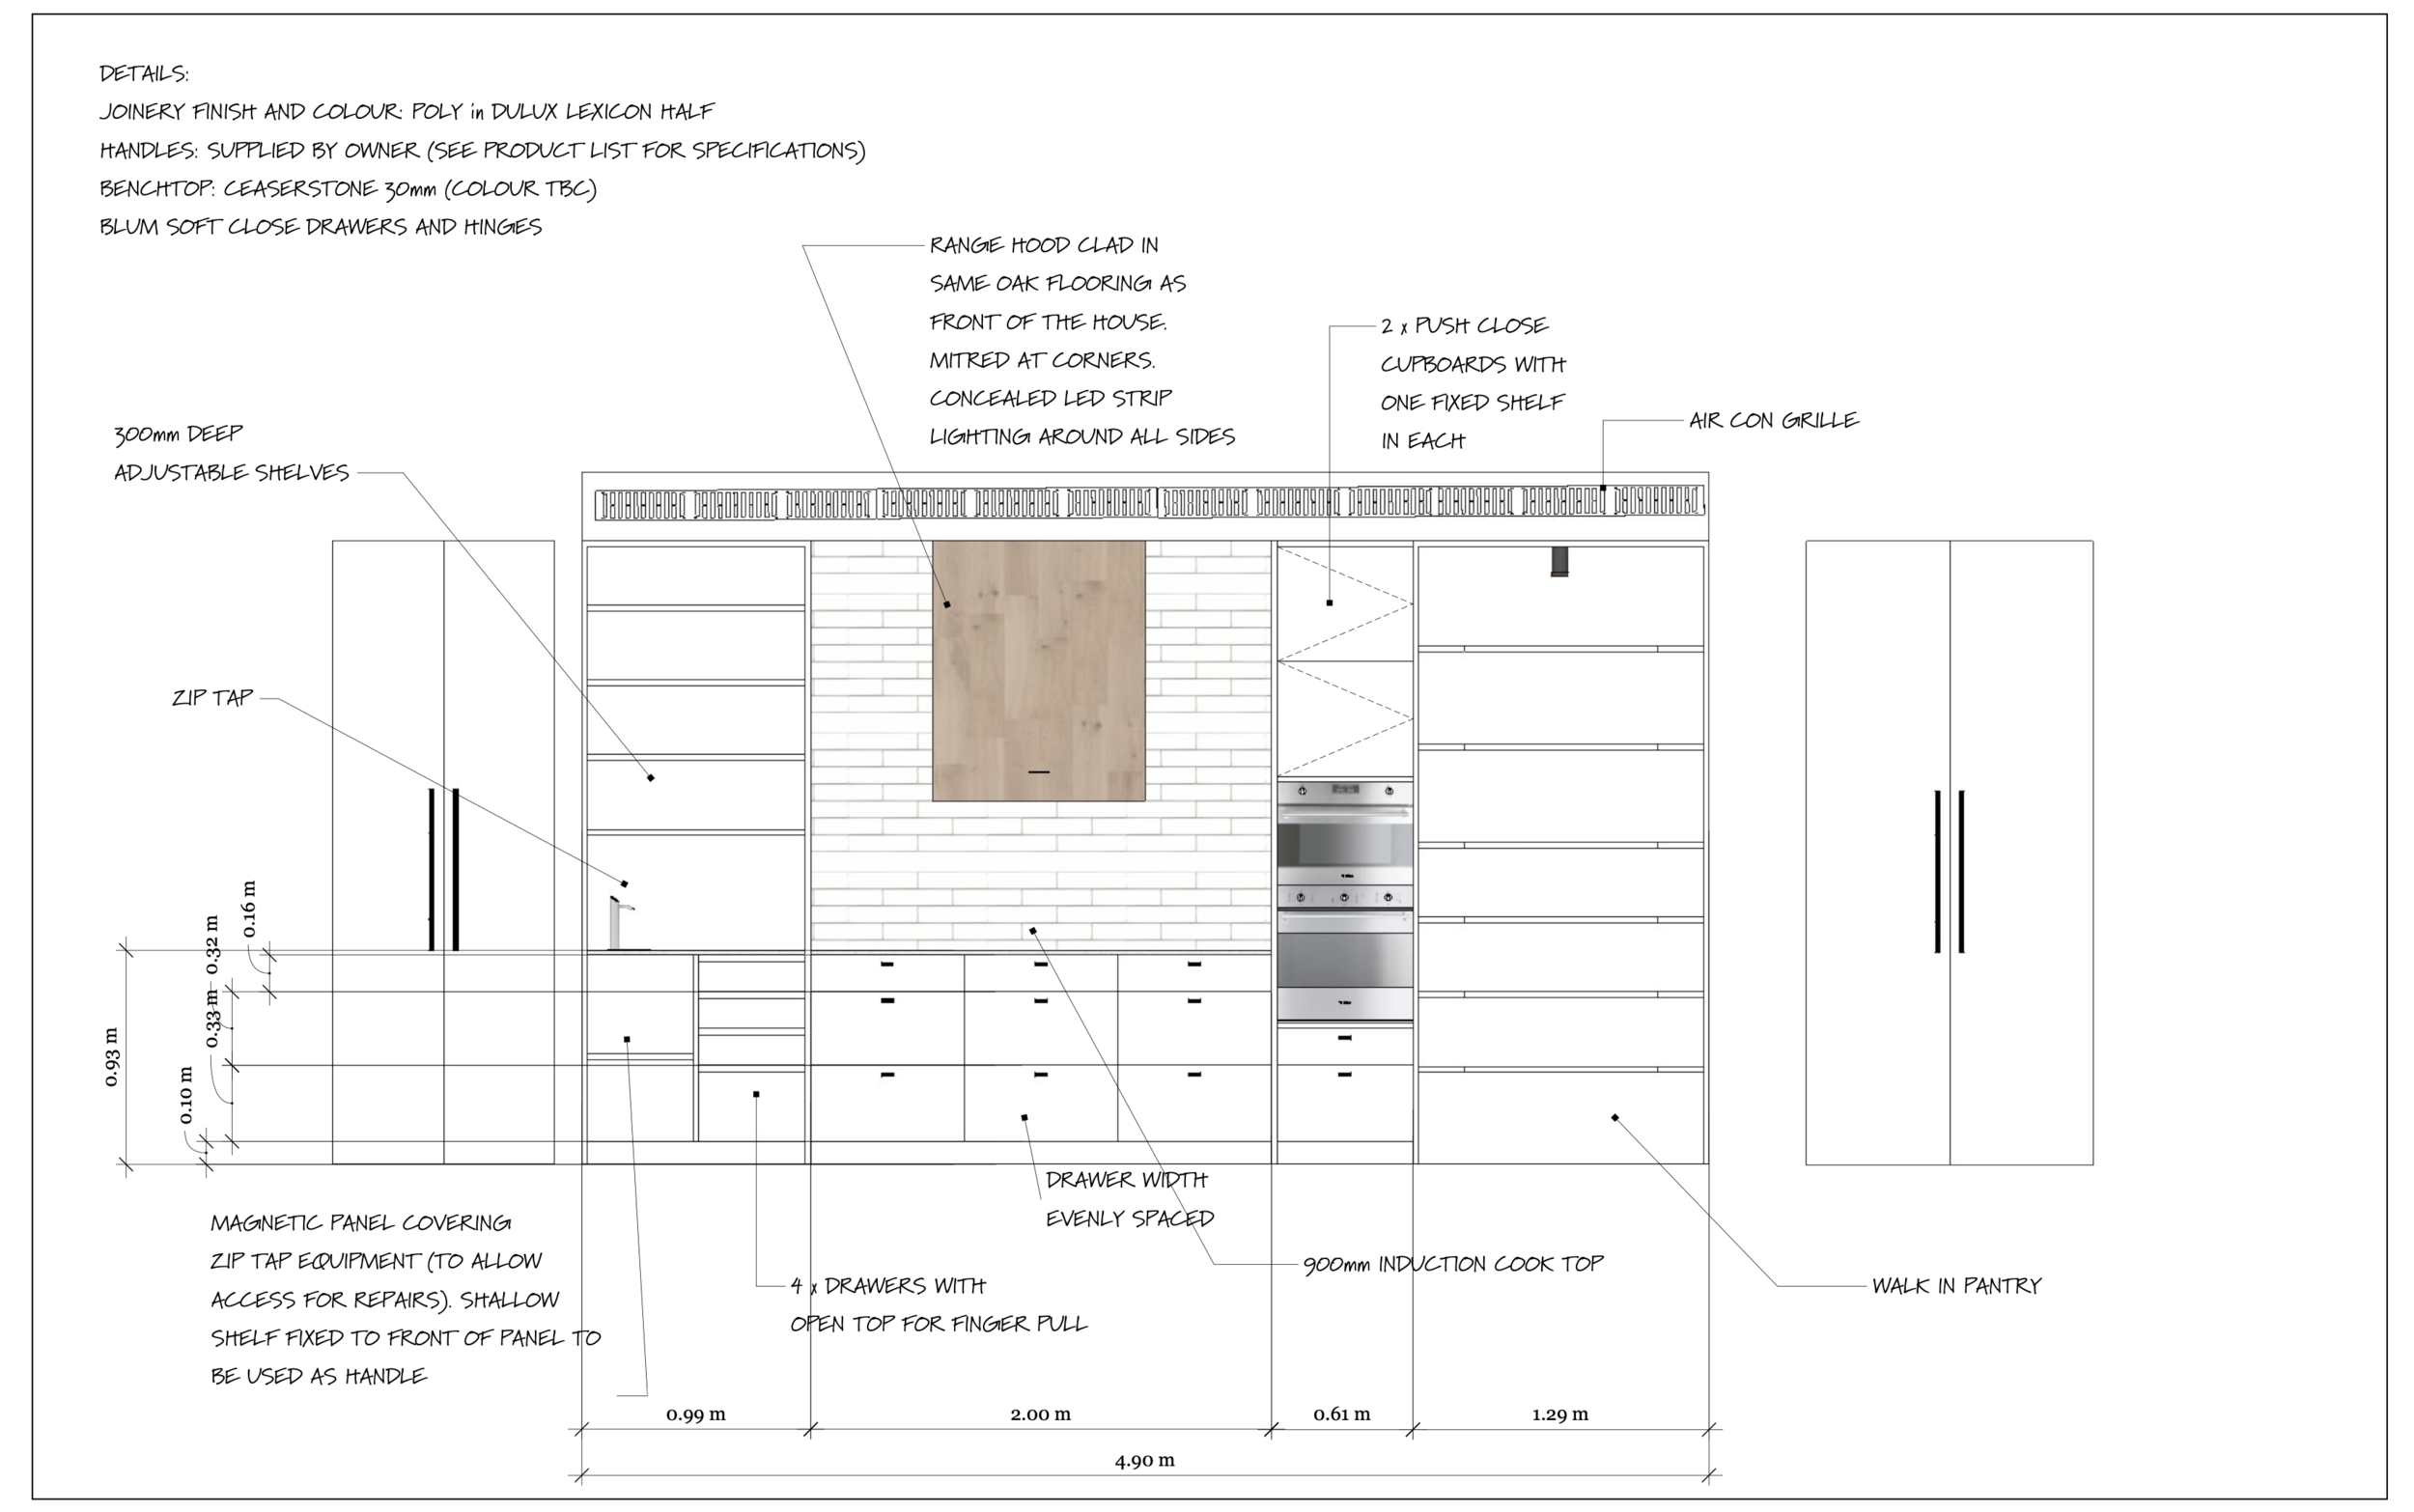
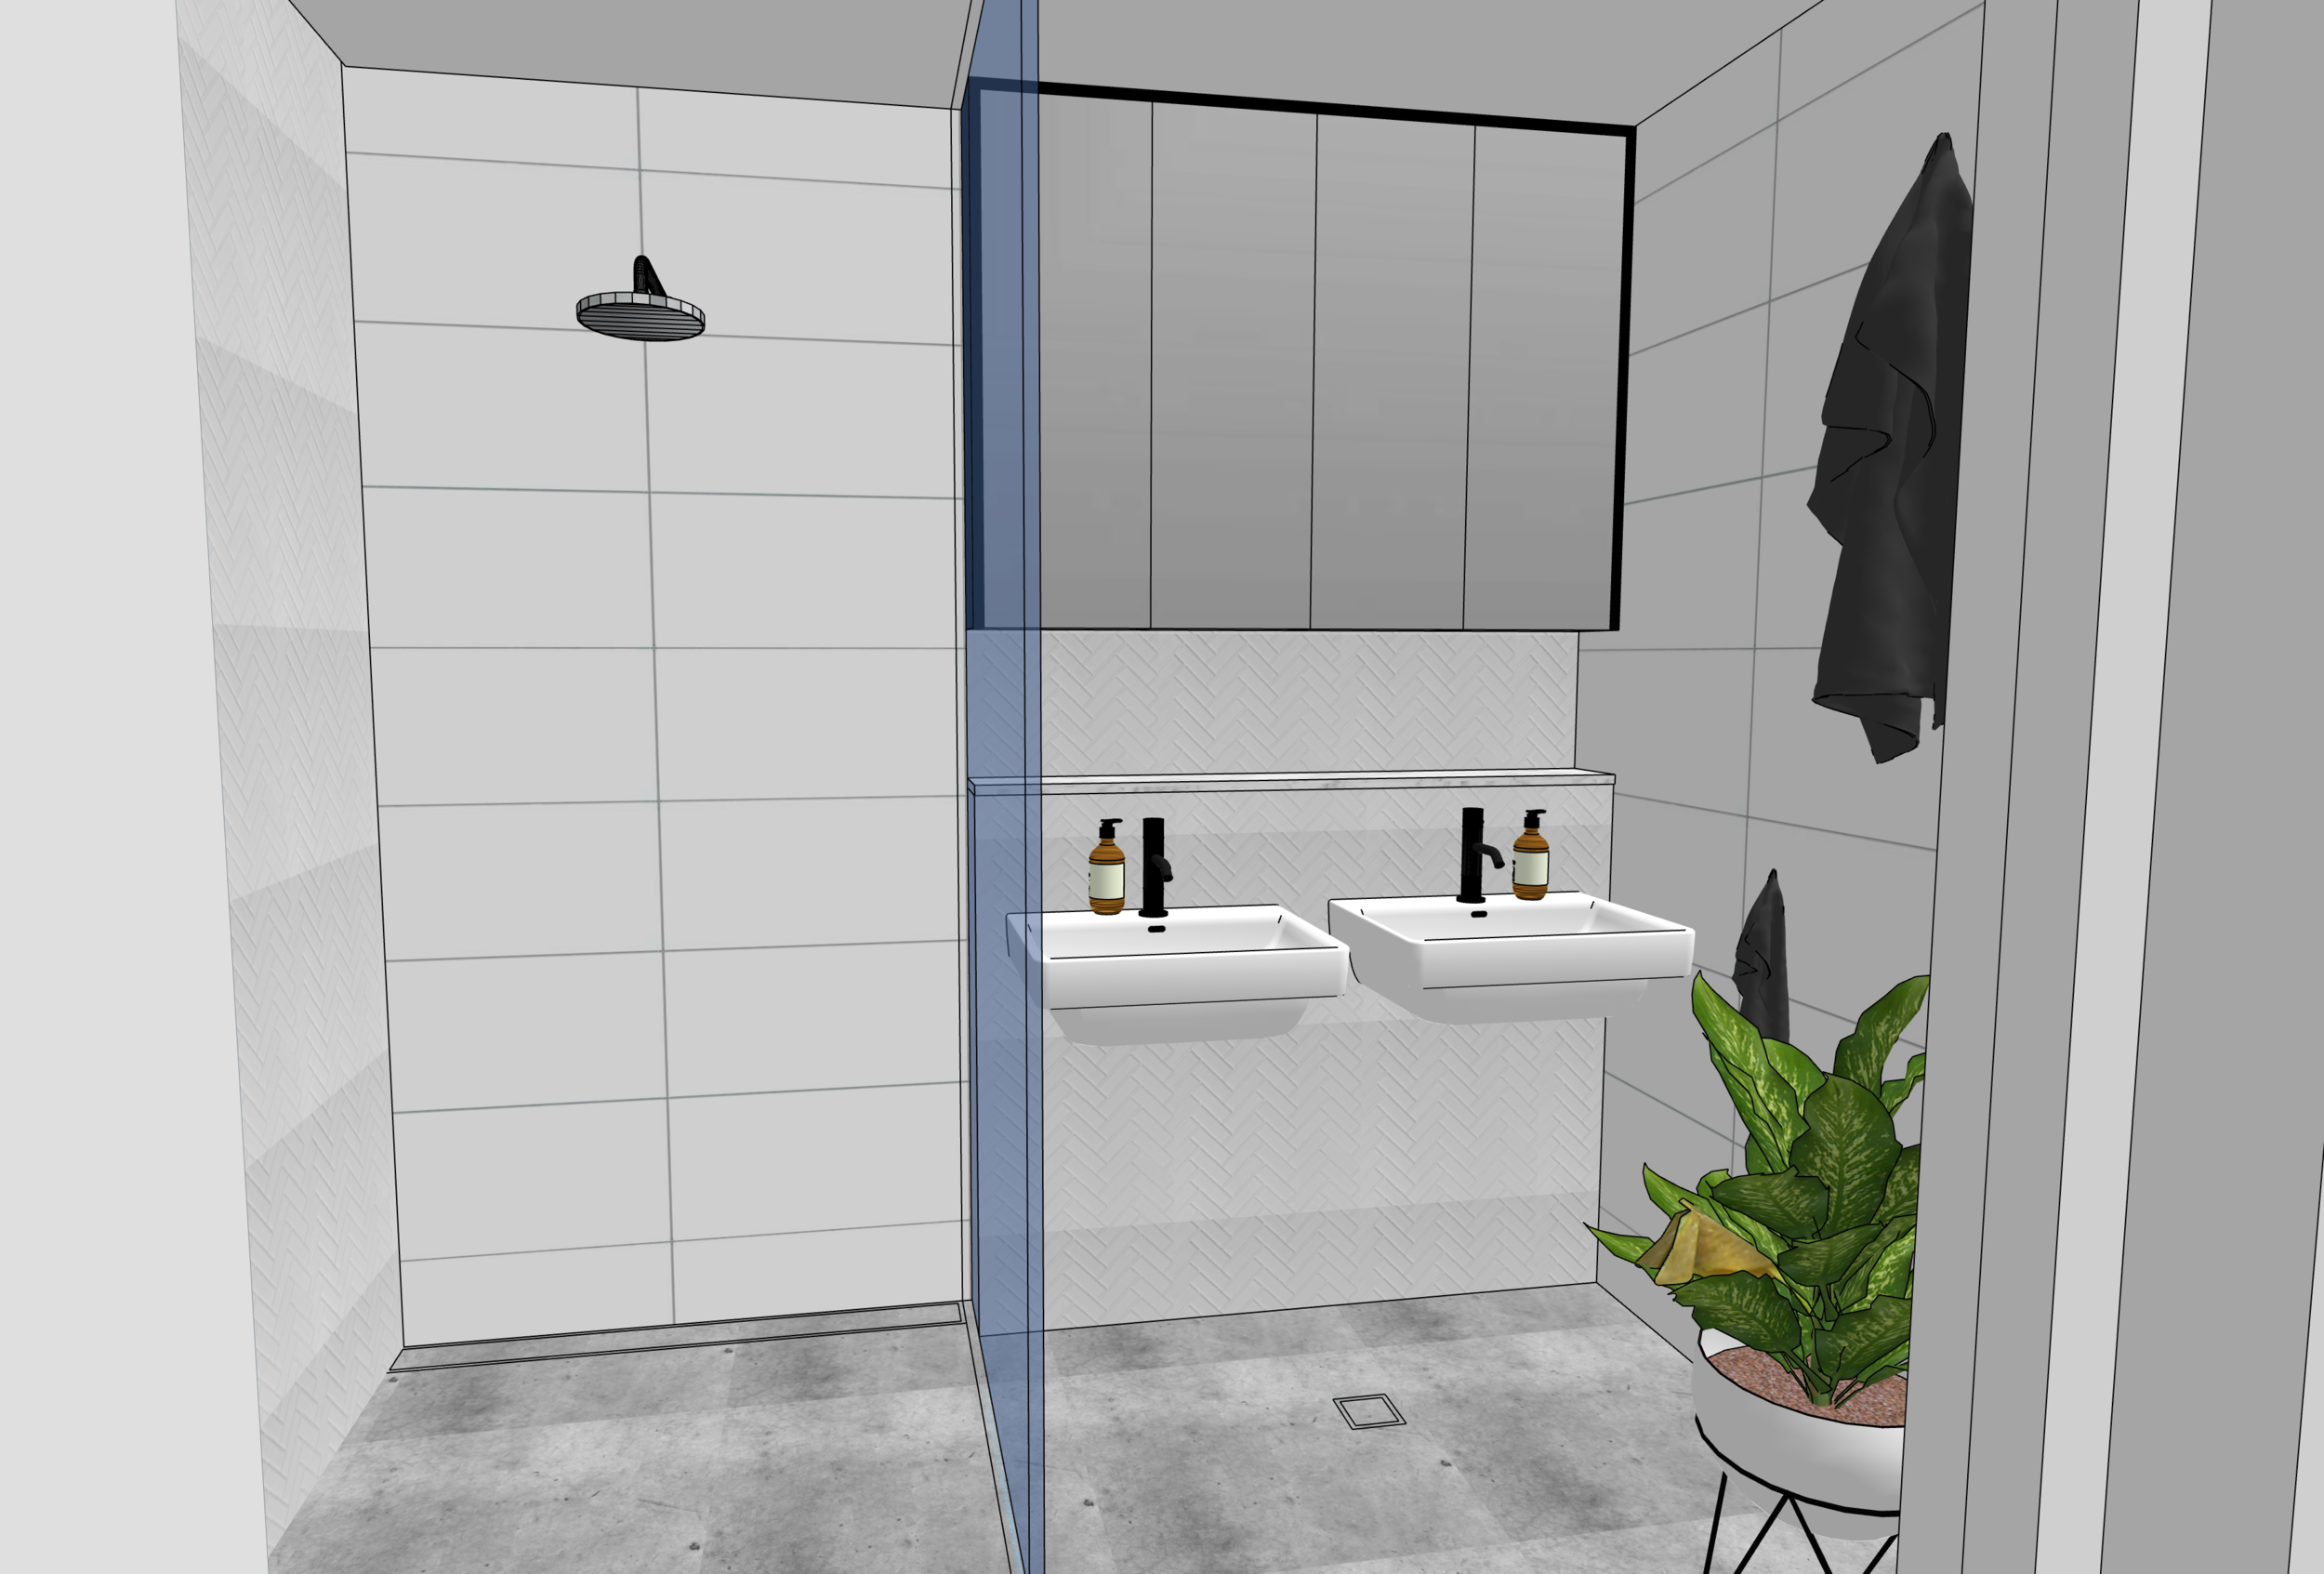
The SketchUp drawings
I worked with an architect to get the floor plan and structure of the house planned out, but once this was drawn I managed the rest of the renovation myself and drew up all the cabinetry and internal design features of the home.
The designs were drawn up in a 3D drawing tool called SketchUp. If you are interested in learning how to use this tool I offer an online course all about how to do this sort of drawing for yourself. You can learn about that here.
SketchUp is a great tool as it helps clients see what their finished spaces are going to look like before they are built and helps avoid costly errors as well. Using the free tool that comes with SketchUp Pro (called Layout) you can also draw up plans and elevations to scale, which is what I do for all my interior design projects.
In my course we actually learn how to design this exact house in Roseville - this is actually the teaching model that we use and learn on. :)

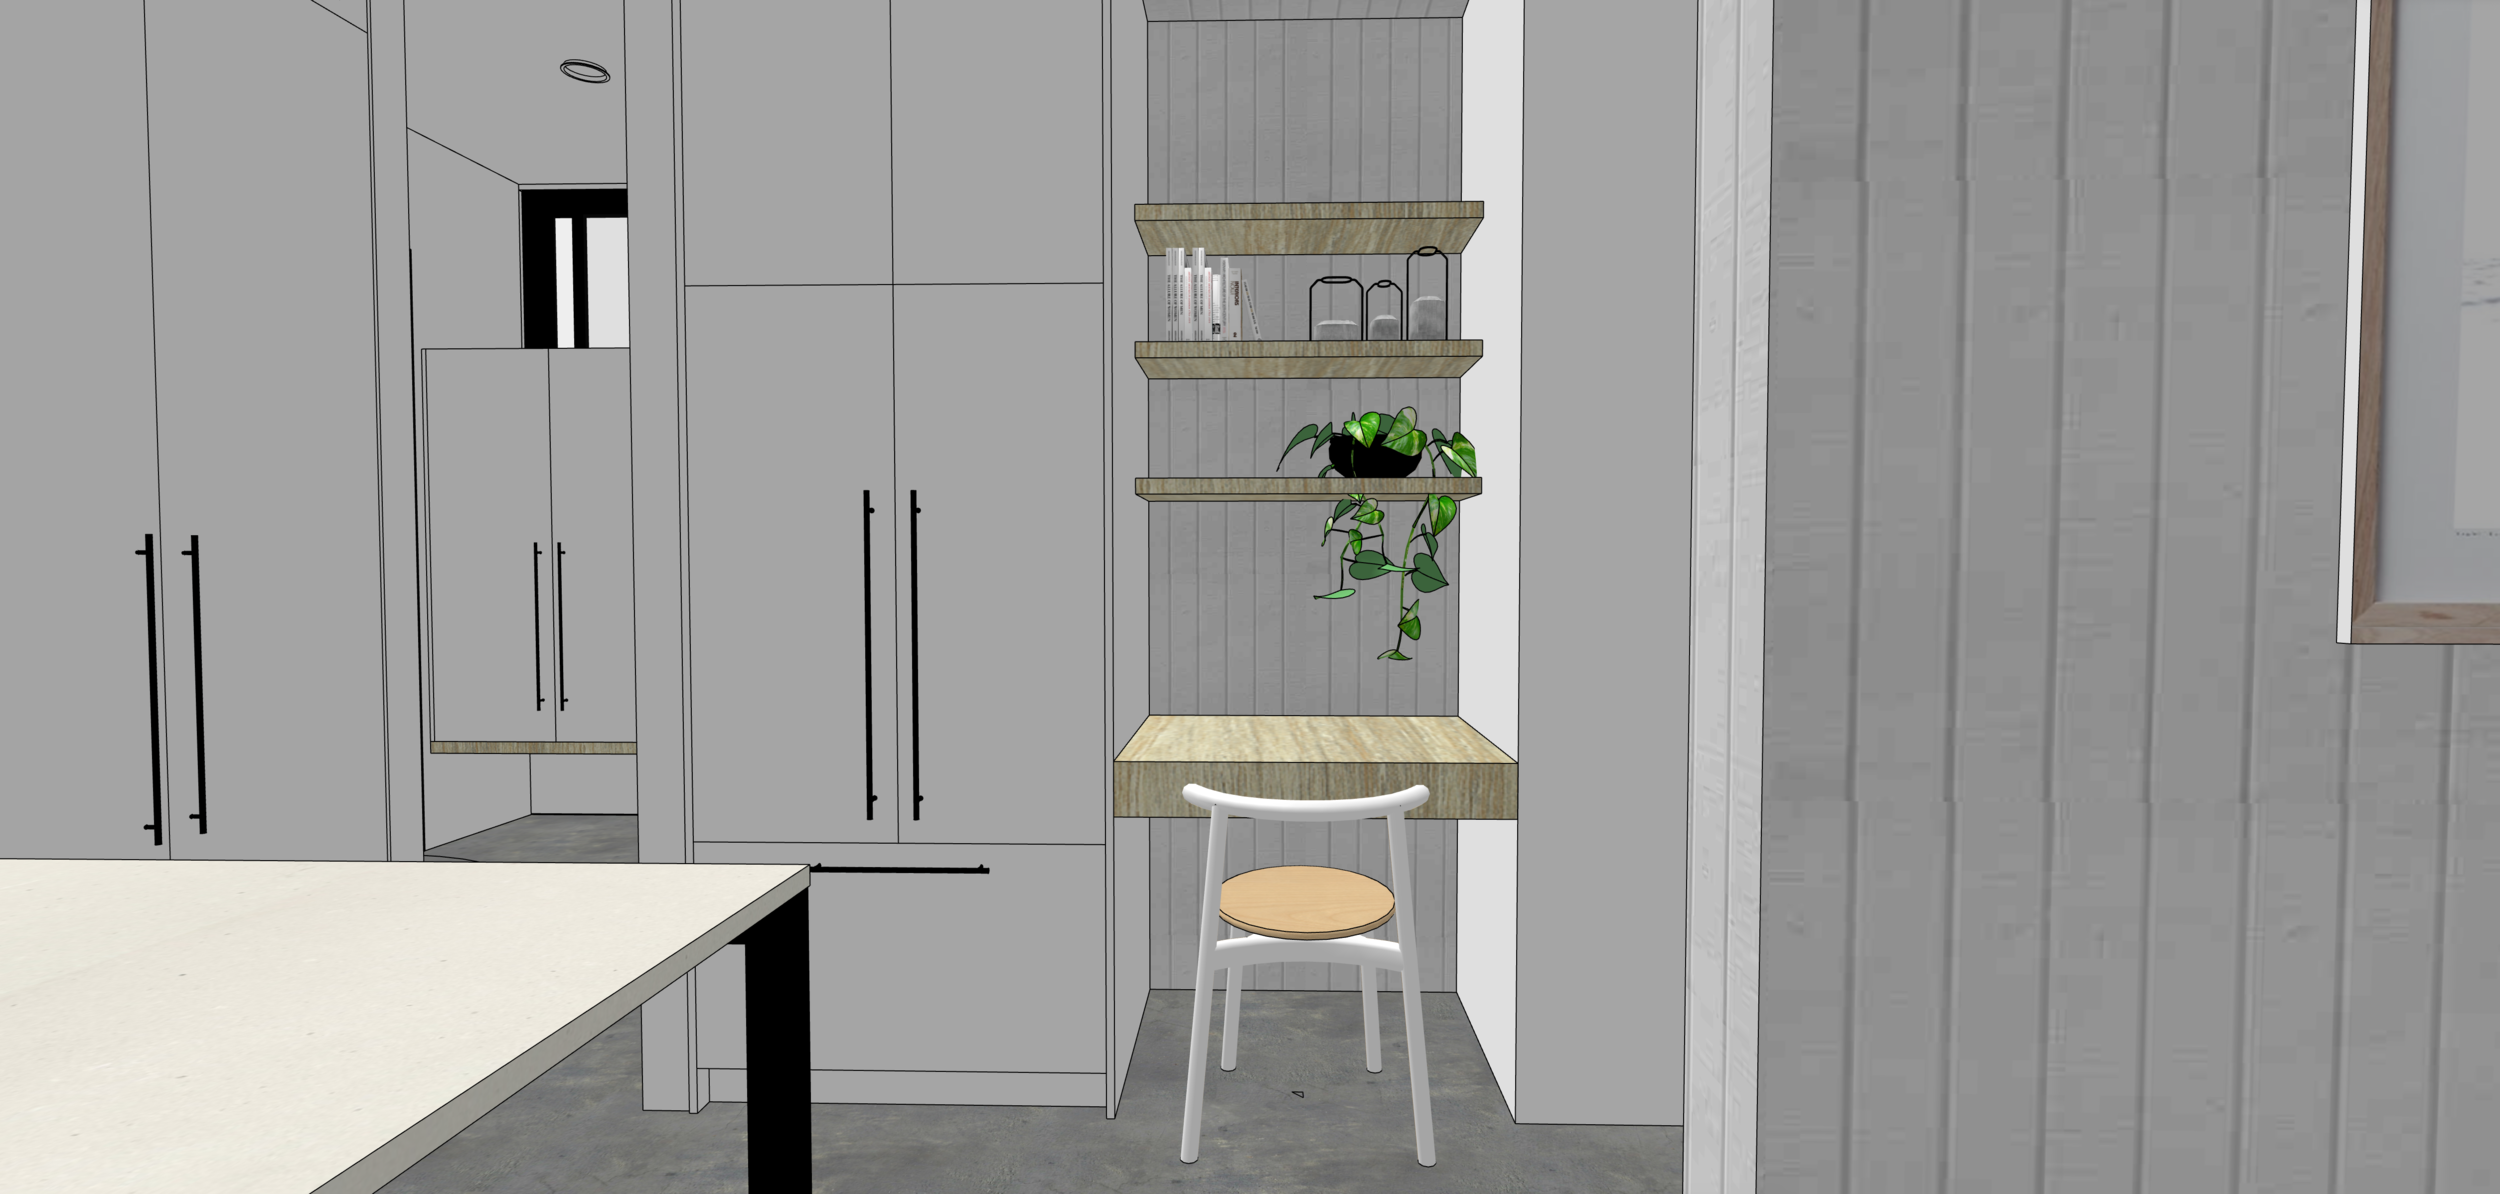
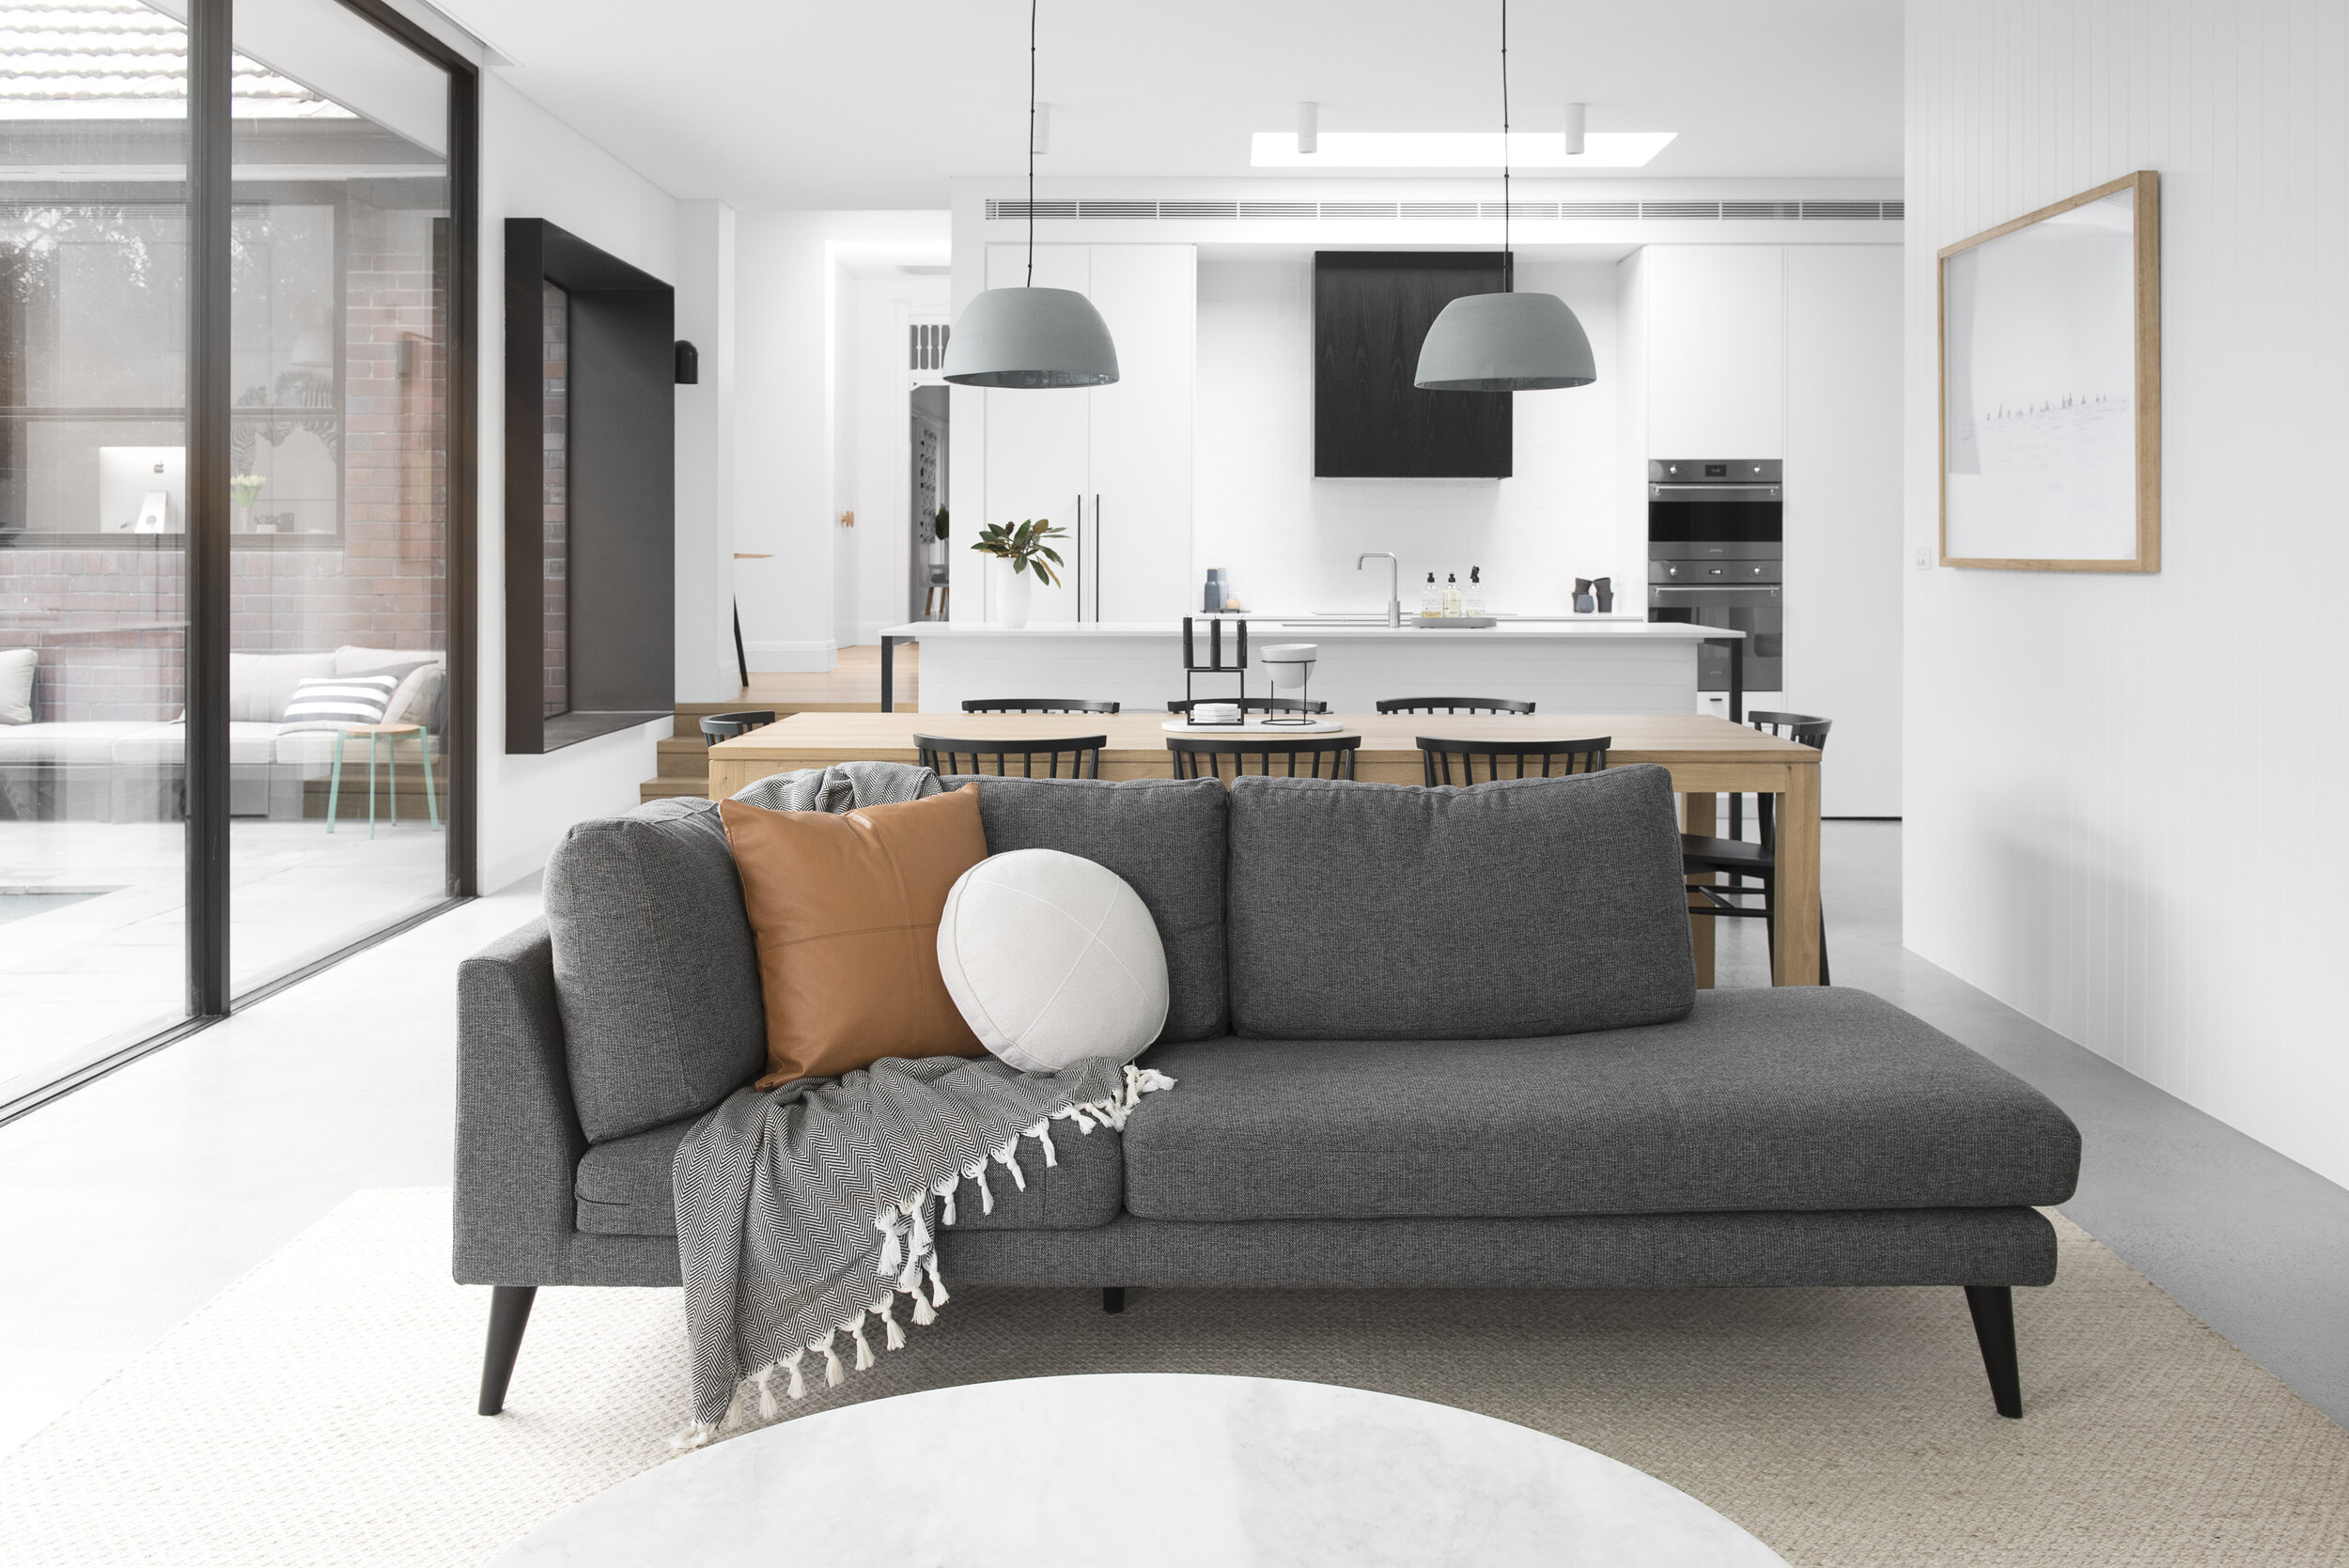
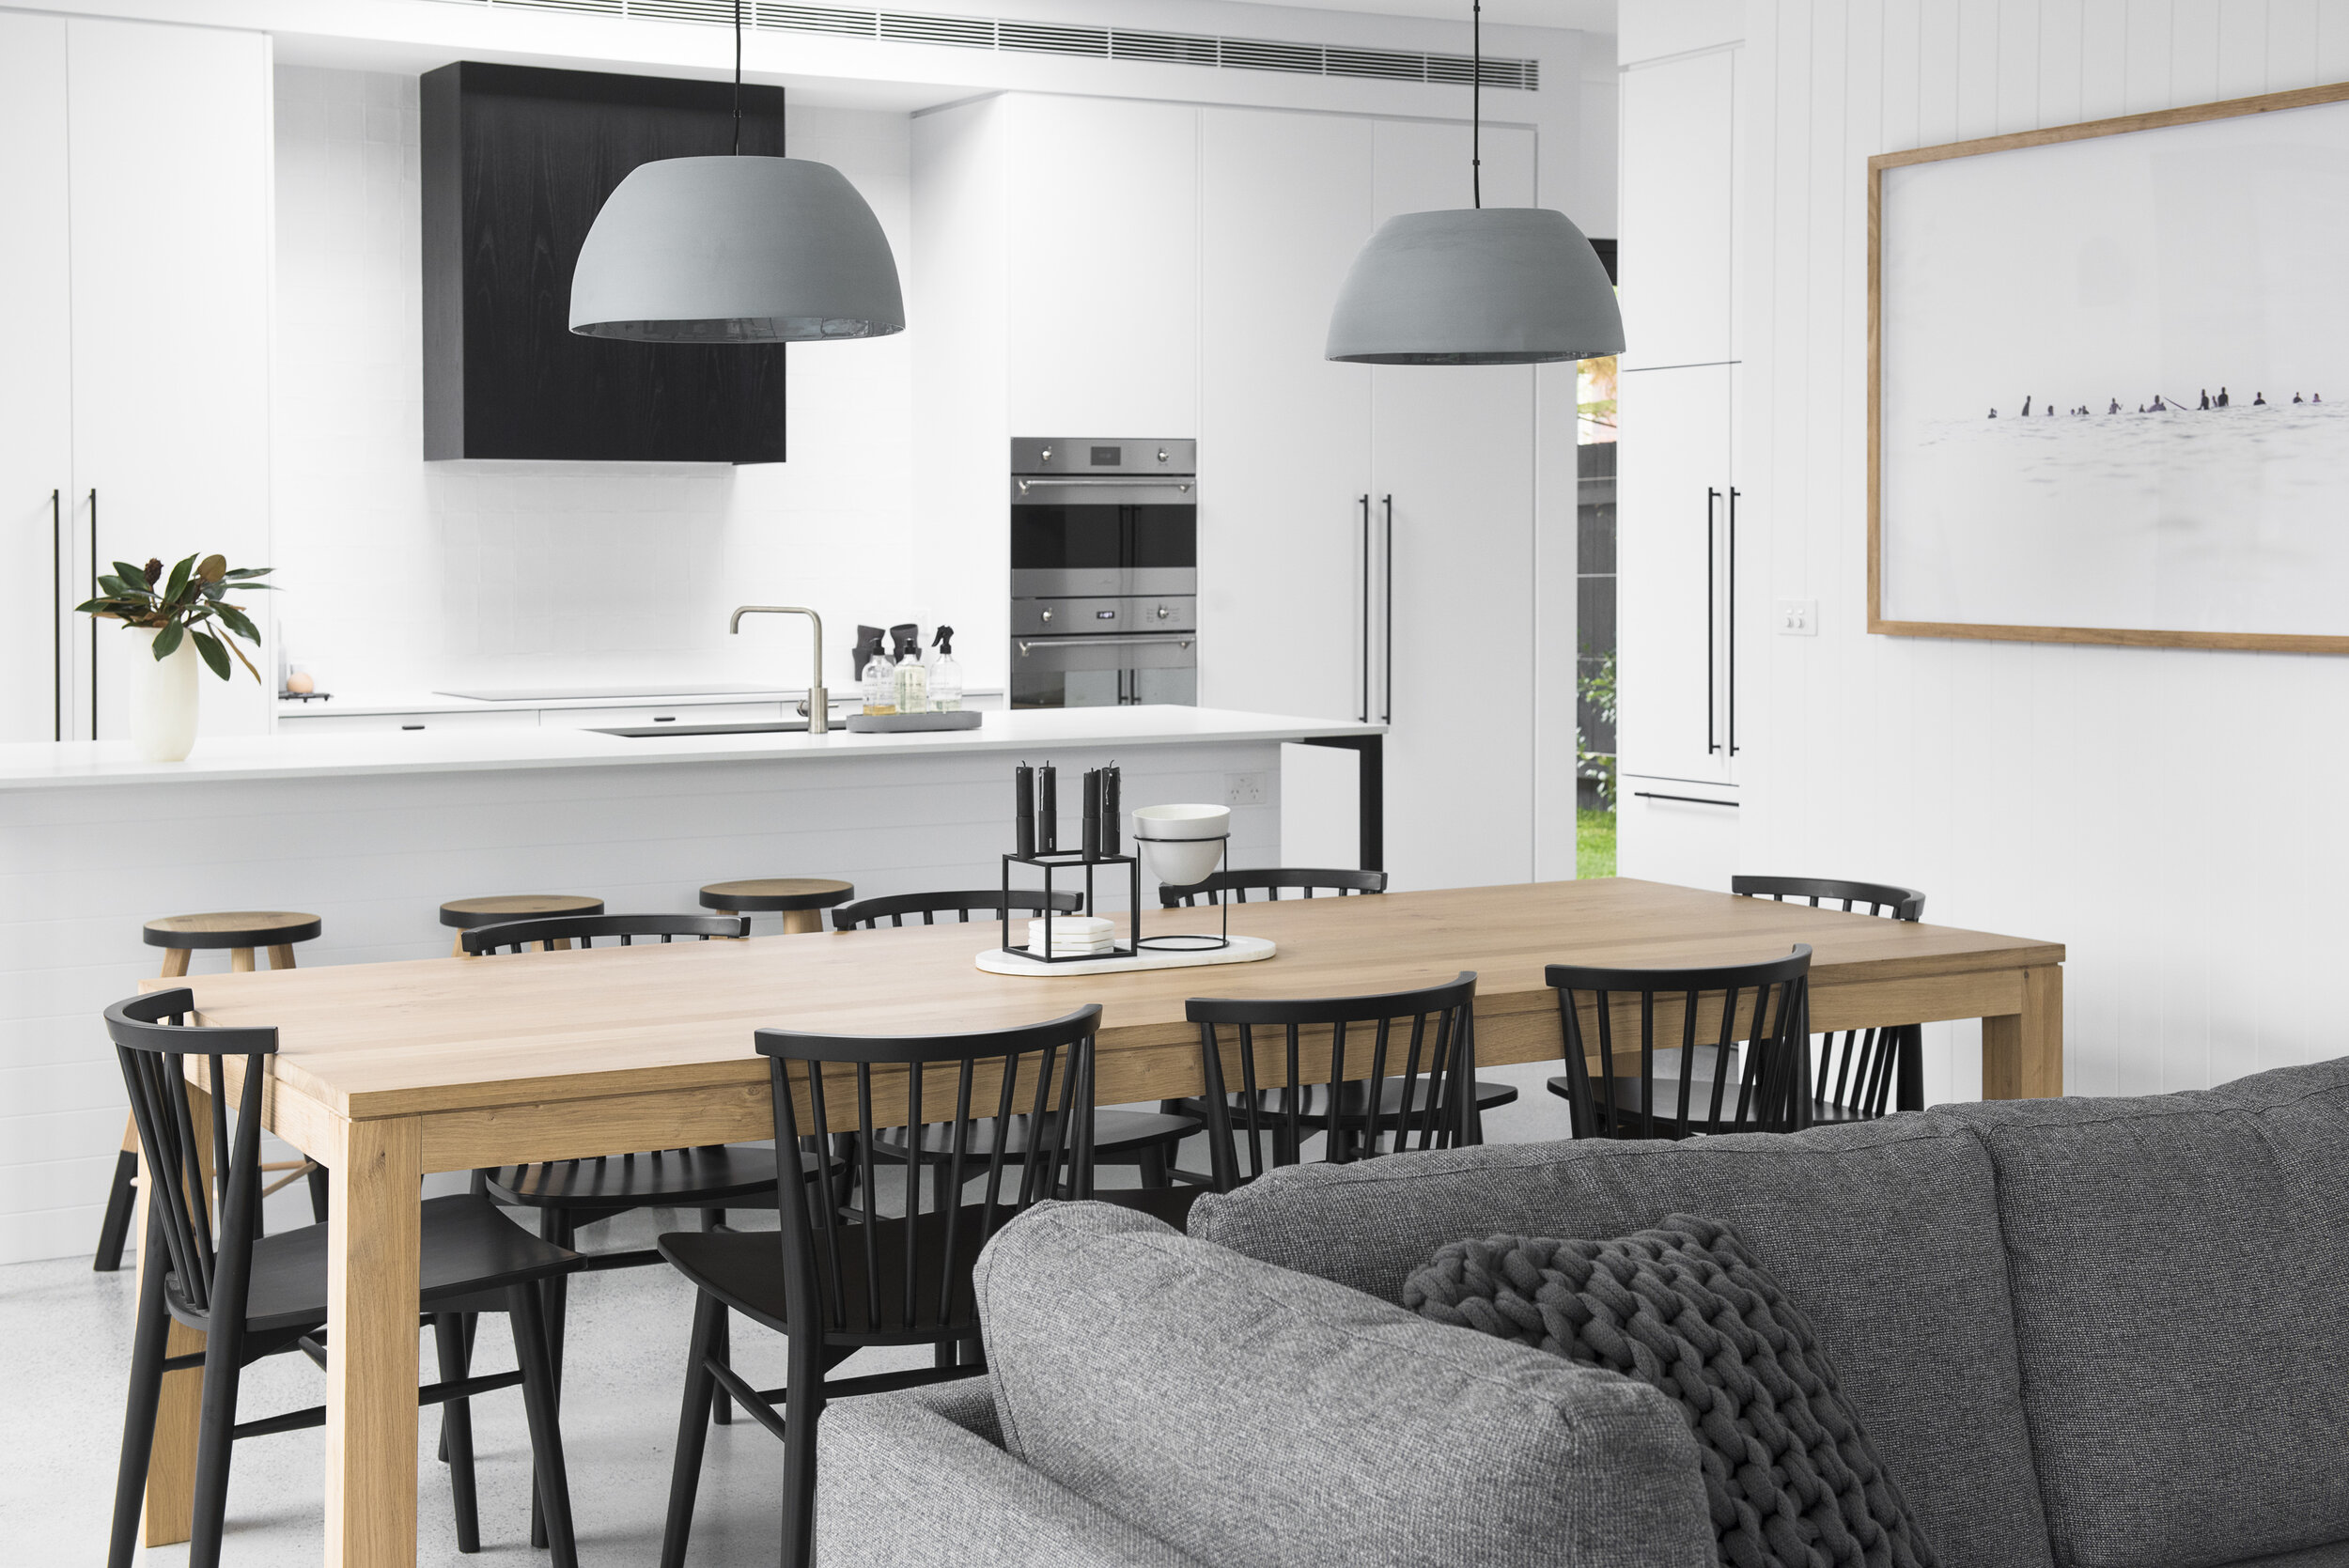
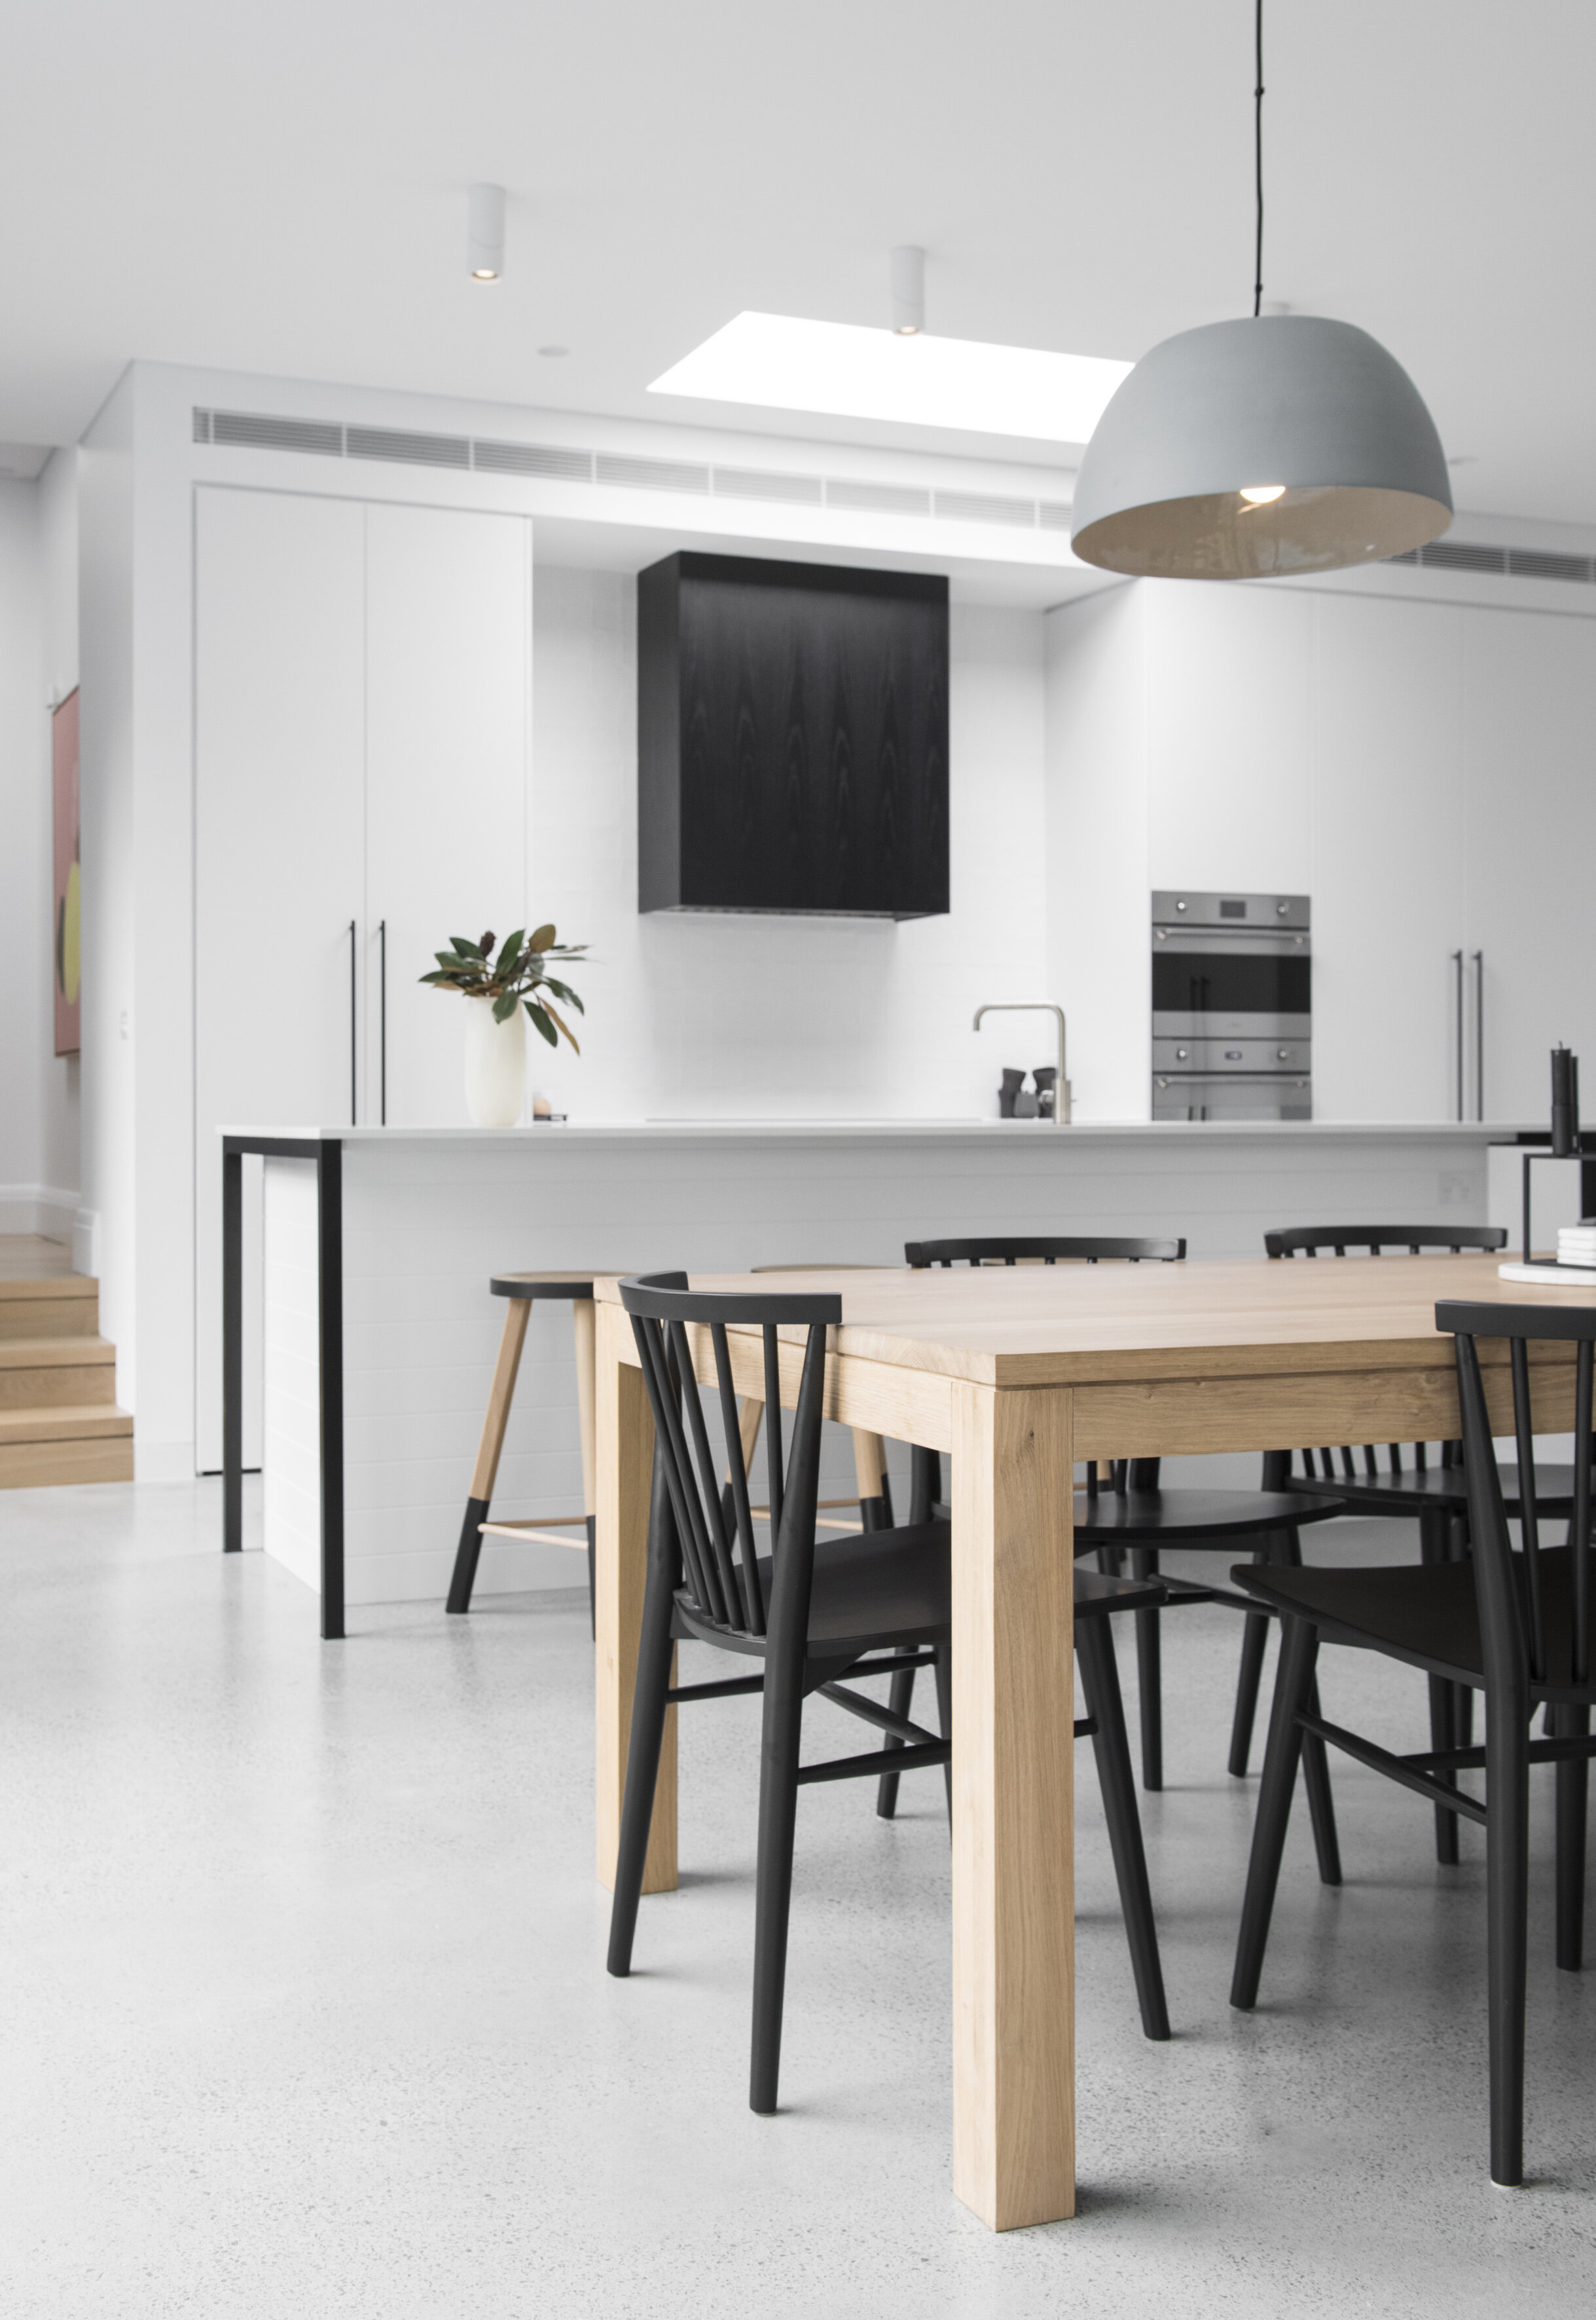
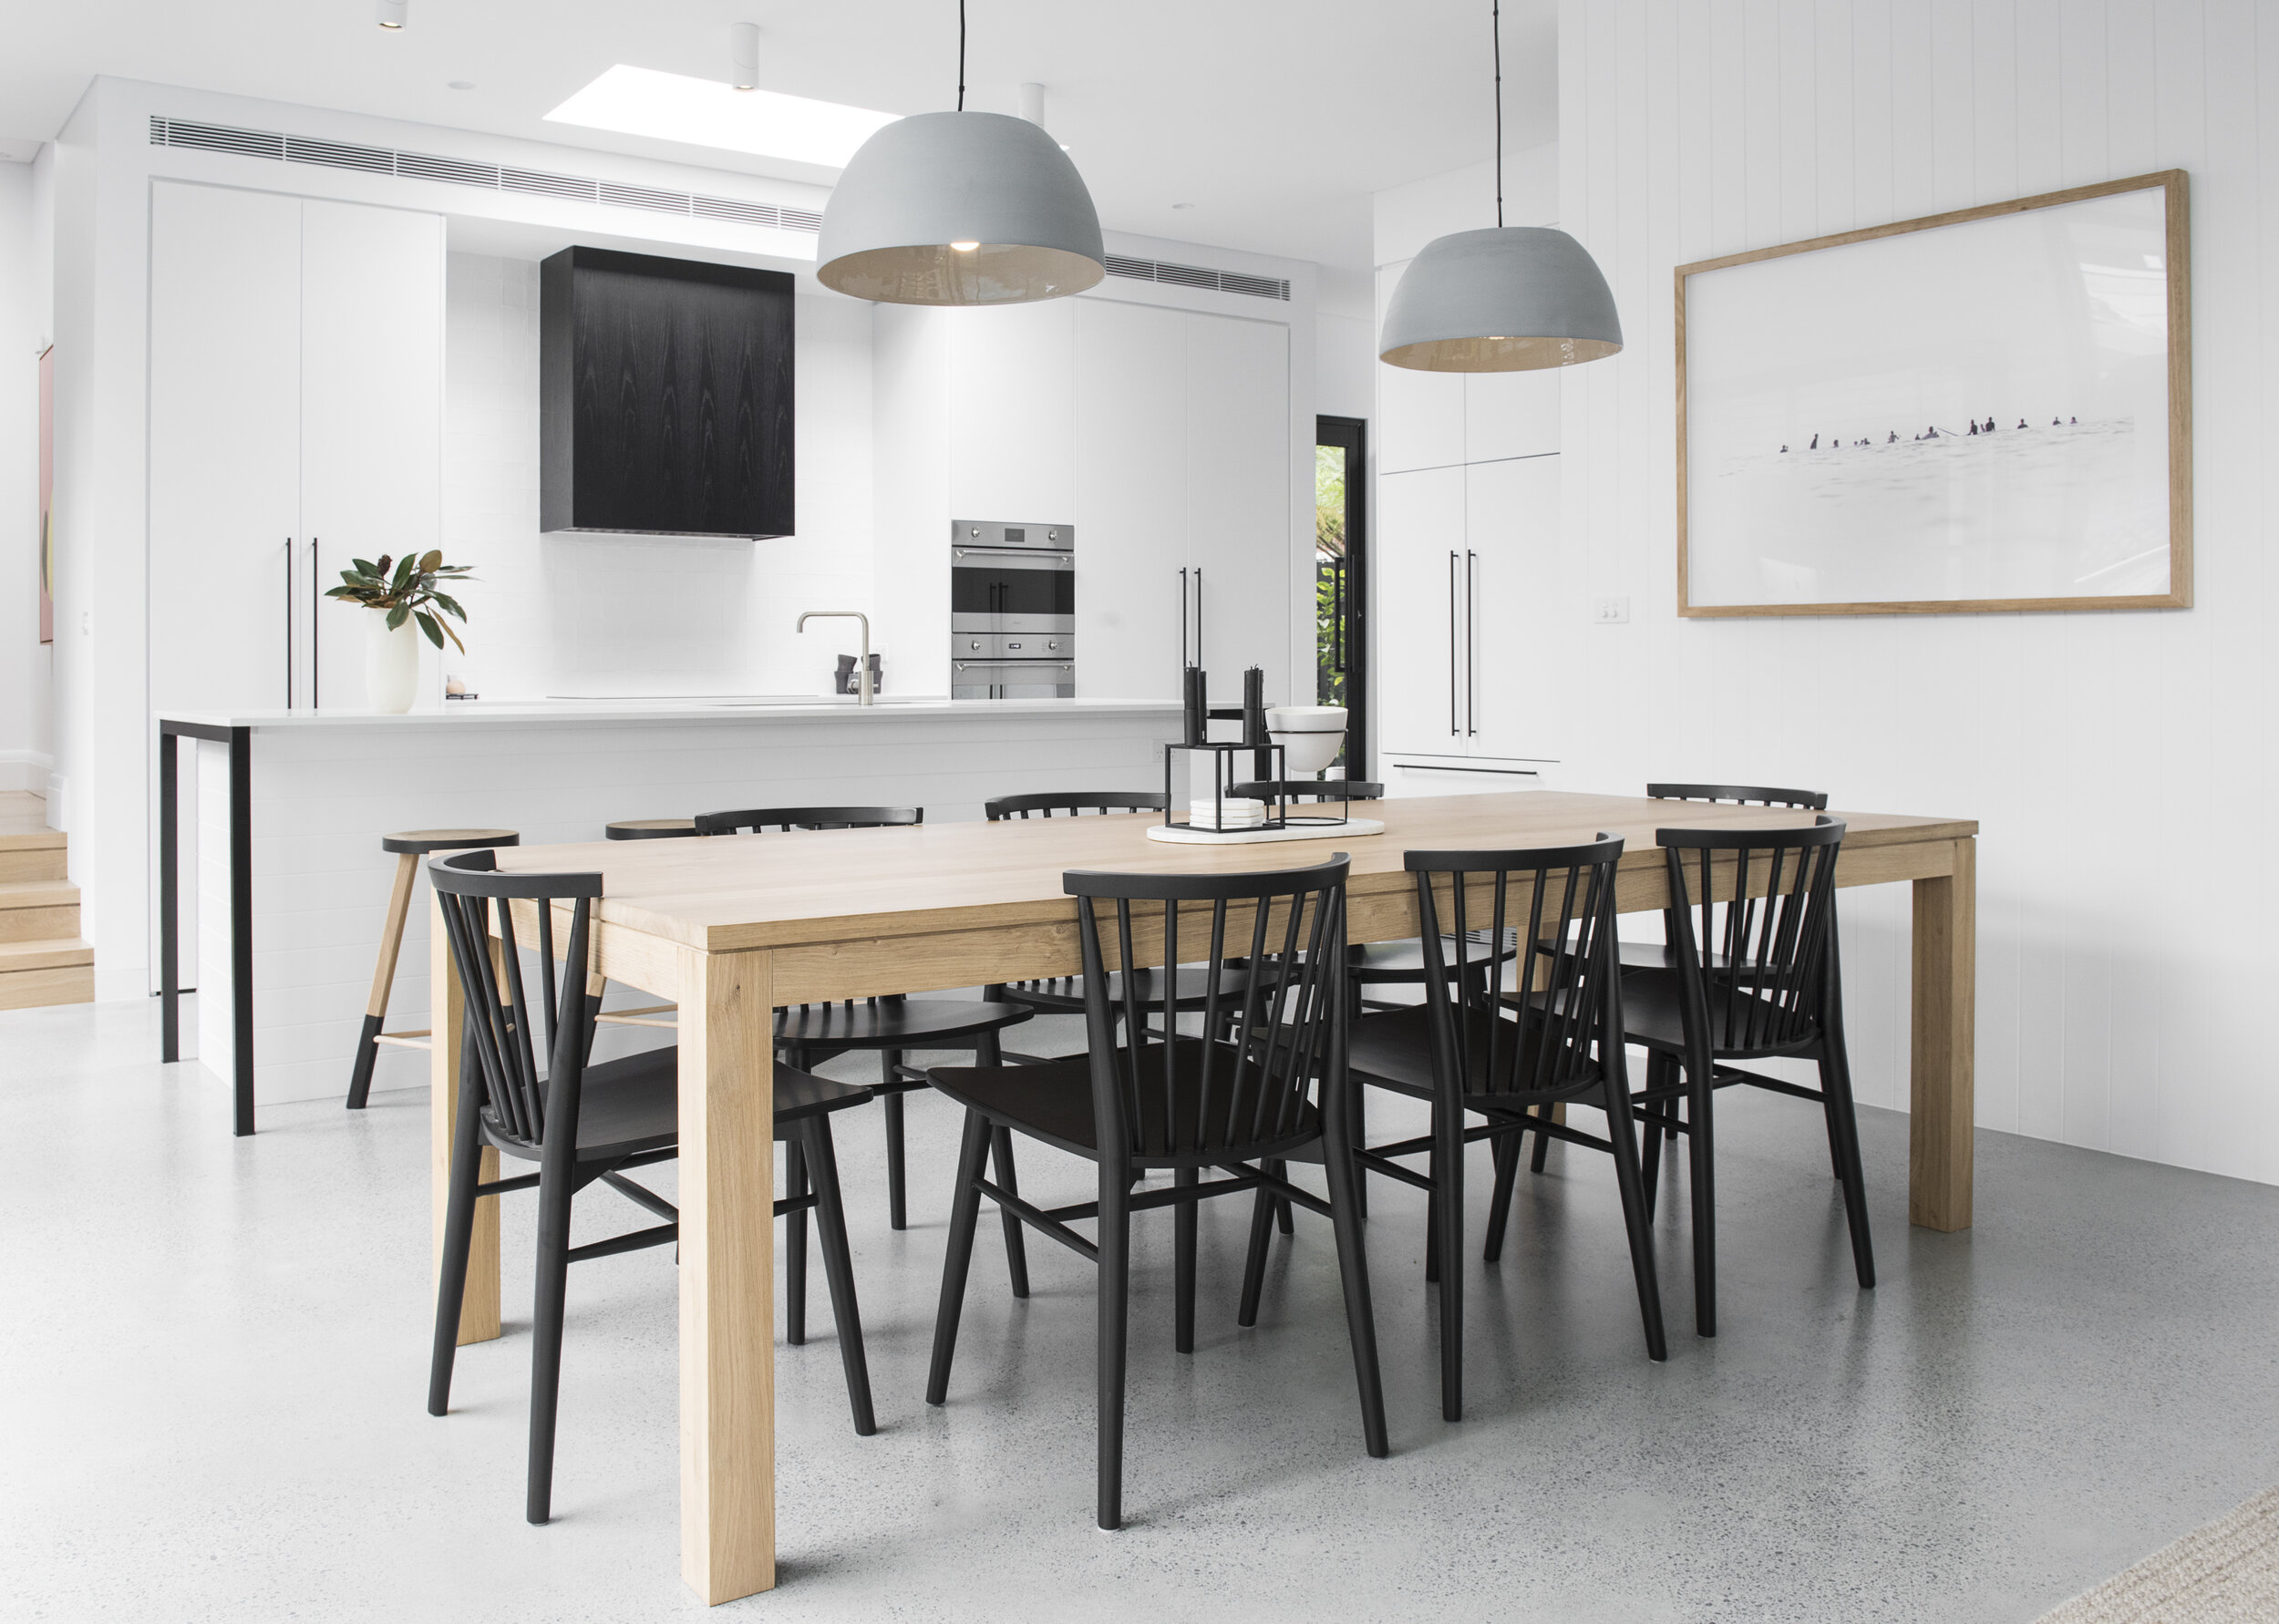
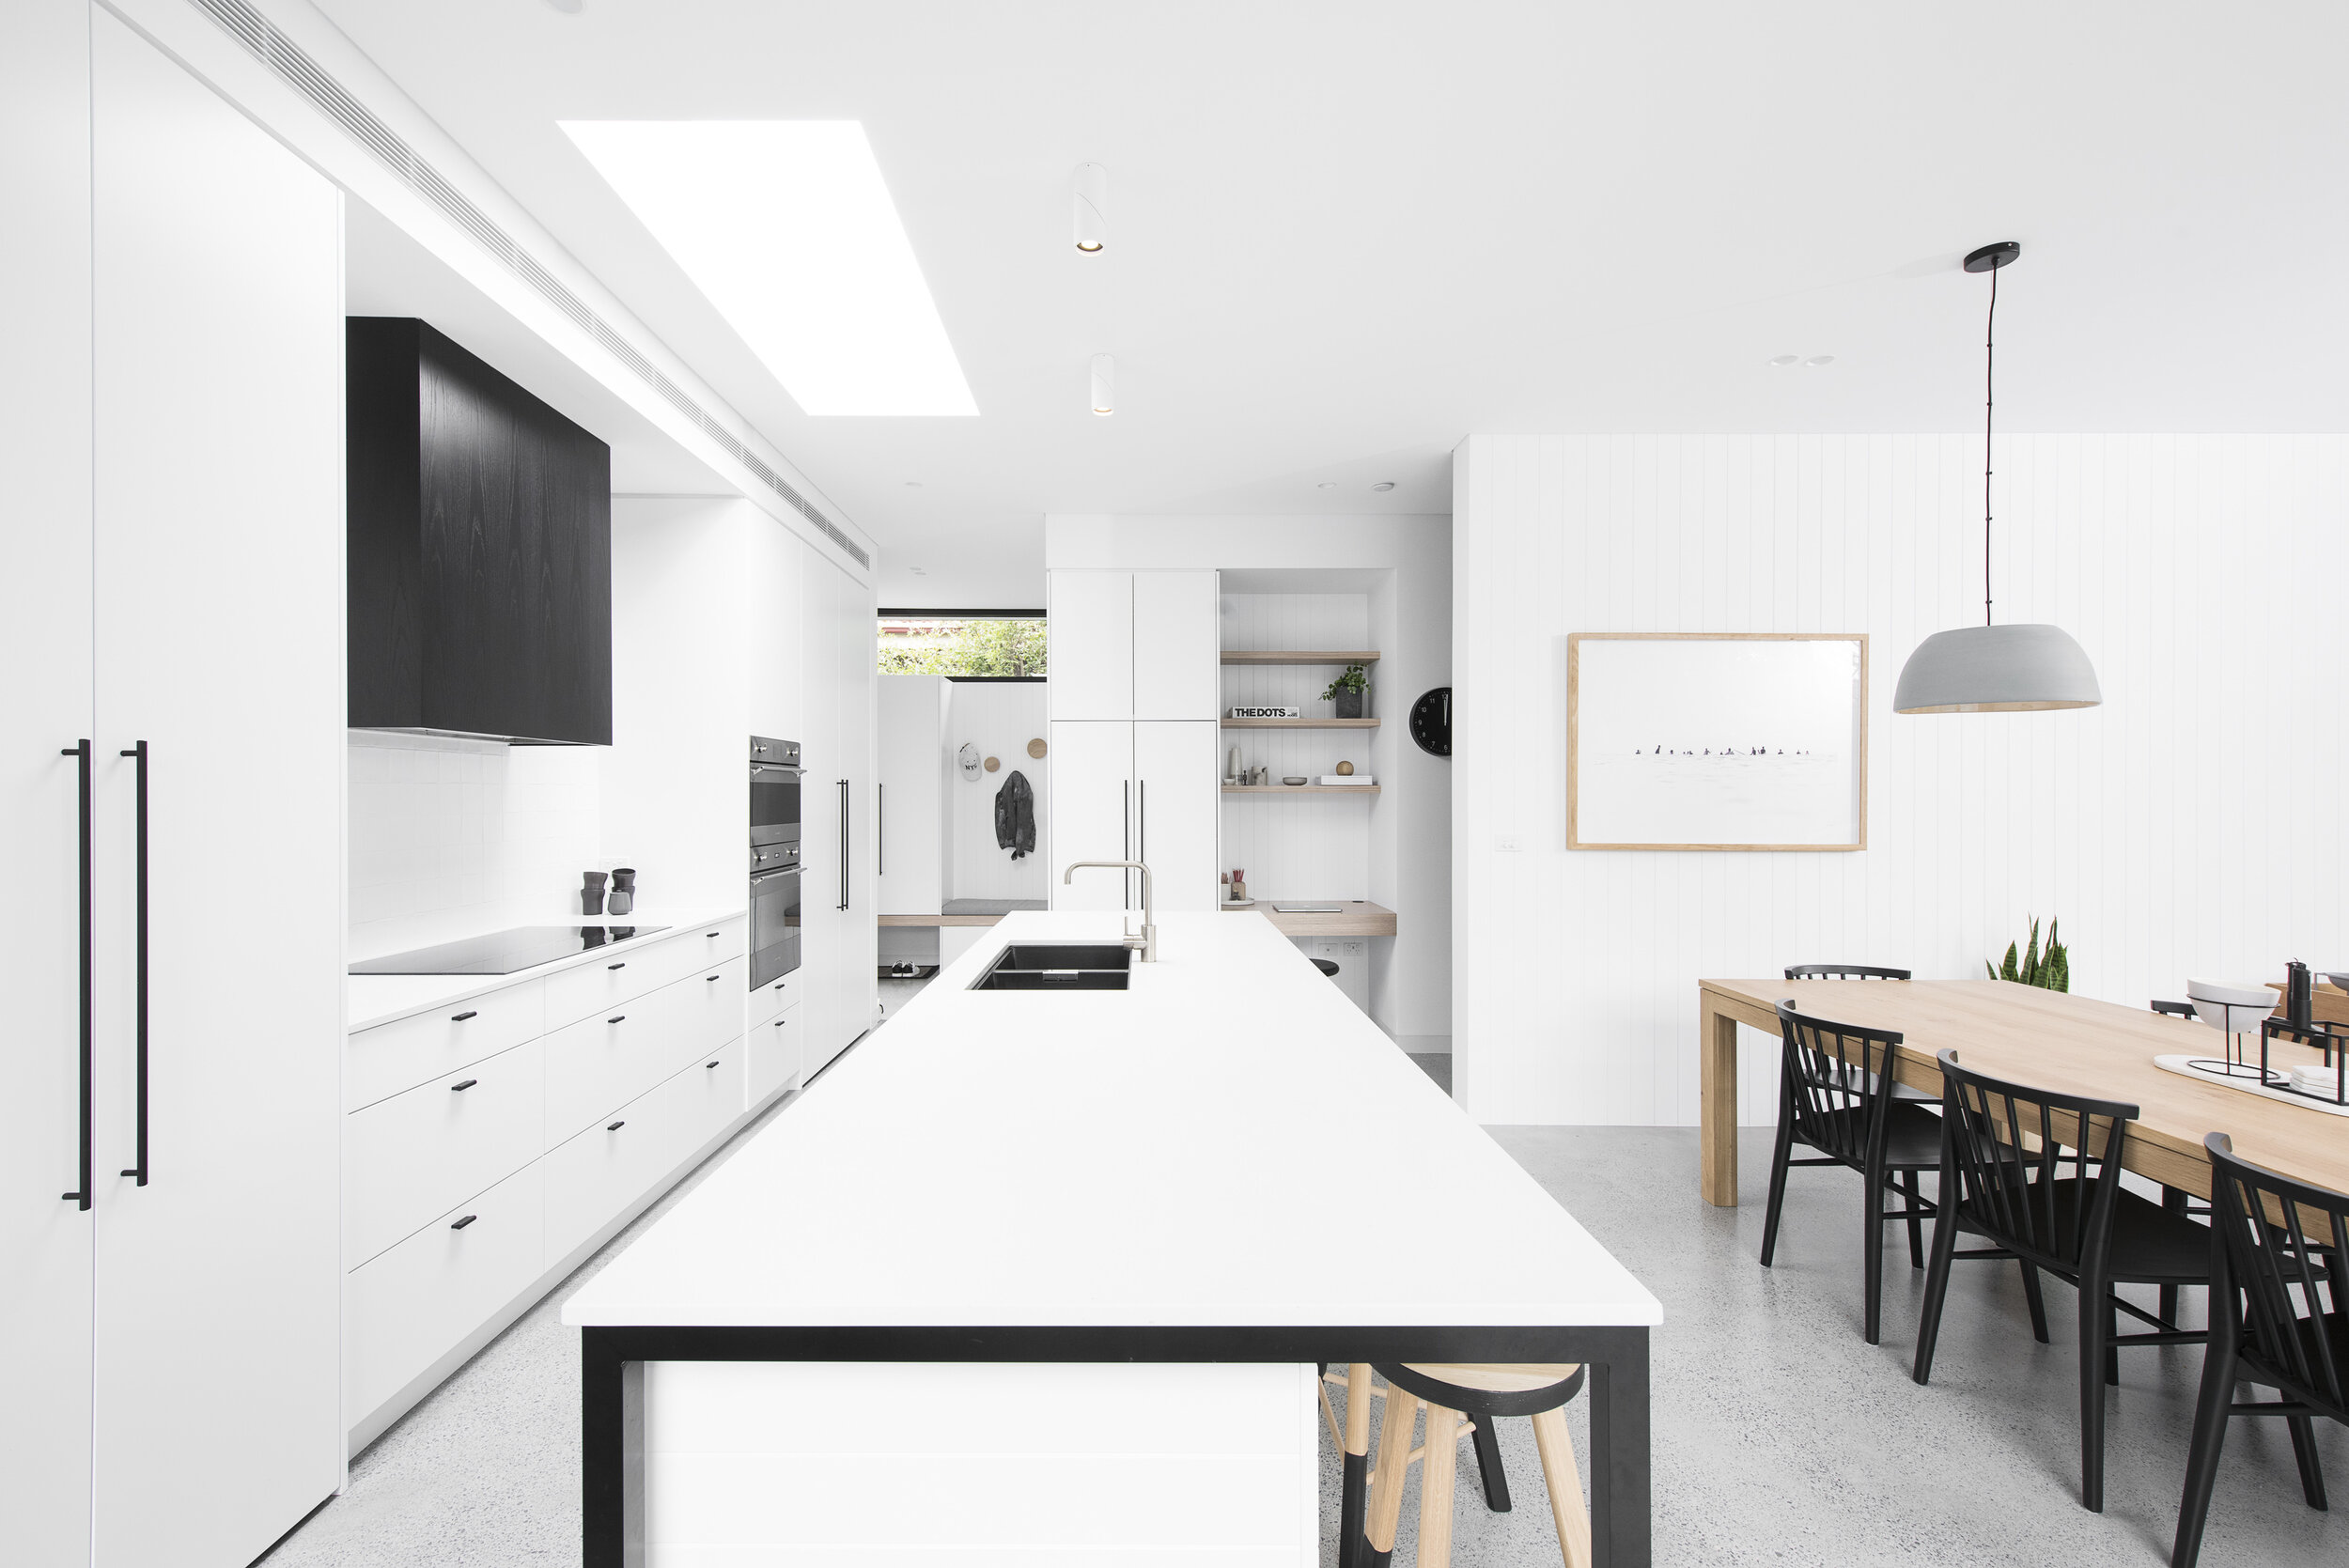
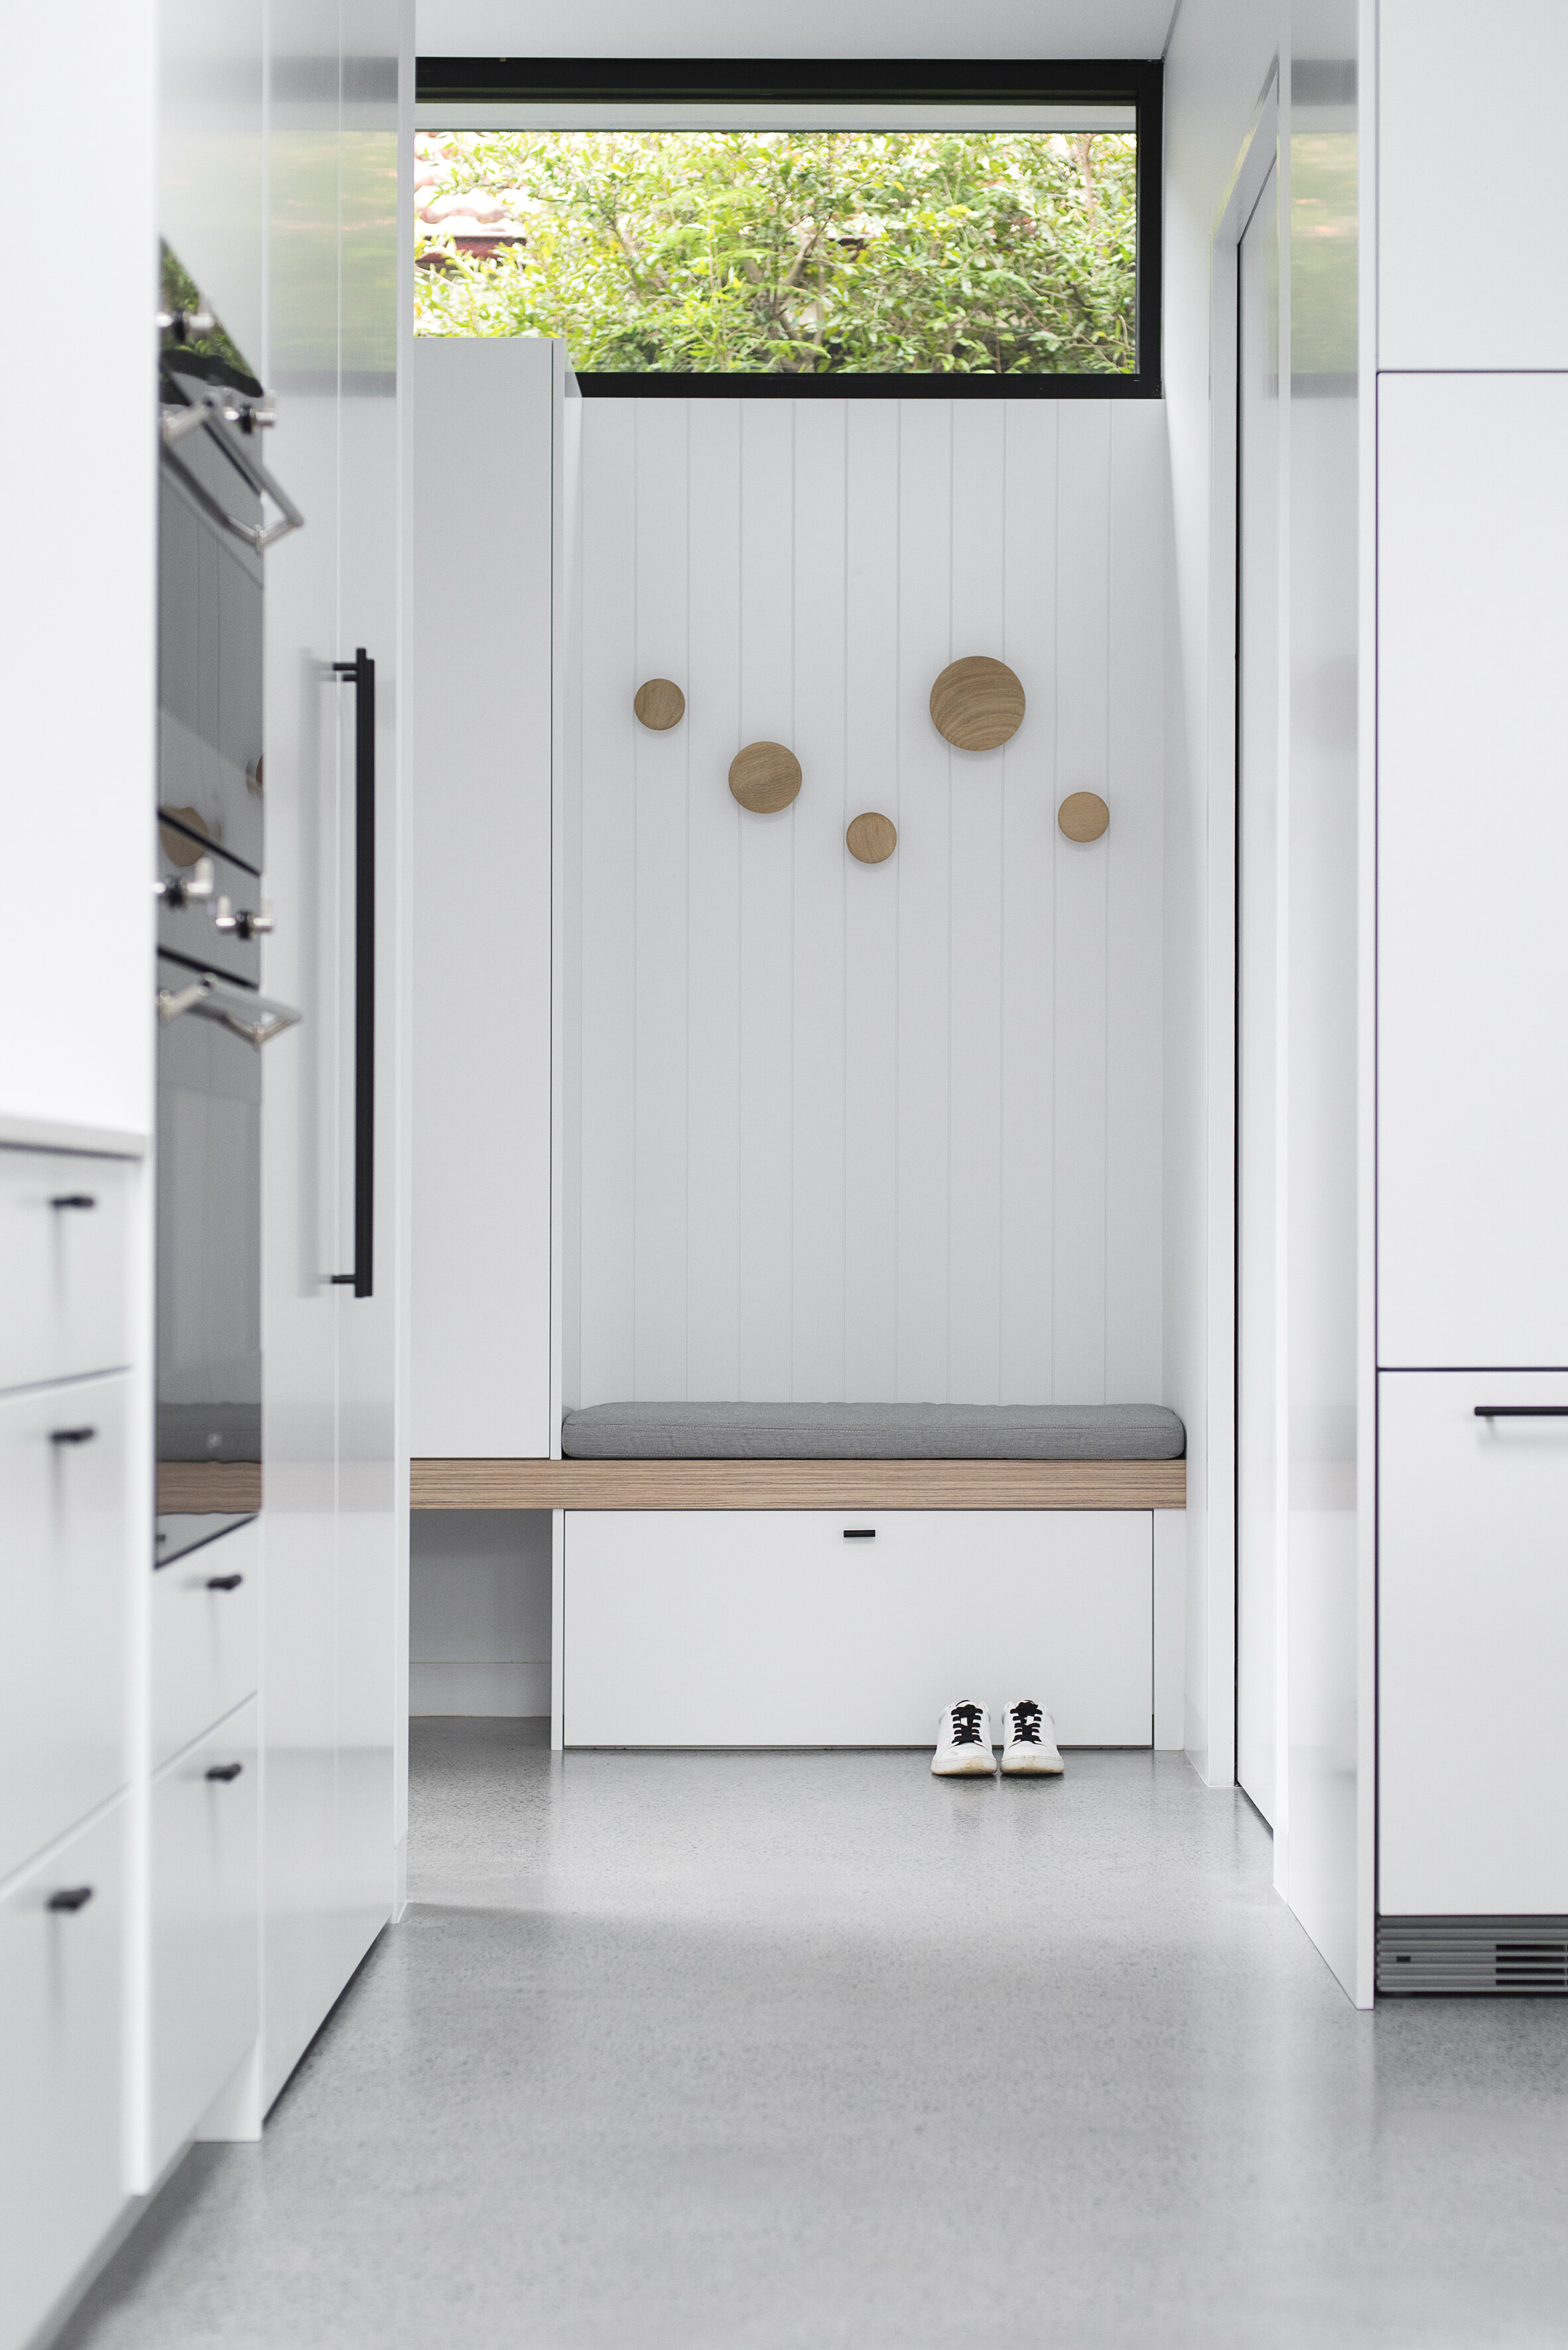
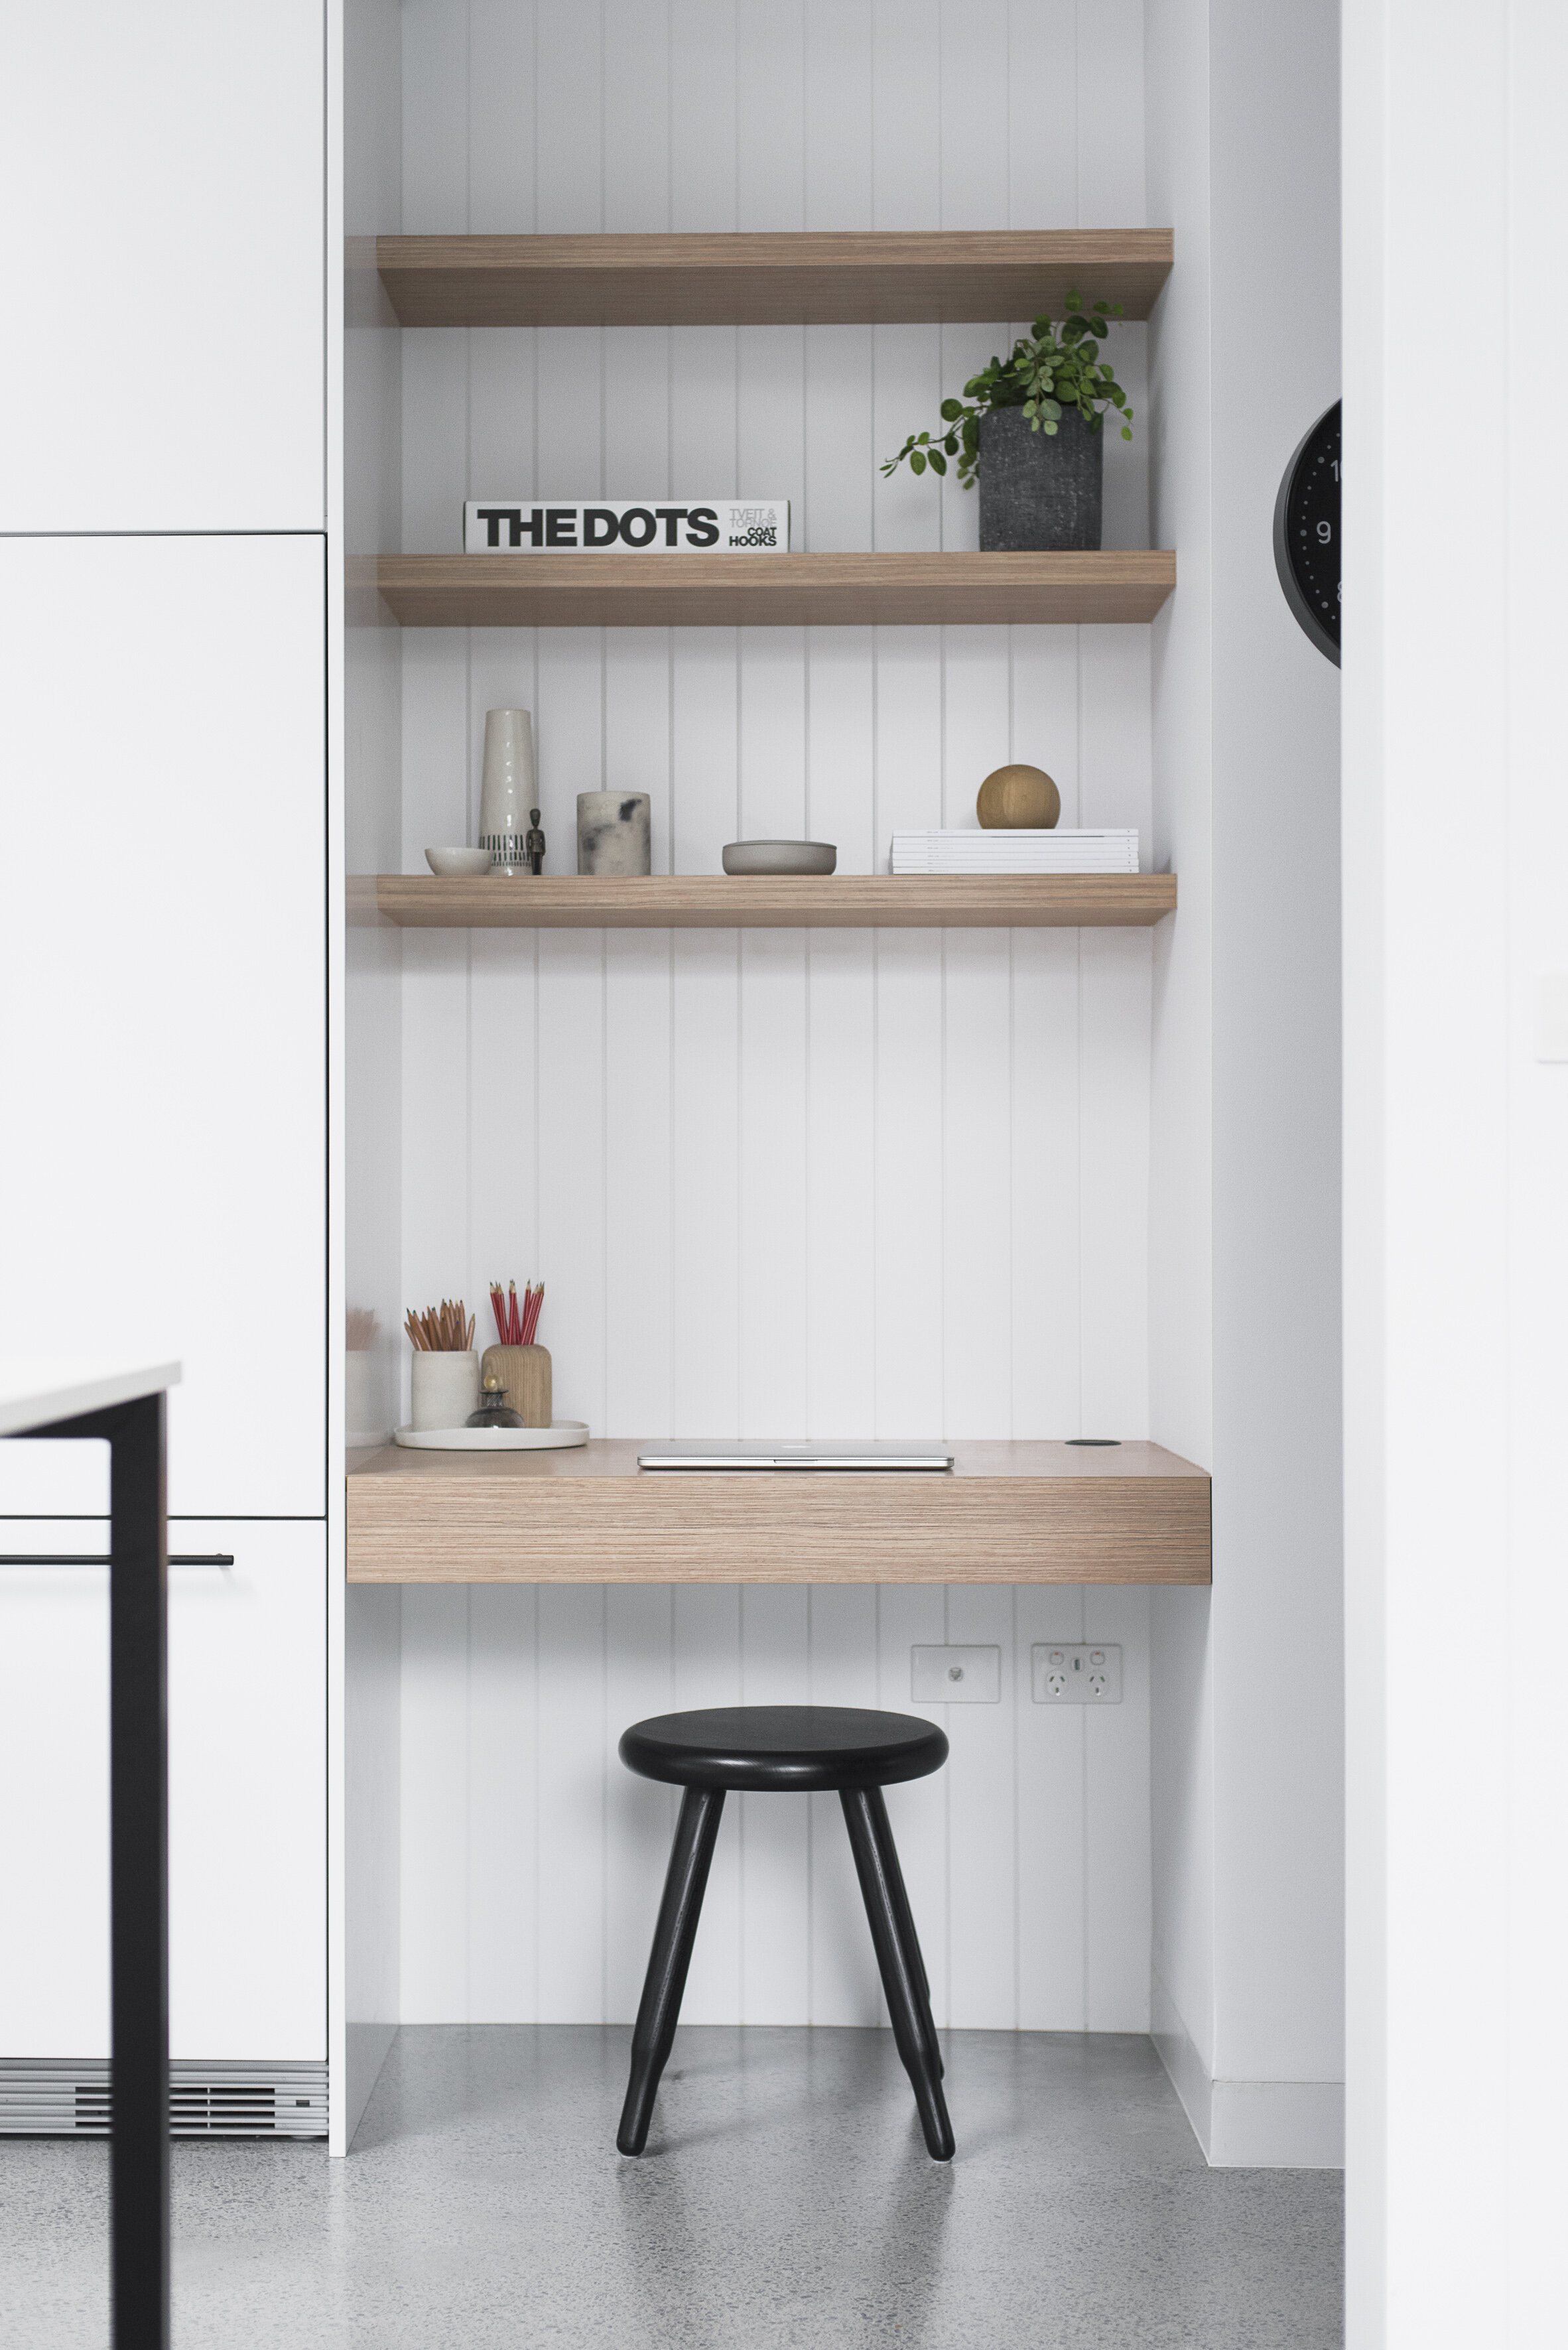
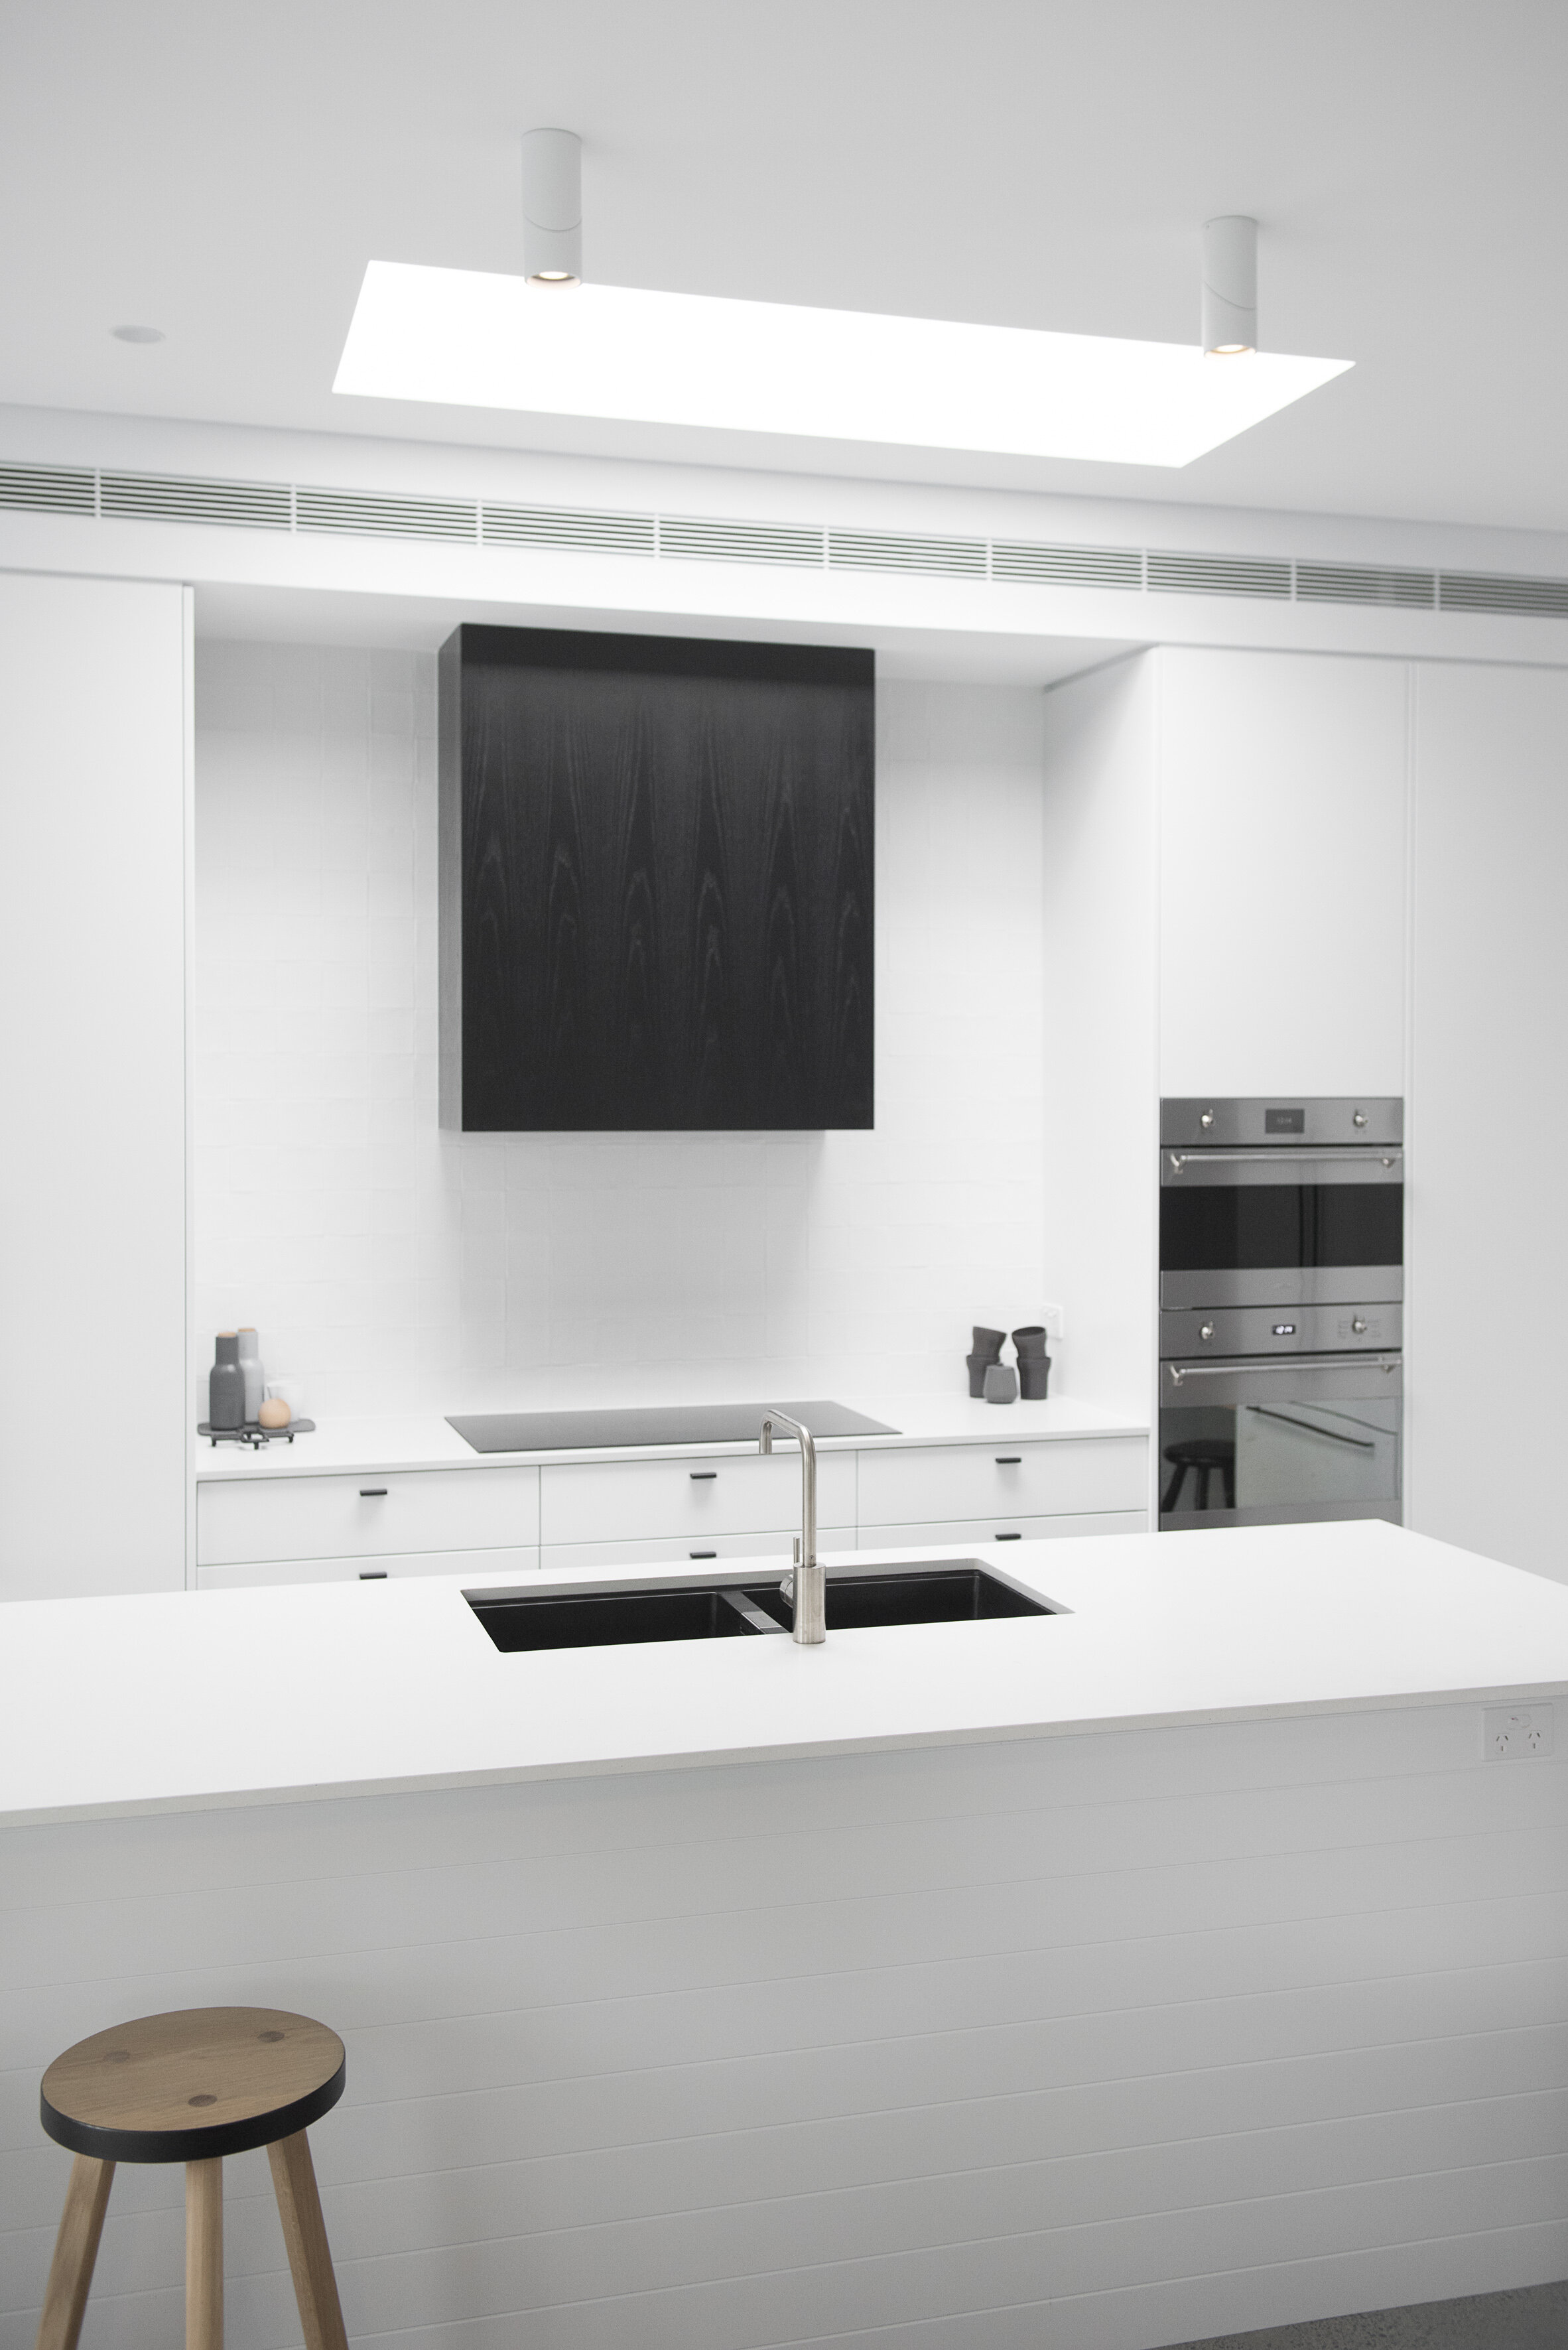
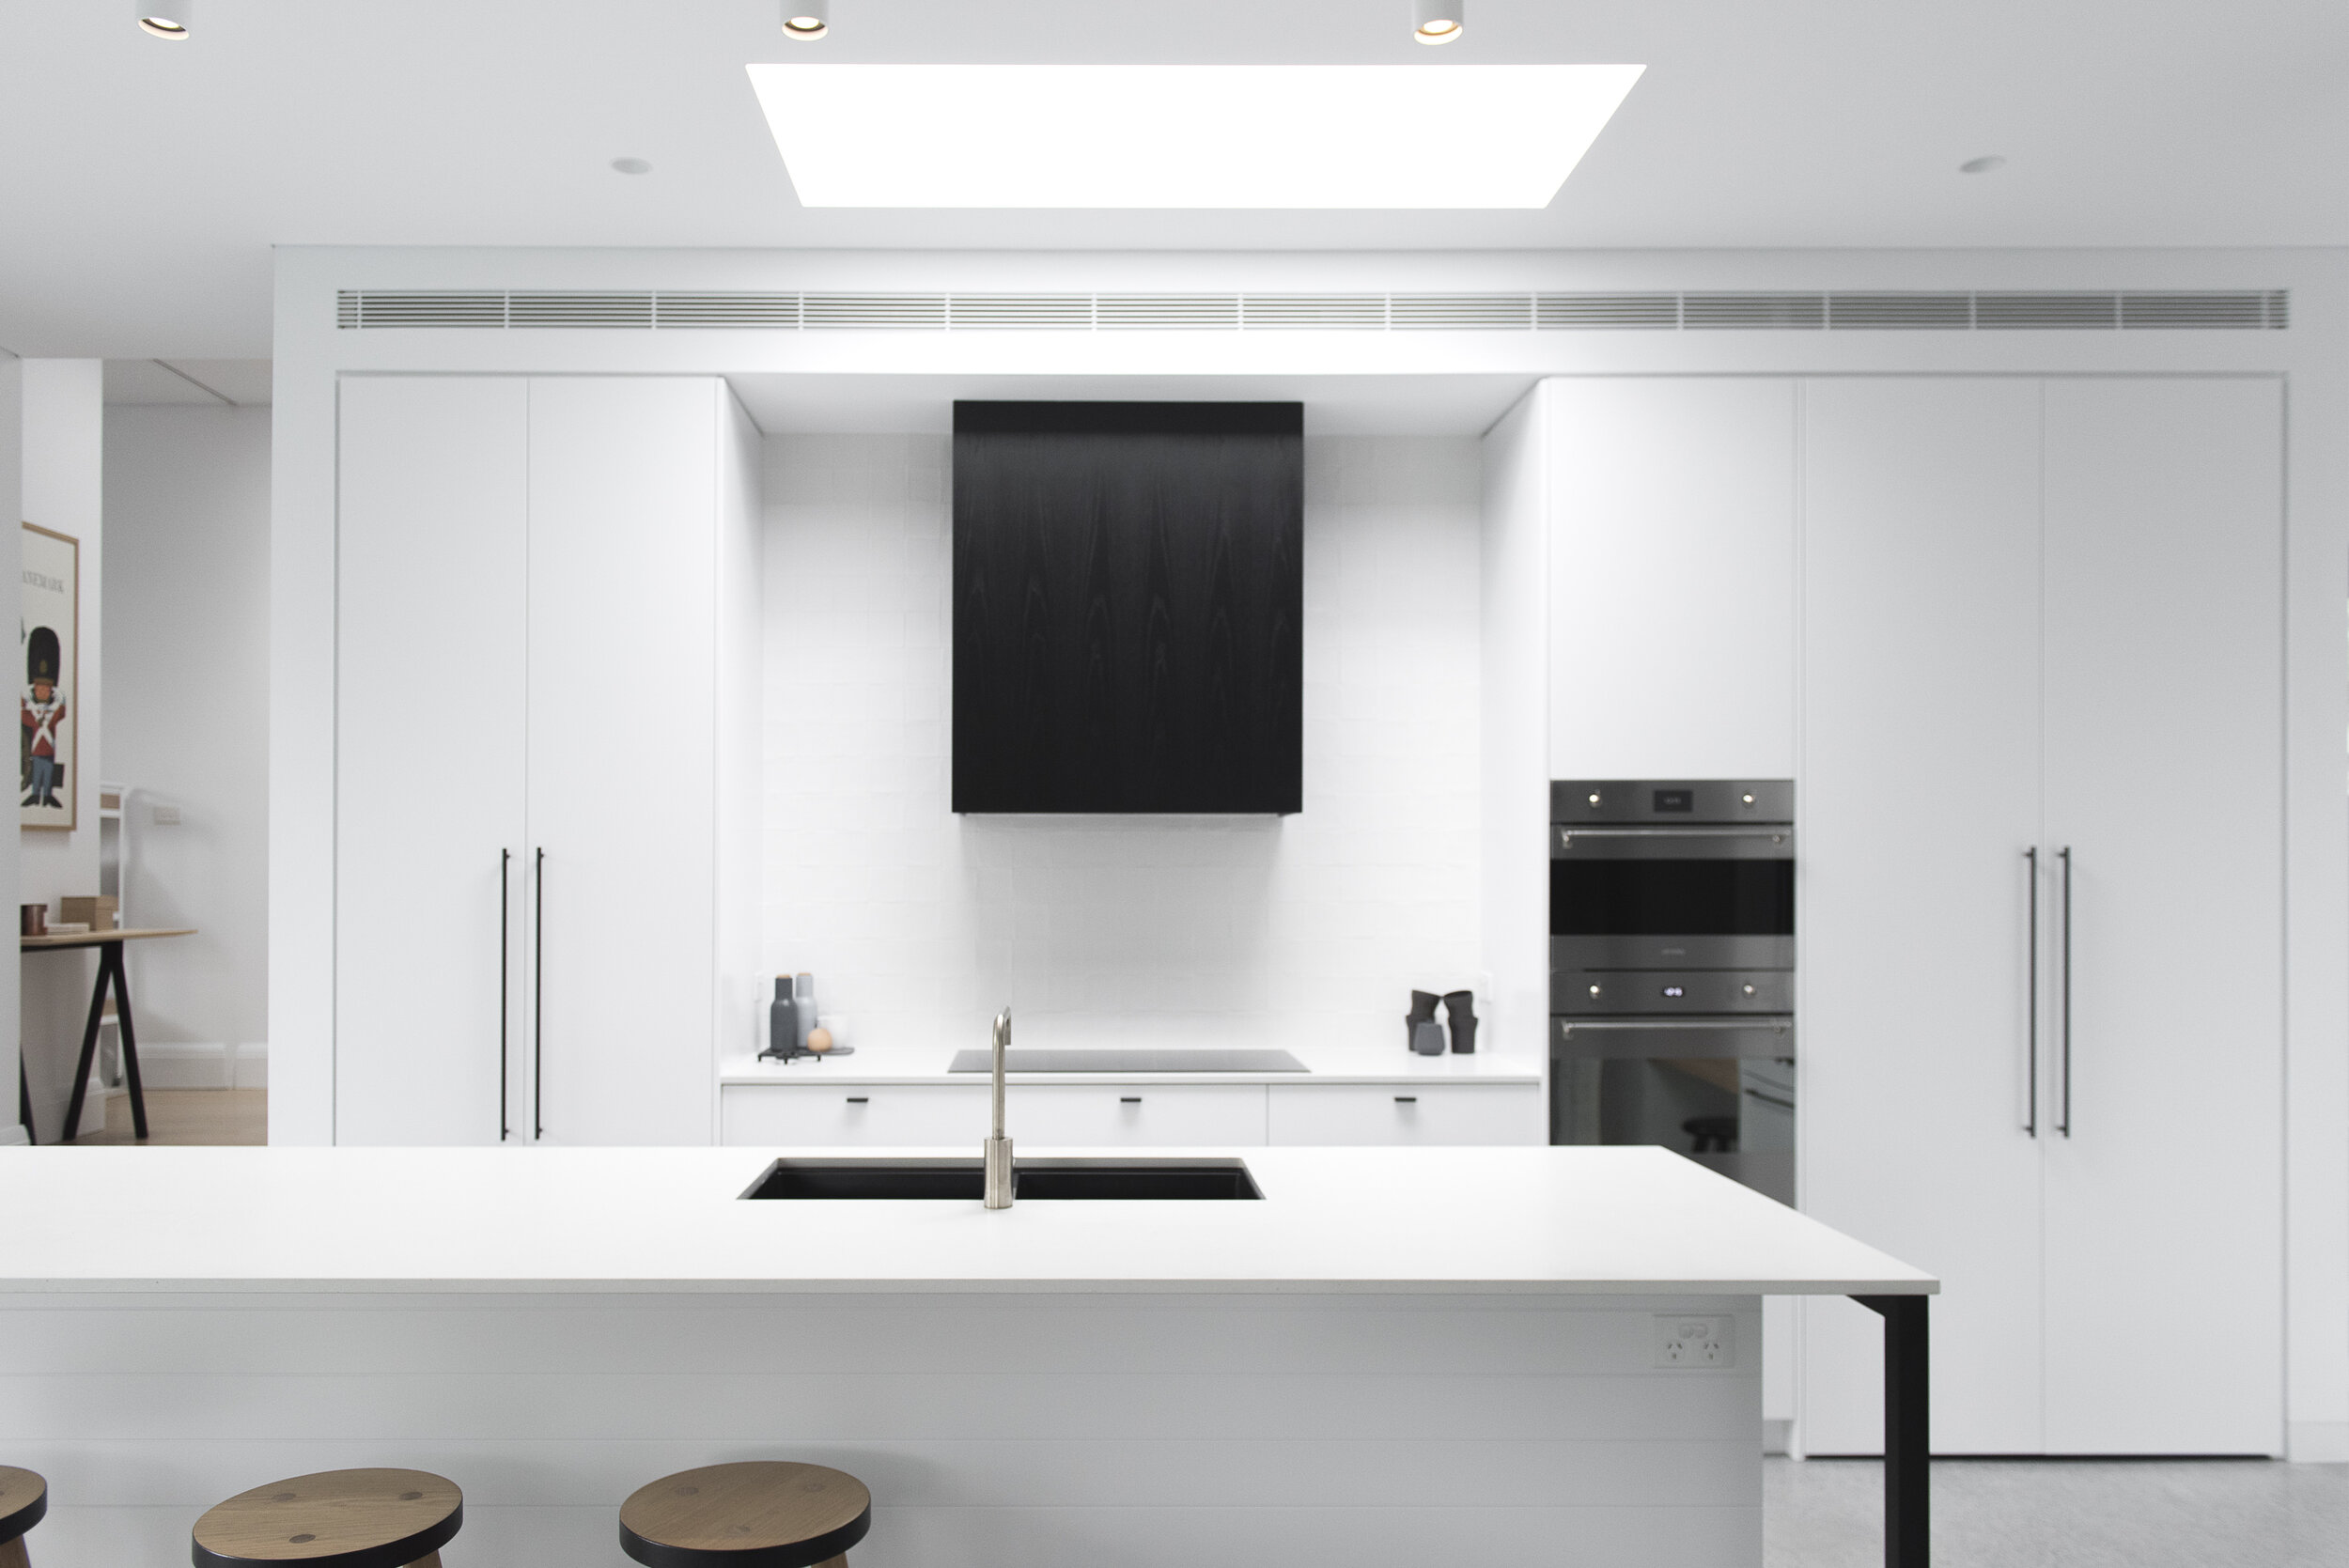
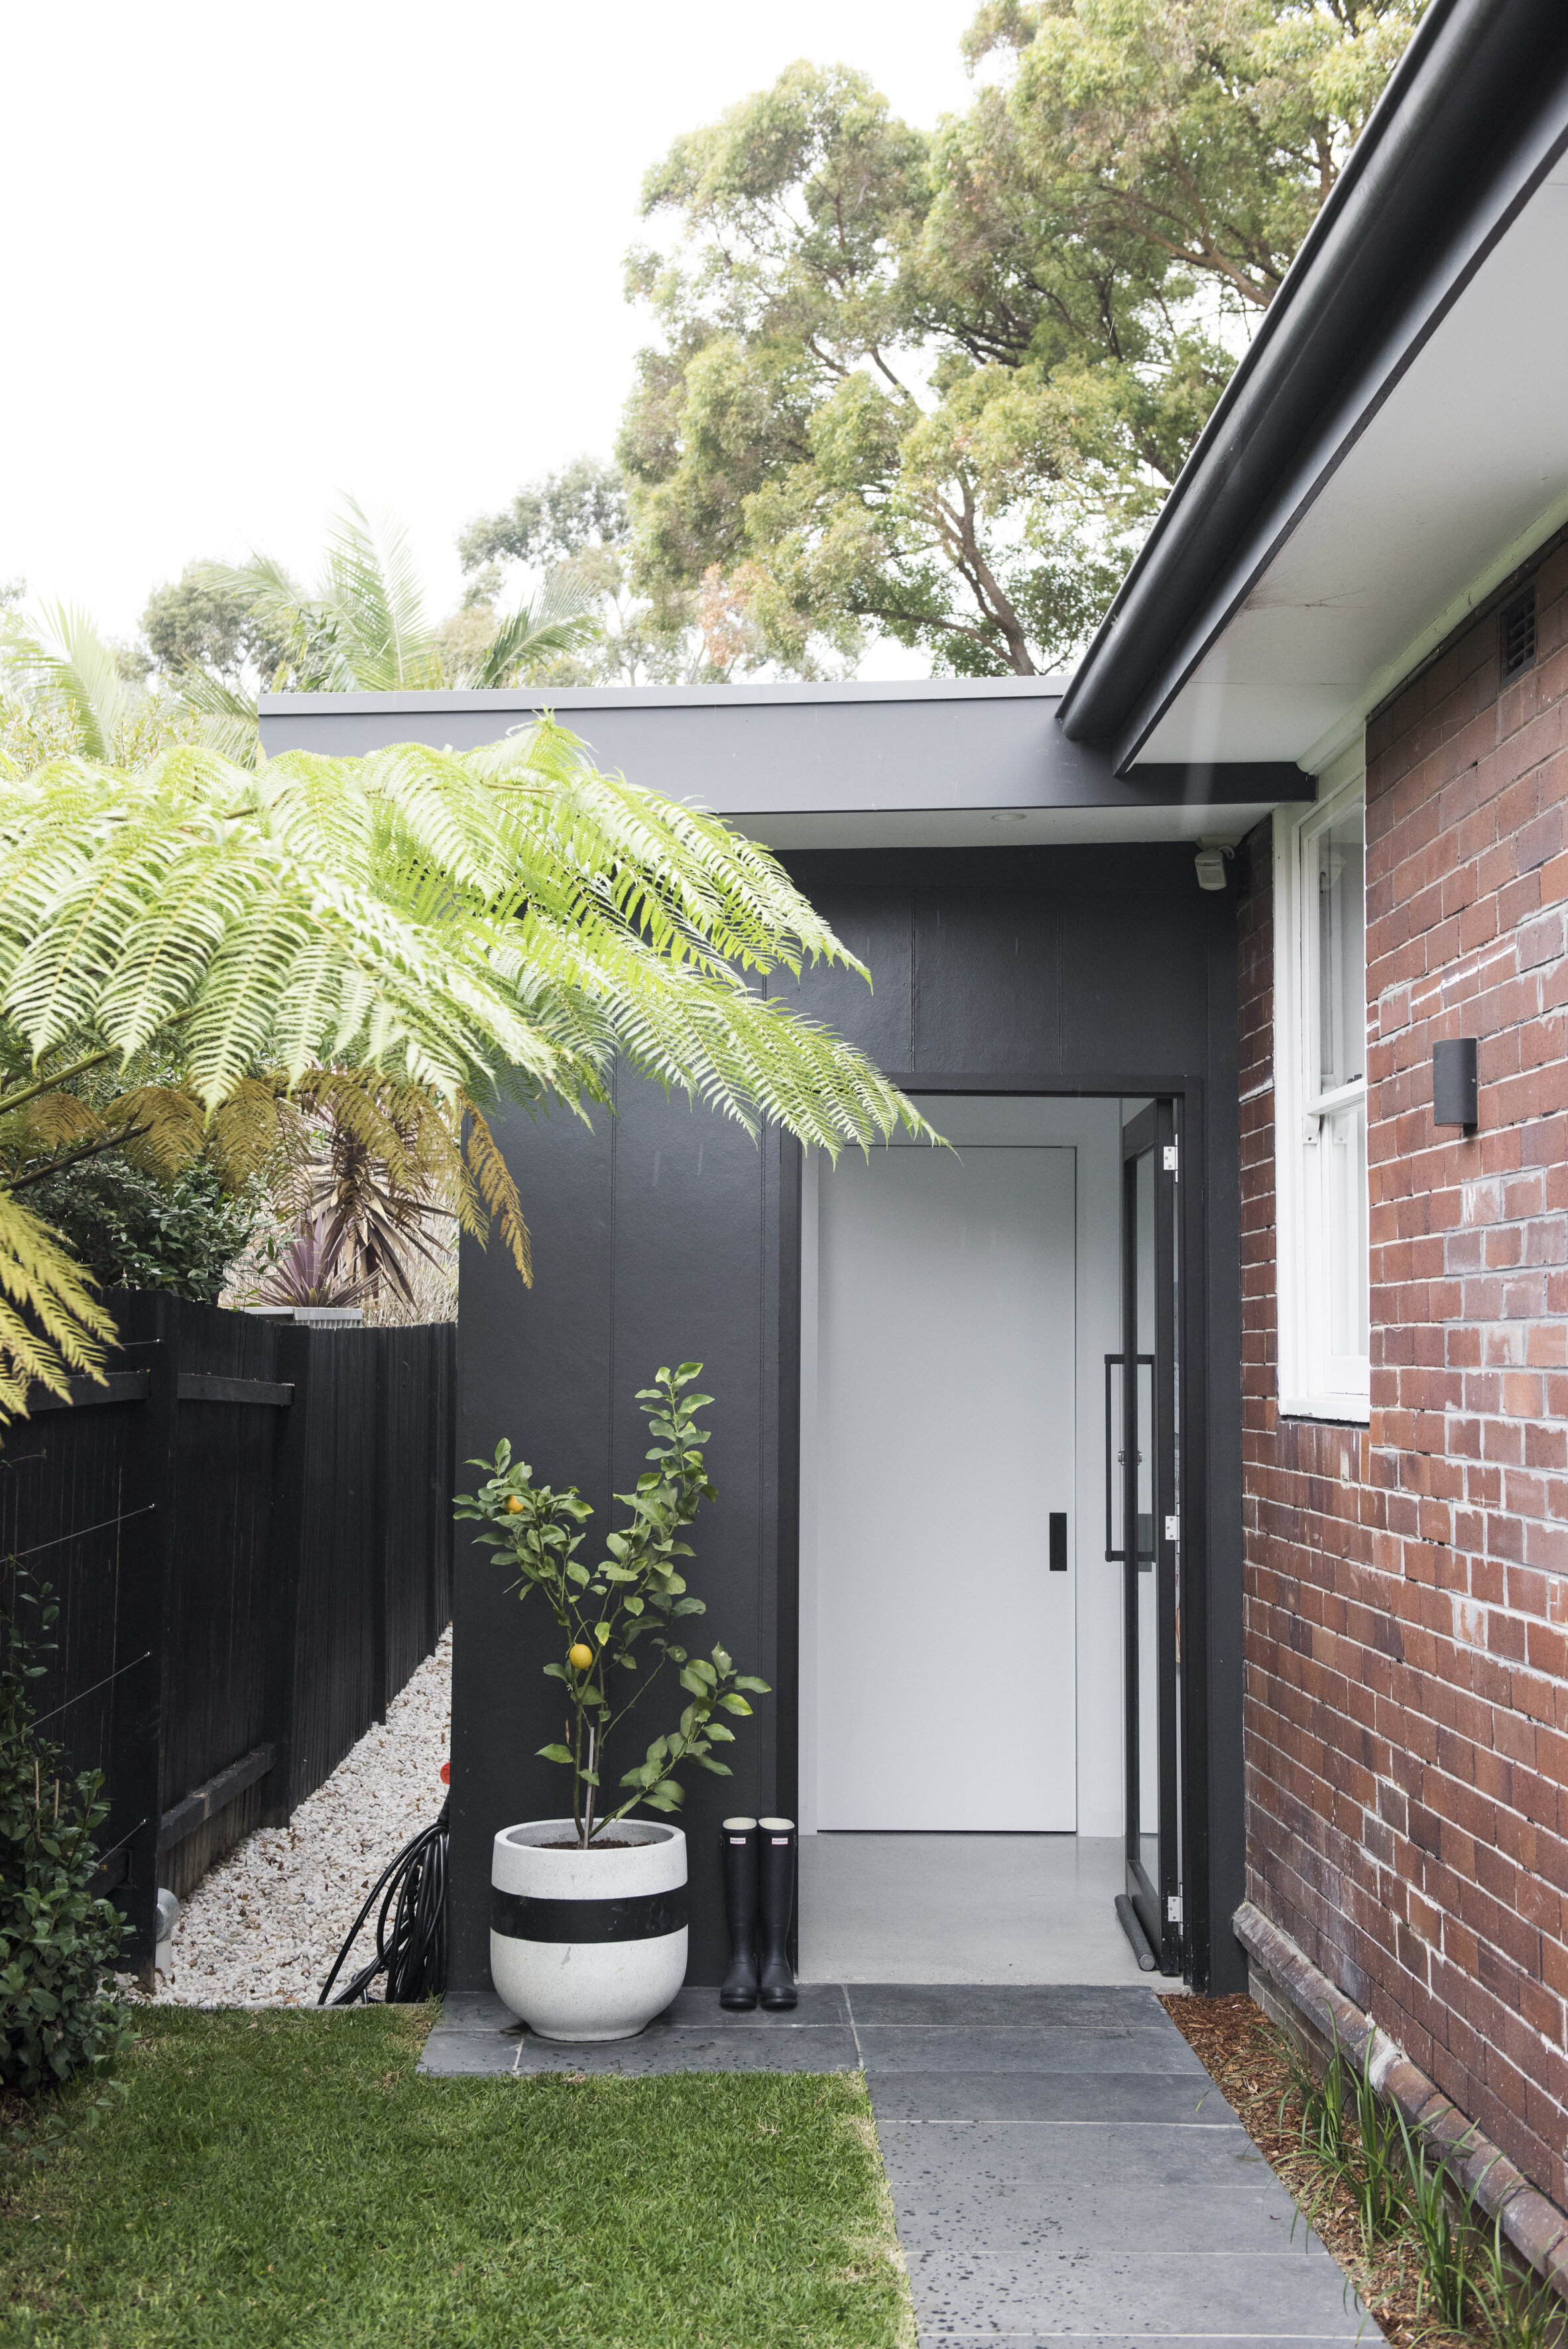
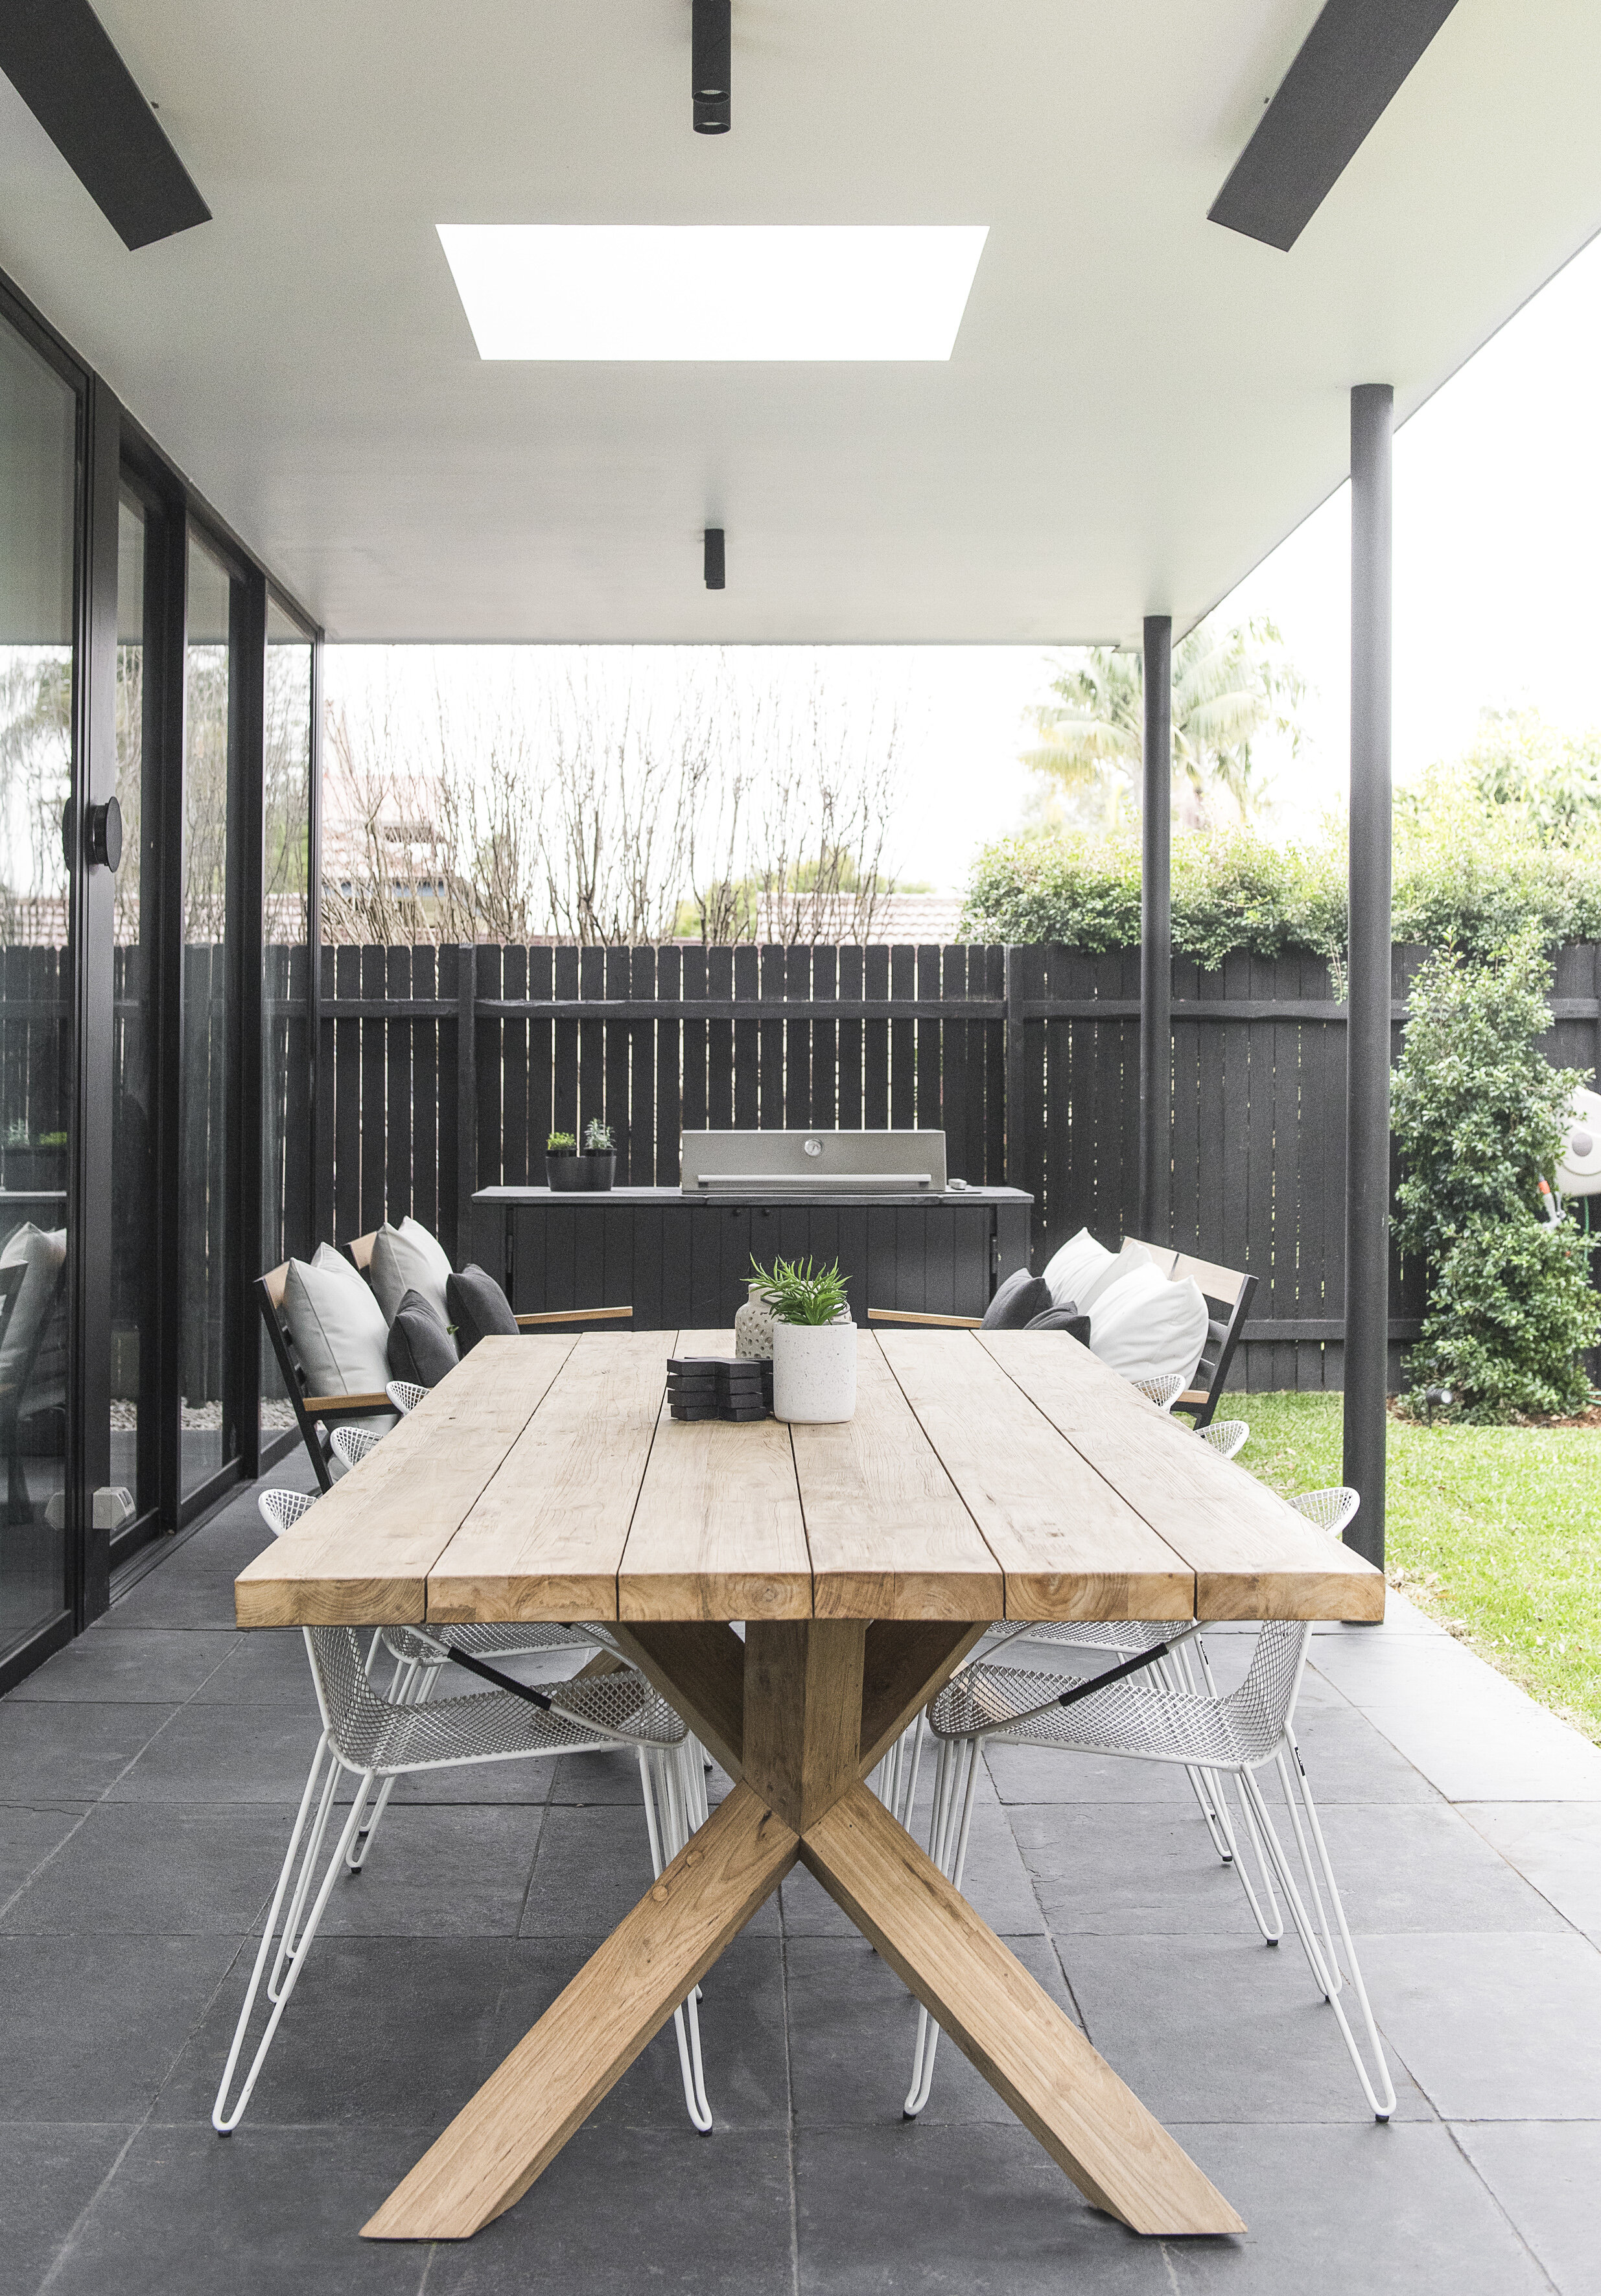
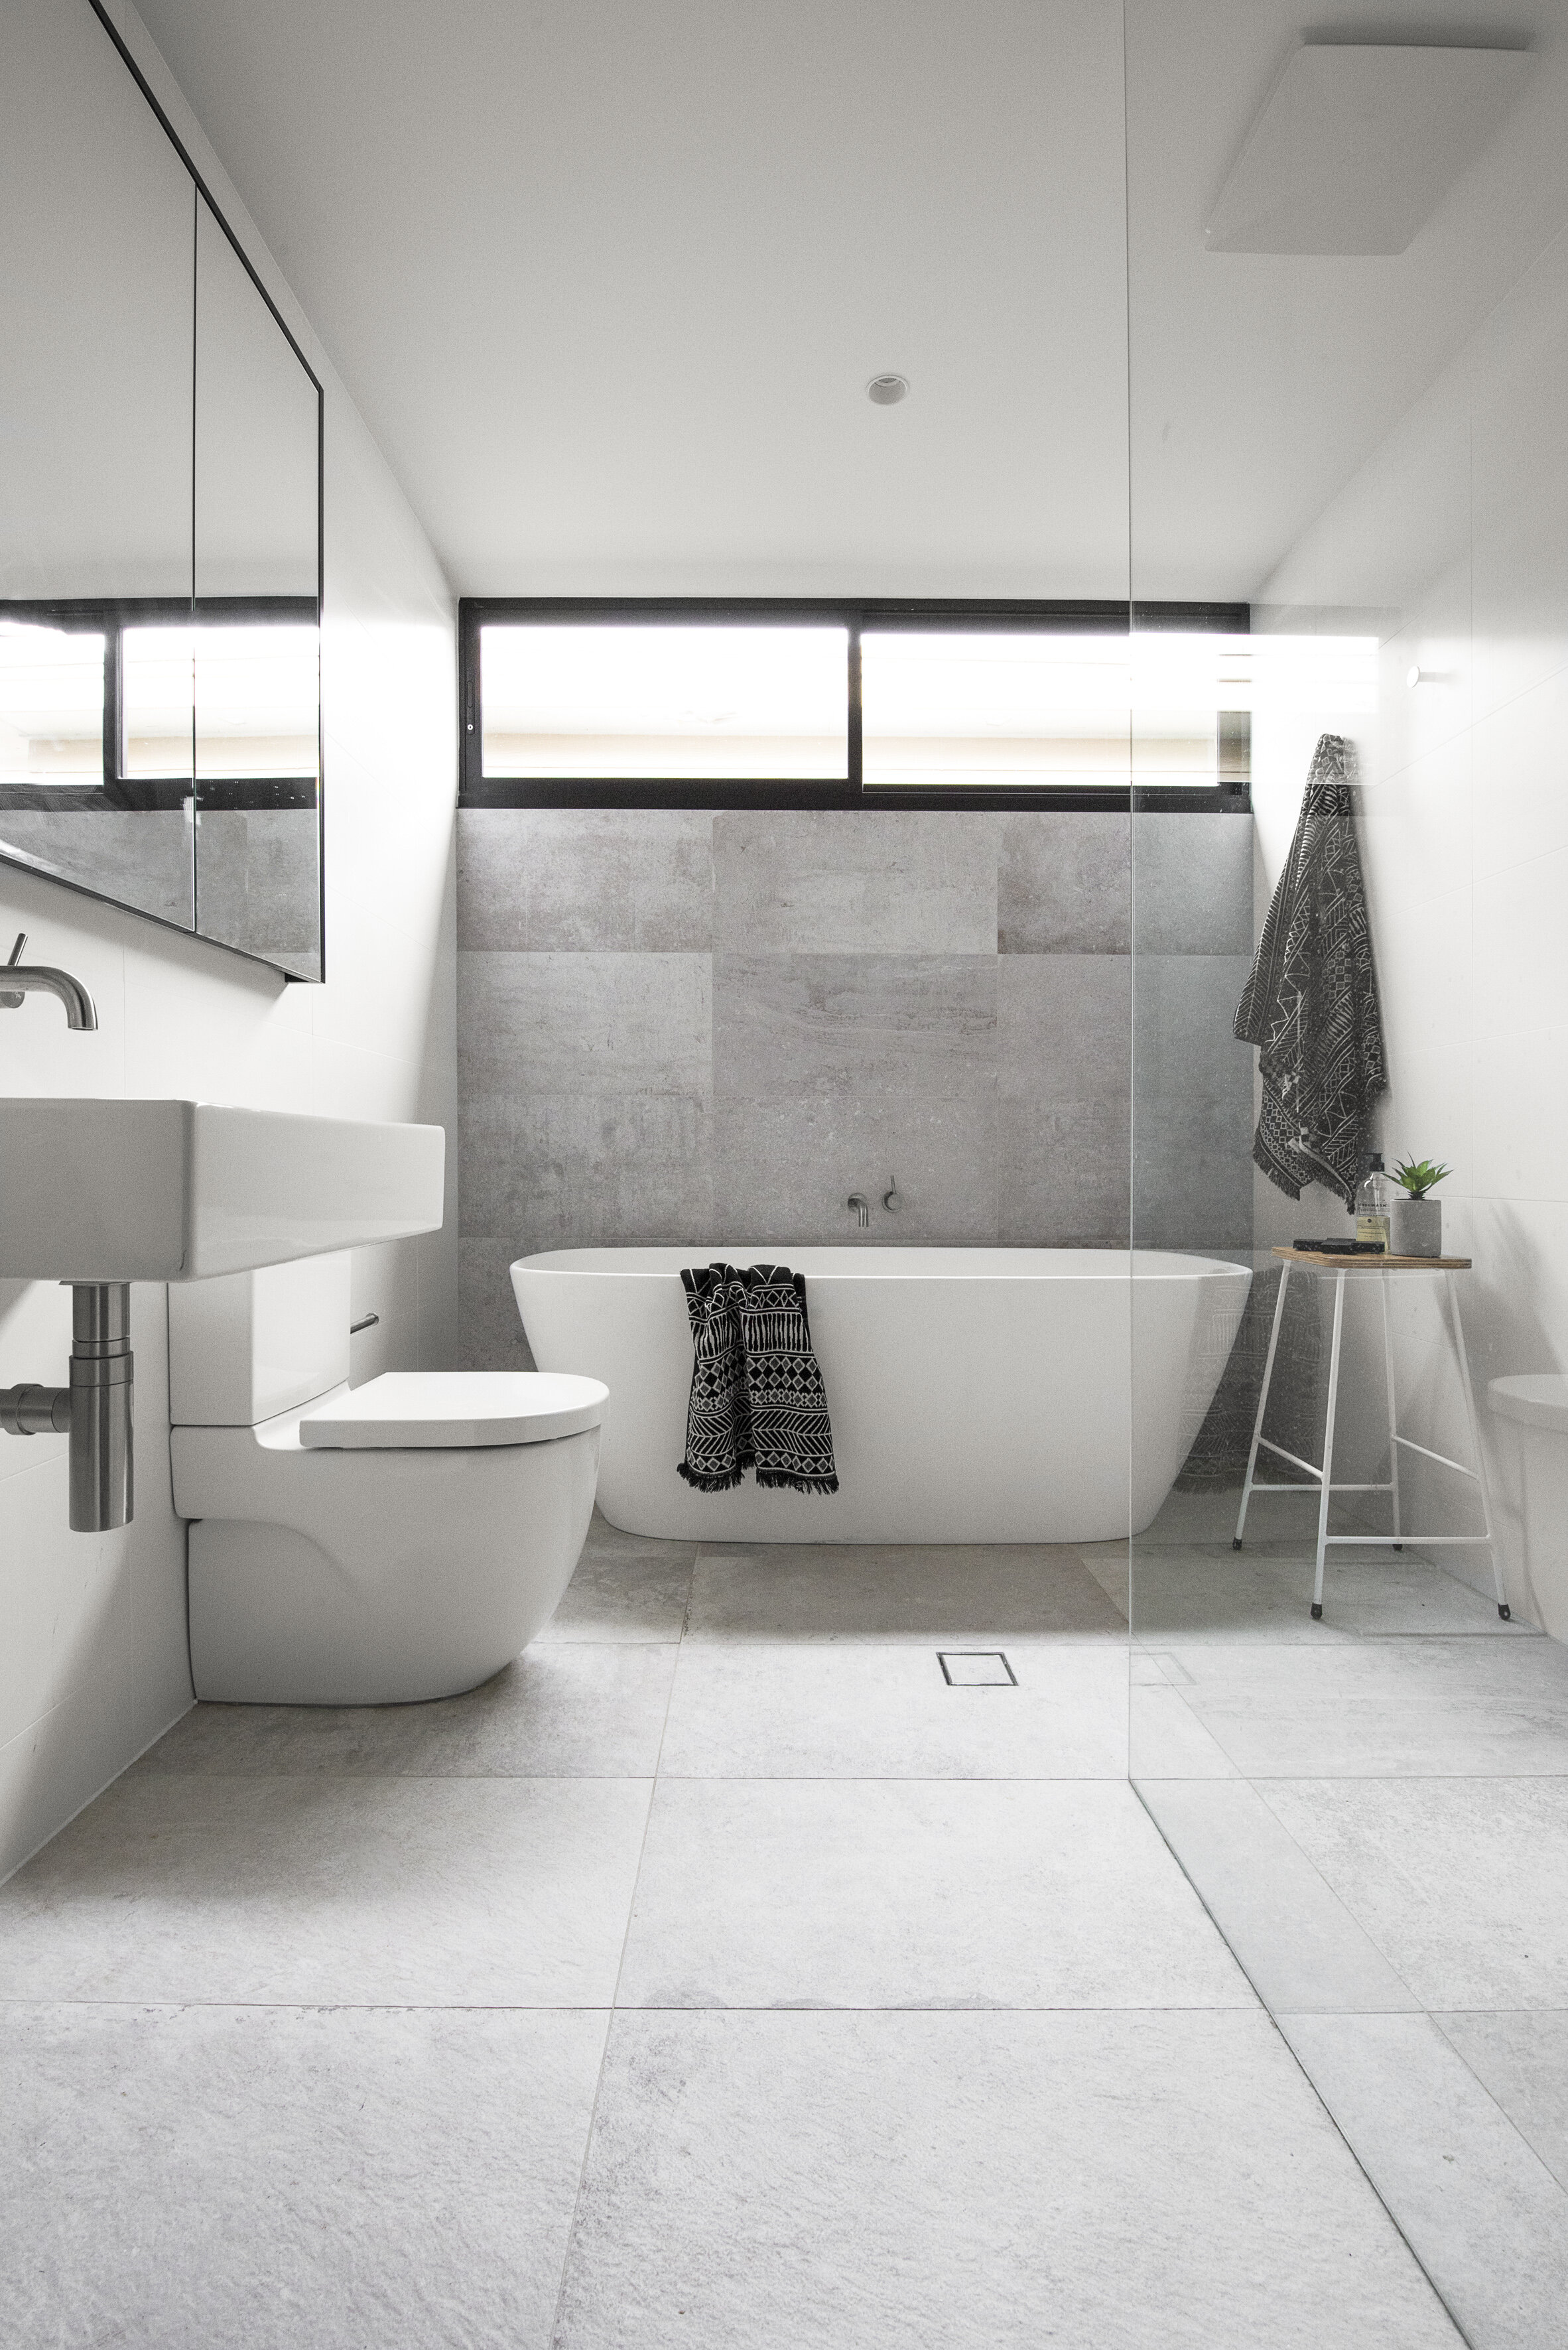
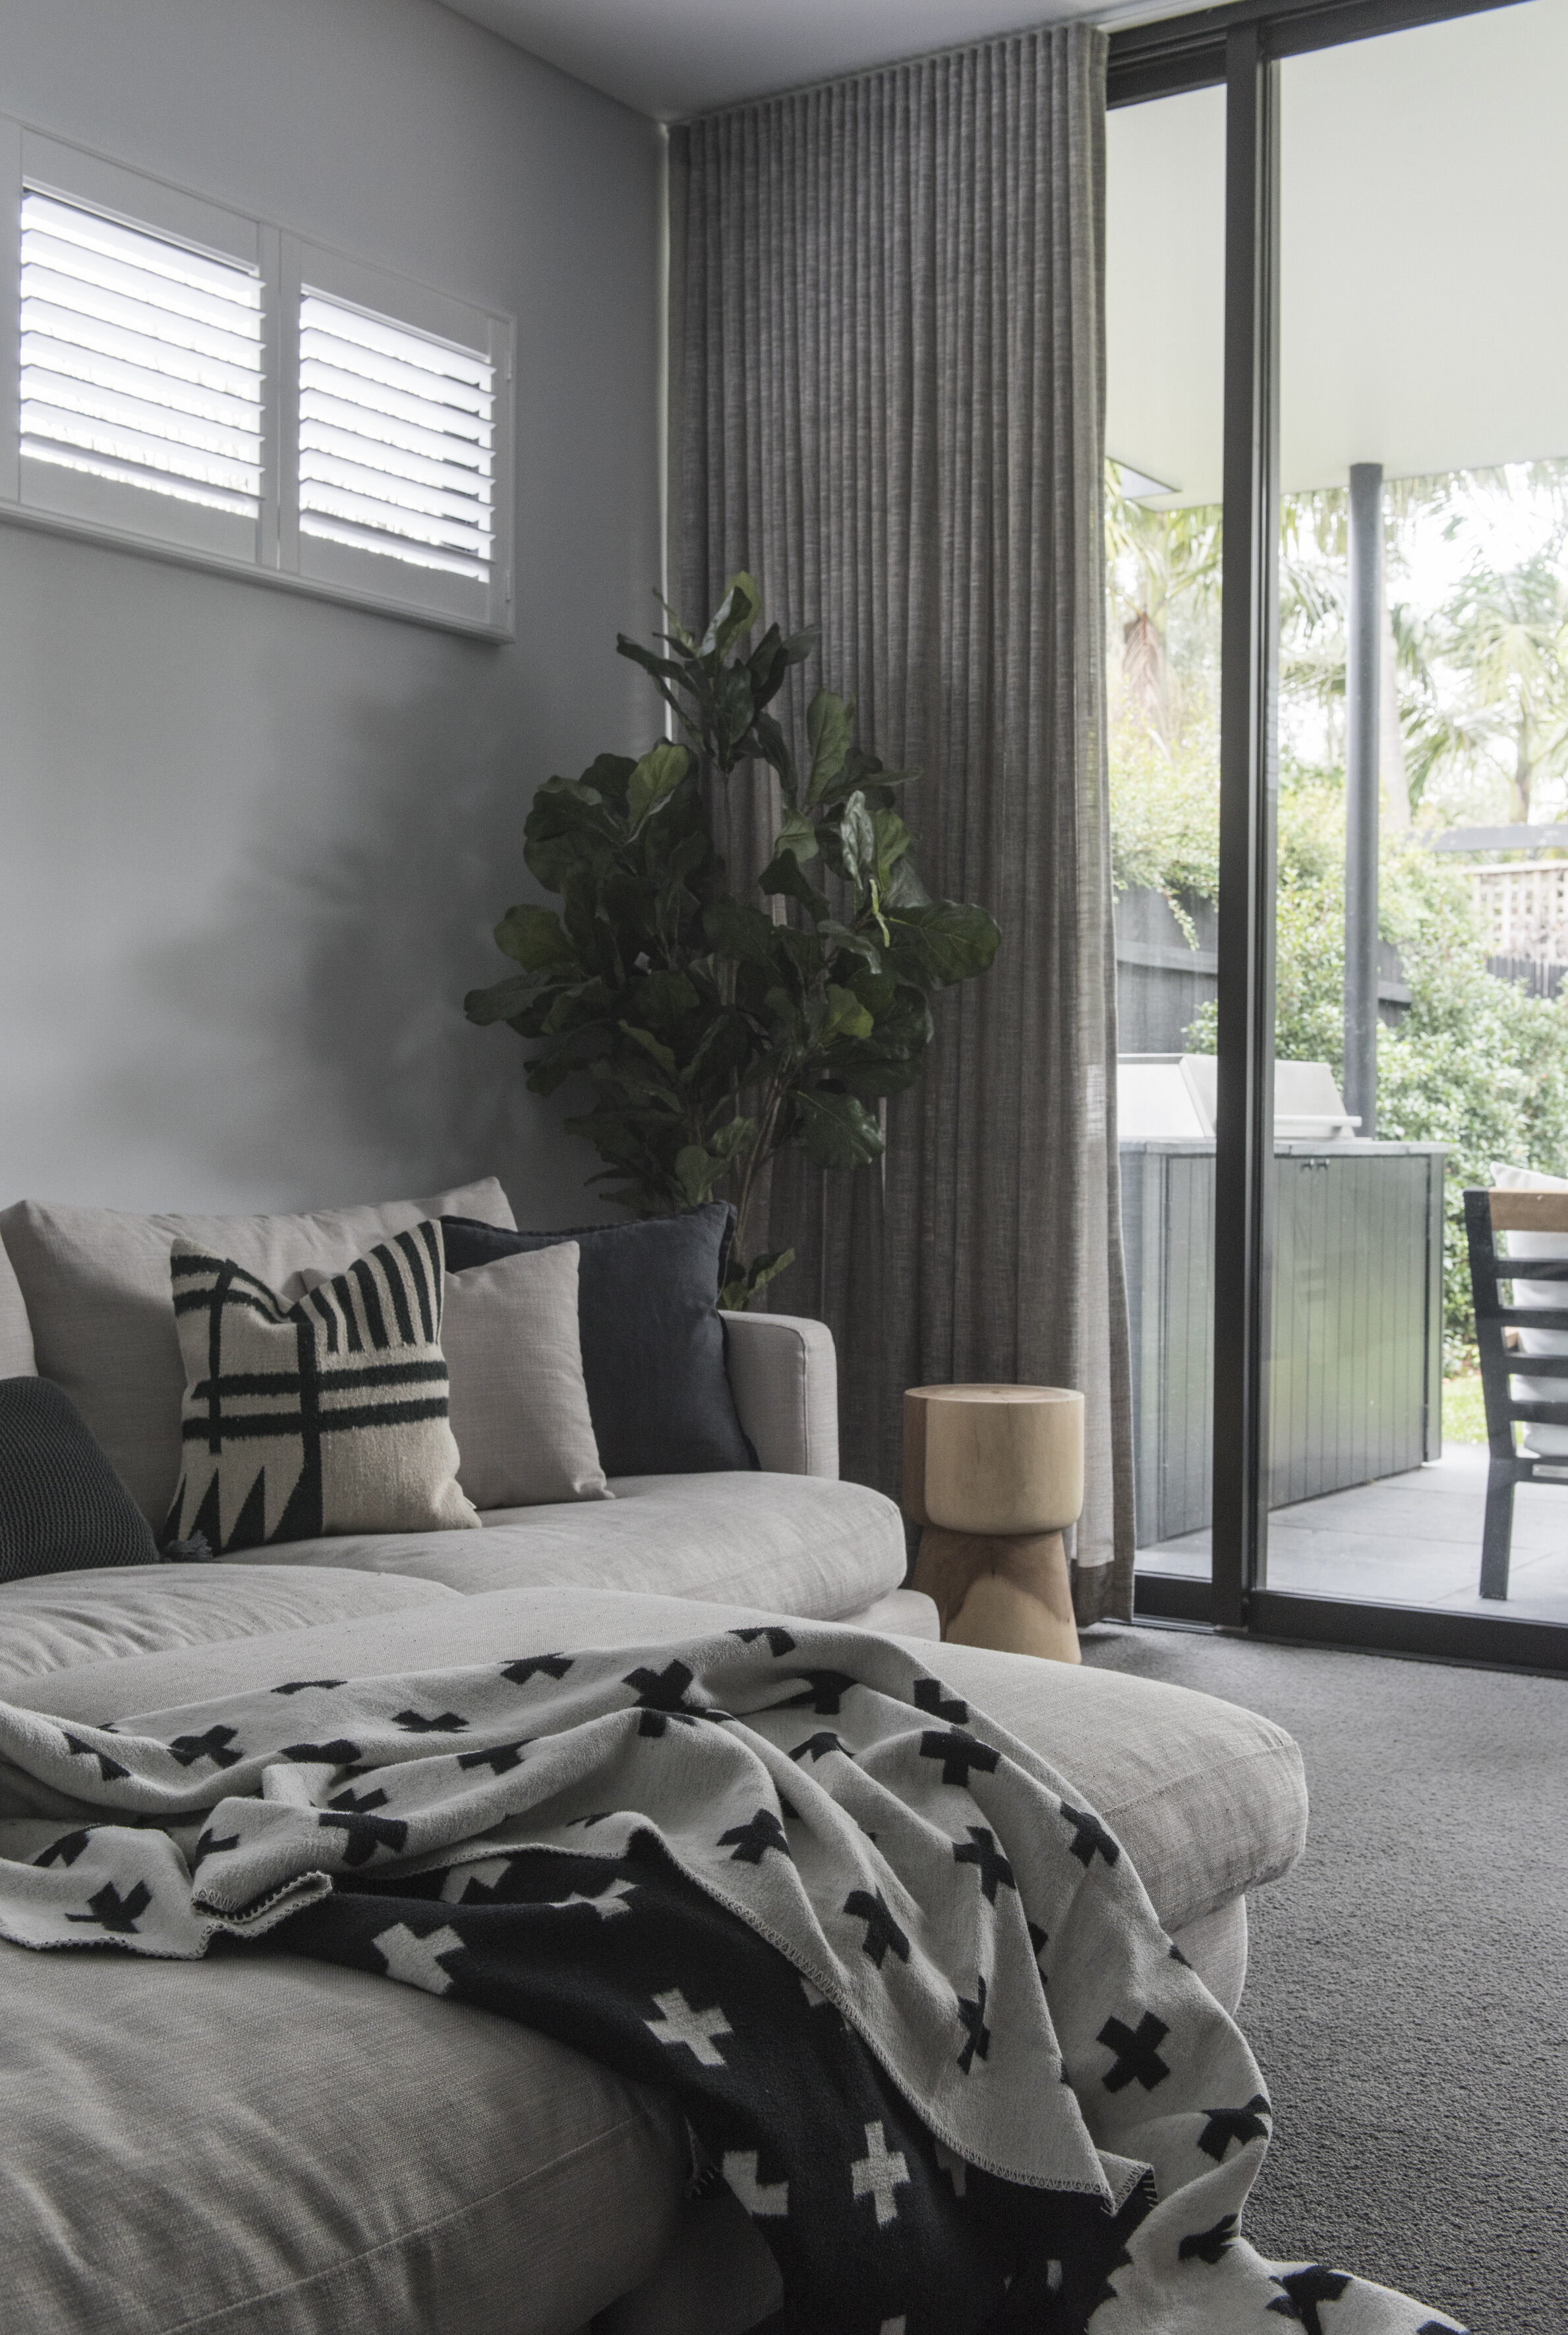
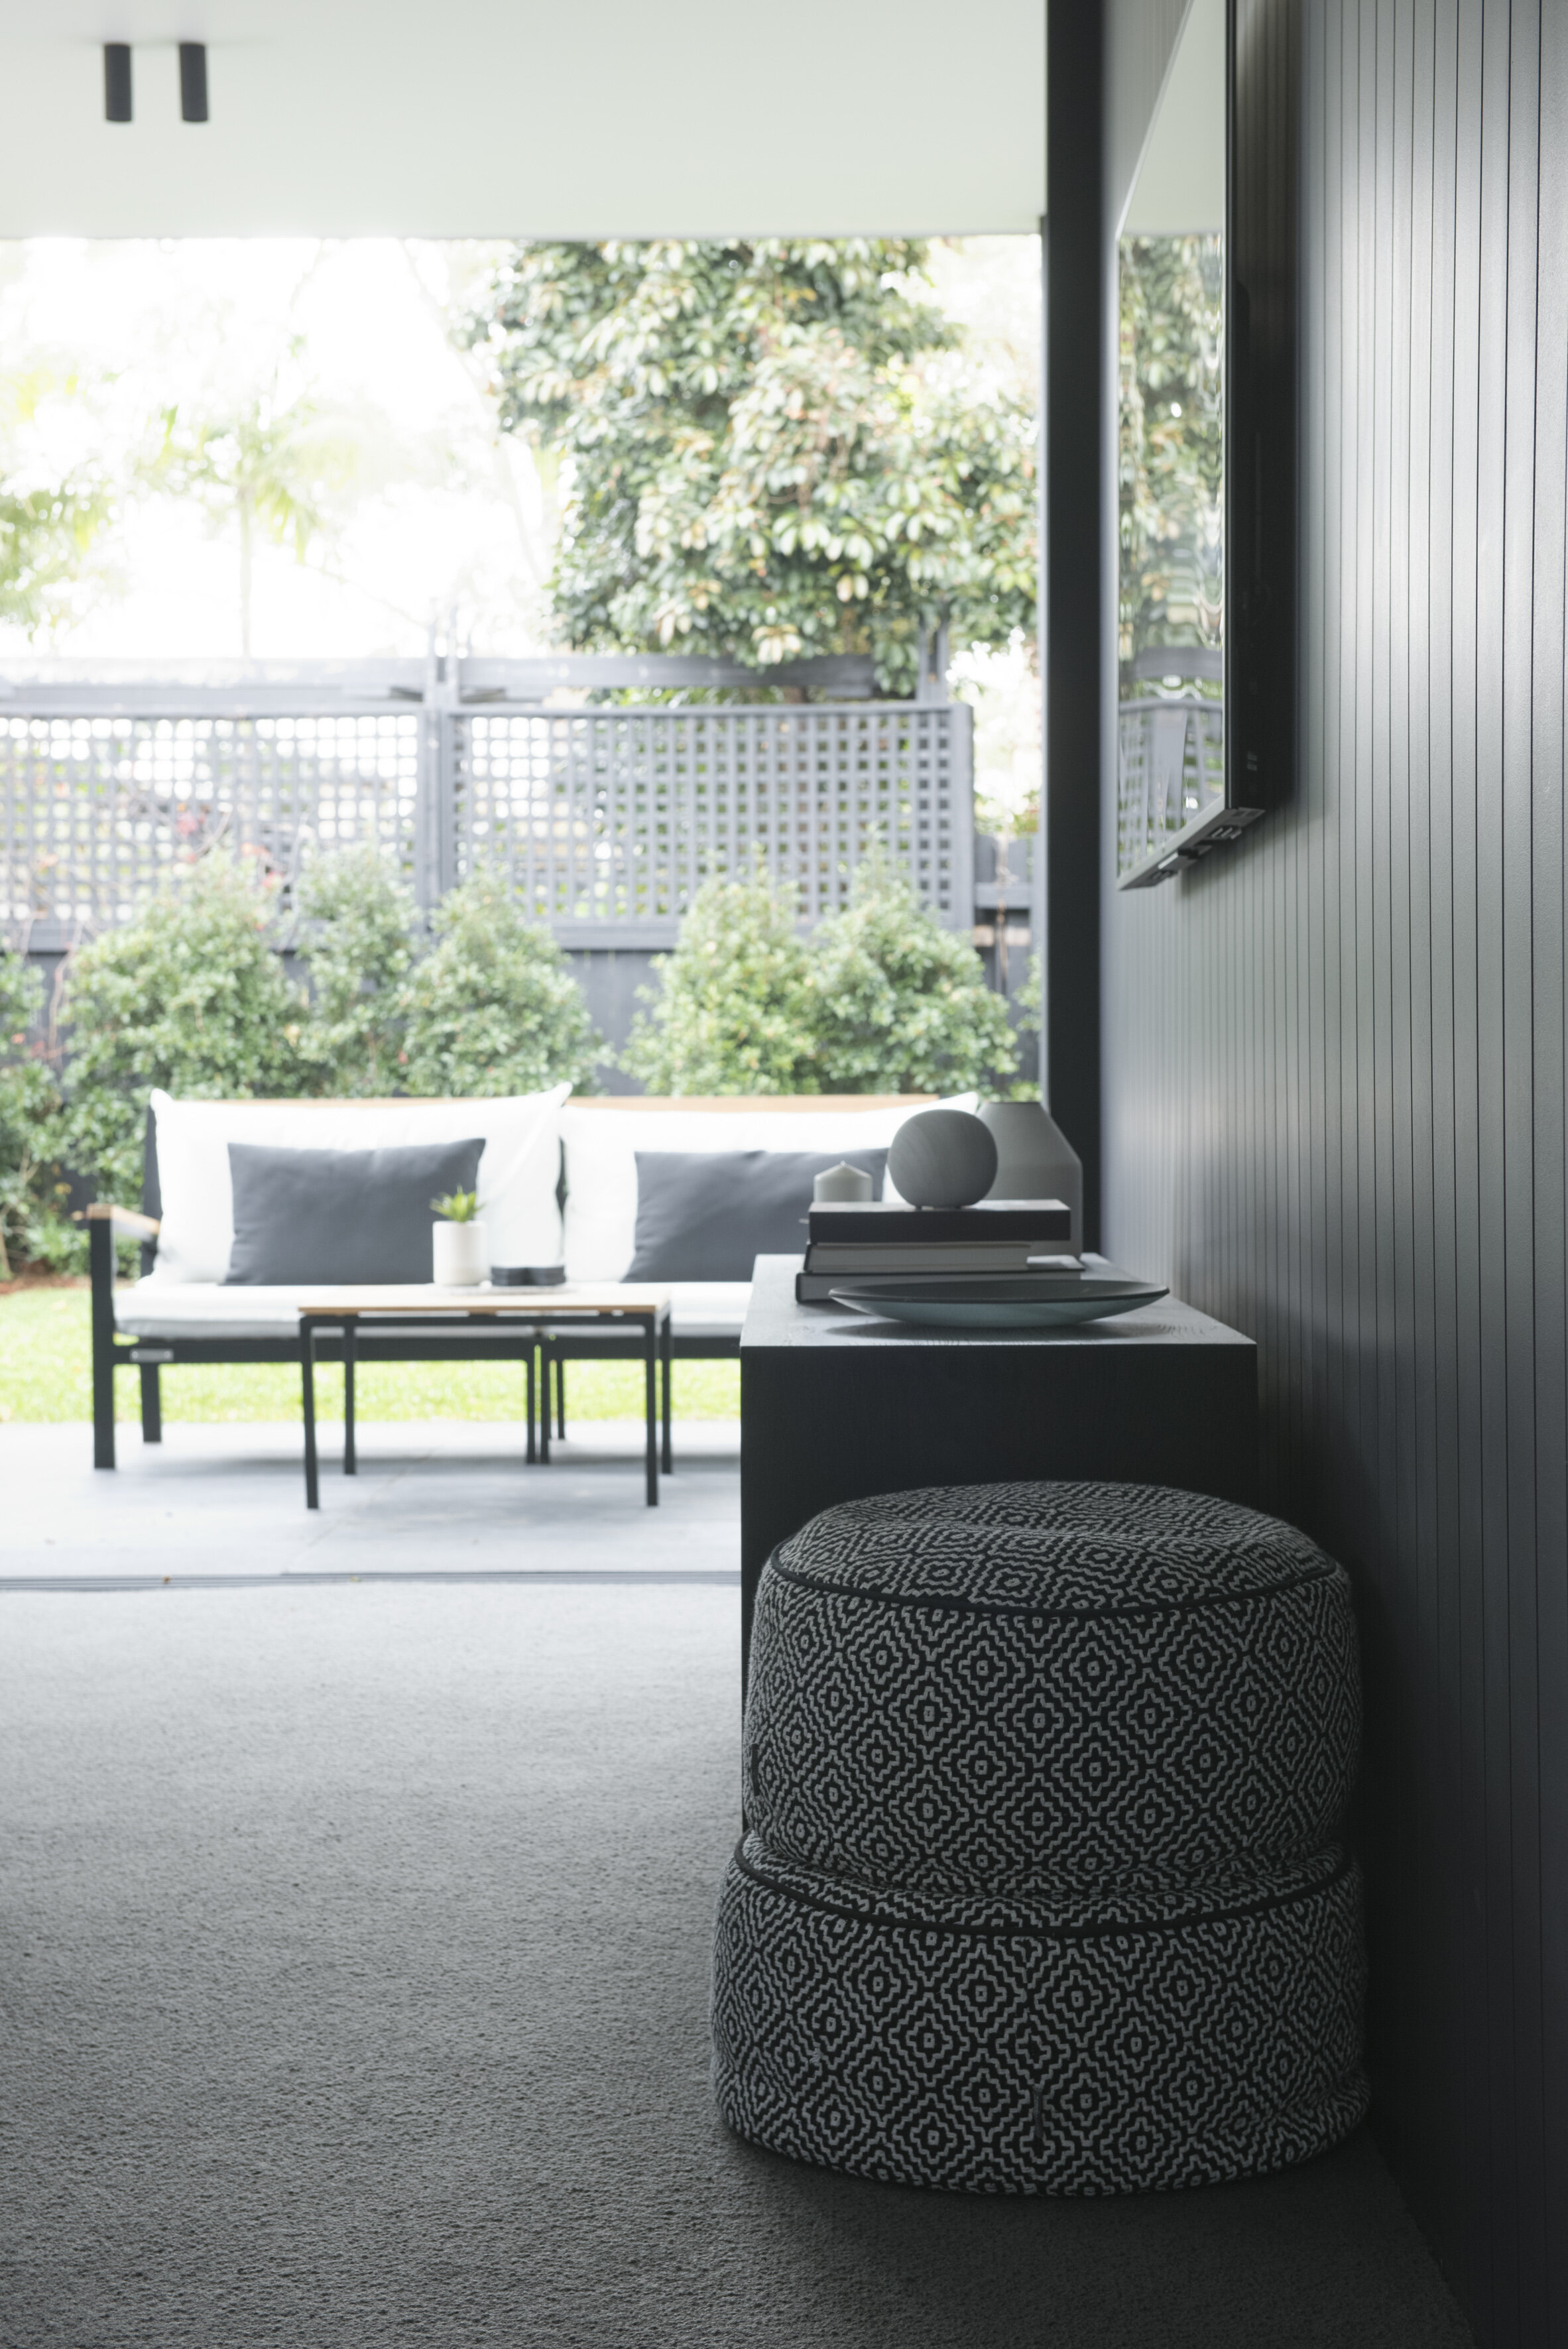
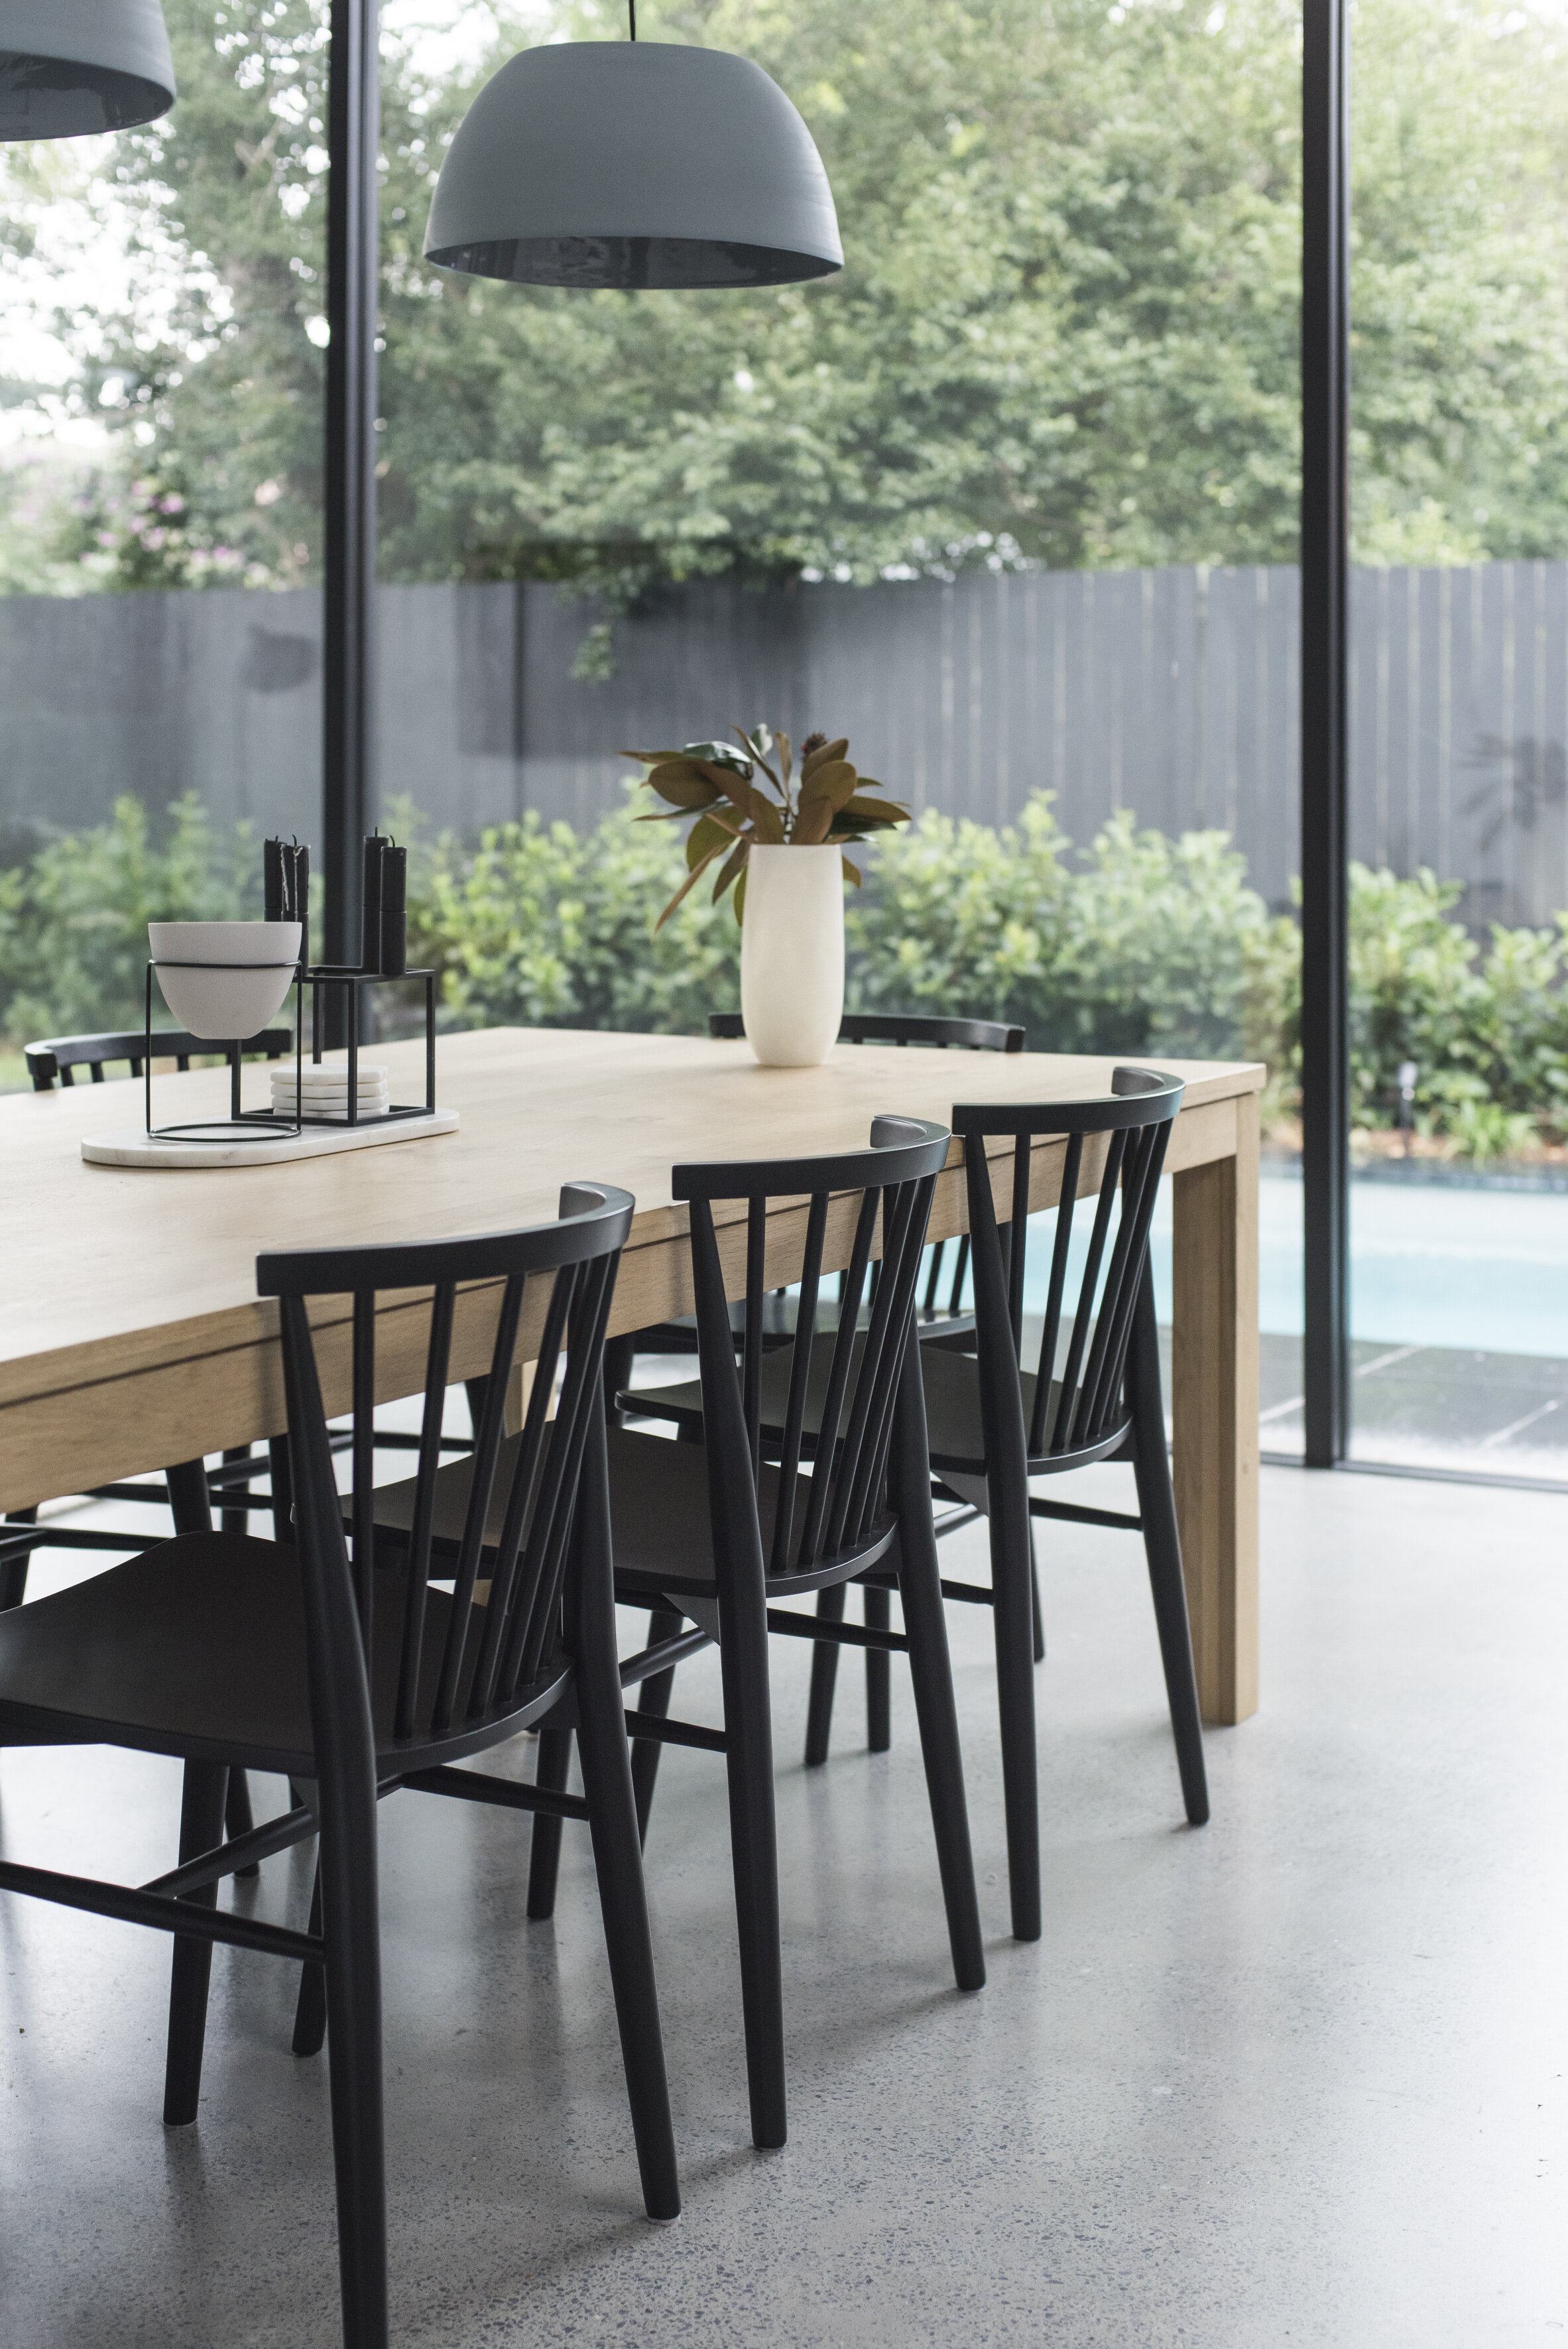
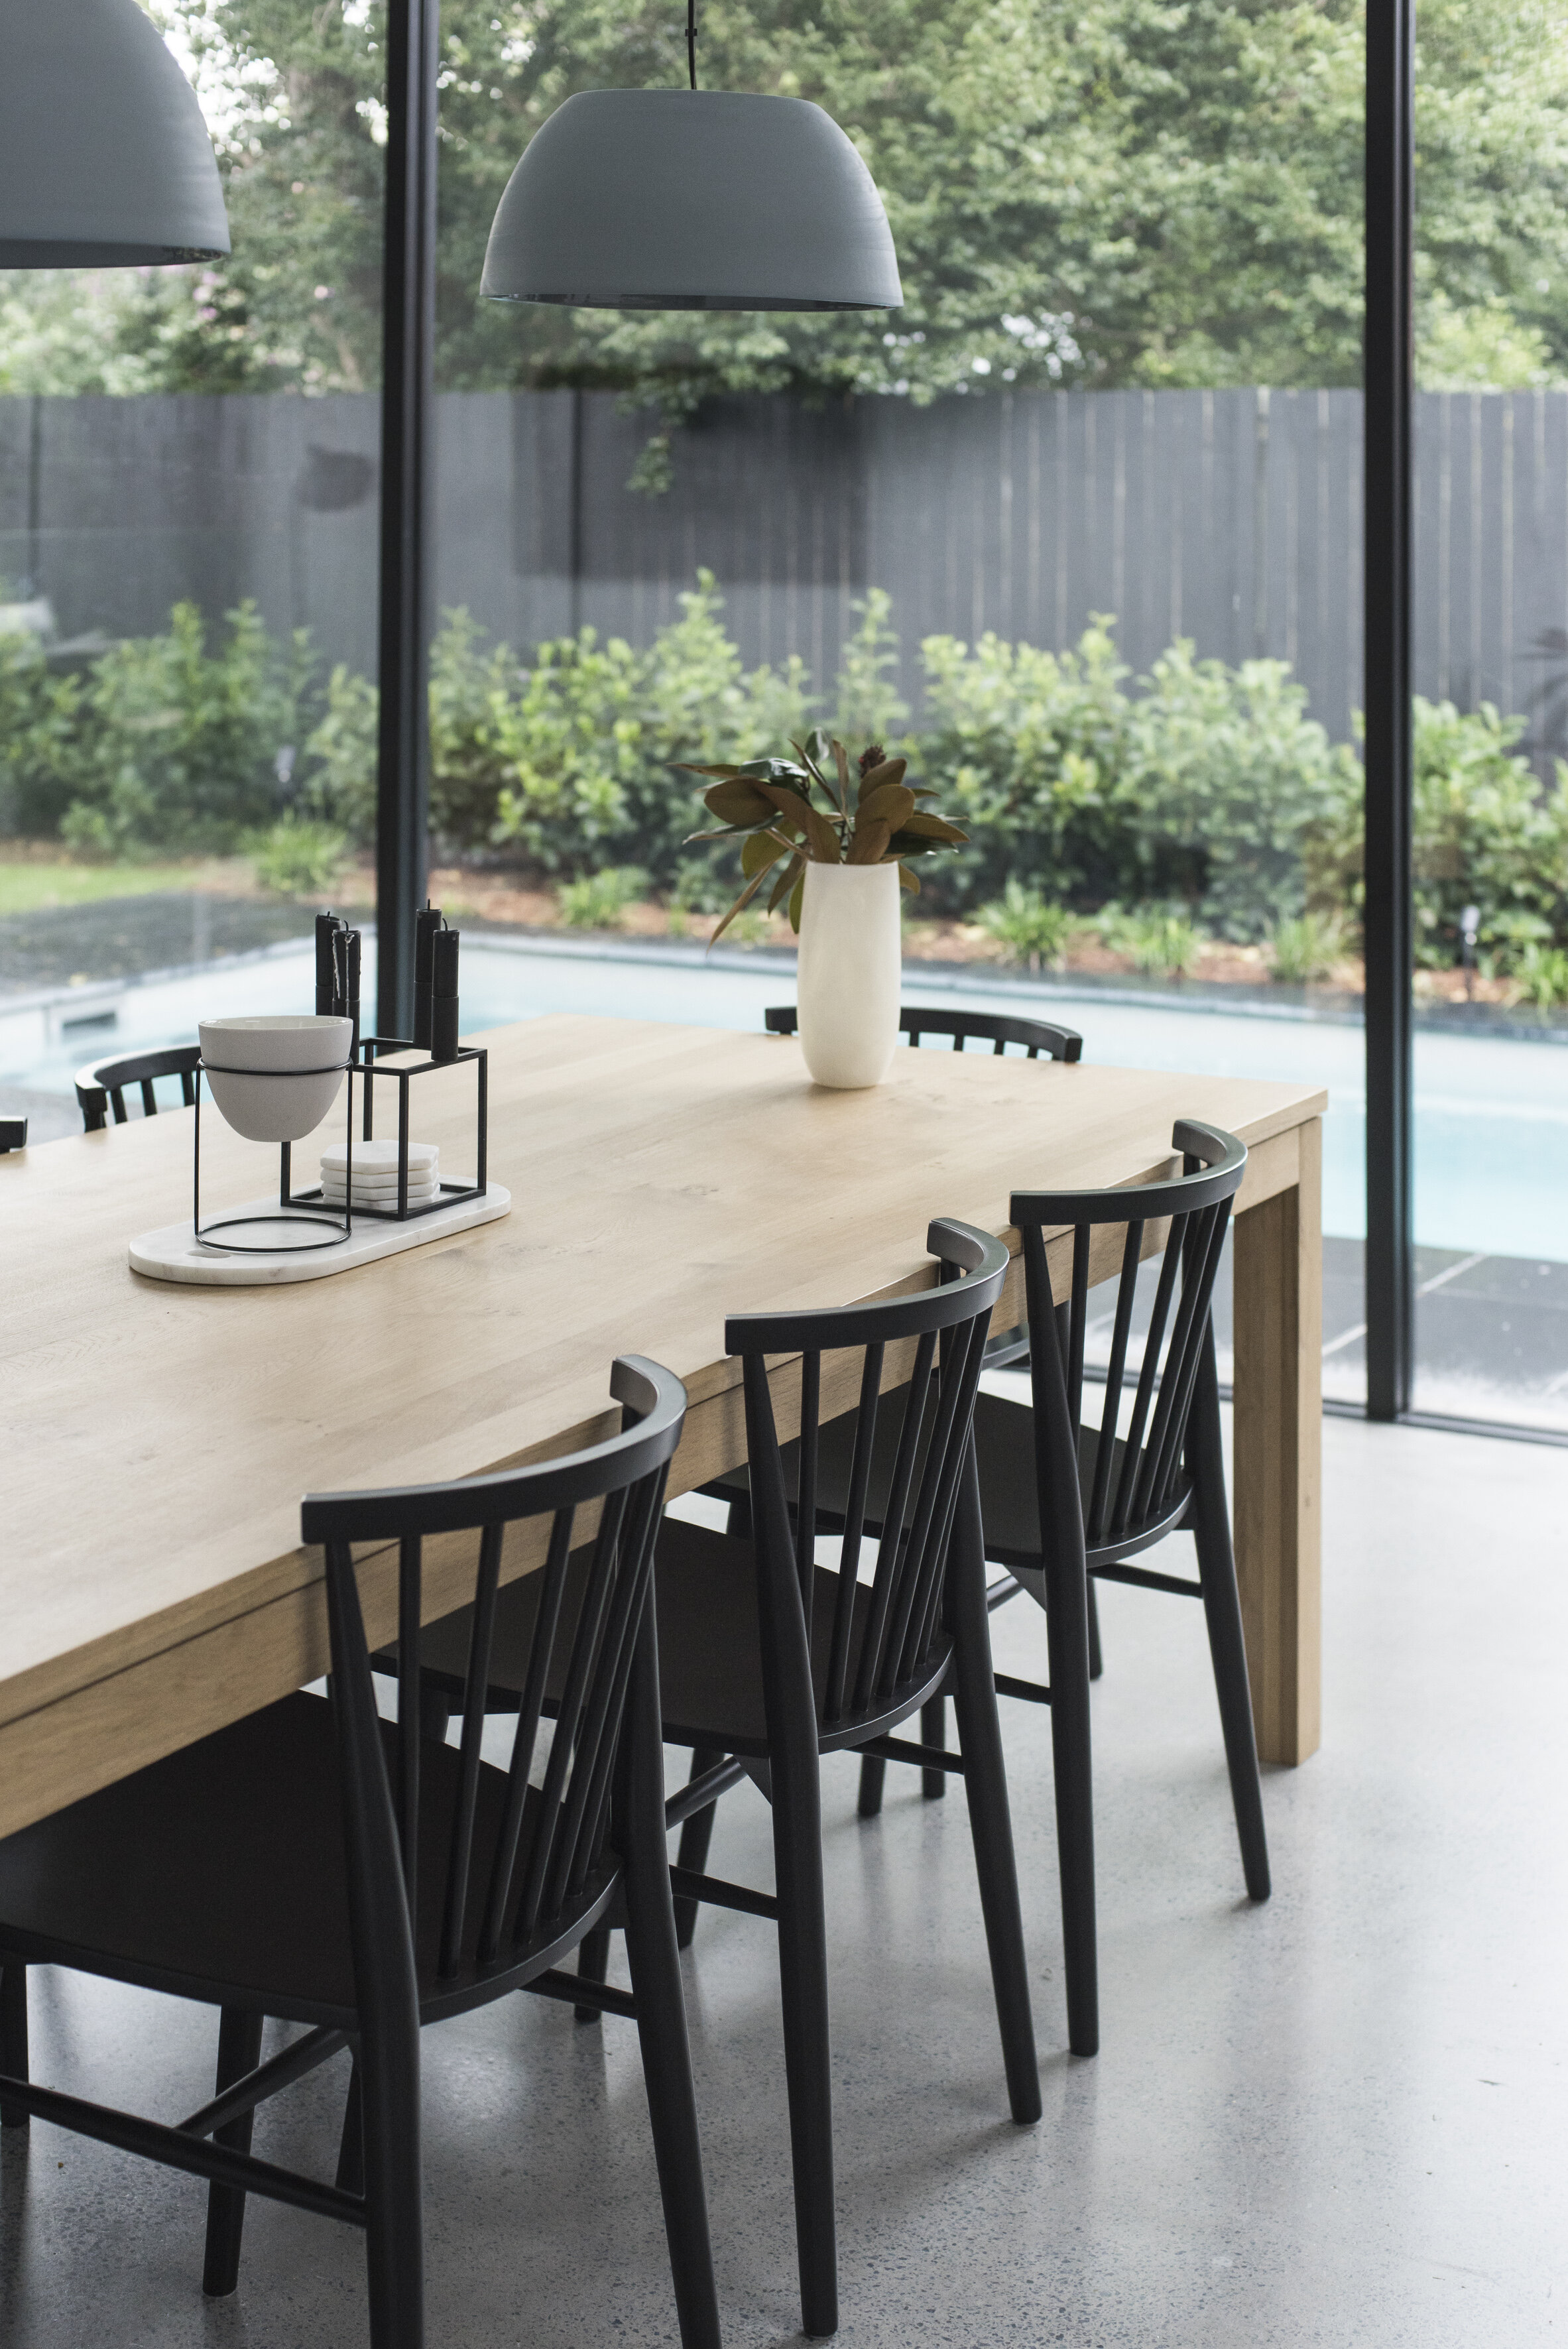
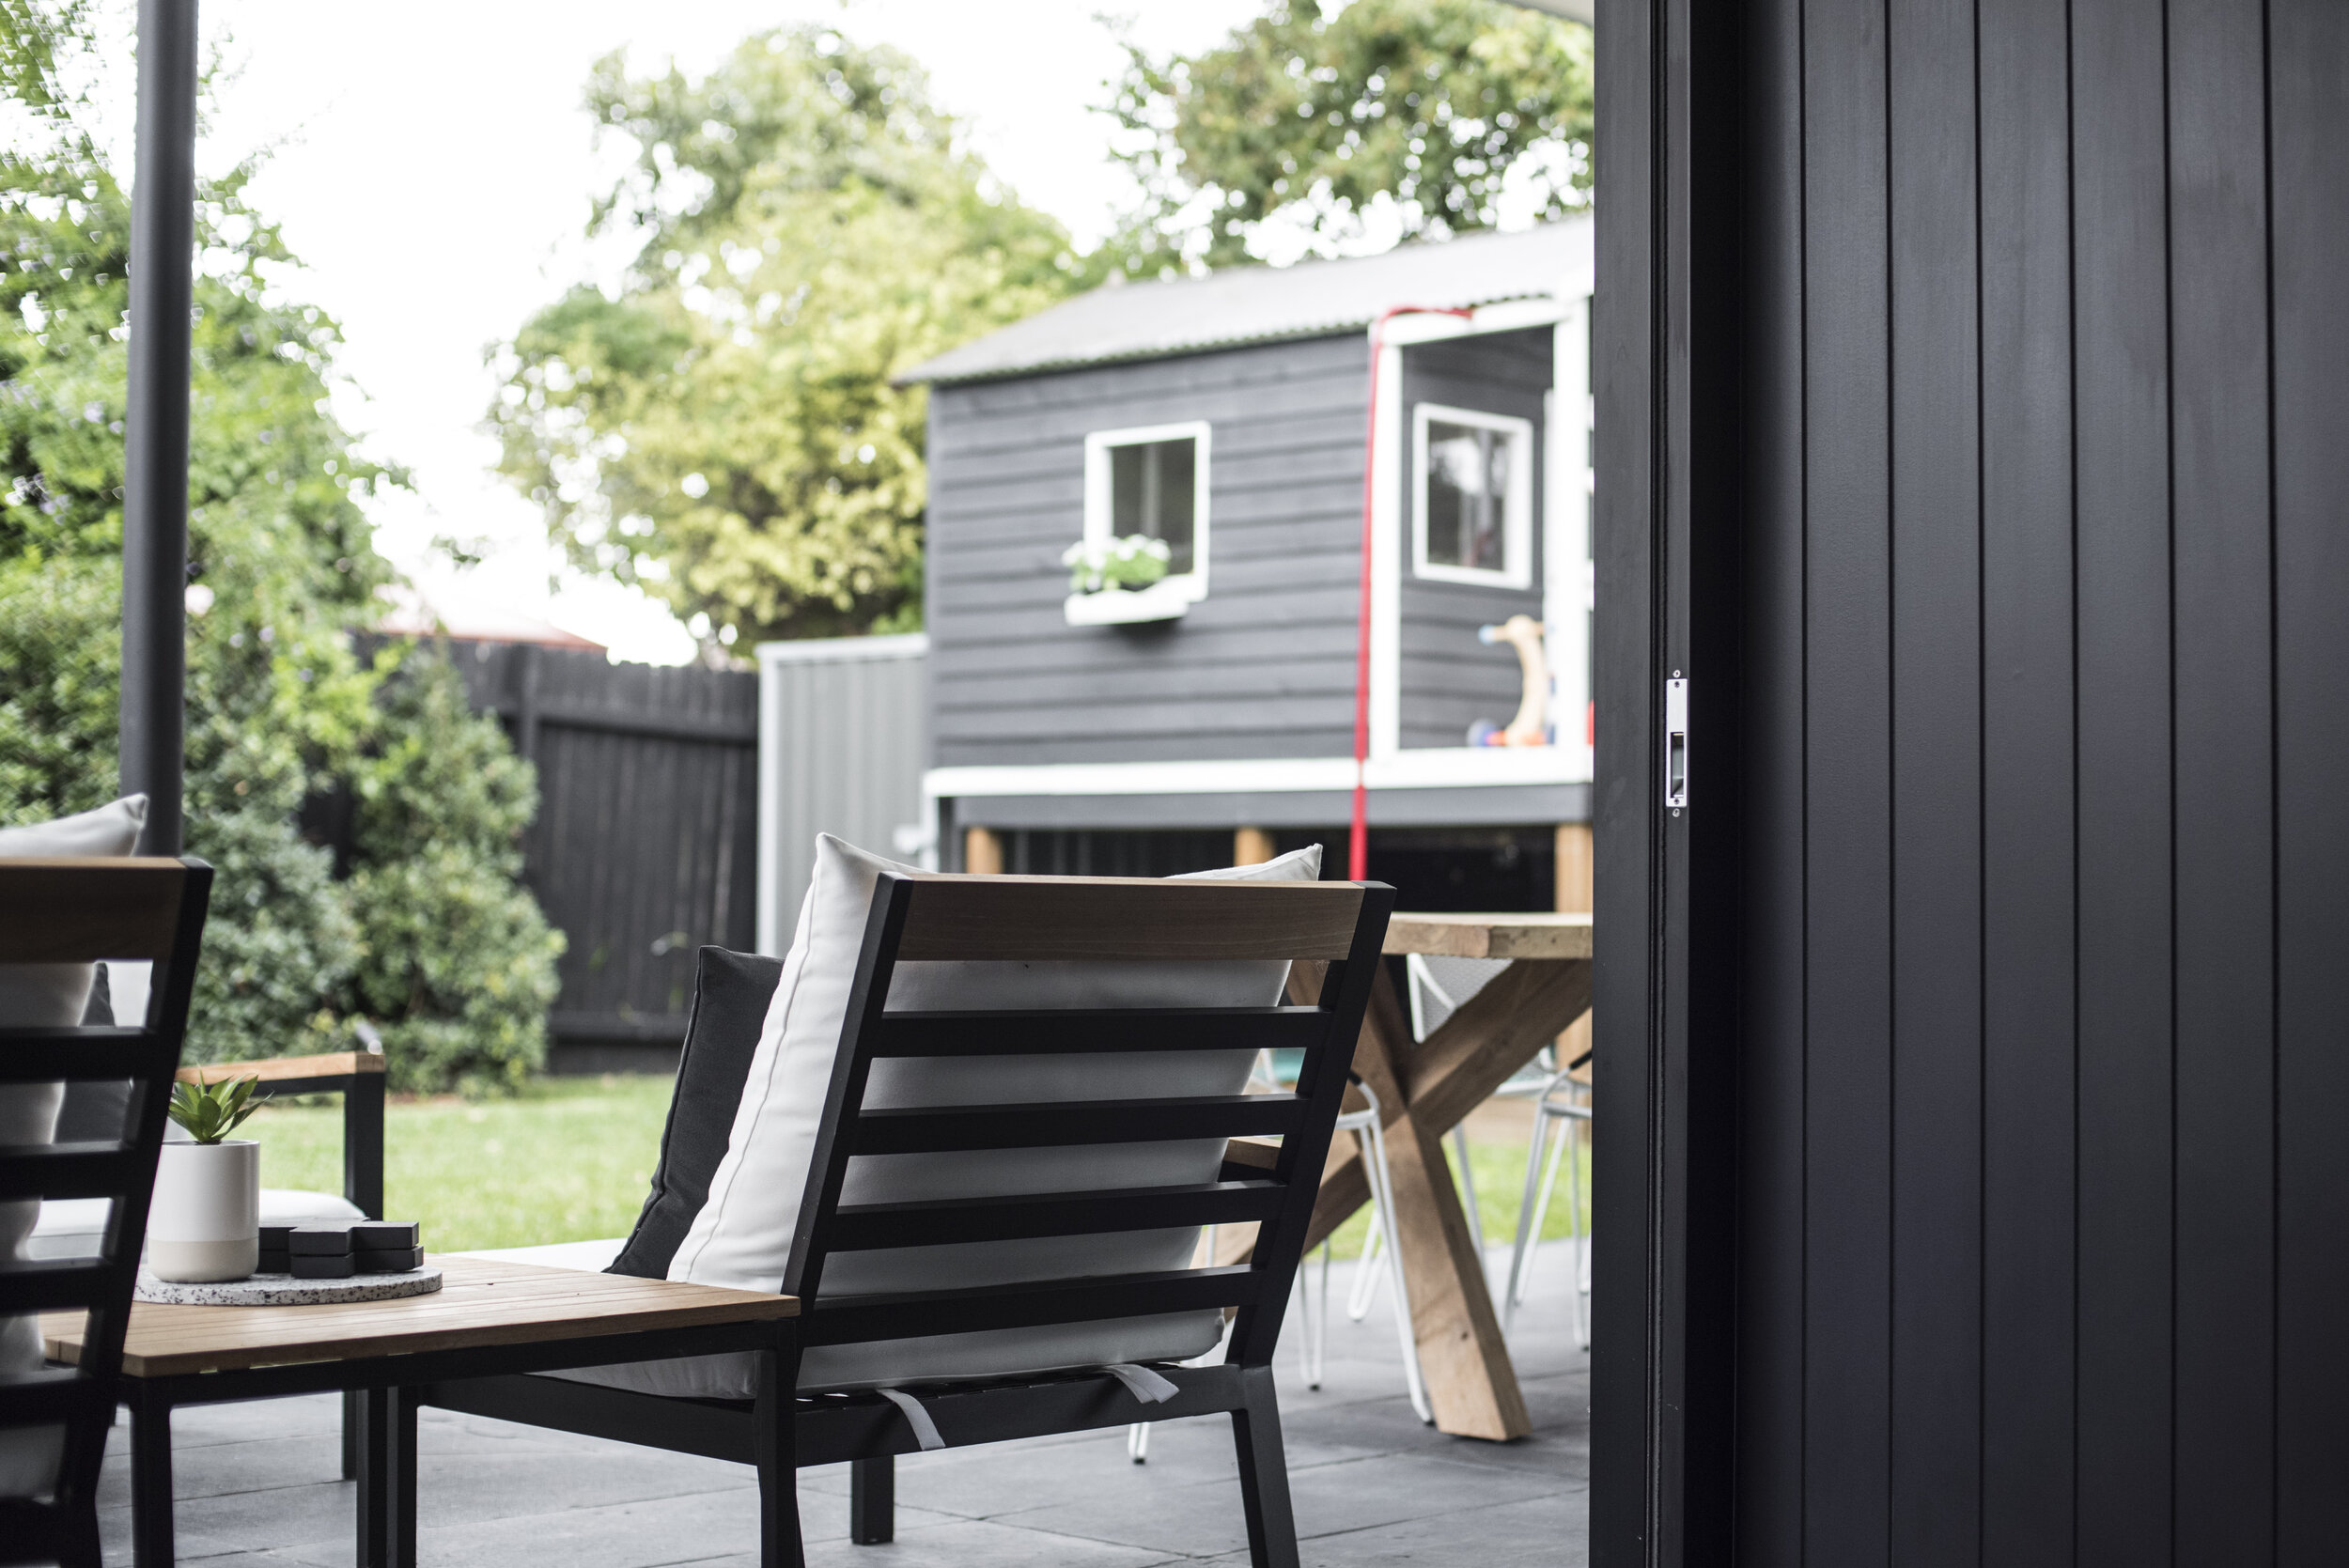
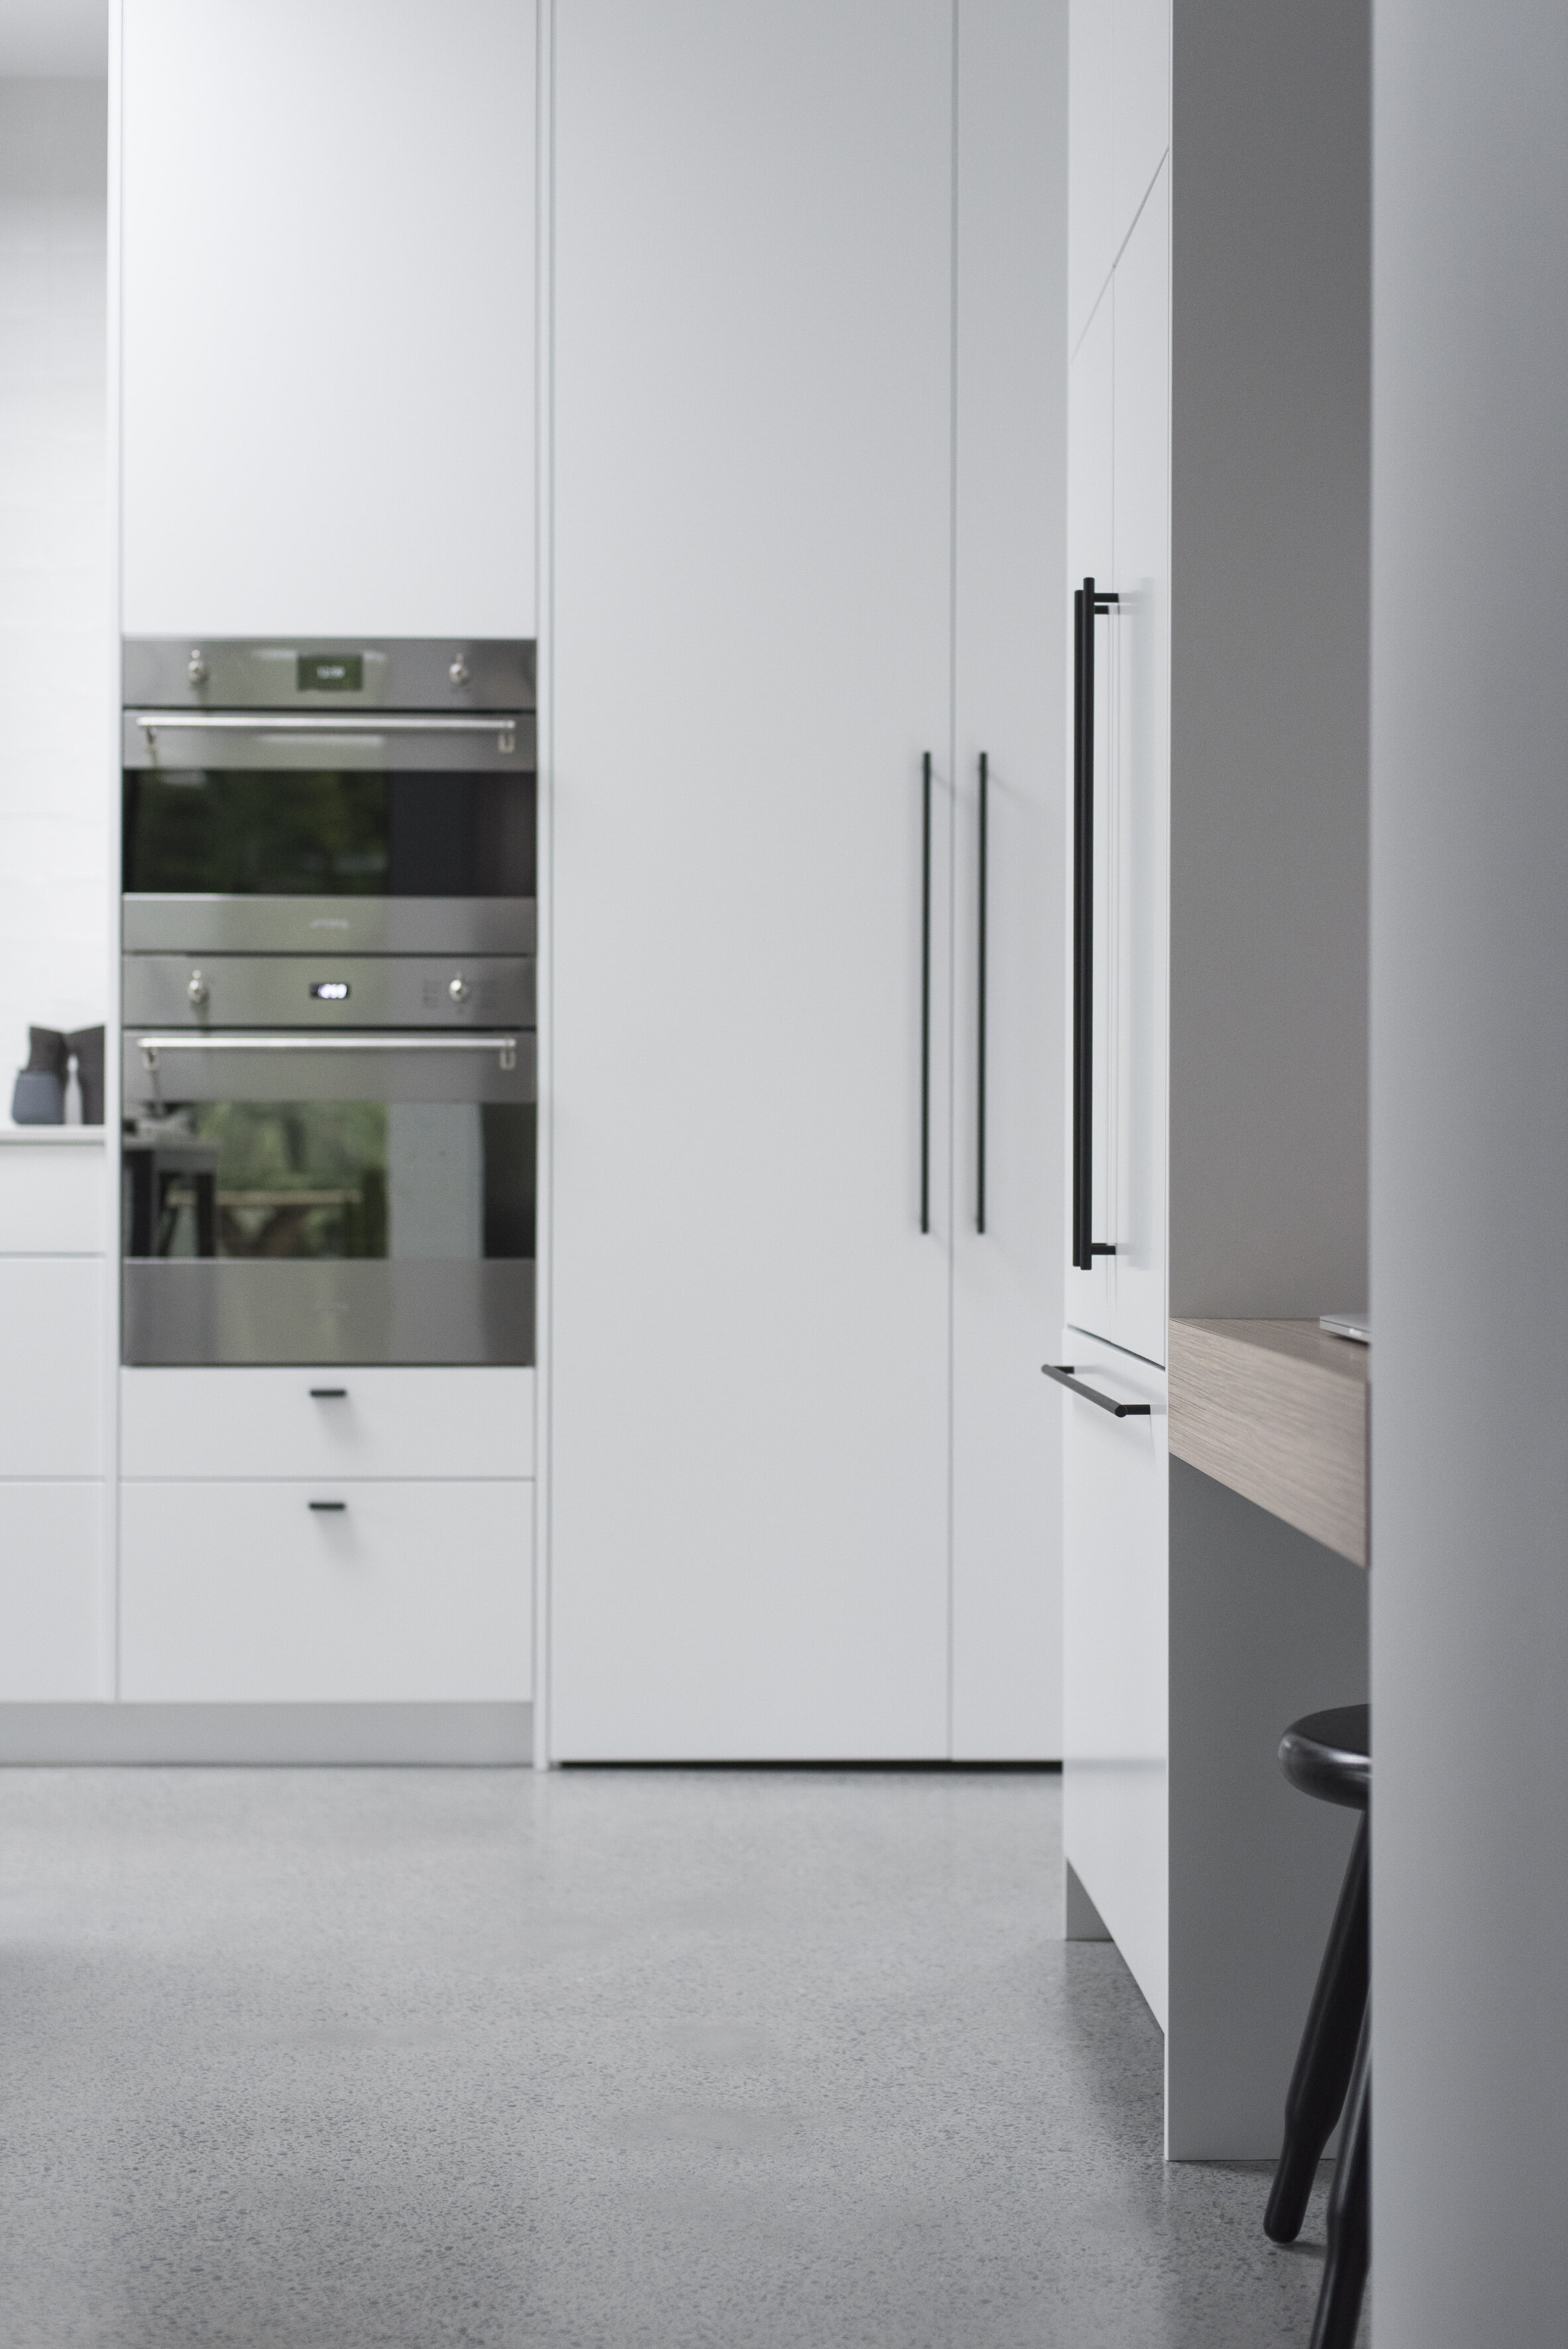
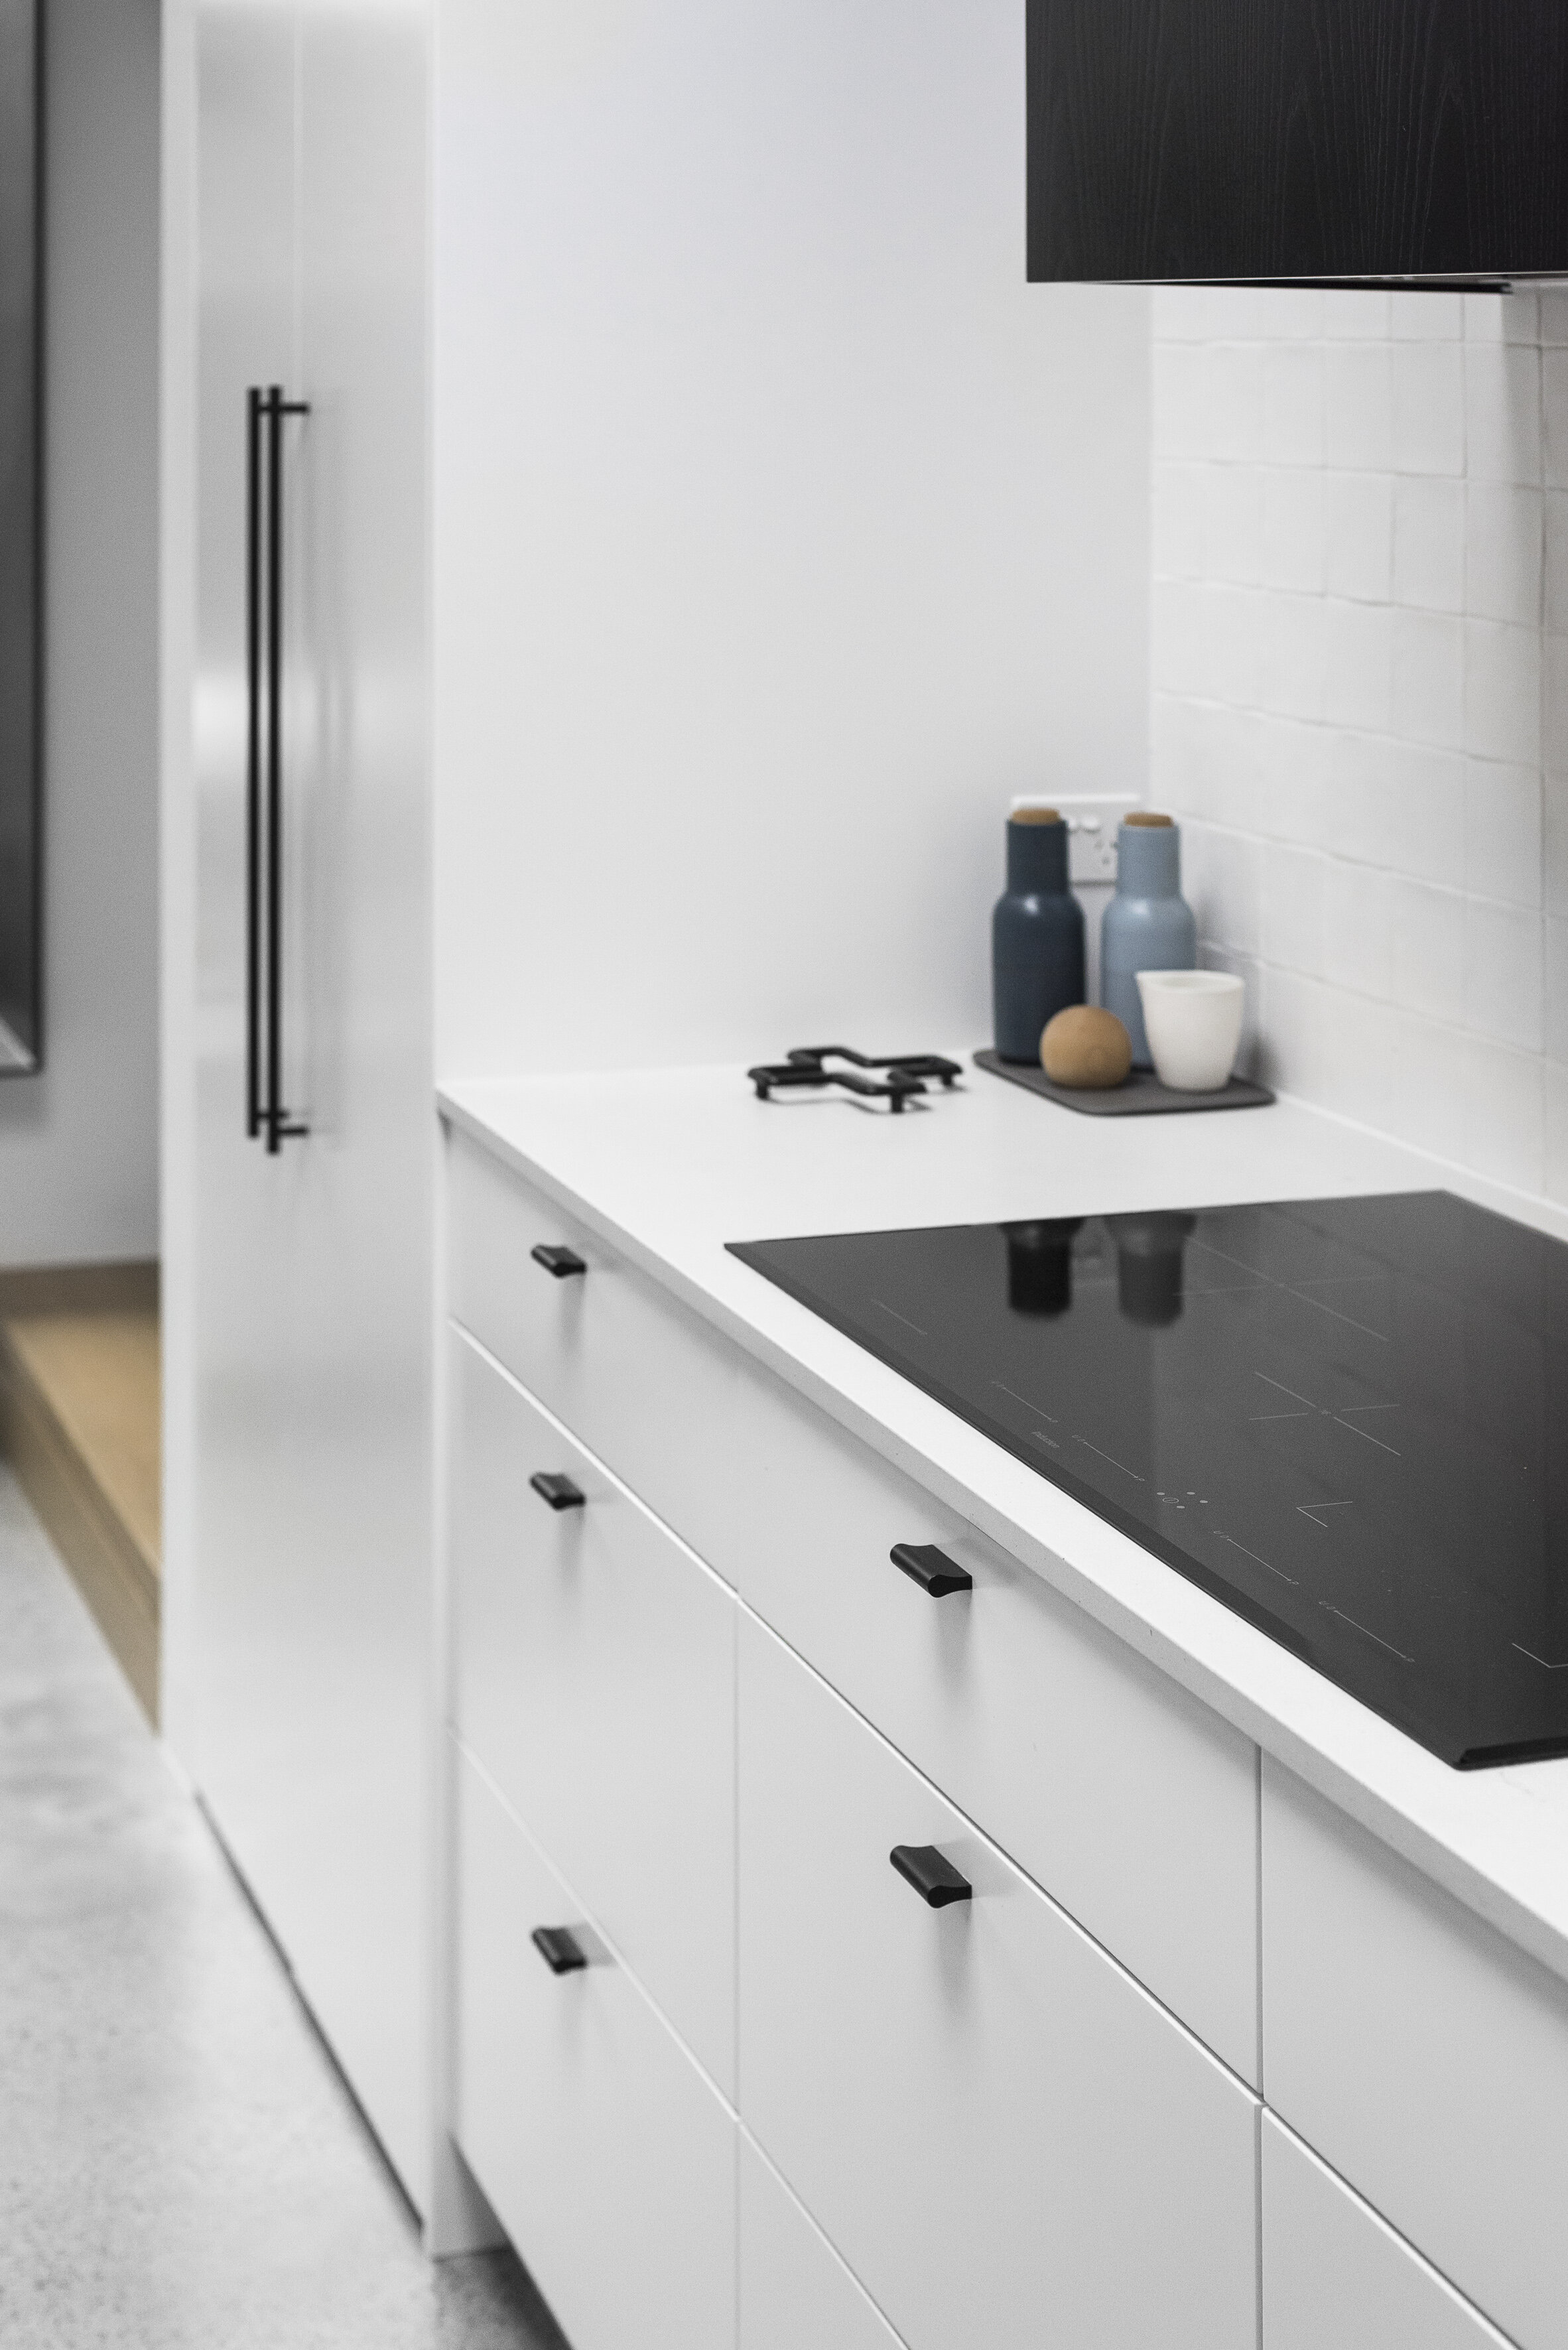
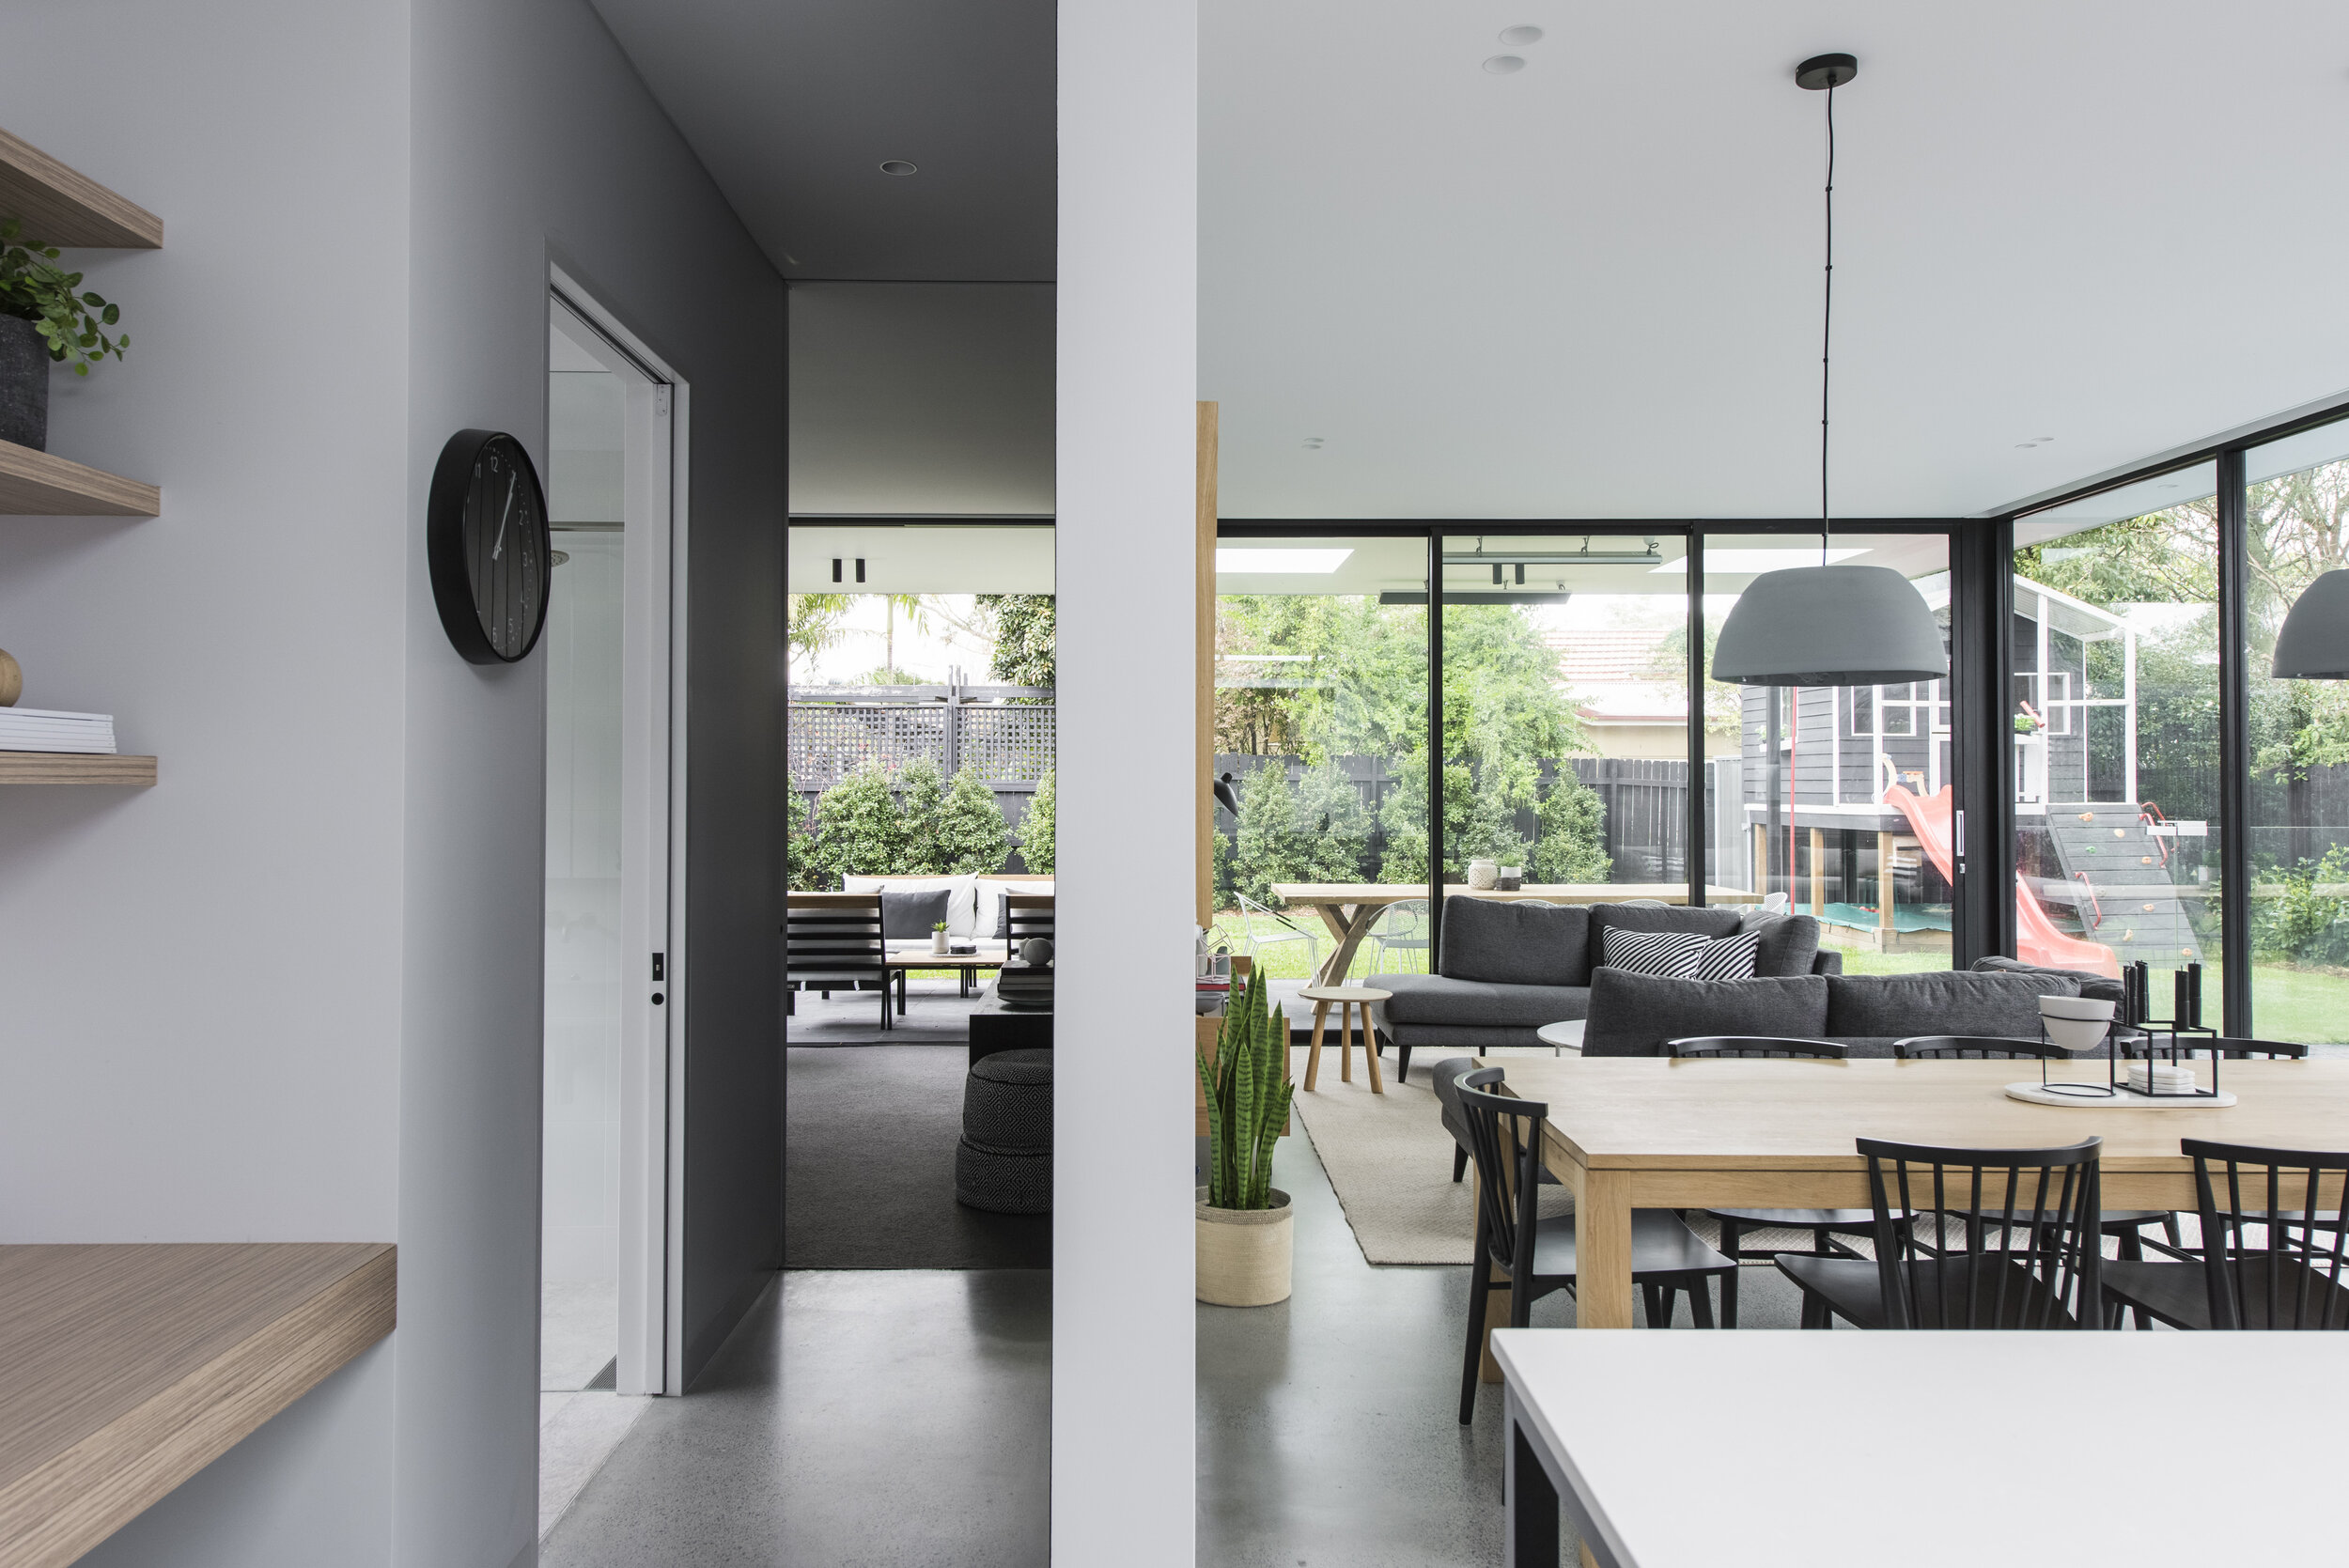
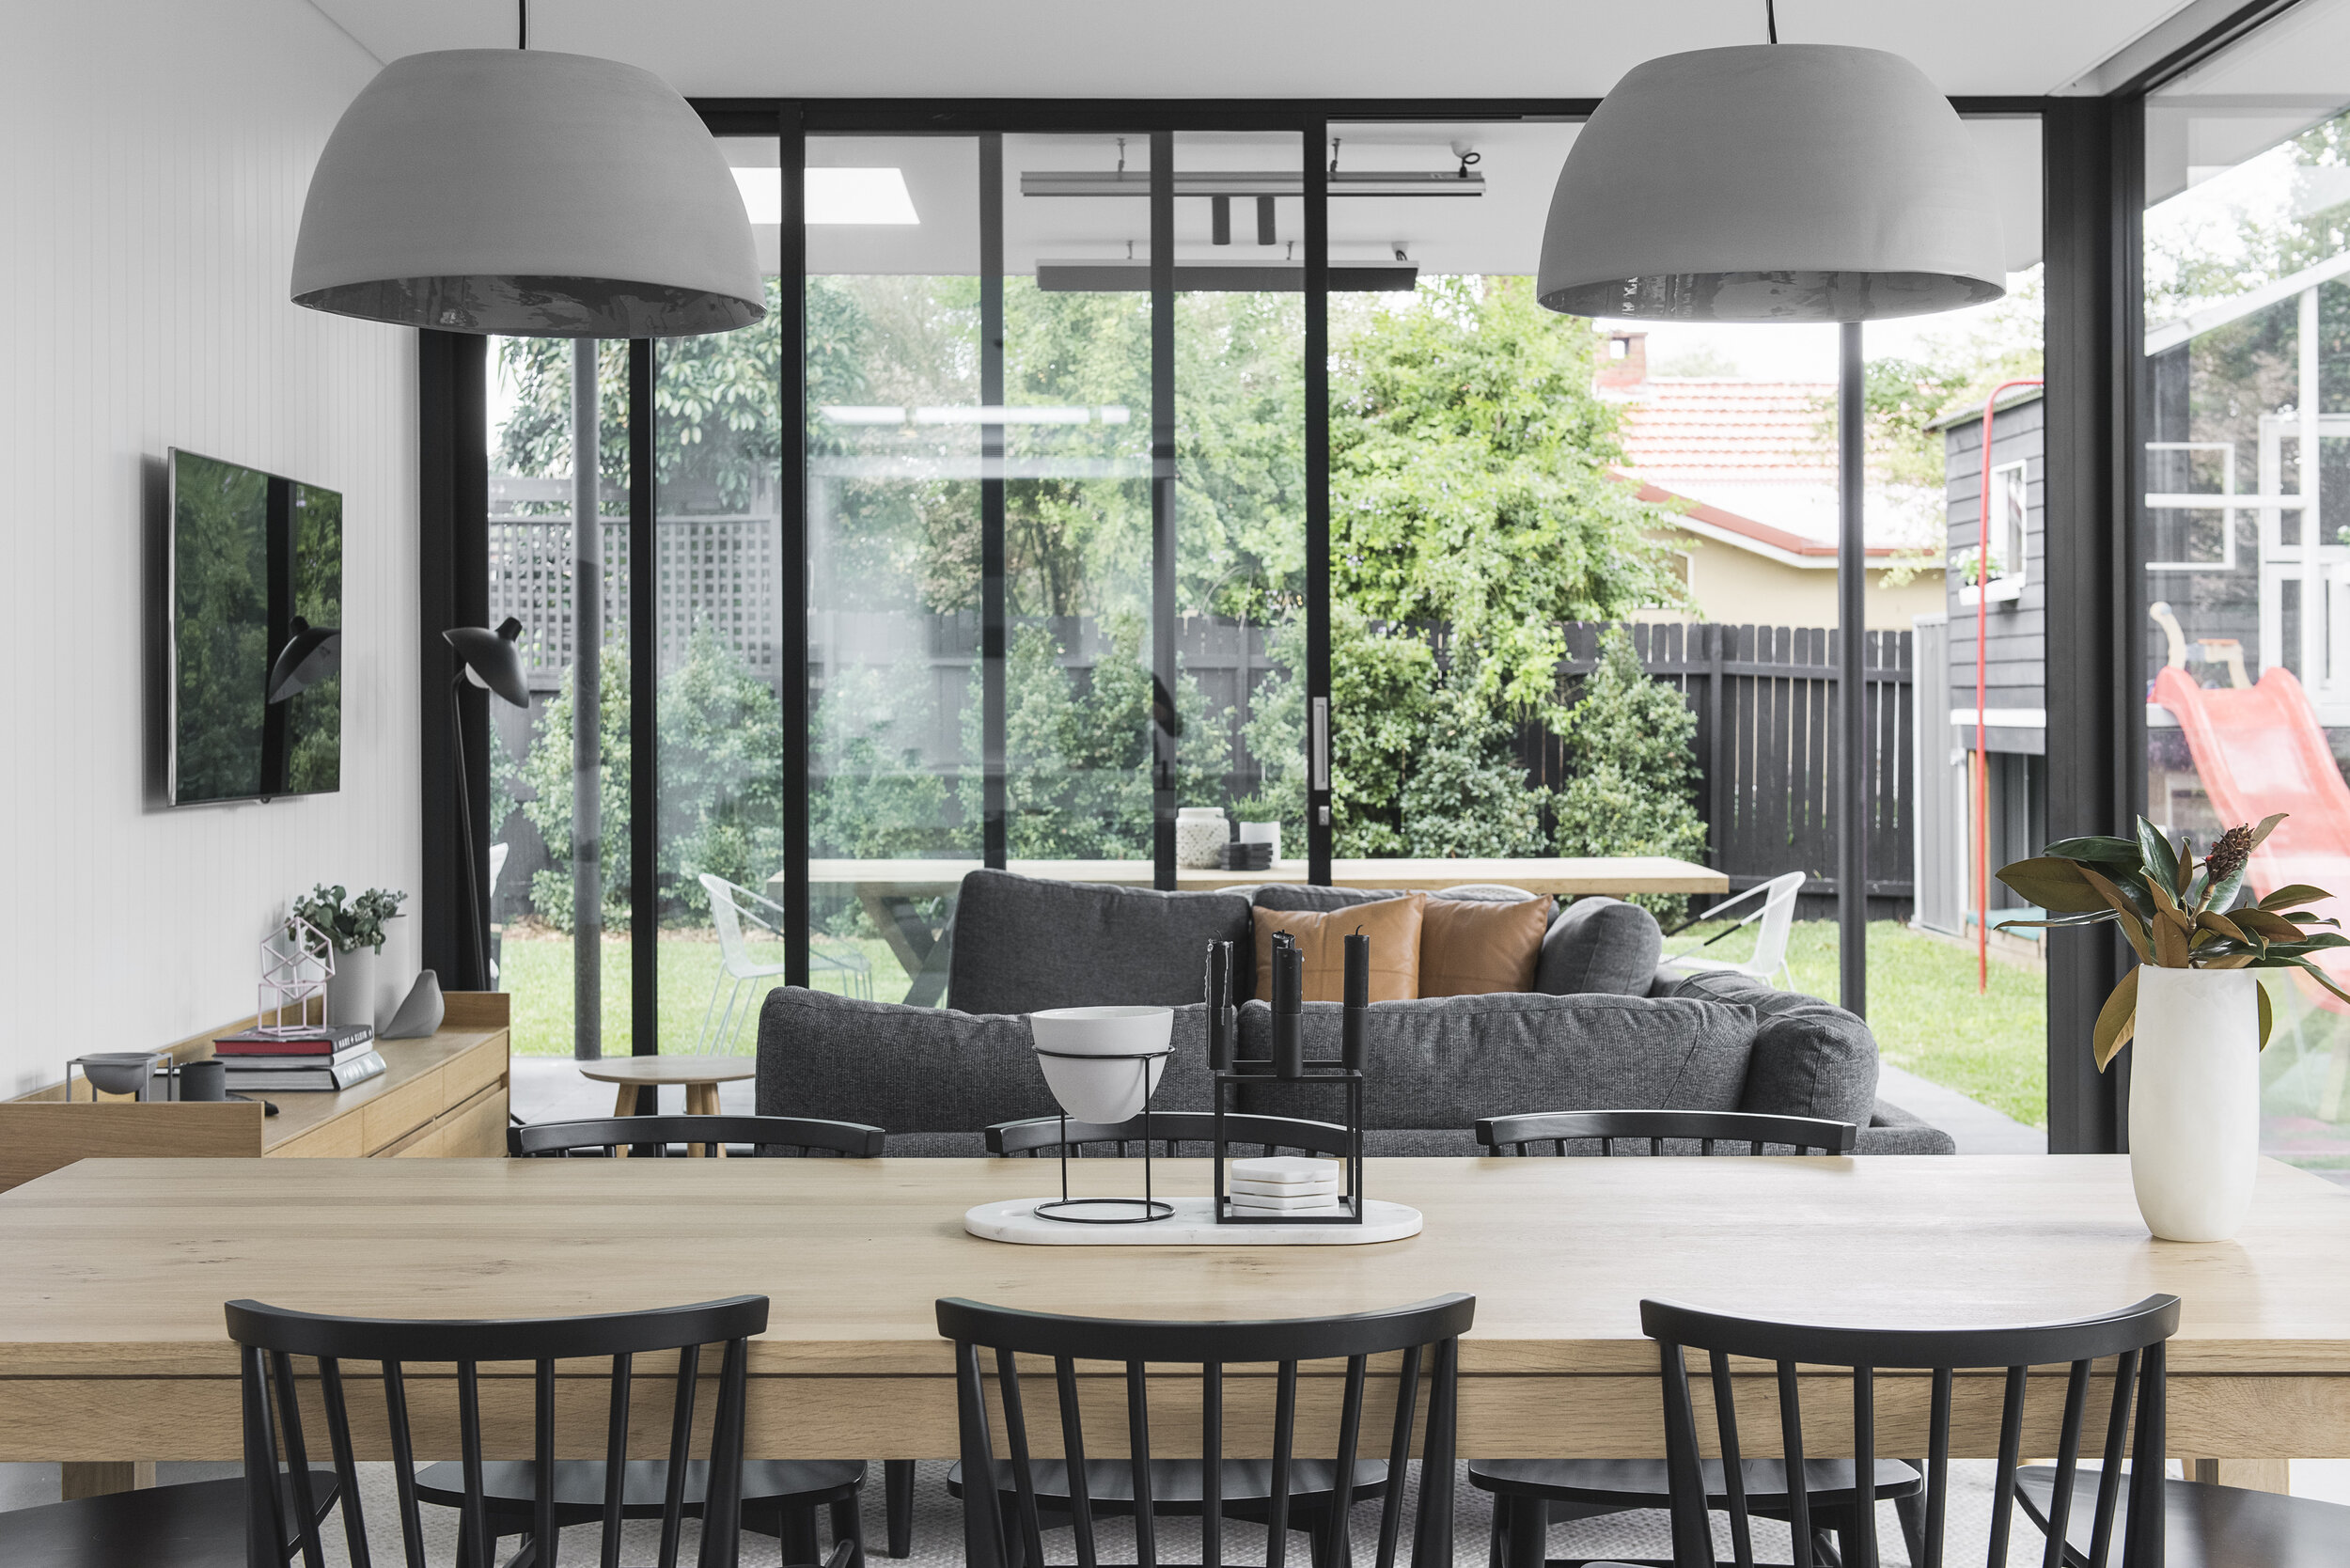
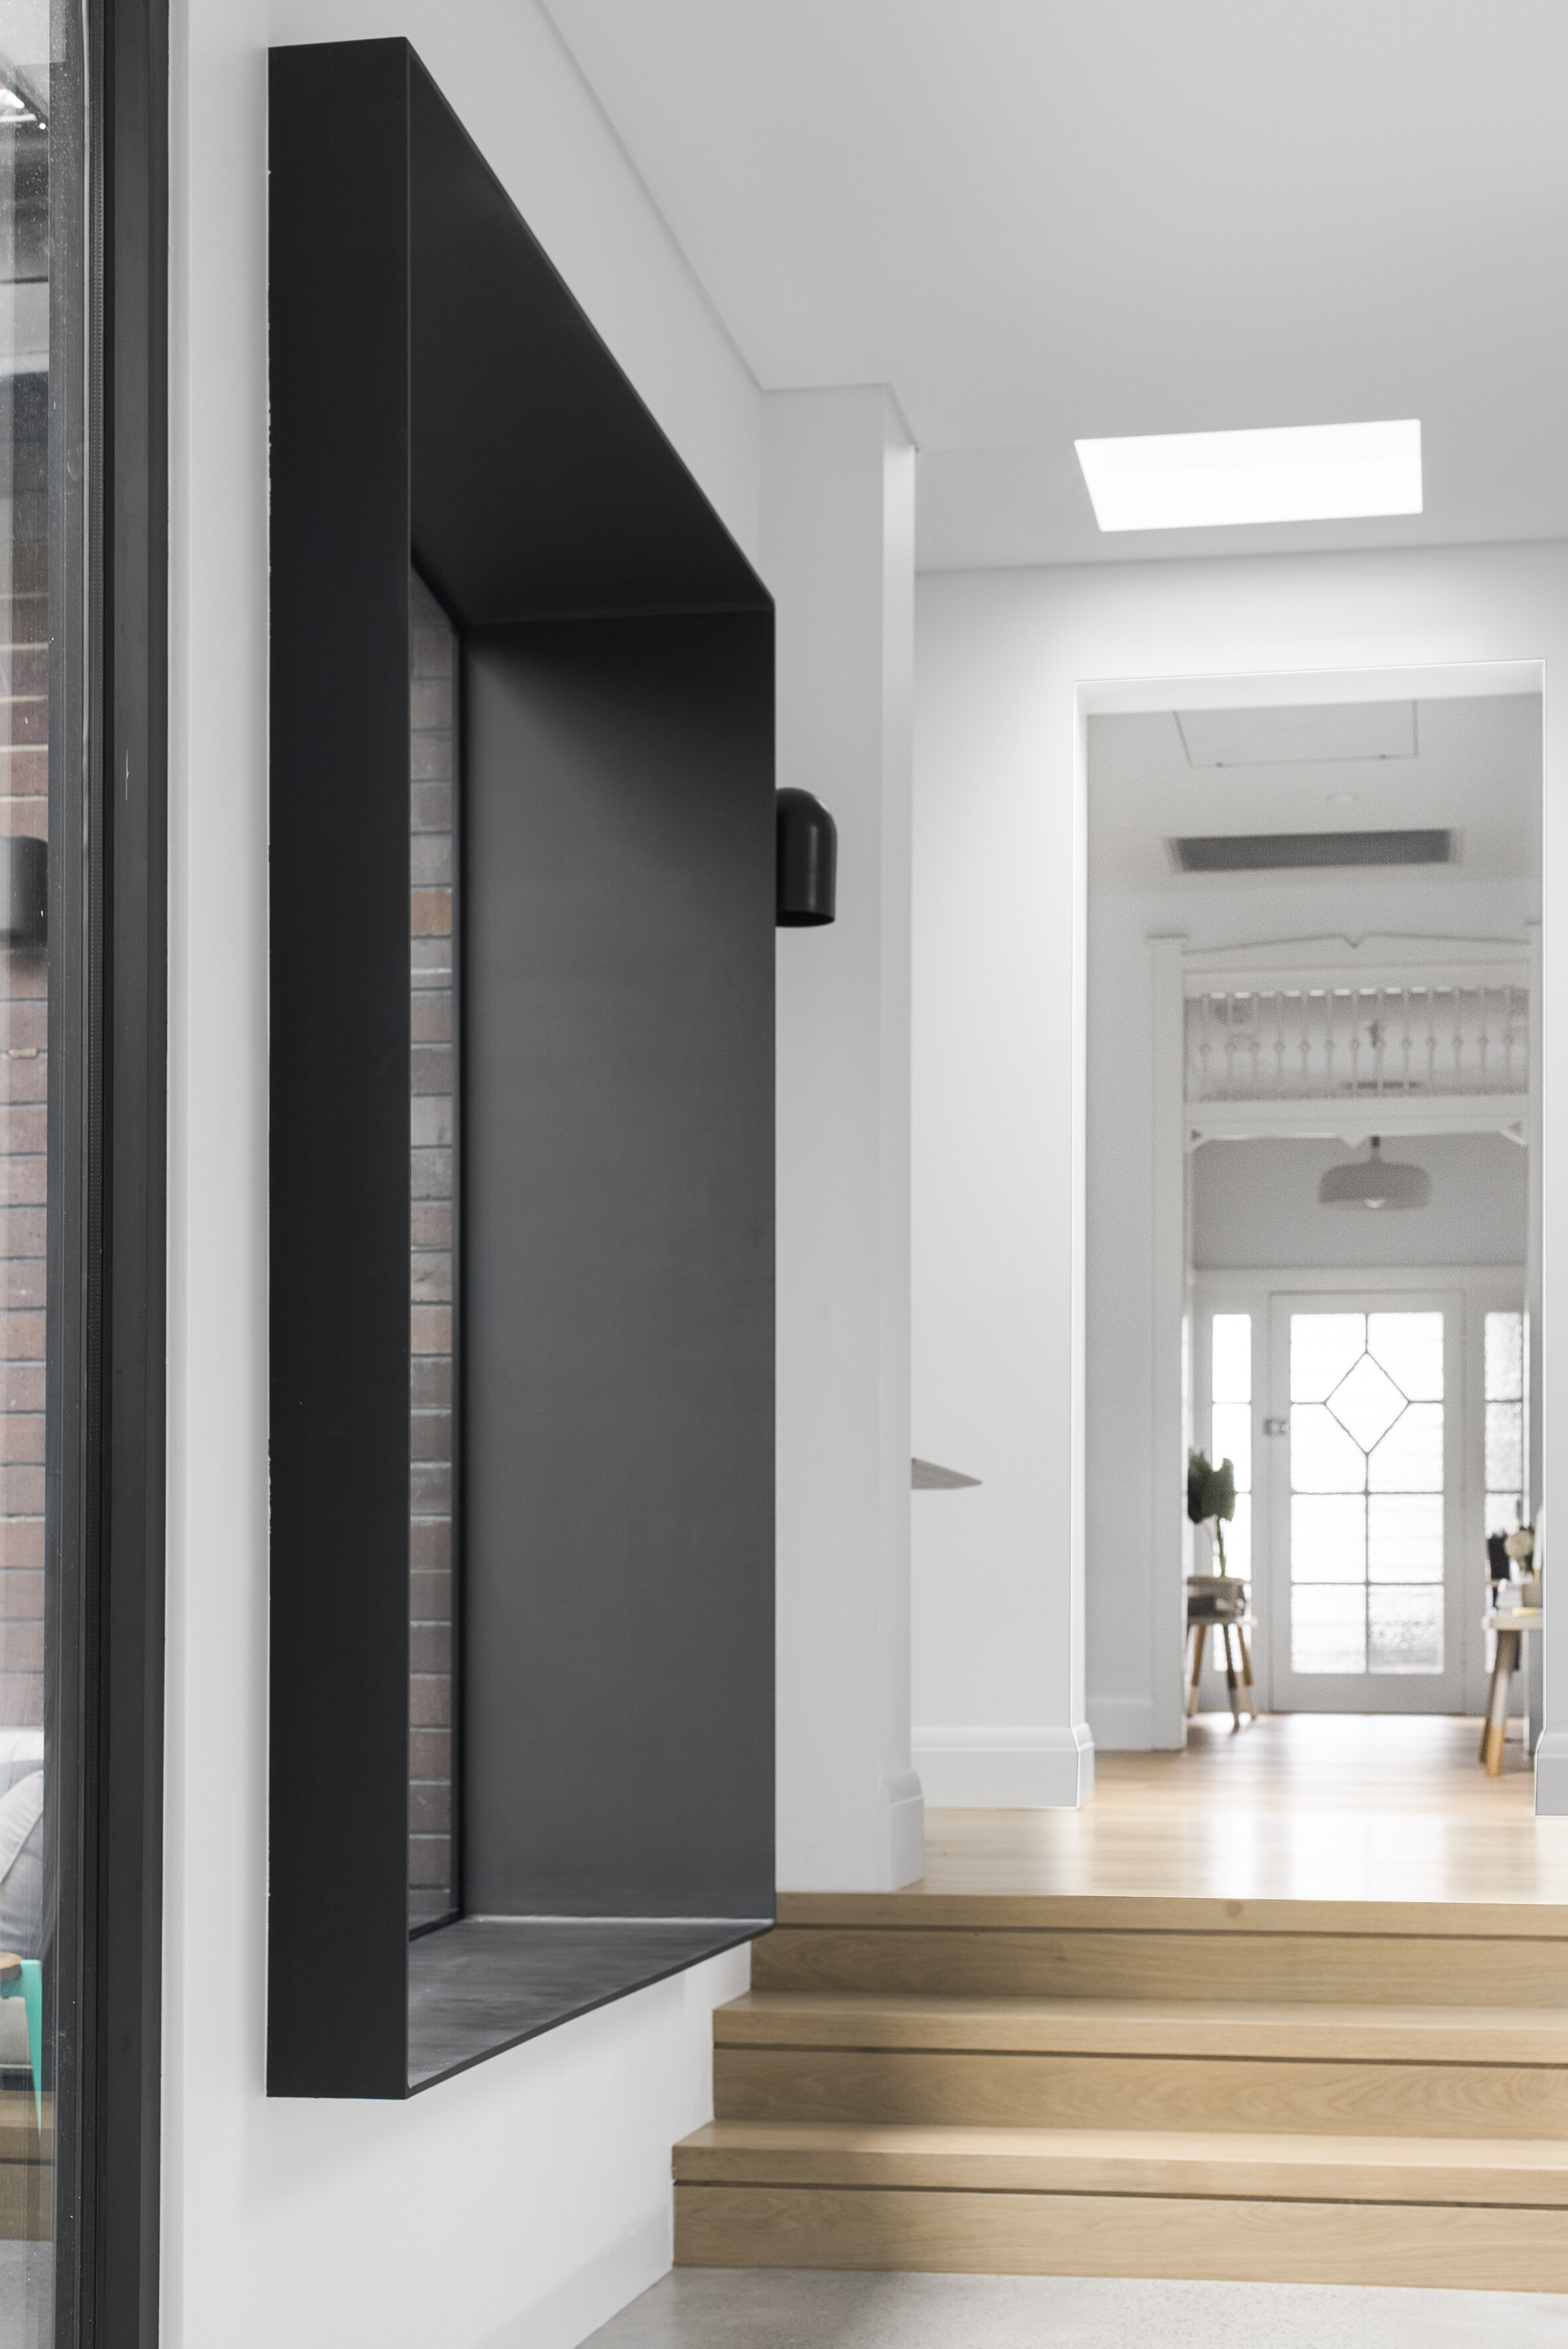
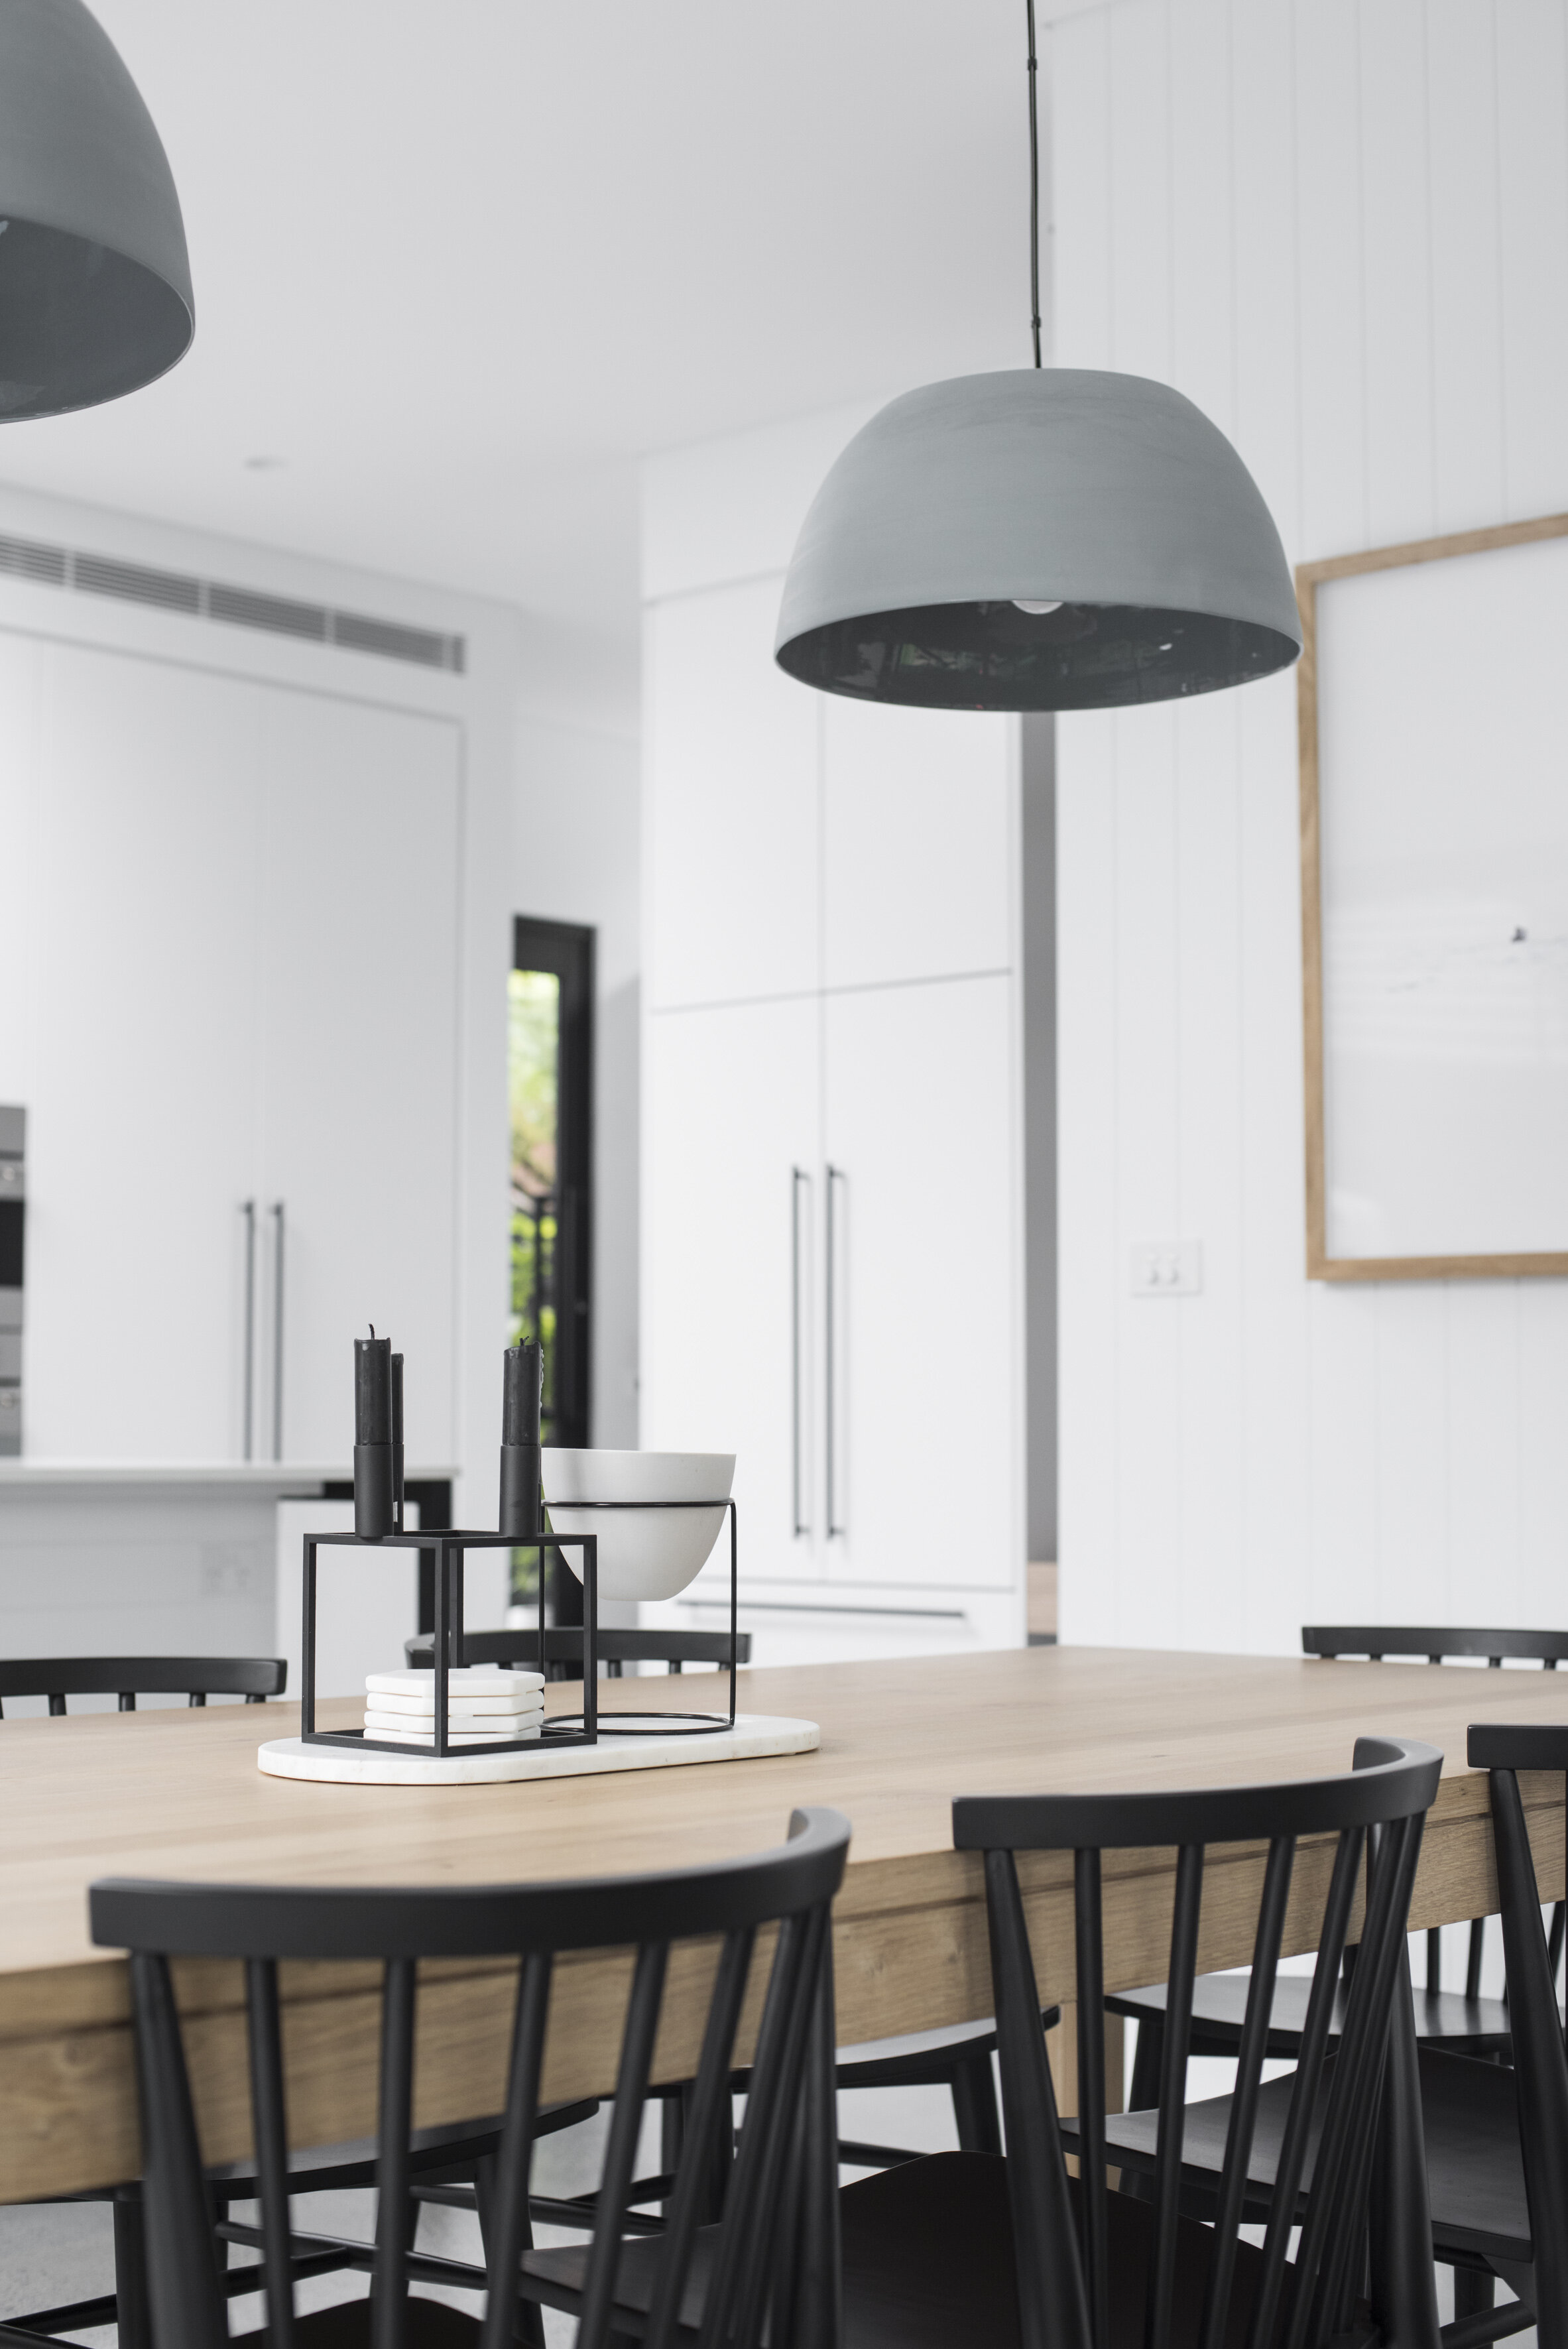
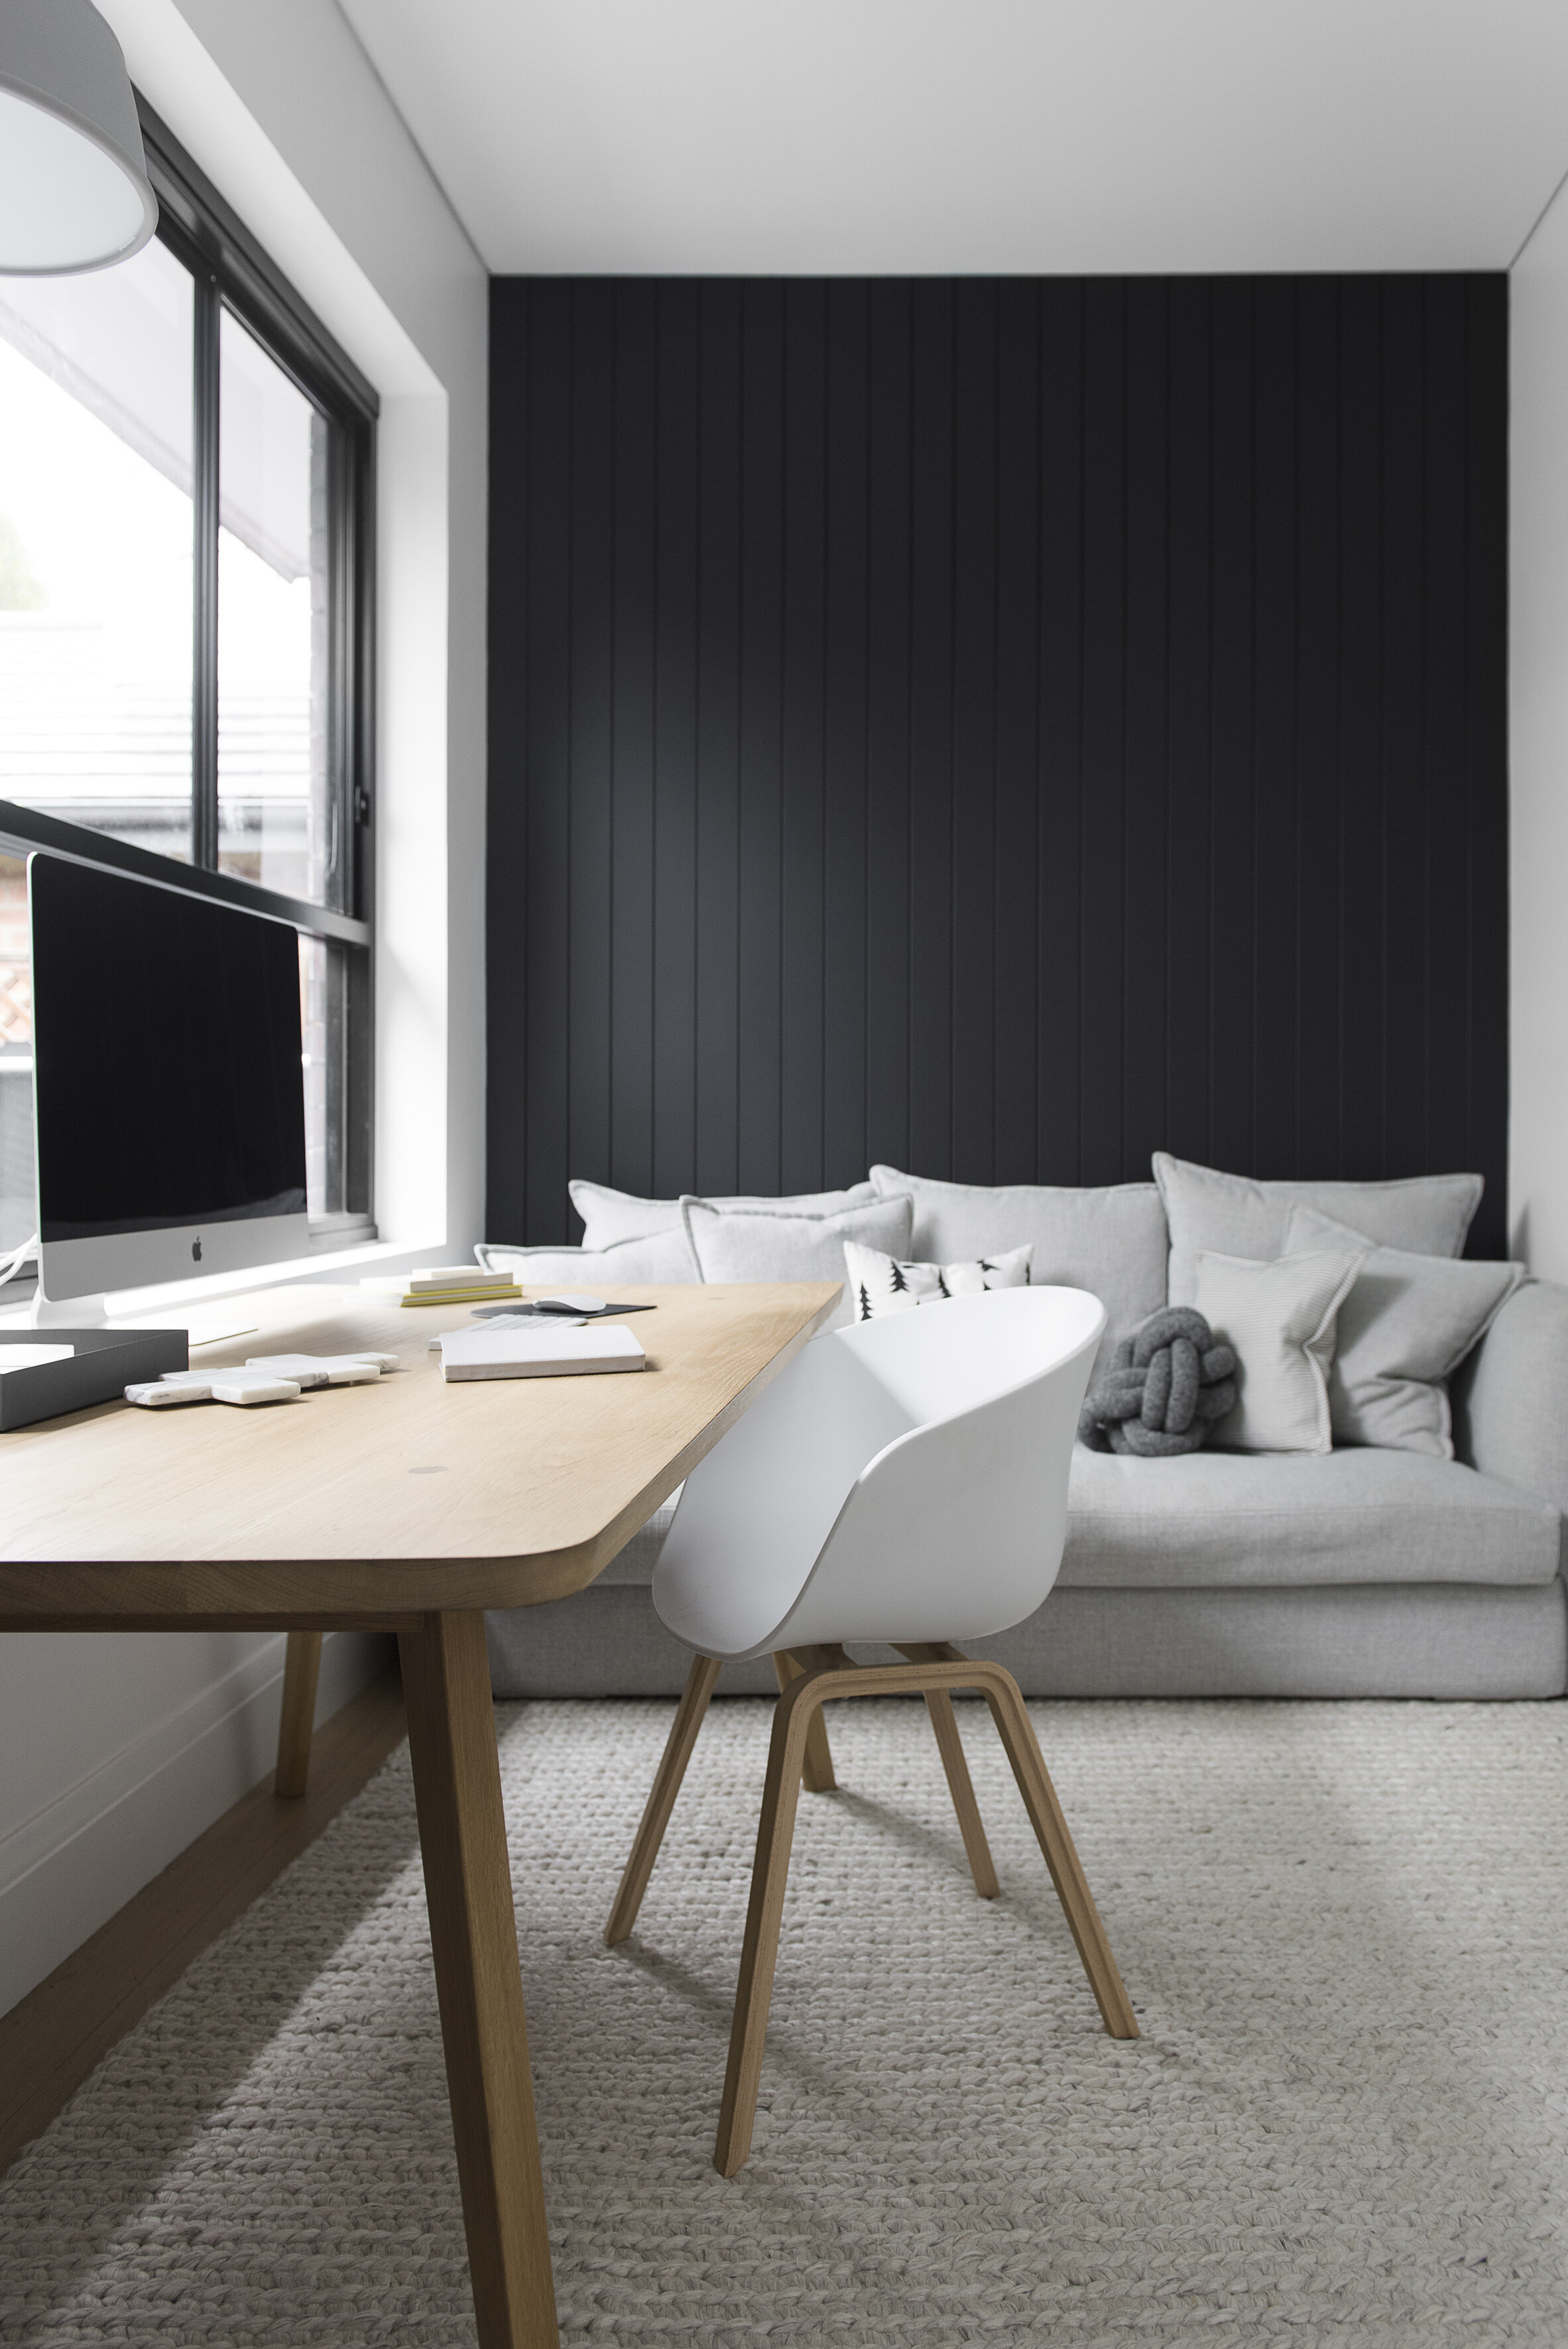
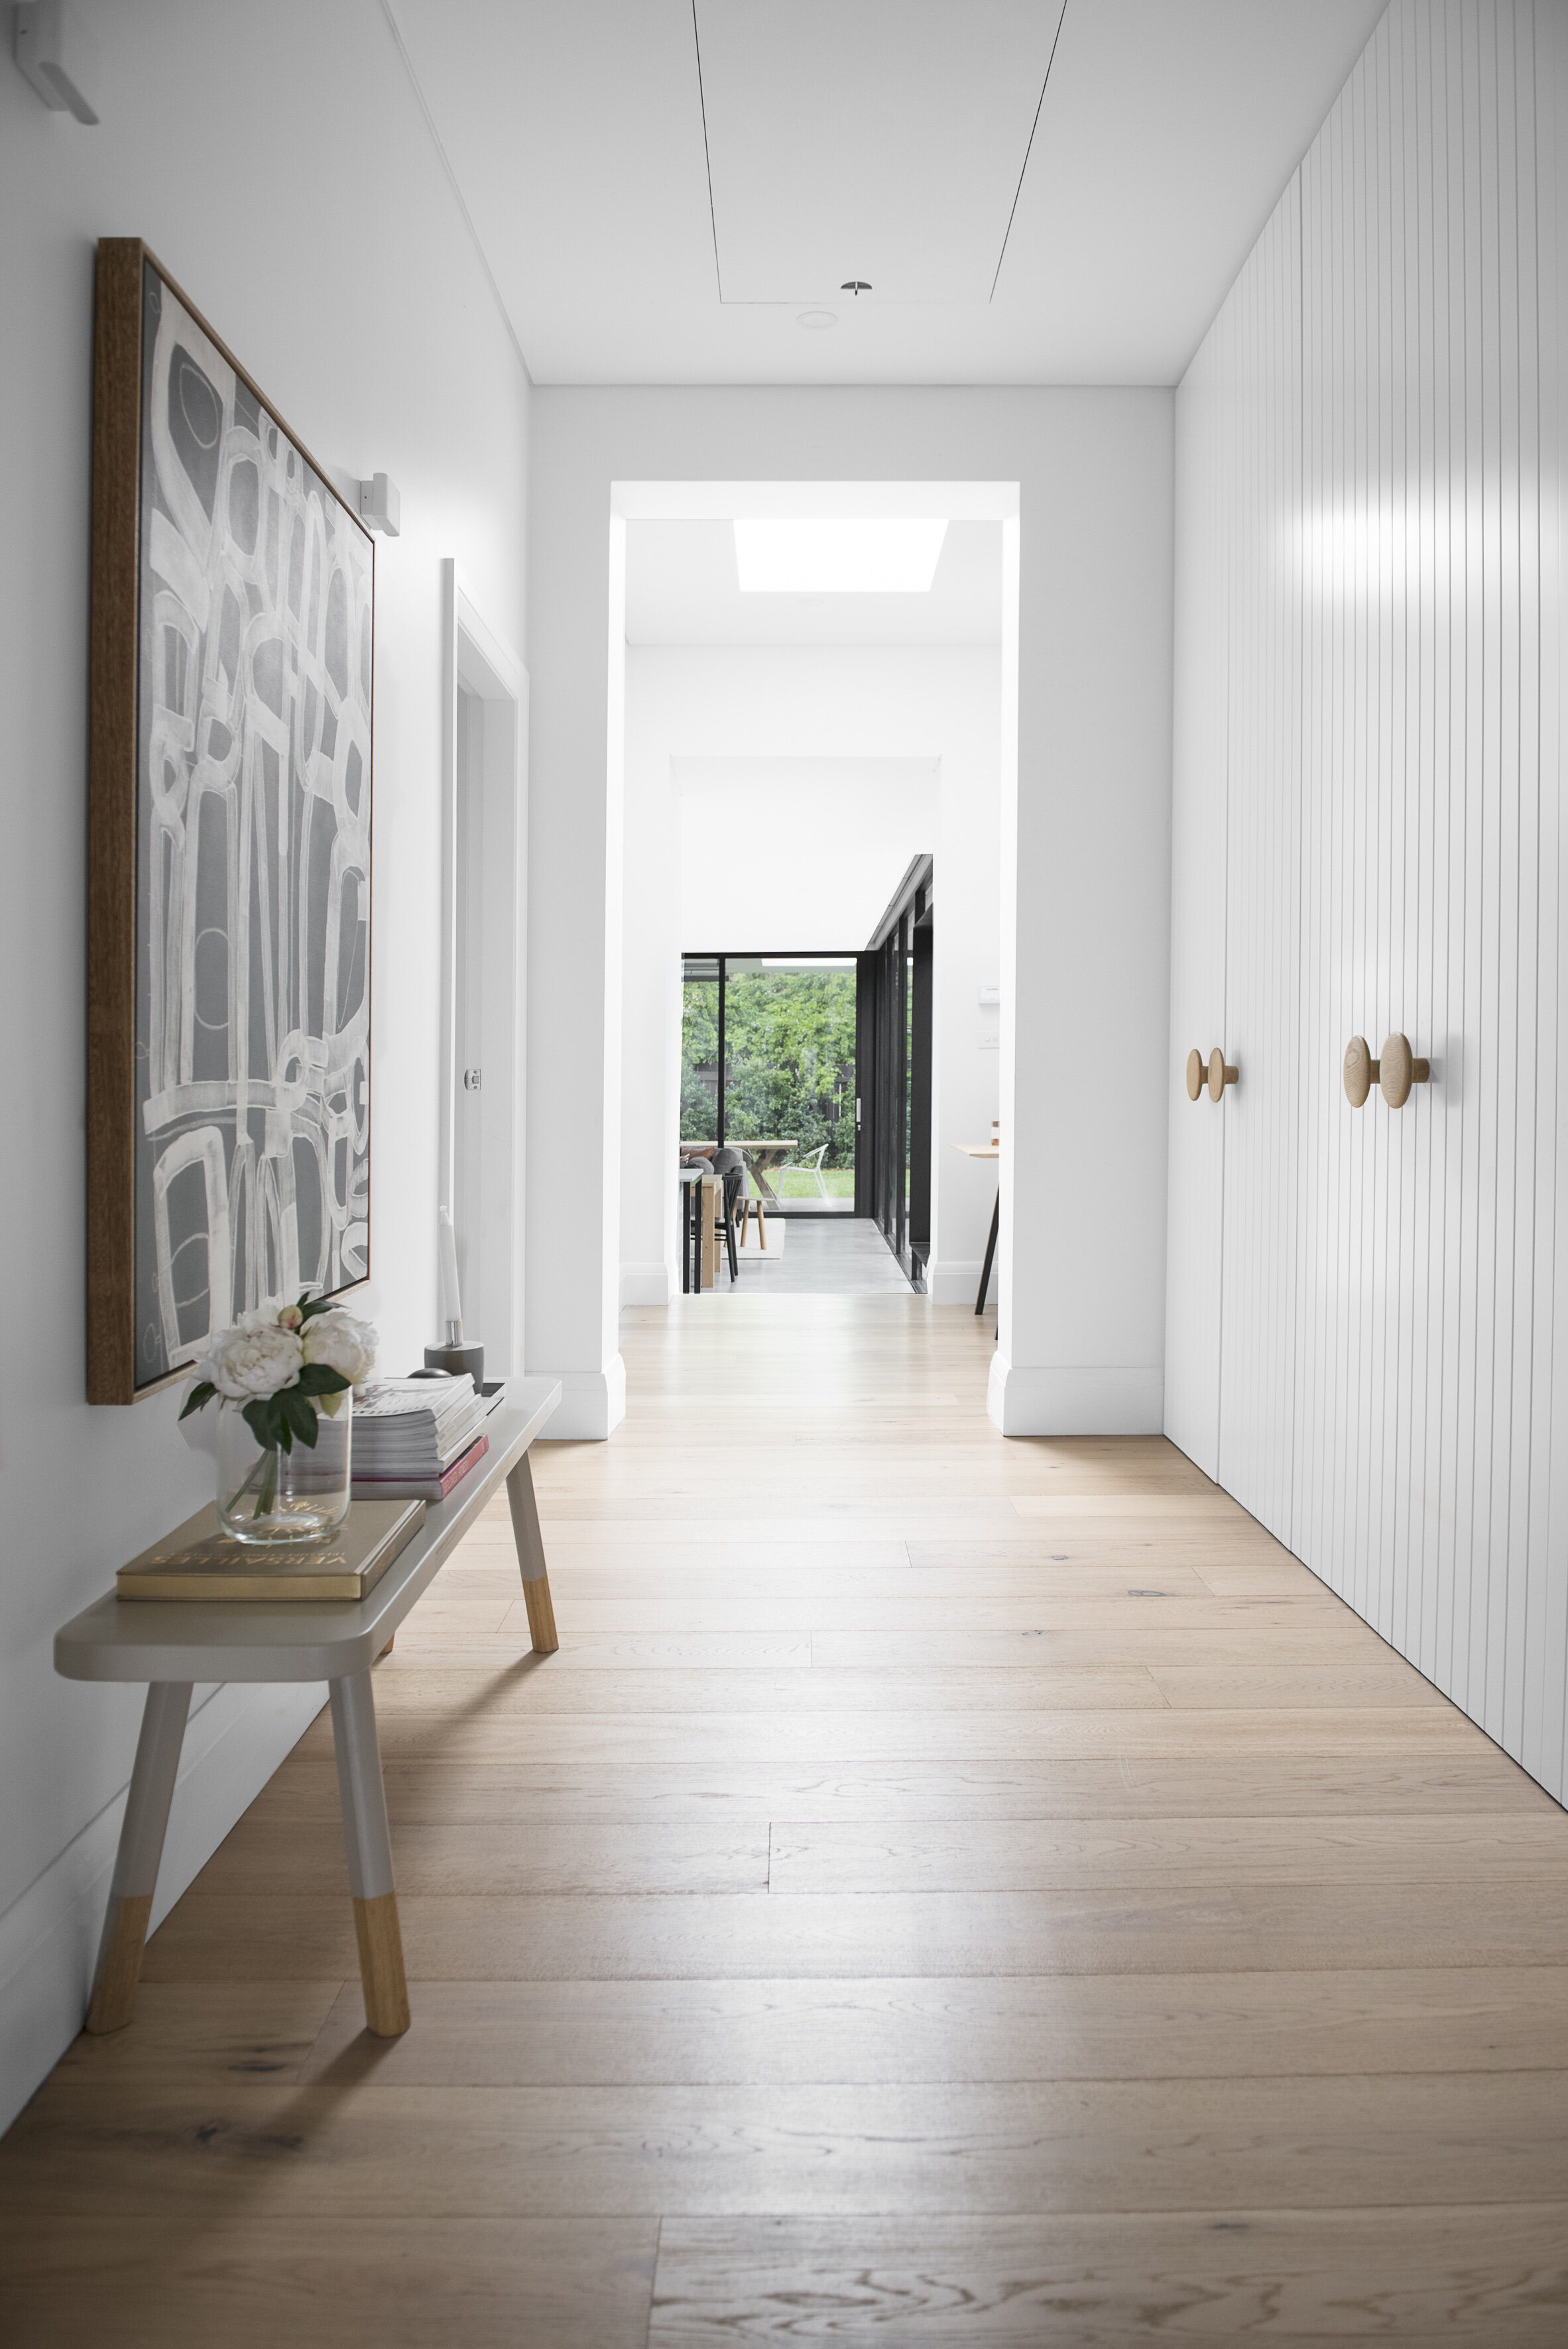
After Photos
As you can see the home was completely transformed and modernised. To see the full transformation scroll the after images in the gallery below!
You will also see how closely SketchUp resembles the finished product. It’s a great piece of software for helping you visualise how your home is going to look before it’s been built.
Builder: Fairweather Constructions
Interior design: The Little Design Corner/Clare Le Roy - that’s me :)
Photographer: Estaban La Tessa


Ready to Learn SketchUp?

If you’re keen to find out more about SketchUp itself or my online course then I have two options for you:
1: Sign up for my free information session:
I have a completely free information session that goes in to more detail about SketchUp and how you can use this to design and renovate your home. In the session I also go over the different software options (as SketchUp have both free and paid versions) and outline the pros and cons of each option. Plus I tell you a bit more about my online beginner’s course SketchUp for Interior Design.
2: Join my SketchUp Course
If you are ready to jump in to the course then follow the button below to learn more about what’s included and how it all works. On this page you will also find answers to even more questions I get about SketchUp and you can join the course on that page as well.
Enjoy the rest of your day!
Clare x