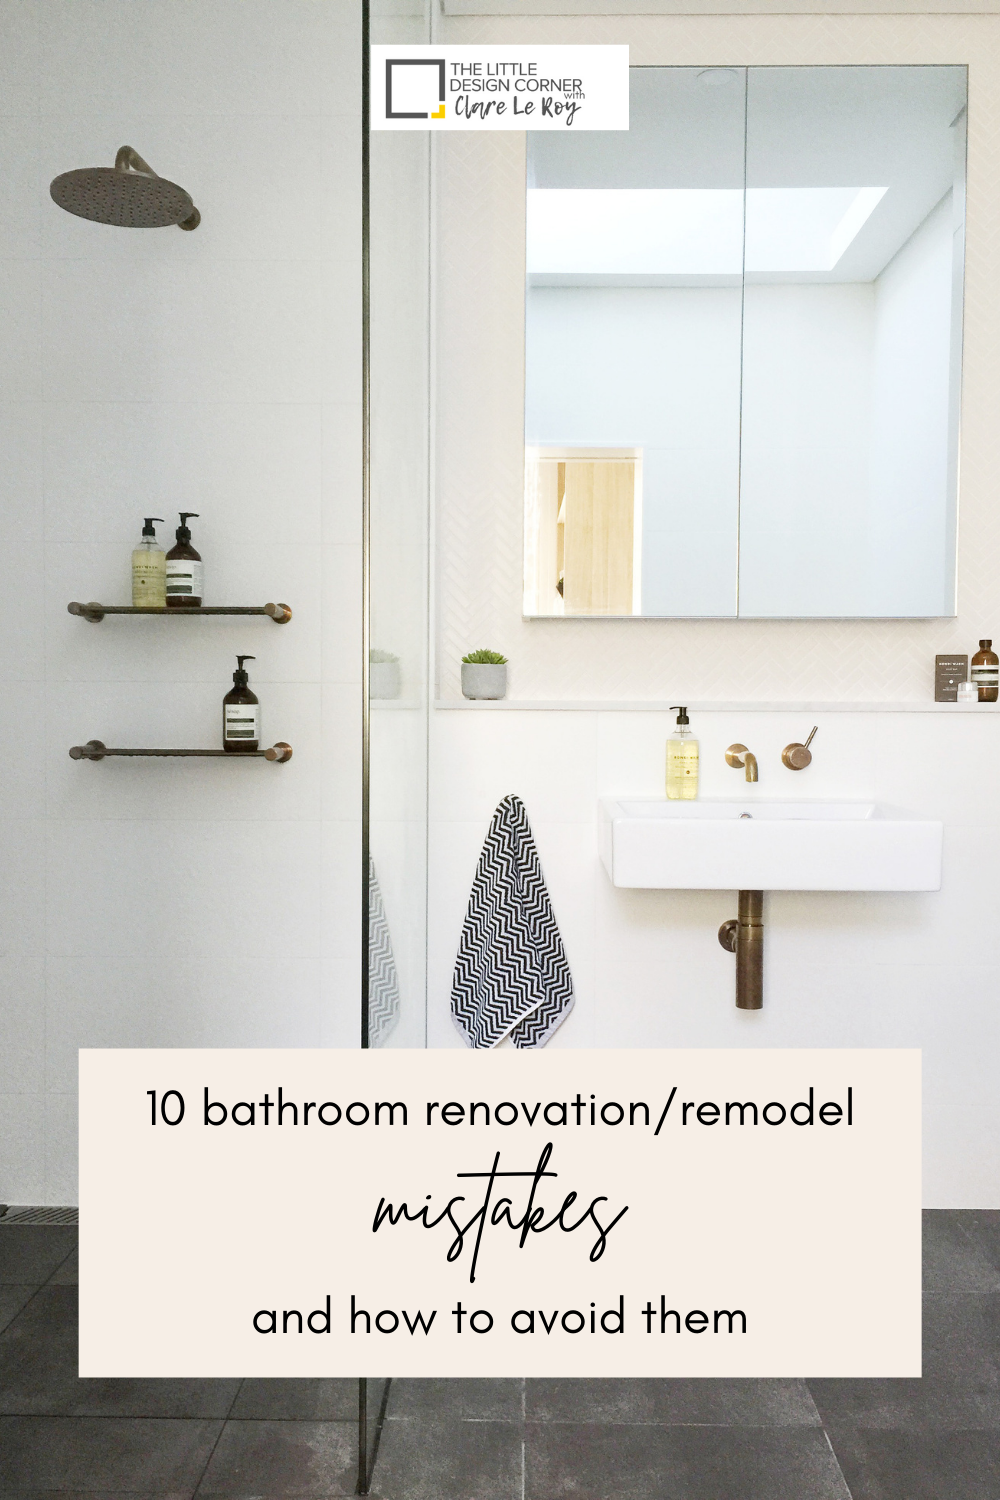
10 bathroom renovation mistakes and how to avoid them
As a designer who has being involved in the renovation of more than 100 bathrooms over the years, I have seen lots of mistakes happen or issues that could have been avoided.
Here are 10 bathroom renovation/remodel mistakes I’ve seen plus how you can avoid them happening to you.
1. Over capitalising
As a general rule you should spend about 2-3% of your house value on a bathroom renovation.
So, for example, if you're house is worth $500,000 then you would spend around $10,000-$15,000 on your bathroom renovation. If your house is worth around $2 million, then your bathroom renovation budget might be more like $40,000-$60,000. Obviously this is just a guideline, not a rule, but it gives you something to work with.
Even though you might not be intending to sell your house soon it’s always important to consider what sort of bathroom your property needs and whether you are going to get that amount back if/when you sell.
If the value of your property is high then it’s worth spending more on your bathrooms - e.g. higher quality tiling or fixtures and fittings - as future buyers will have certain expectations about this. But buyers for less expensive properties will be looking for neat and tidy bathrooms, with simple but timeless design. And this doesn’t have to cost a fortune! They won’t expect high end fixtures and fittings.
Even if you aren’t going to be selling in the near future it’s important not to spend more than what you need on your renovation/remodel. You want to make sure you’ve only invested what you will get back if you ever want or need to sell.

2. Waterproofing issues
Leaking bathrooms often stem from poorly installed waterproofing.
To avoid waterproofing issues make sure you always use a certified waterproofer. That way you will be provided with a waterproofing certificate and the waterproofer will guarantee the waterproofing and be liable if something goes wrong with leakage.
Don’t skimp on your waterproofing company! And make sure you get the certificate from them.
3. Tiling issues
There are a whole range of issues that can go wrong with tiling.
These include:
issues with tiling layout
quality of the tiling itself
poor choices in tiles (e.g. making tile selections that are polarising or that will date quickly).
choosing the wrong sort of tile for purpose - e.g. a floor tile with an incorrect slip rating that makes it extremely slippery when wet
Here's a few tips about things to think about in relation to the tiling of your bathroom:
Think about your tile choices
Larger tiles are cheaper and easier to lay (so save you money!). Mosaics and very small tiles are much more expensive to install as they are fiddly and time consuming for the tiler.
By using larger format tiles in a number of walls or the floor it means you can spend a bit more on more expensive tiles for a feature wall (e.g. in shower area), for example.
Also keep in mind that small tiles mean more grout lines. This means that grout can get dirty more easily. If this sort of thing bothers you I suggest you keep small tiles and mosaic tiles out of very wet areas, like shower recesses.
Also make sure when choosing tiles that you choose tiles that have the correct slip rating for purpose. Floor tiles will need a specific slip rating that stops them becoming slippery when wet. Tiling supplier can provide you with this information.

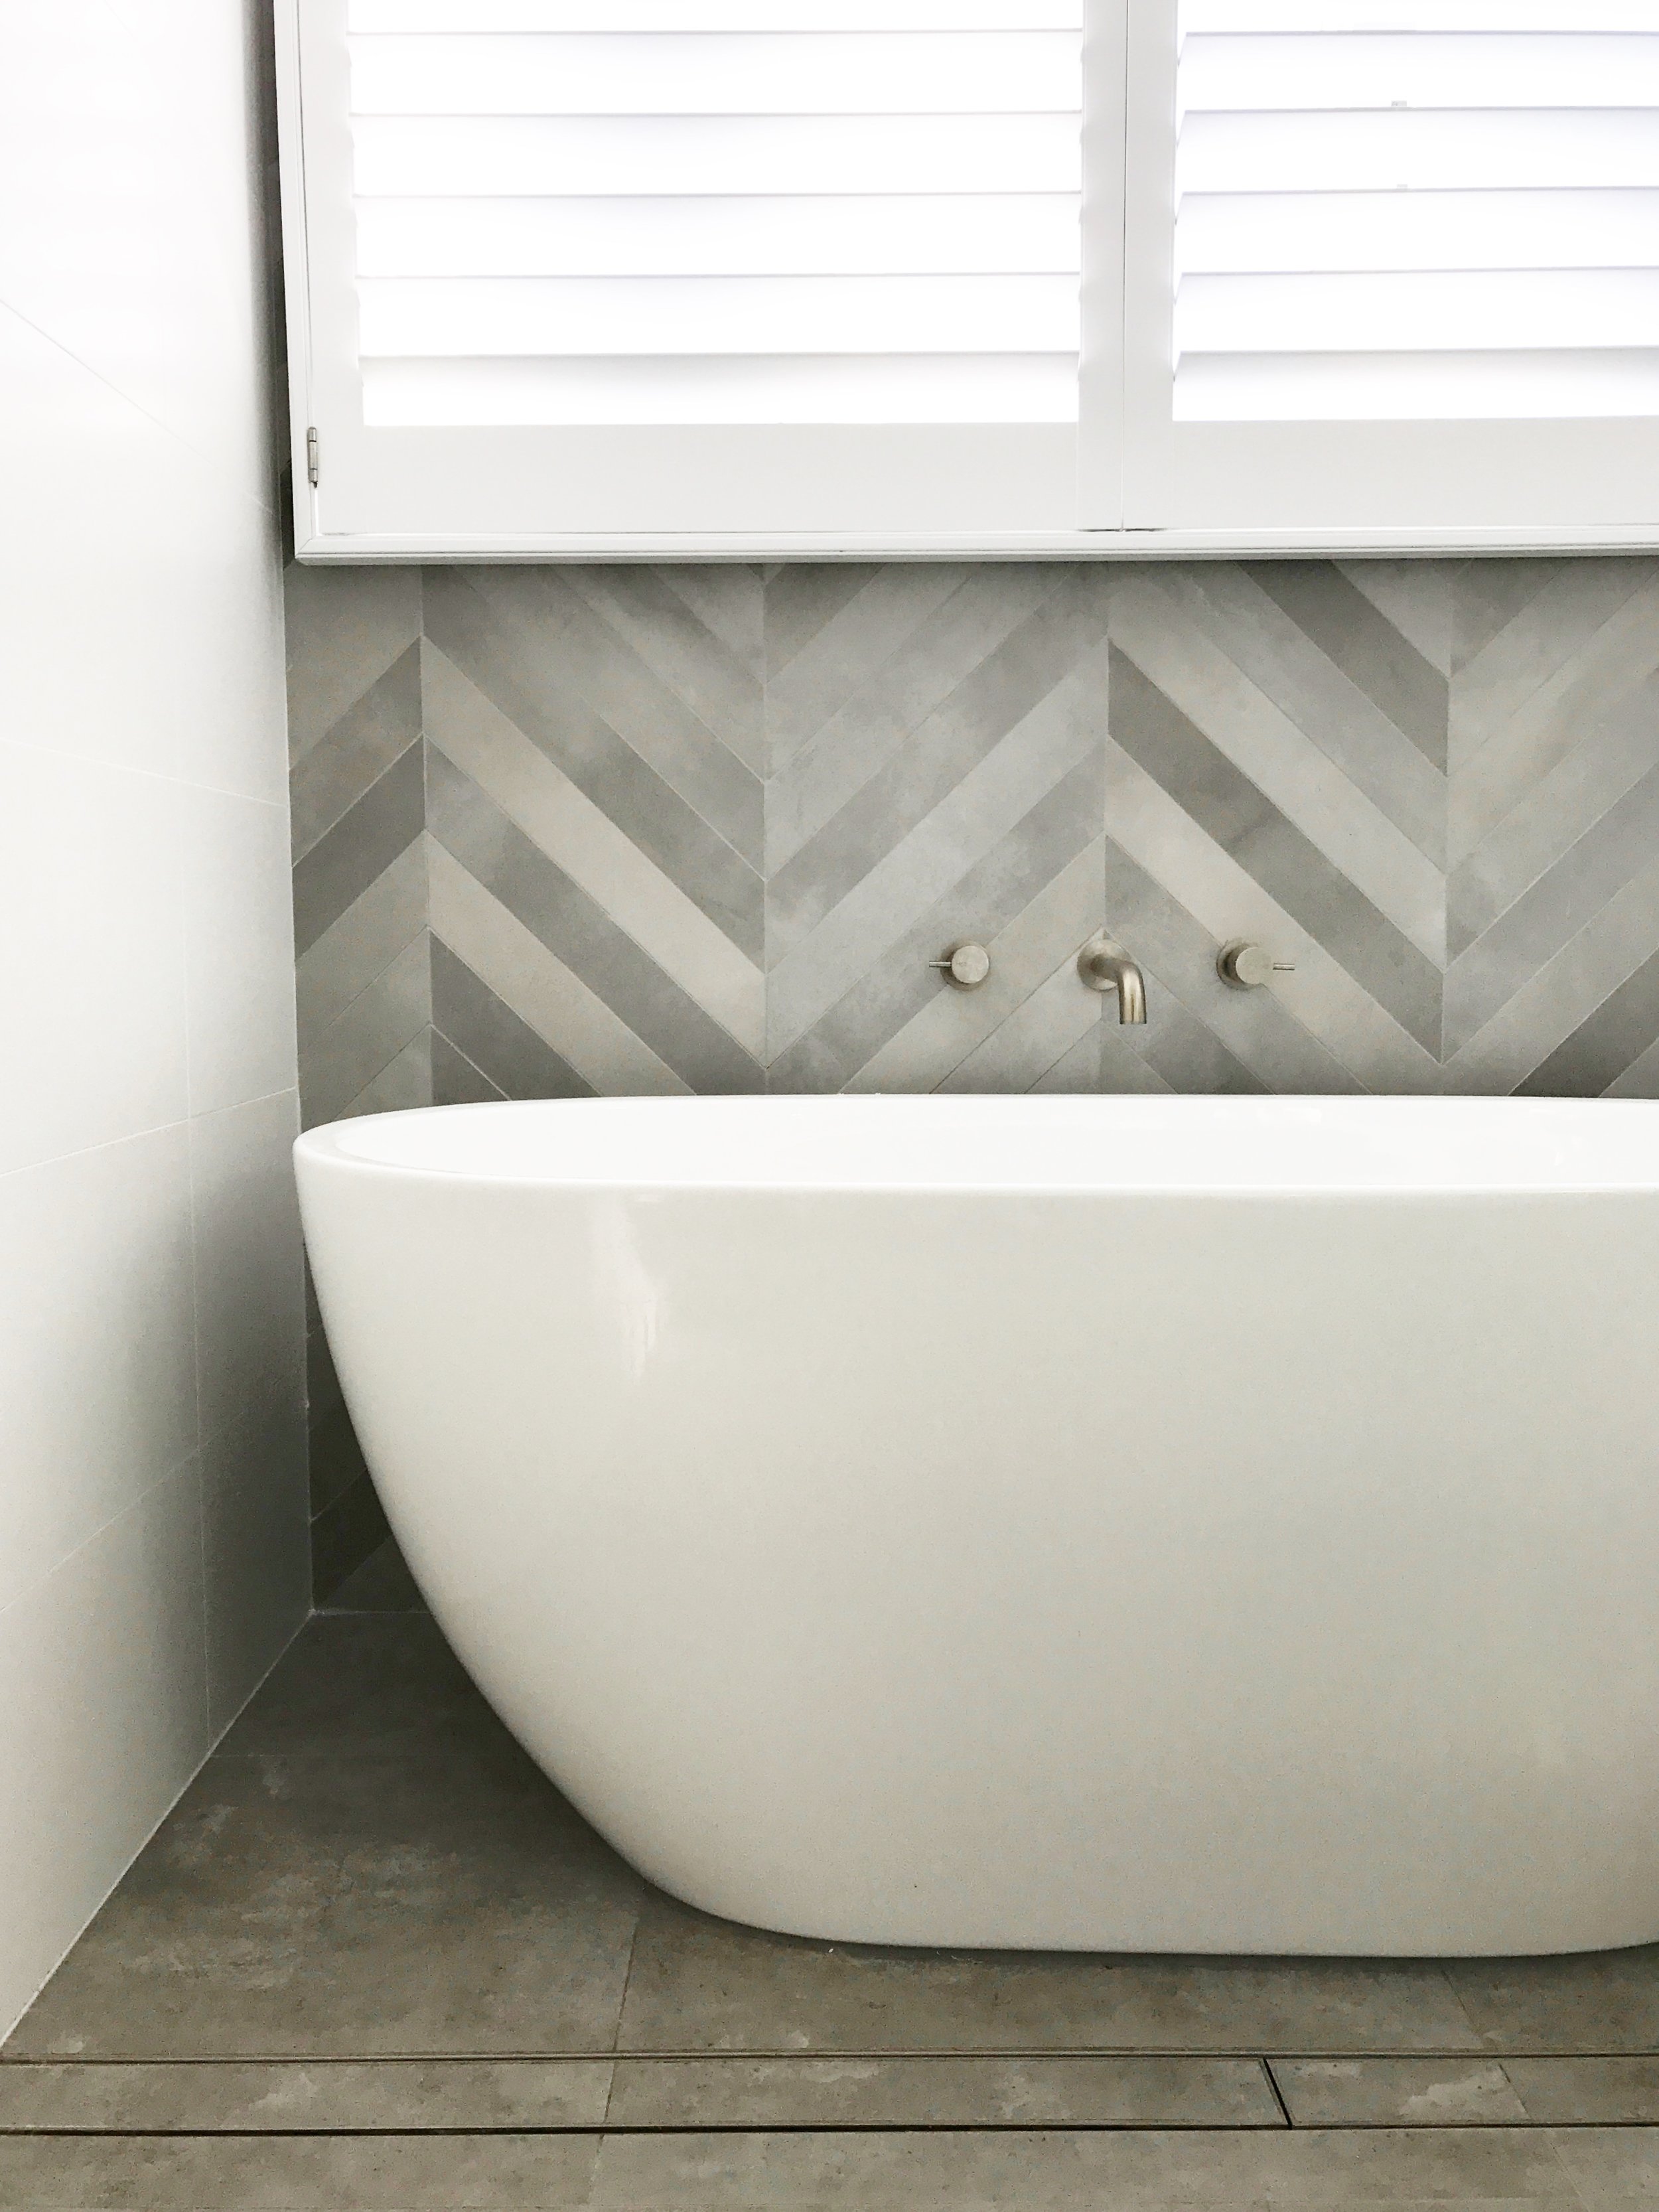
A combination of inexpensive large format white tiles with feature herringbone mosaics from my Roseville project

Close up of the herringbone mosaic tiles with aged brass fixture as the feature
Keep an eye on your tilers
Tiling is what makes or breaks your bathroom and you need to be extremely clear with your tiler about how you want your tiles laid out.
A good tiler will go through the exact cuts and placement of all tiles before he/she starts and make sure you (or your designer) are happy with the layout, but not all will do this (especially less experience or cheaper tilers).
The best way to avoid mistakes with tiling layout is to map out the exact pattern you want your tiler to work with. You could do this on grid paper, drawing up each bathroom wall/floor and then drawing in each tile layout exactly how you want it. Or if you use CAD software you can do tiling layouts in that more easily. This will also help give you a visual representation of how your tiling will look once it is installed so you can make changes if you need to and avoid mistakes or miscommunication with your tiler.
Either way, it's critically important to have a meeting with your tiler before he/she starts work and go through the exact layout they propose for your bathroom and make sure you're comfortable with what is being proposed.
Mitering your tiles vs using a trim/angle
Make sure you're also clear with your tiler about how you want corners and edges finished.
The higher end option for how to finish tiling on corners is to mitre the tiles. This looks by far the best but is more expensive (due to the extra time involved for the tiler to make cuts of the tiles) plus not all tiles can be mitred.
So if you want to go with this look then make sure you discuss this with the tile company prior to purchase, to ensure the particular tiles you're choosing can be mitred at the edges. Also keep in mind that the edges of mitred tiles are not as strong as those that are finished with an aluminium angle. So they are more prone to chipping and you will need to be more careful with this area.
The alternative to mitred edges is to install an aluminium angle on the edges.
These angles can be a bit ugly and I prefer not to use them personally (the exception to this being when clients are concerned about chipping - e.g. in a kids’ bathroom, or for similar reasons or when a tile really can’t be mitered).
But the benefits of an aluminium angle is that they are a cheaper way to install tiles as there are no special cuts that need to be made, like with the mitred edges. In addition, they are a more durable finish and not prone to chipping.
These days the aluminium angles do come in a range of colours - including black, white or even custom finishes to match what else is going on in your bathroom - so they don't look quite as ugly as they used to in the past.
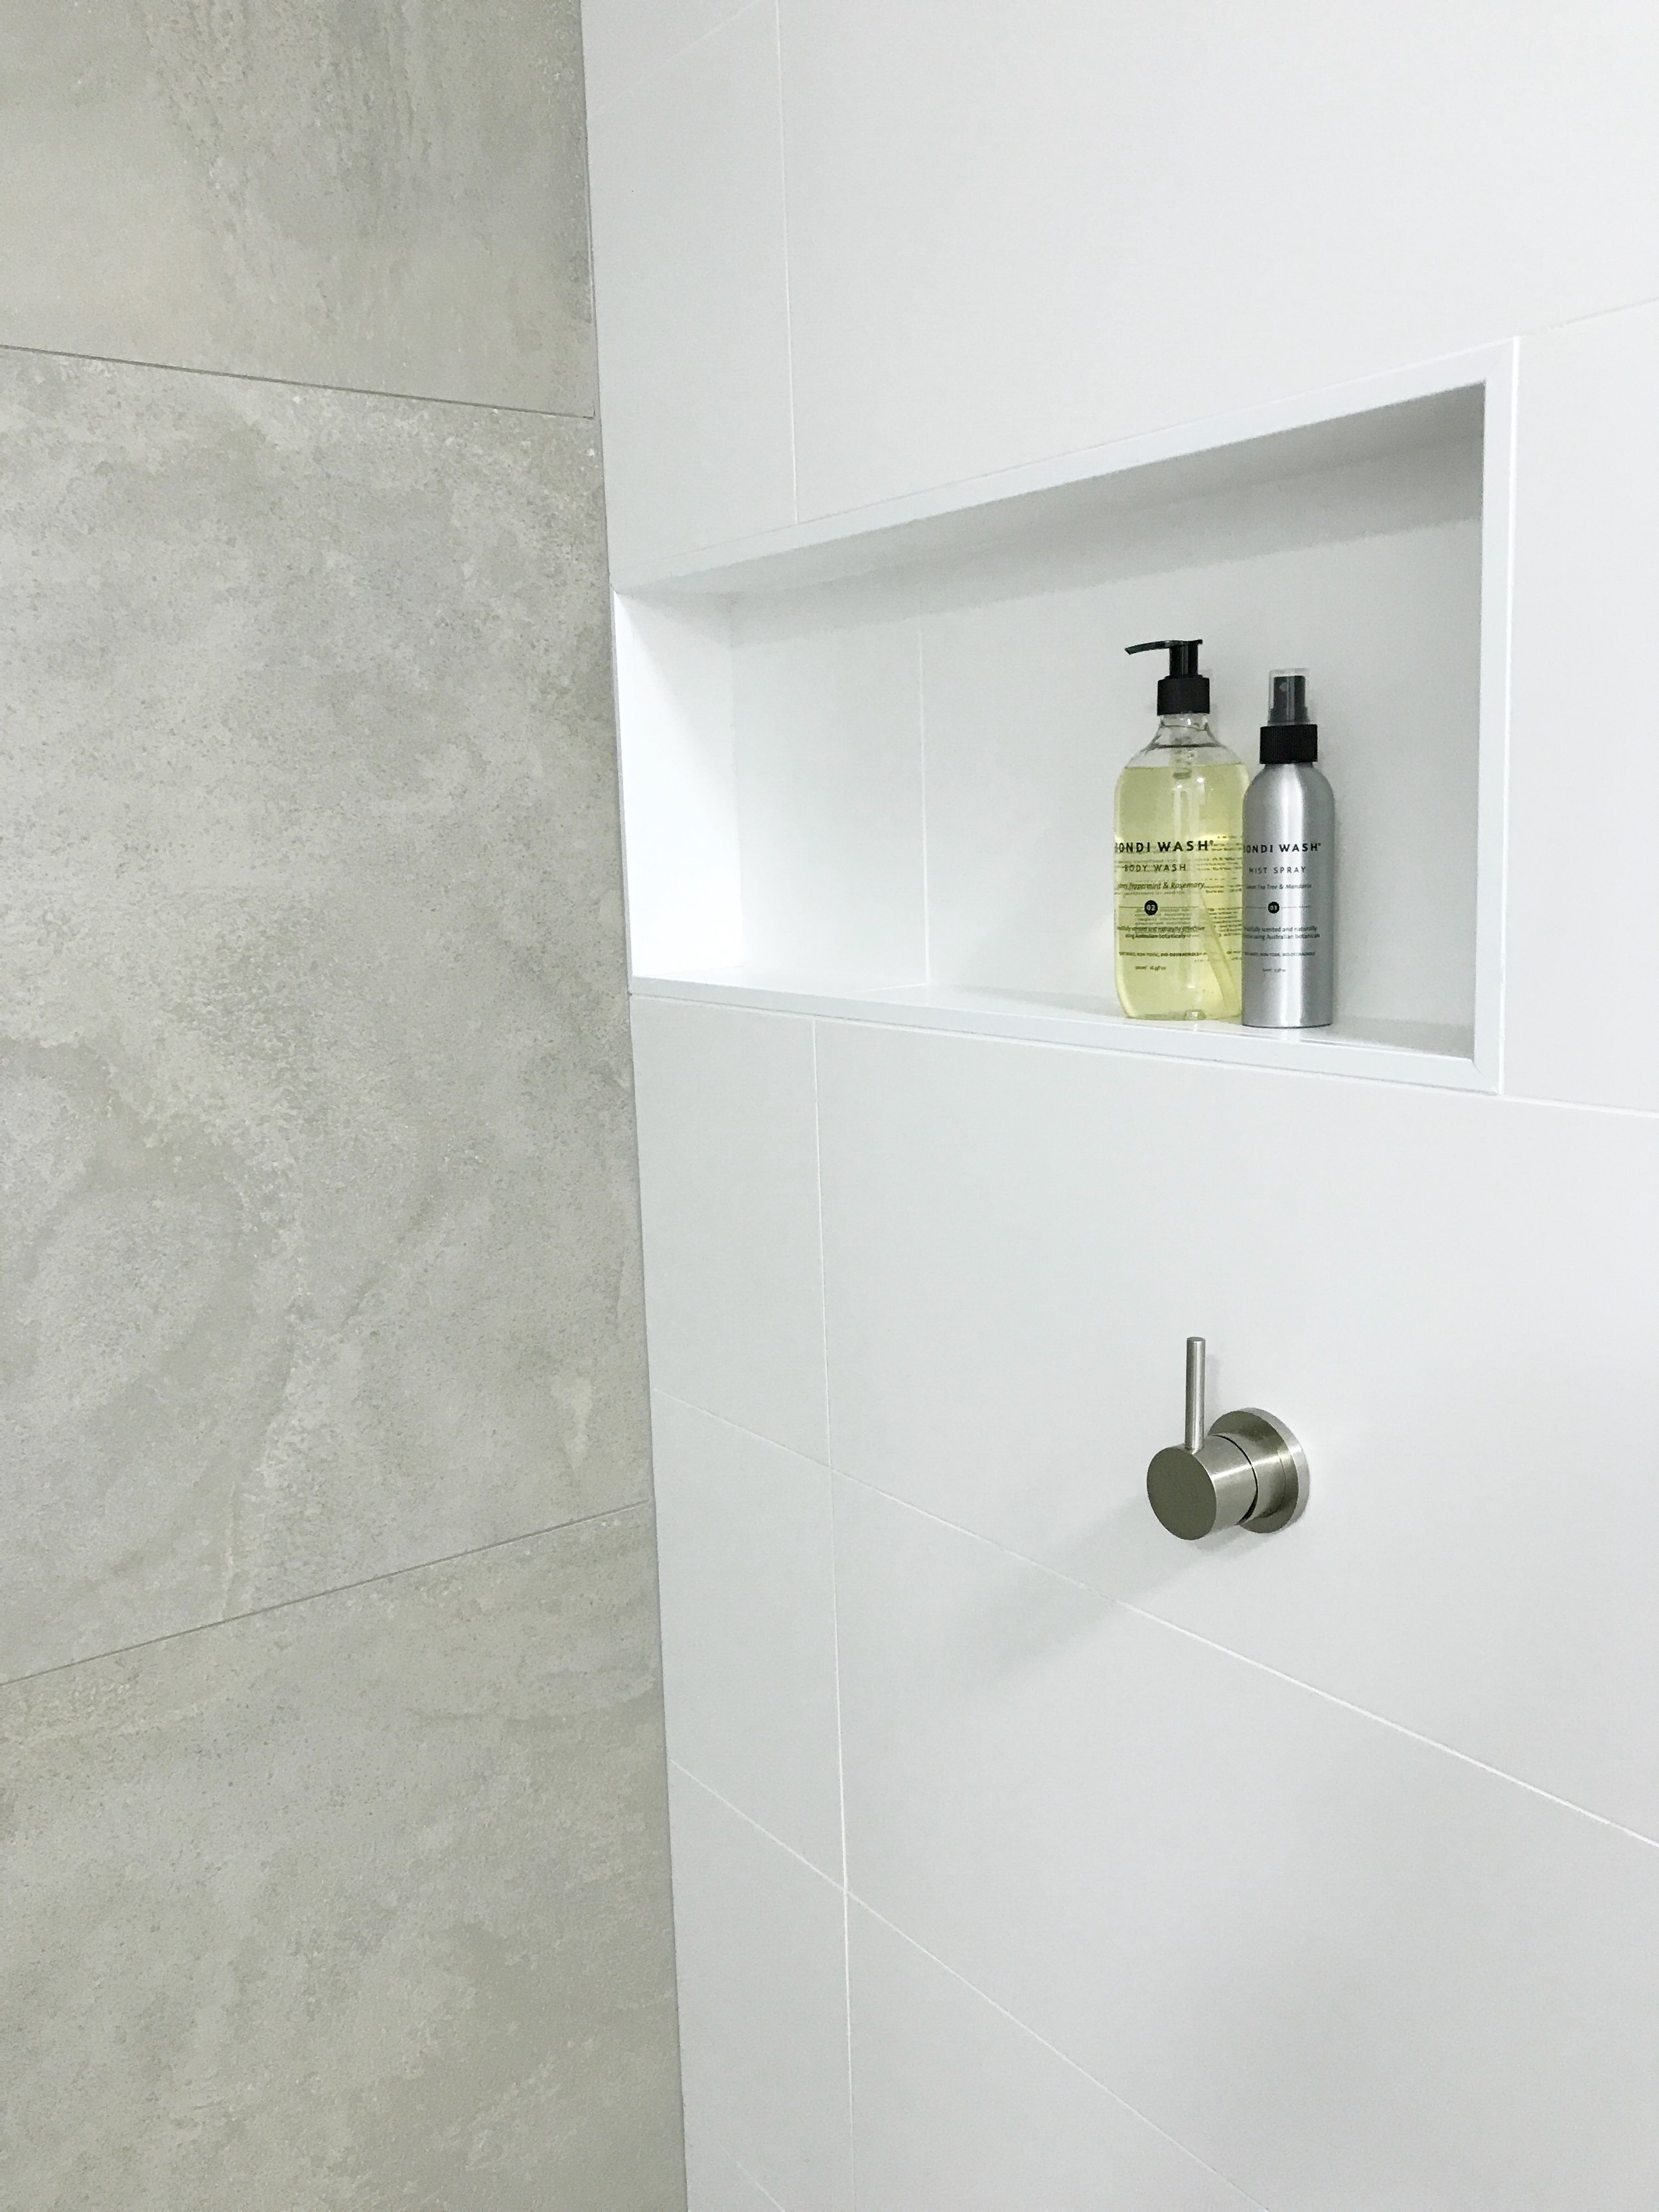
Example of a niche with white angle - Project by The Little Design Corner

Example of a niche with mitred edges - Project by The Little Design Corner
4. Not enough storage
Storage is essential in a bathroom and a good rule of thumb is you should try and have storage for both larger items like hairdryers, towels etc. (e.g. in a vanity or cabinet) as well as face level storage for things like cosmetics, toothbrushes etc.
A niche in the shower is really good for storing shampoo and soap bottles and these tend to date less quickly than shelves you install after tiling - plus surface mounted shelves often go rusty or look bad after a few years, whereas a niche should always look good if it’s kept clean and mould free.
Keep in mind that niches need to be planned for at framing stage so think about whether you want one of those right back at the planning stage for your bathroom and make sure your builder roughs that in. Once you’ve moved past framing it will be too late to add a shower niche.
Here’s some tips for creating the perfect shower niche if you’re interested :)

5. Spending money on unnecessary things
I see lots of people waste money on a range of things with their bathroom renovation.
I personally try and steer clients away from wasteful spending and encourage them to instead spend the money on more important areas.
If a client is on a strict budget then here’s some of the tips I use to help them keep costs down in their bathroom project:
where possible keep plumbing in same location
if practical, consider not tiling the whole bathroom - e.g. you could use a mix of tiling and painted finish if you have a large space. This will keep your tiling costs down.
use a mix of high end and less expensive tiles - e.g. use an inexpensive white satin rectified 300x600mm white tile on most of the walls and offset this with a feature tile that is more expensive
buy vanities off the shelf. This is much less expensive than designing and installing custom joinery/cabinetry and there are some great options on the market.
My biggest tip is to save where you can, but make sure you don't underspend on the important parts of your bathroom.
In my opinion the fixtures (e.g. taps/faucets/shower heads/bath/toilet) are definitely worth spending on as you can tell a less or more expensive fixture and these need to last.
I also think heated towel rails are worth their weight in gold - especially for family bathrooms or bathrooms that are being used by a number of people and where towels are all stacked near each other. The heated rails help the towels dry out more easily and avoid them getting mouldy or never drying out. The heated towel rail also helps to heat up a bathroom in winter.
Again, if you want a heated towel rail it will need to be roughed in at framing stage by an electrician.

A mix of vanity and overhead storage - Project by The Little Design Corner
6. Not enough ventilation
Good ventilation in your bathroom will increase the life of the room dramatically.
Poorly ventilated spaces never get the chance to dry out properly and mean that they will go mouldy more easily. Even if you have good window ventilation it's worth investing in a mechanical ventilation system as well - e.g. an exhaust fan installed over the shower/bath area to catch steam as it's being used. This is normally required by building codes anyway - so make sure you know what is needed for the size of your space.
Another option, if feasible, is to install an opening/closing skylight. This is a bit more costly but is a good investment for more expensive bathrooms as it creates another layer of ventilation and provides an additional source of natural light.
7. Bad layouts
One of the main layout issues I see is trying to fit too many things in a small space.
I would recommend you install a shower over bath rather than a cramped shower and tiny bath, for example. Think about whether swinging your existing door the other way or replacing with a barn style door on the outside wall, or even a pocket slider, will save space or create the sense of a larger space.
In wall cisterns can provide some extra space, but be aware these are more expensive to install and can be problematic if they start leaking or break. You may even consider taking out a bath altogether if you have one in another bathroom in the house.
8. Not having a bath
Pulling out a bath and then not having one in your home at all can be an issue for the resale of your home.
Unless you live in a one bedroom apartment and you really don't think that the family market is a potential buyer of your home, it's important that at least one bathroom in your house has a bath. Normally it's best if this is in the bathroom that would most likely be used by kids. I have seen houses where a bath is included in the ensuite but not in the main (kids) bathroom, but I personally feel this isn't the right way around as many parents don't really want to share their ensuite with their kids but need to bath them - meaning their ensuite gets splashed by the kids and their bath water!
My recommendation is to always have a bath and ideally keep this in the main bathroom wherever possible. In my opinion, having more than one bath in a house is a luxury, not a necessity. So think about whether more than one bath is essential - especially in relation to the value of your home.
9. Poorly planned lighting
Think about the lighting for all different tasks and activities that will be done in your bathroom.
You may like to have task lighting for applying make up and doing hair - in which case front facing light casts no shadows and works well for this purpose. As such you may like to install some wall lights.
You may also like to consider LED strip lighting under vanities or below overhead cabinets. These not only create a 'mood lighting' atmosphere for when you don't want to put on all the overhead lights, but it's also a light that can be used at night when you or young kids get up to use the bathroom in the middle of the night. These LED strip lights can even be put on a sensor so that if your kids get up they don't have to stumble around looking for the light - and better still the light gets turned off itself rather than staying on for the rest of the night when they forget to turn it off (or don't want to because they are scared of the dark)!!
Also be careful about the placement of any overhead down lights (pot lights) as if they are over a vanity they can cast weird shadows on the face, which can make applying makeup really difficult.
10. Making design choices that date
The final mistake I see with bathroom renovation is making design choices that are far too 'on trend' and will date quickly. This includes choosing on trend tap ware or dramatic looking tiles.
Bathrooms are expensive and the best idea is to use simple, stylish design elements that will last the test of time.
If you want to be quirky or show your personality then spruce the bathroom up with 'on trend' towels or styling elements that are inexpensive to swap out as needed.
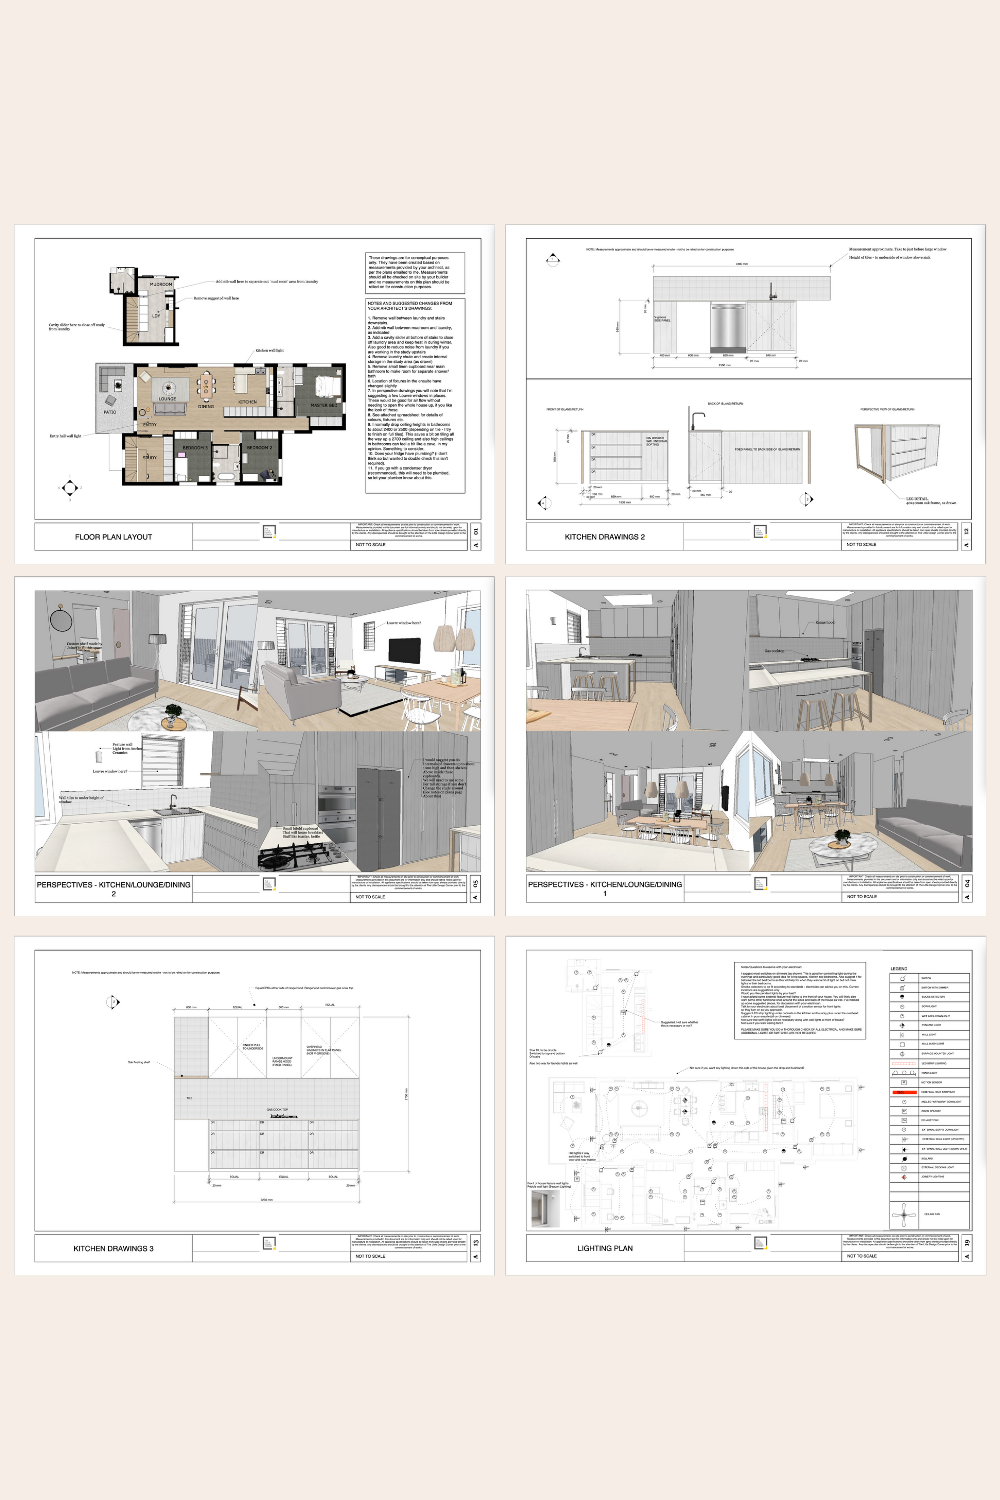
Design your bathroom in SketchUp with our fun online course for beginners…

If you want improve your work with design clients or you are about to start renovating or remodeling then you will love SketchUp.
With this software you can mock up an entire home in 2D (floor plans, joinery/millwork elevations, lighting and electrical plans and more) and 3D (renderings and perspective drawings) so you can picture exactly what it will look like when it is finished plus prepare your technical drawings for use with your clients, trades and contractors.
Learning SketchUp will save you time, money, mistakes and so much more! It is a well known piece of software in the interior design and architecture industries and will give you a solid technical drawing skill that will immediately upgrade the professionalism of the work you are doing.
I teach an online course for beginners that is focused specifically on using SketchUp for interior design purposes. We have had more than 10,000 students come through the course with so many fantastic projects designed and built!
We have all sorts of students in the course including designers and architects, cabinet makers, home renovators/remodelers, kitchen and bathroom designers, event planners, landscape designers and design enthusiasts.
To find out more about the courses we have on offer click the link below. And reach out if you have any questions I can help with :)
I hope you've found this post helpful and it gives you more confidence going in to your bathroom renovation/remodel project.
Enjoy the rest of your day!
Clare x