How to create lighting and electrical plans in SketchUp and Layout
You don’t need multiple pieces of software for your interior design workflow…
I’ve only ever used SketchUp + Layout** in my interior design business and I LOVE this software so much.
**If you’re not aware, Layout is the software that comes free with SketchUp Pro that allows you to create your documentation drawings - it’s amazing!
Here’s what I love about the combination of SketchUp + Layout:
✅ I only pay for one piece of software each year to do my full interior design workflow (great for small business owner)
✅ I only need to learn how to use one piece of software (and SketchUp is really easy to learn luckily!)
✅ My workflow is fast - no doubling up on drawing the same things in different pieces of software
✅ I don’t have to faff around with complex workflows - e.g. export to photoshop and colour, combine SketchUp with AutoCAD and workflows I hear about from other designers
✅ SketchUp is really fun to use - so work feels like play! :)
One question I get asked a lot is about lighting and electrical plans in SketchUp and Layout and in today’s post I’m sharing the steps for how you can do this.
I teach this full process in detail in my online SketchUp and Layout courses for interior design - including giving you free Layout templates you can use to create these lighting/electrical plans in minutes!
You can find out more about those courses via this button:

Here’s how to create your lighting and electrical plans in SketchUp + Layout step by step!
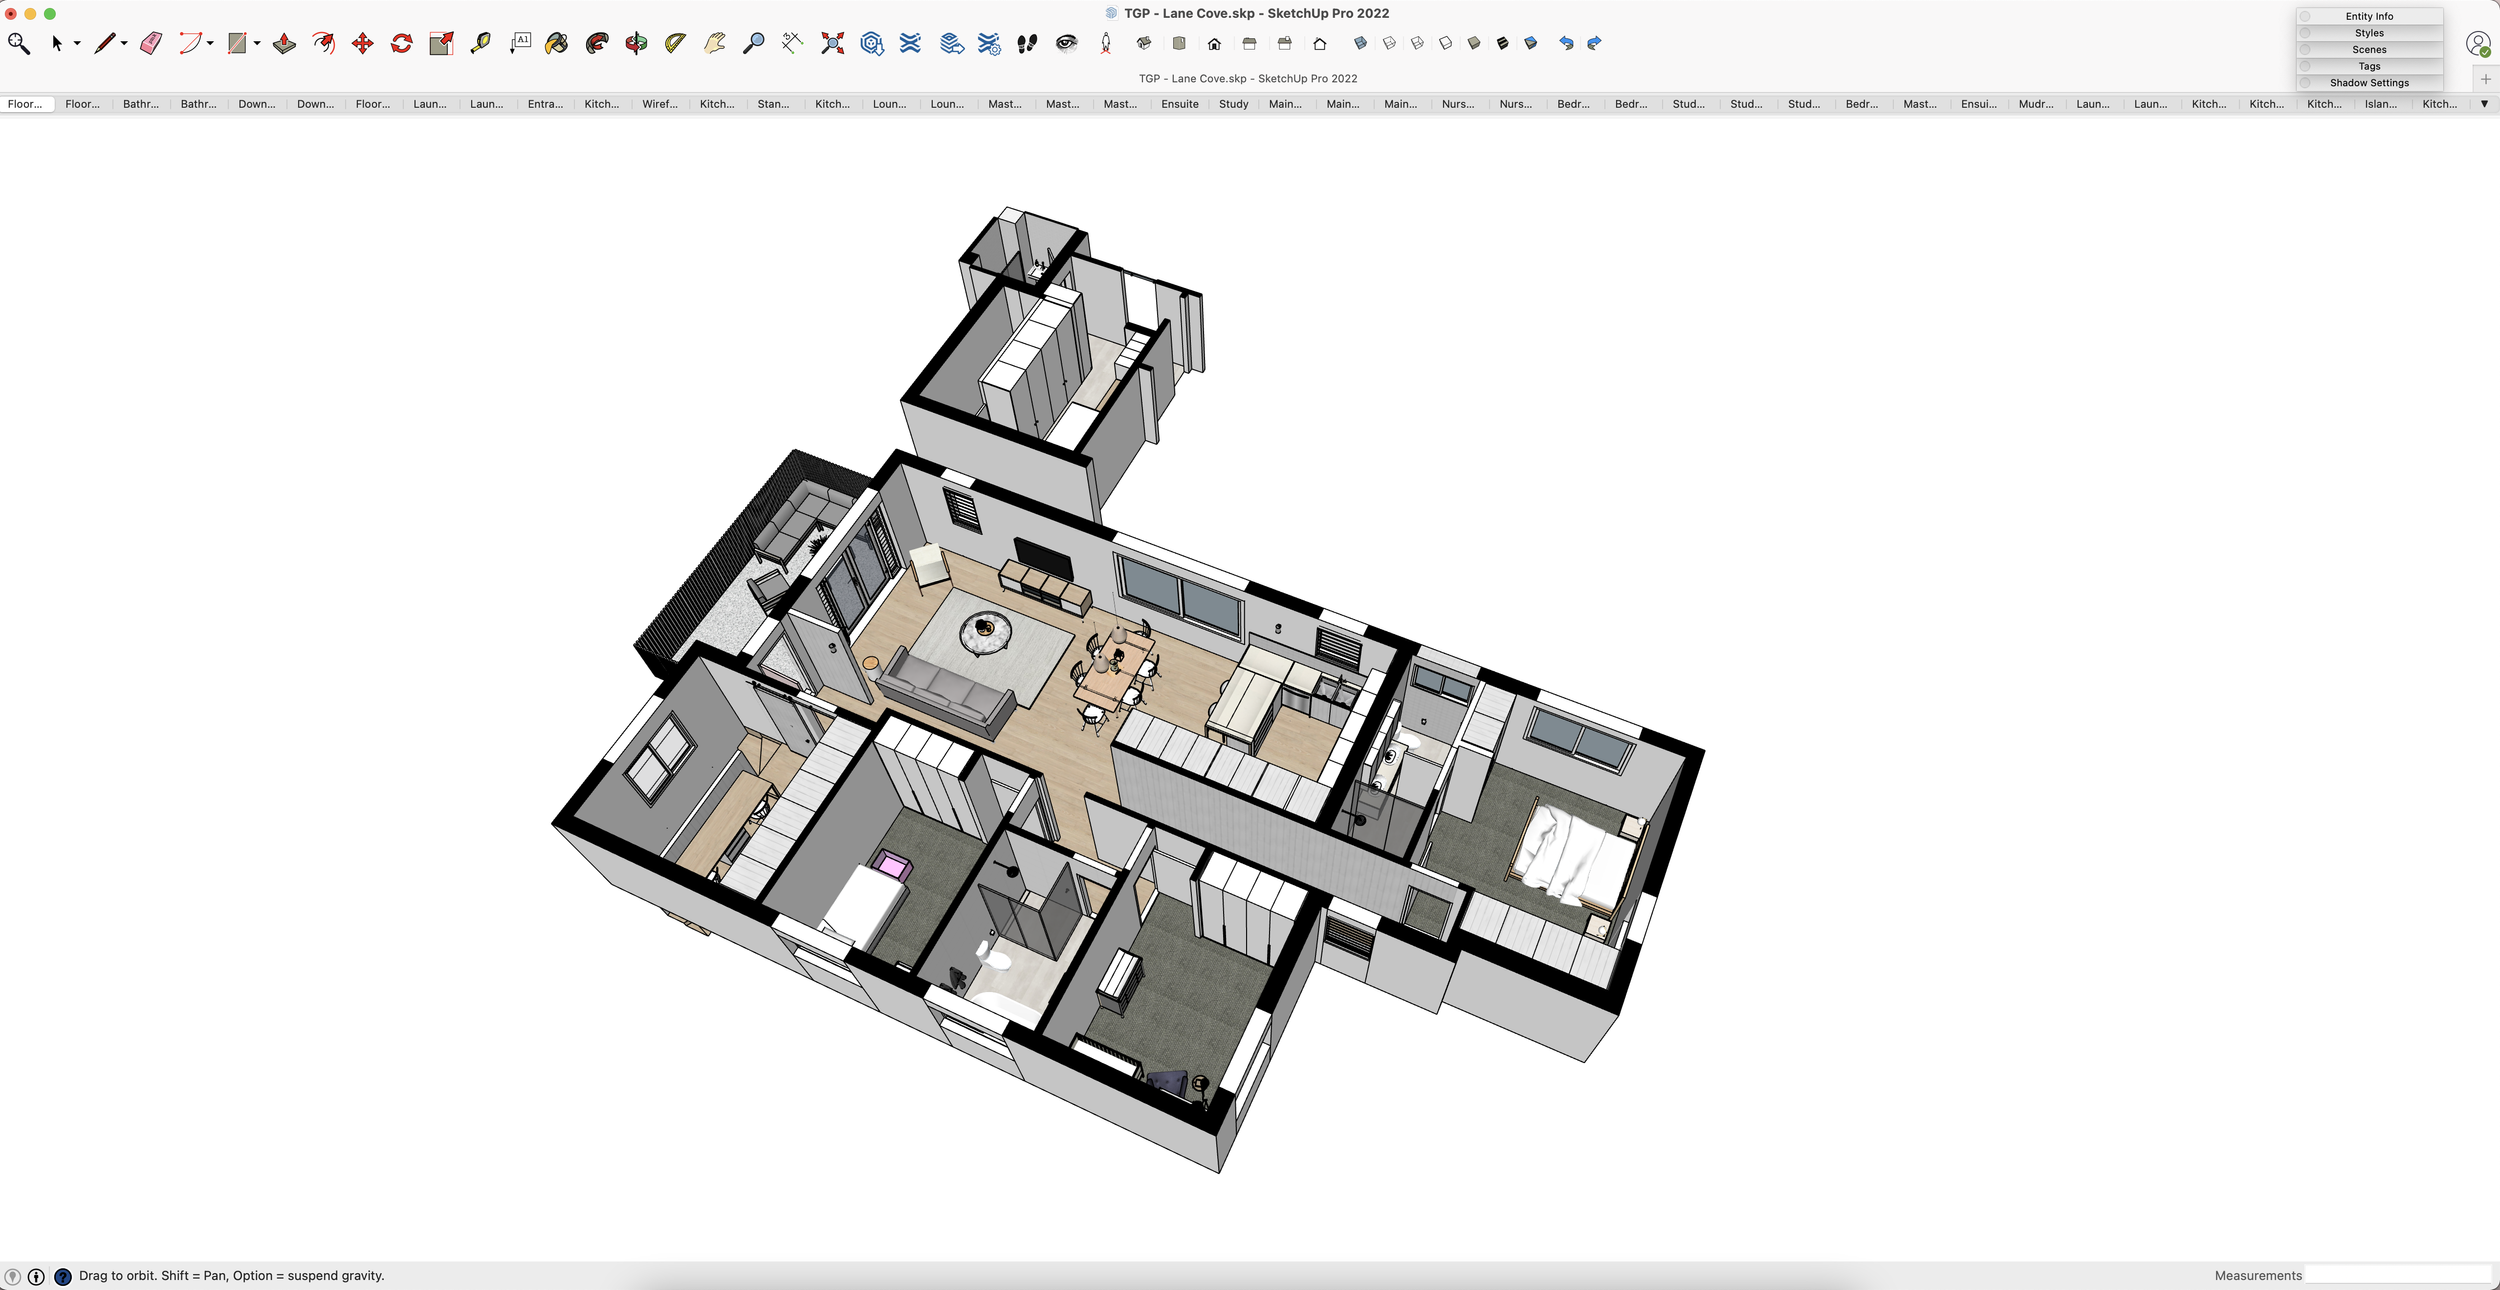
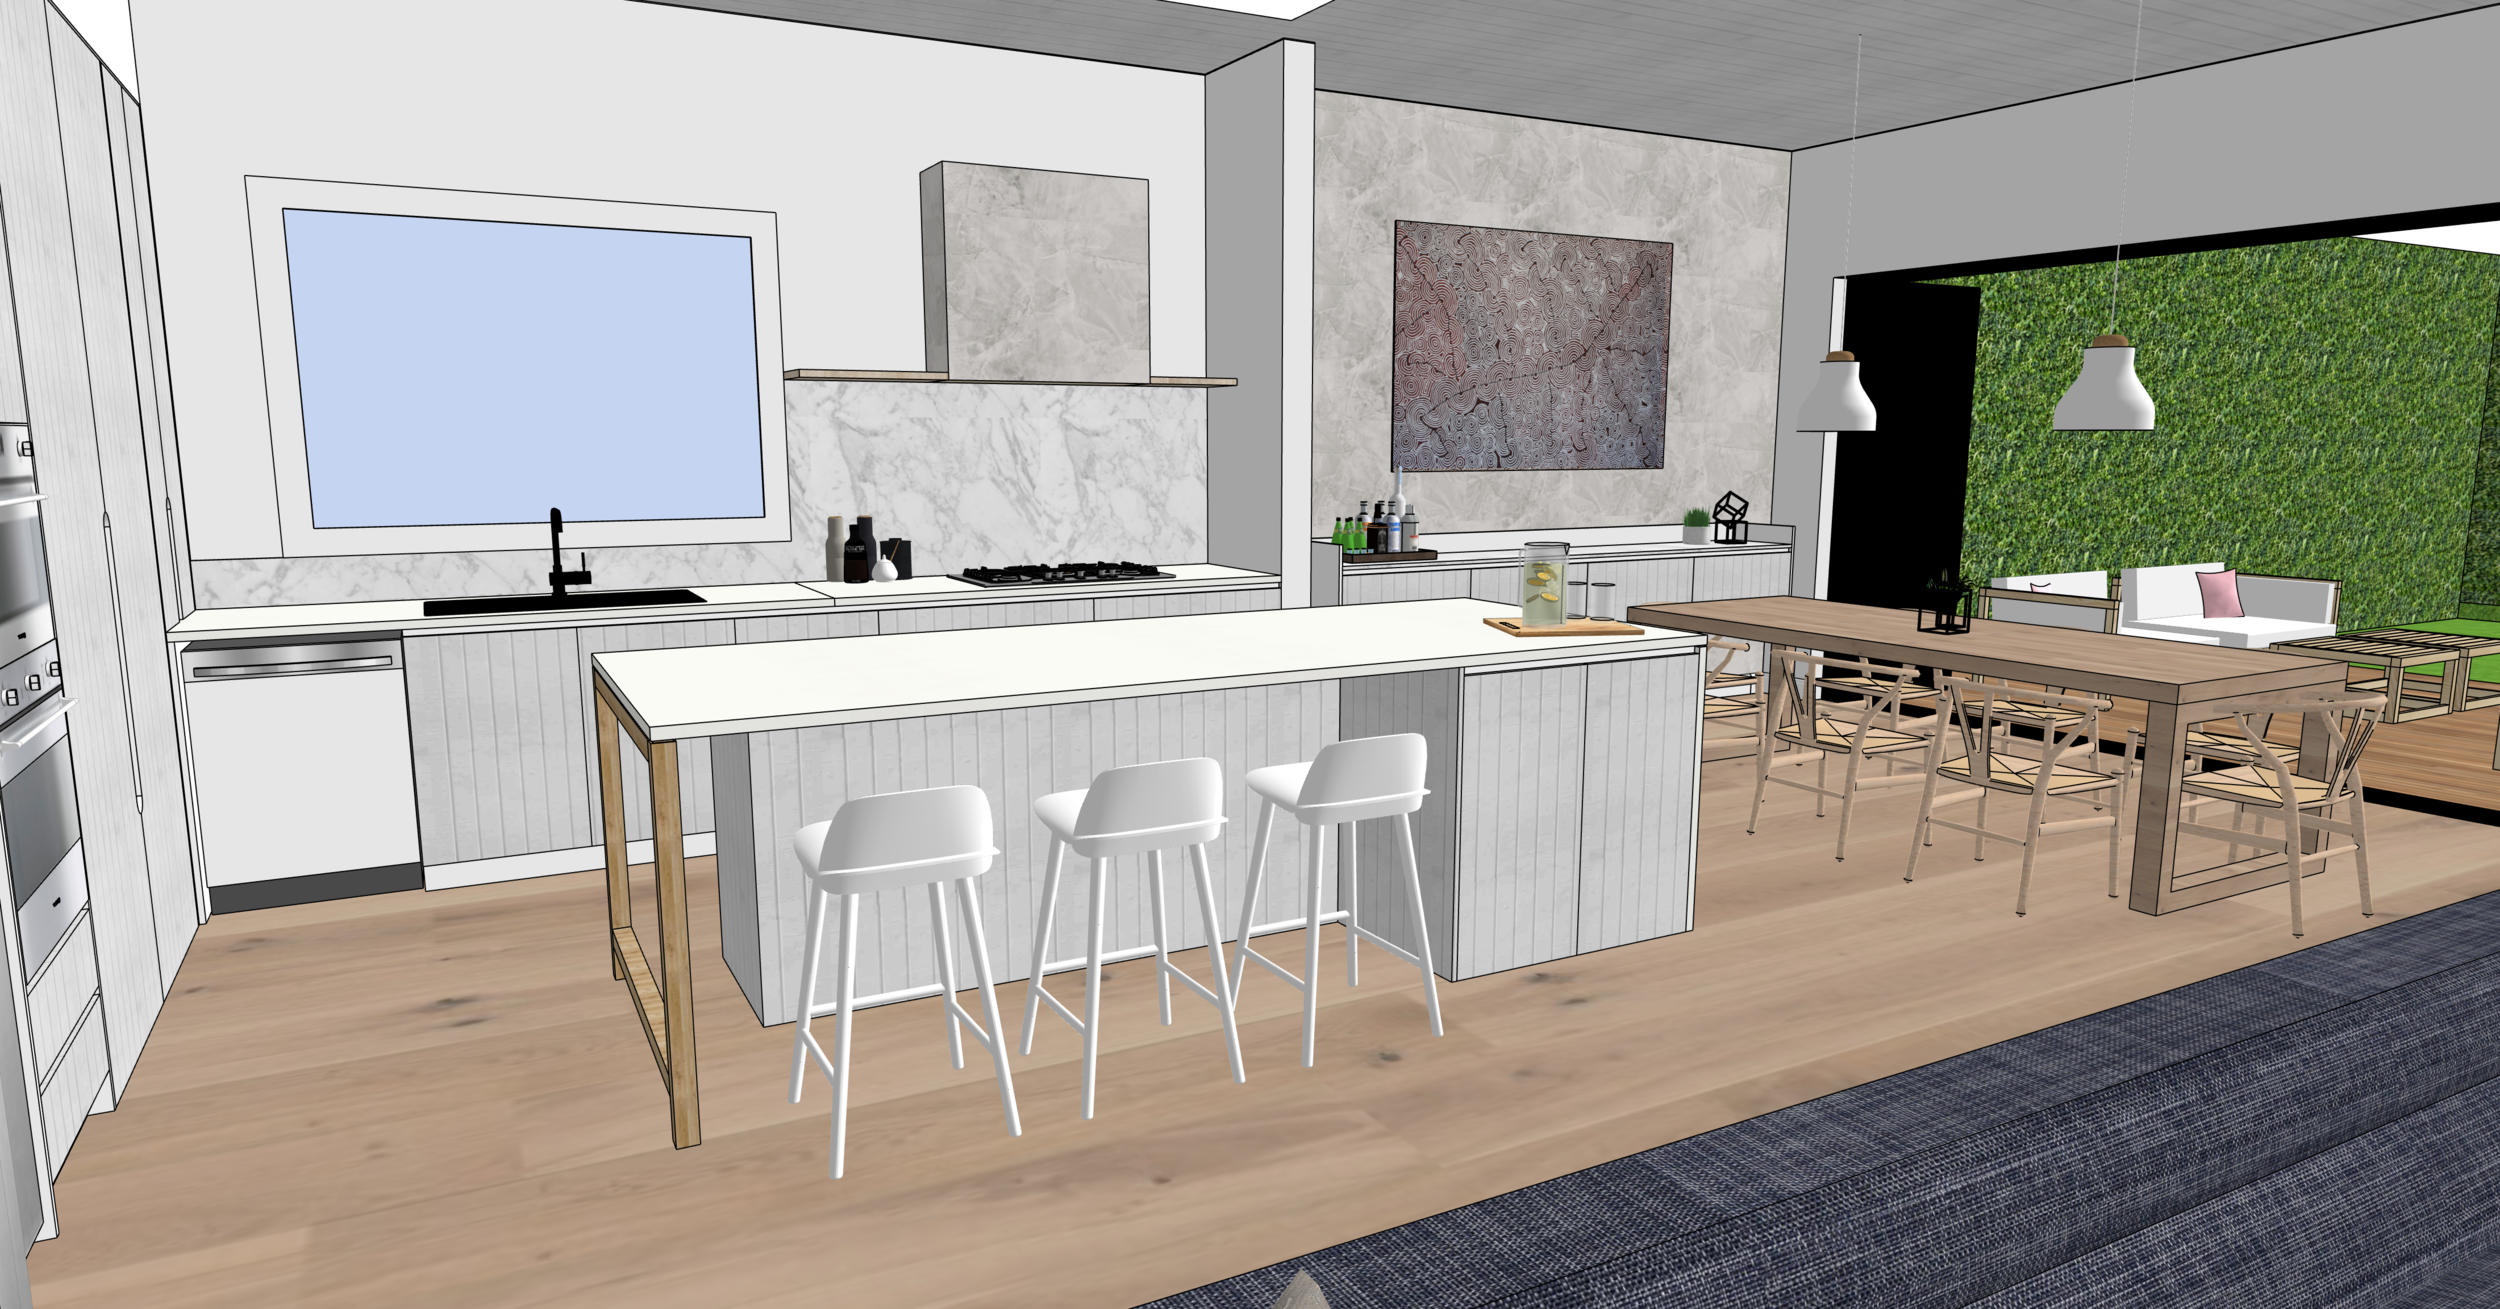
Step 1: Create your design in SketchUp
Your first step is to create your actual design in SketchUp including all the details you want.
You can learn this part of the process in my beginner SketchUp course if you aren’t sure how to do this :)
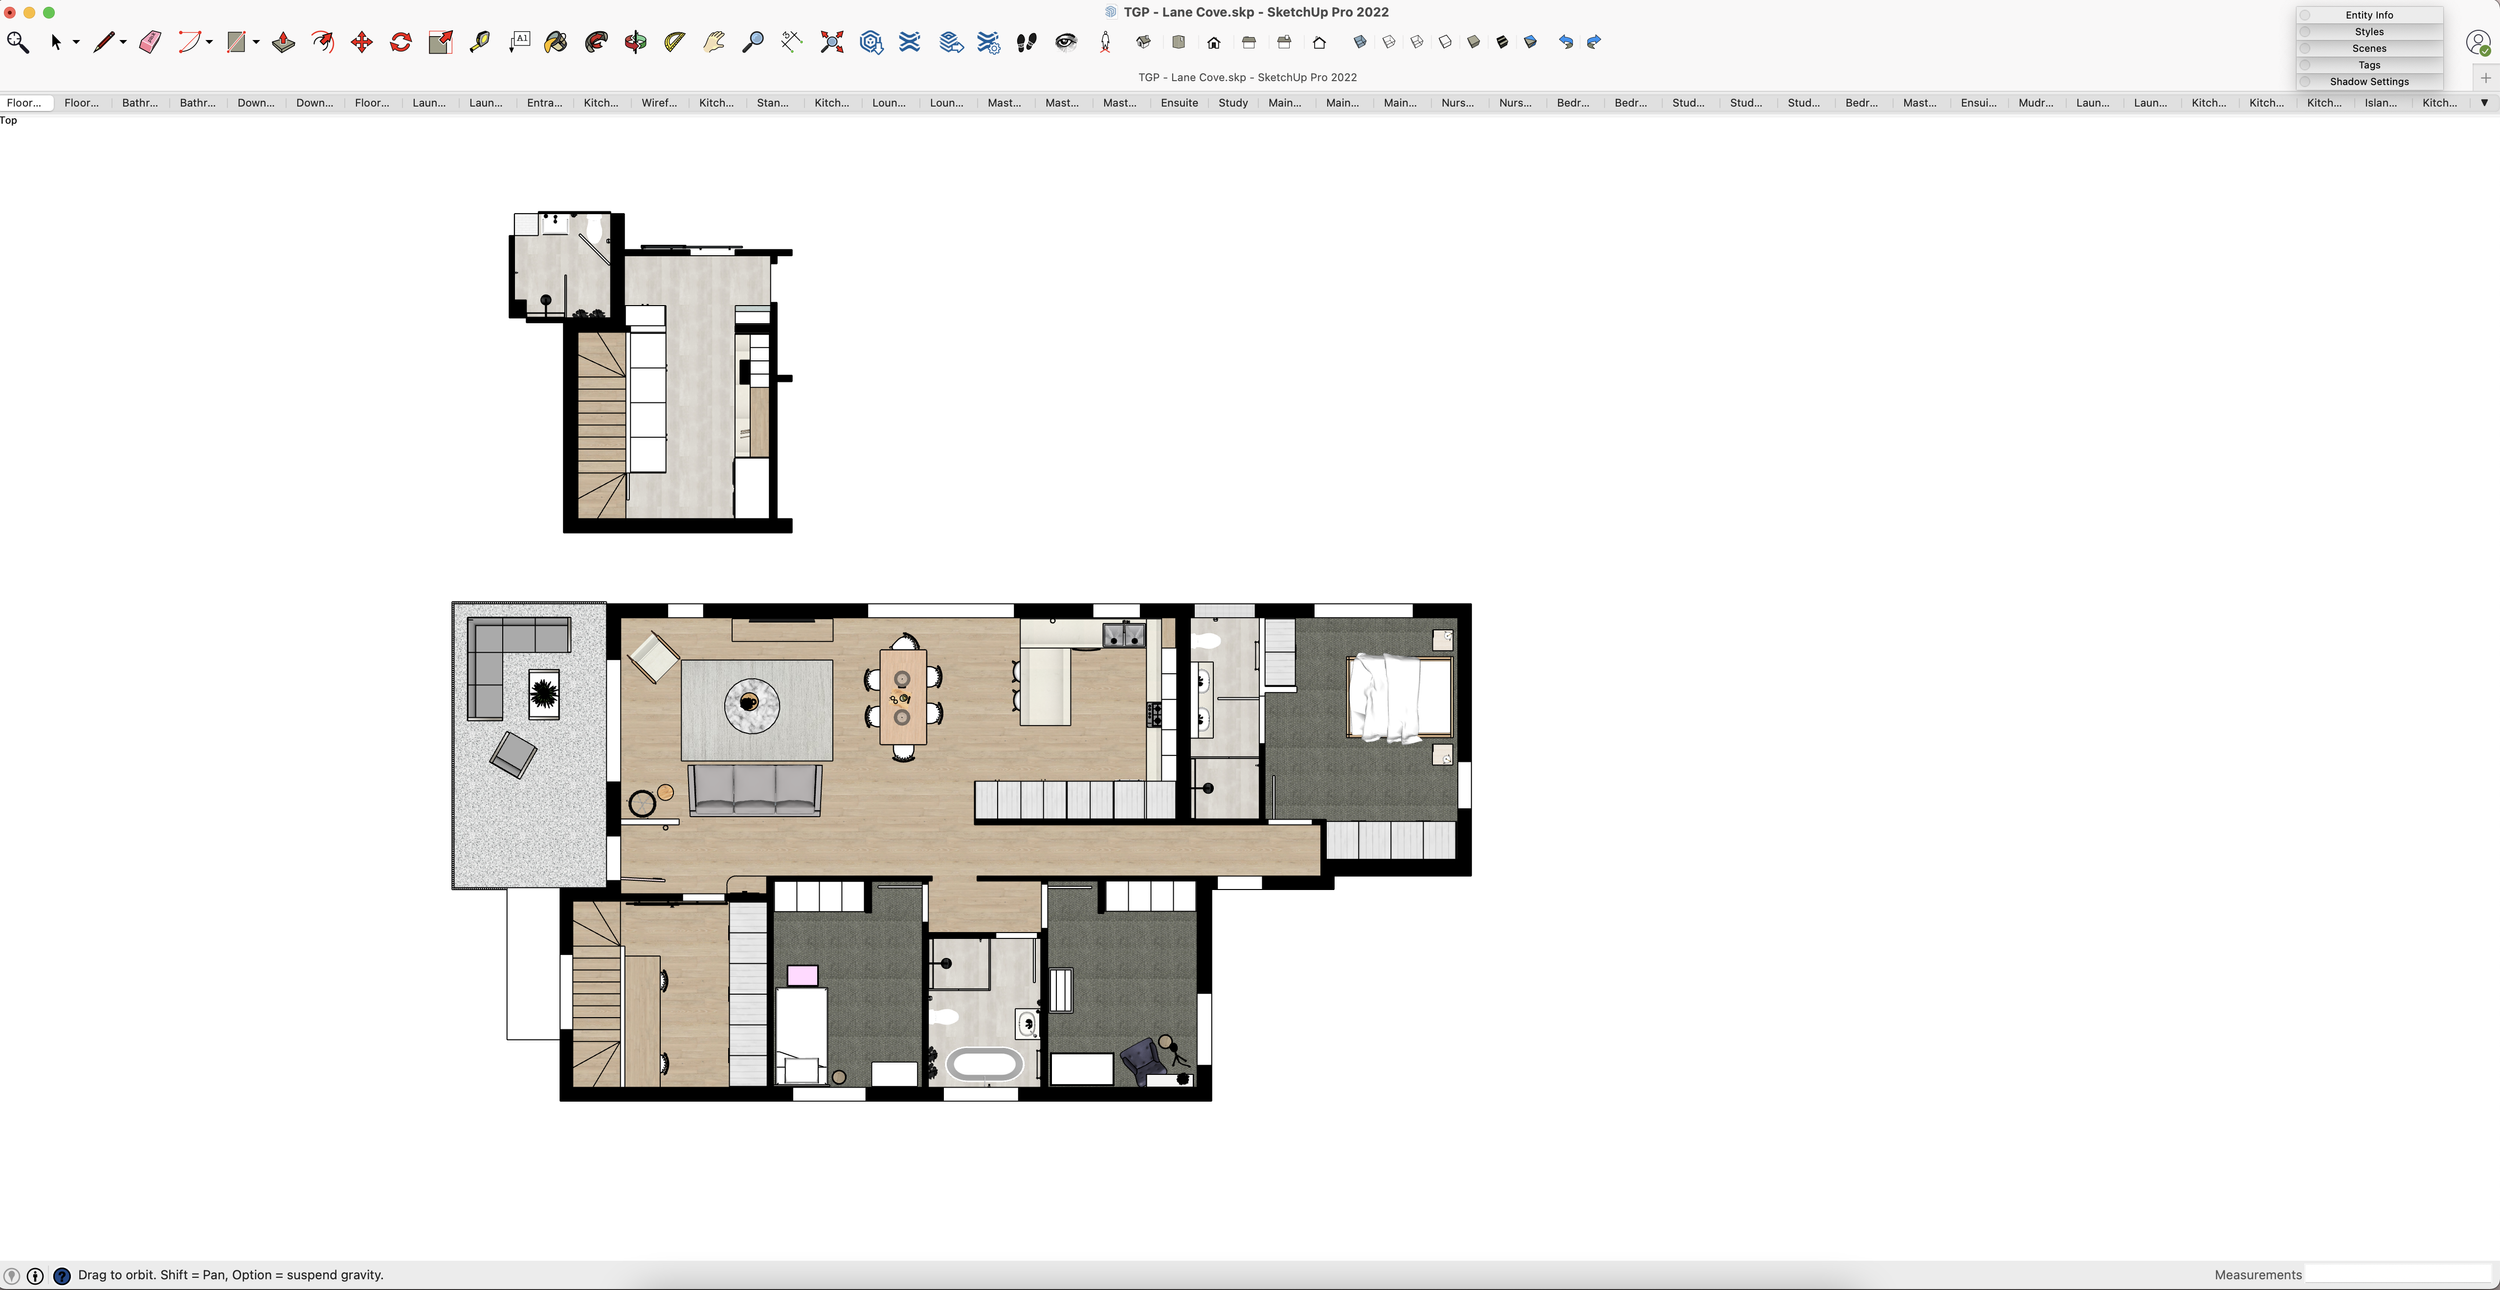
Step 2: Create a wire frame floor plan in SketchUp
Once you’ve created your plan/design in SketchUp and you’re happy with it create a wireframe style of your floor plan using your styles window
Tip: if you don’t want your furniture in the plan (like I have below) you can add all those to a tag and toggle those on/off as you would like to
Another tip: Did you know you can toggle tags on and off within Layout itself - lots of people don’t realise that!
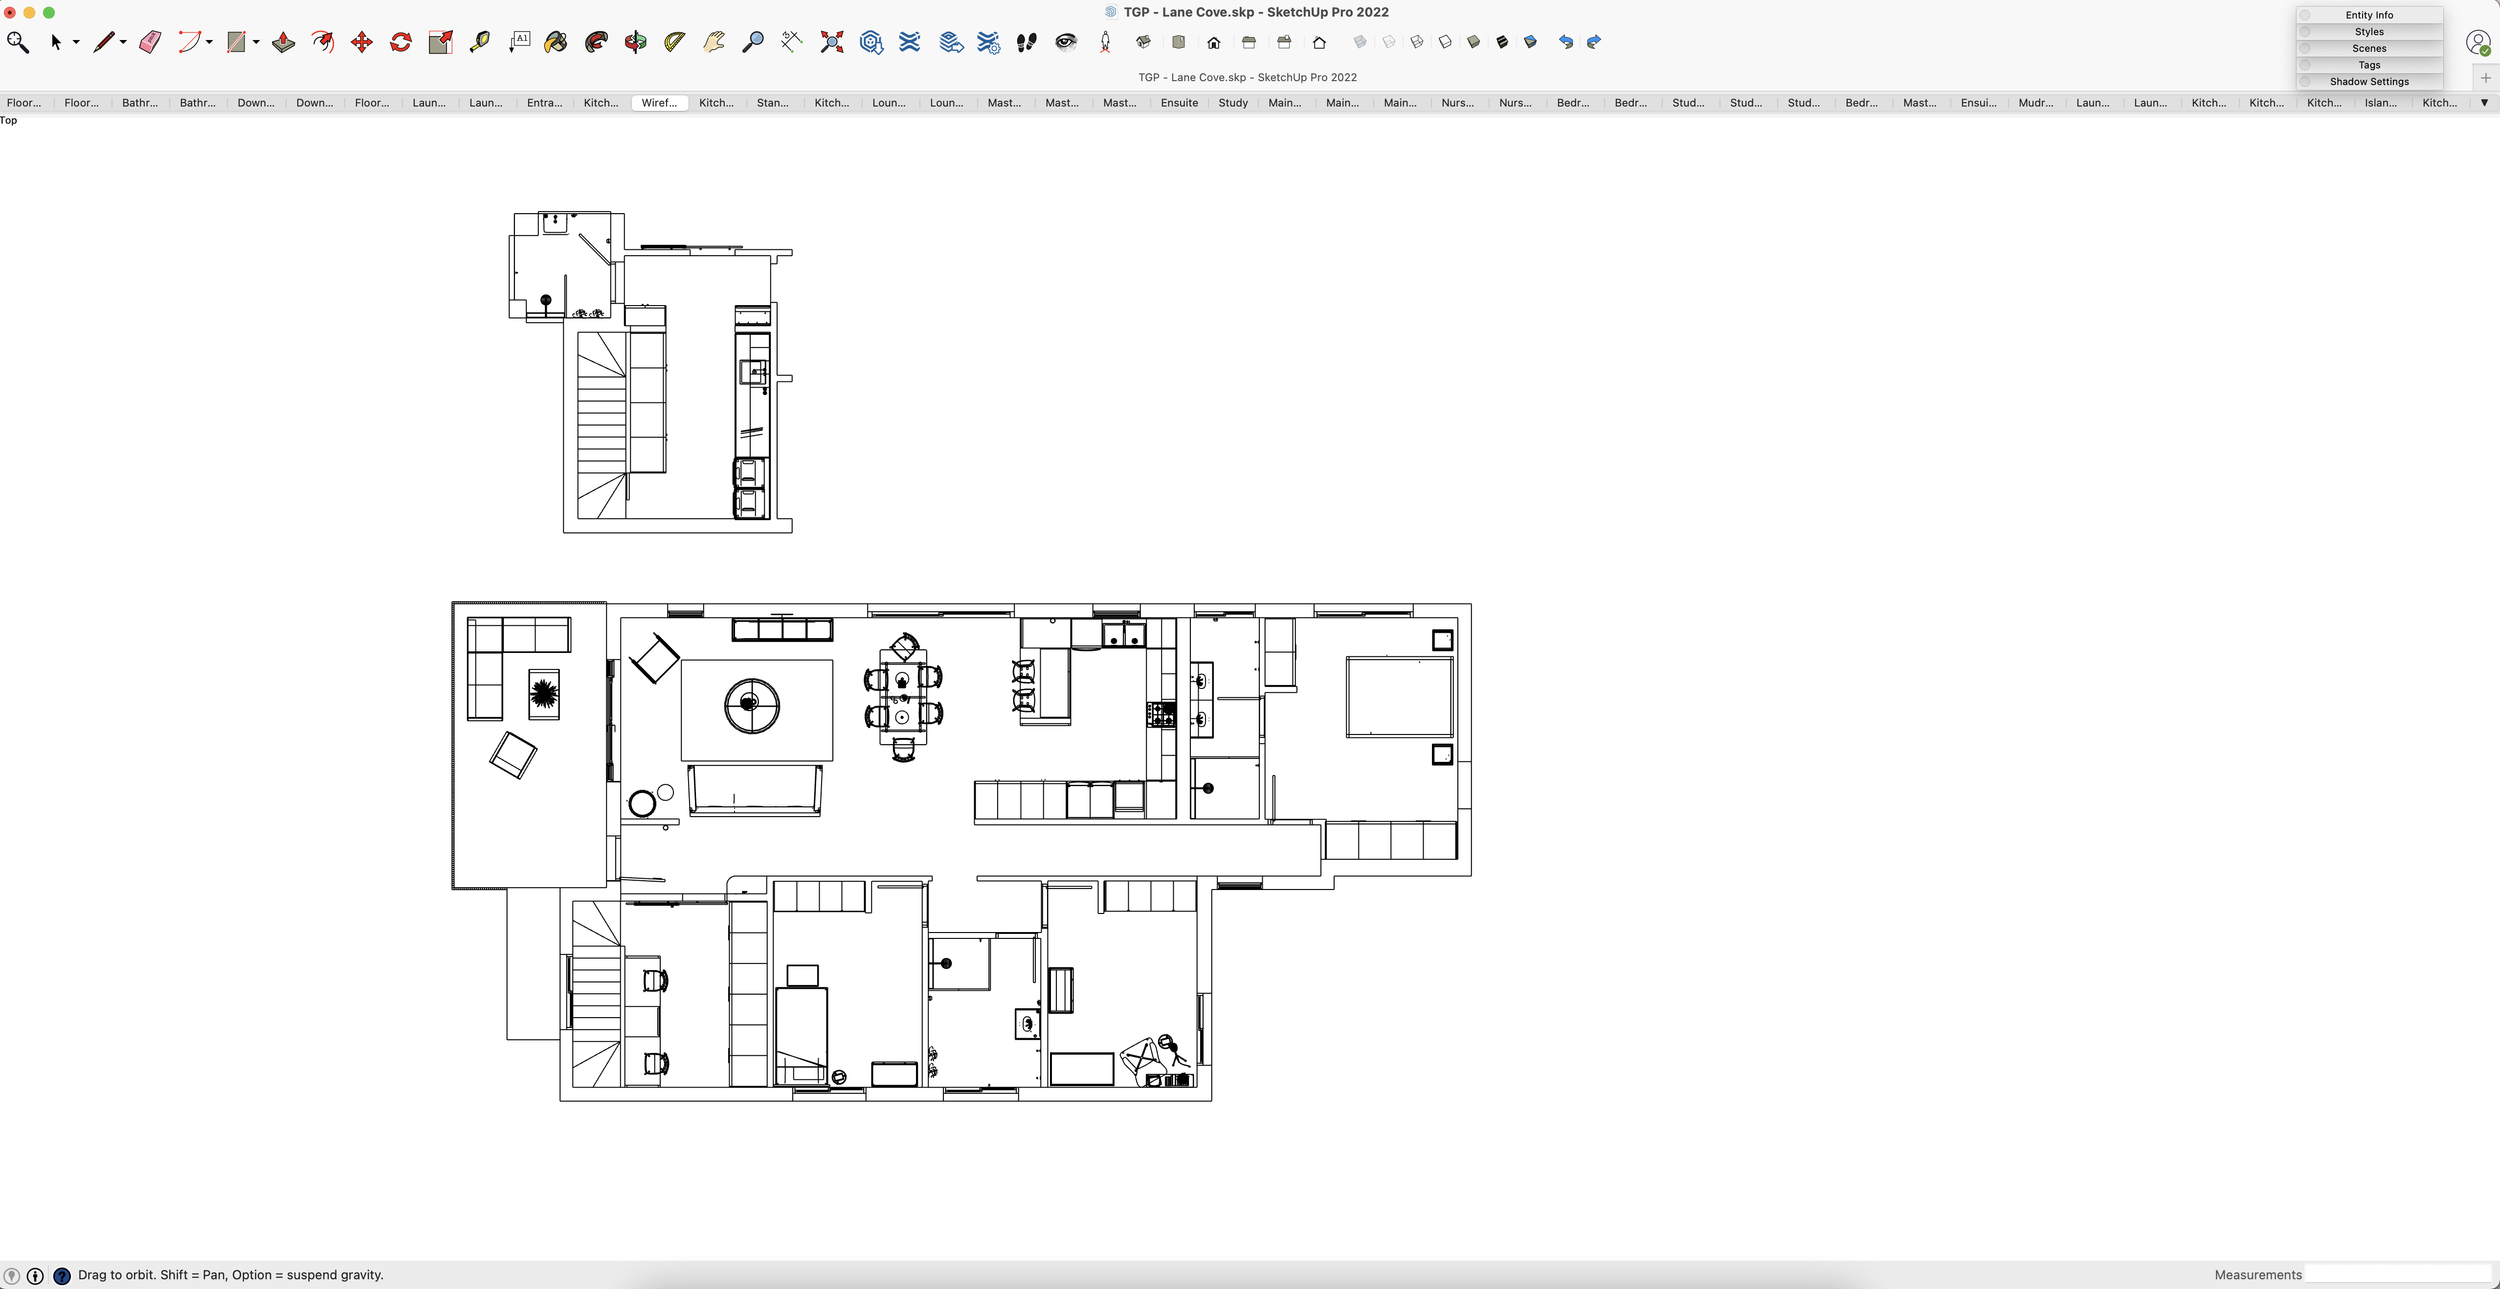
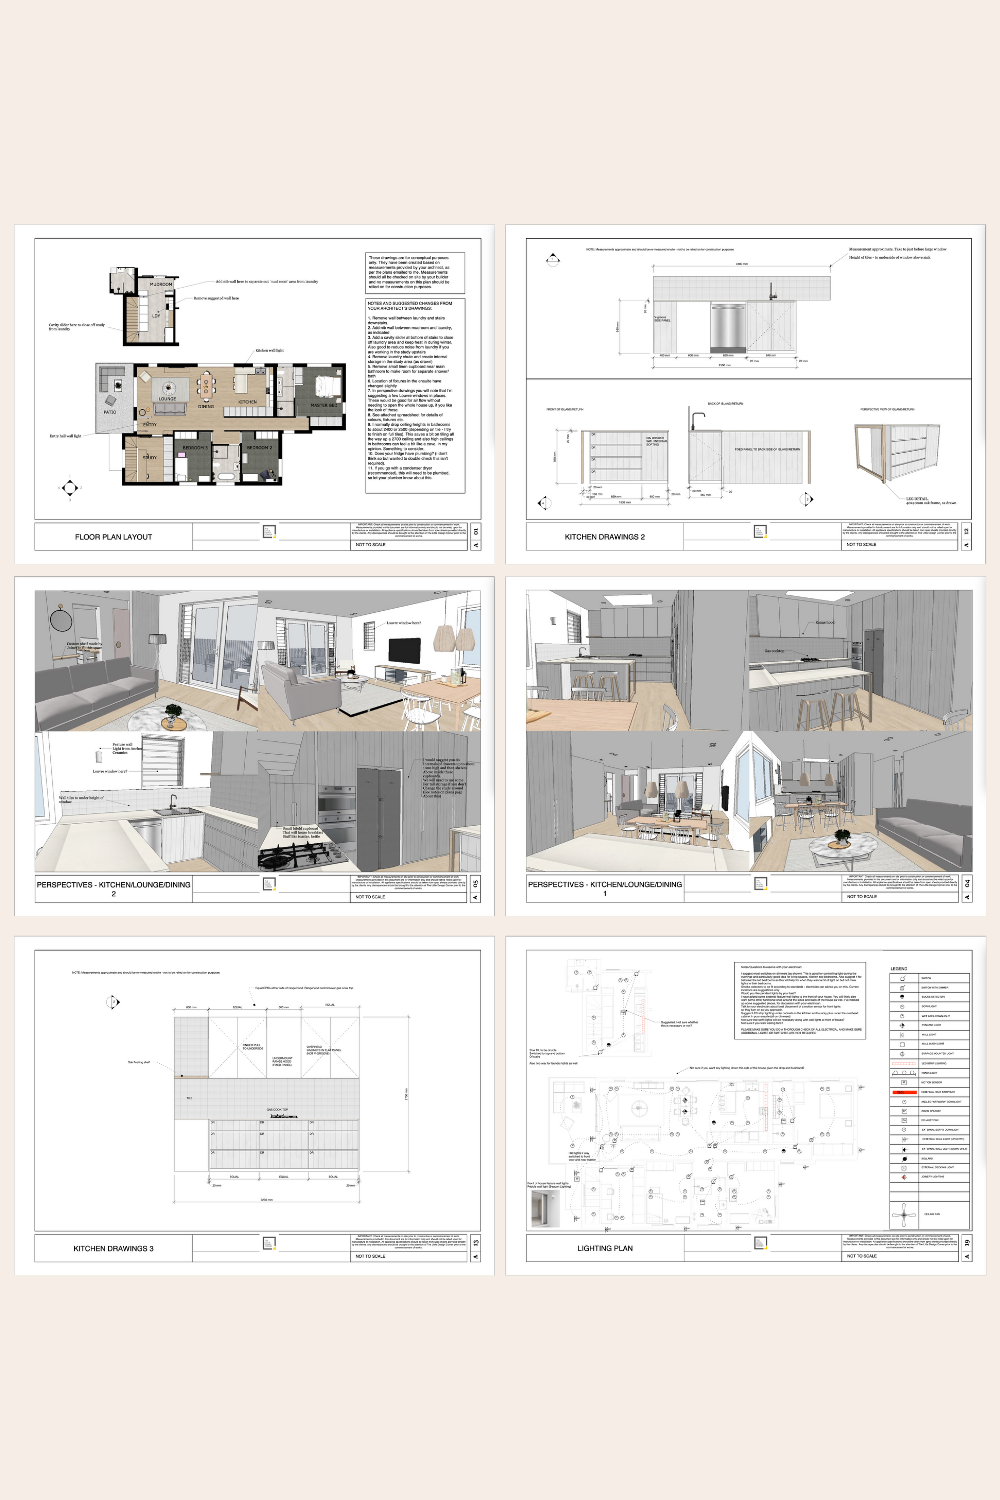
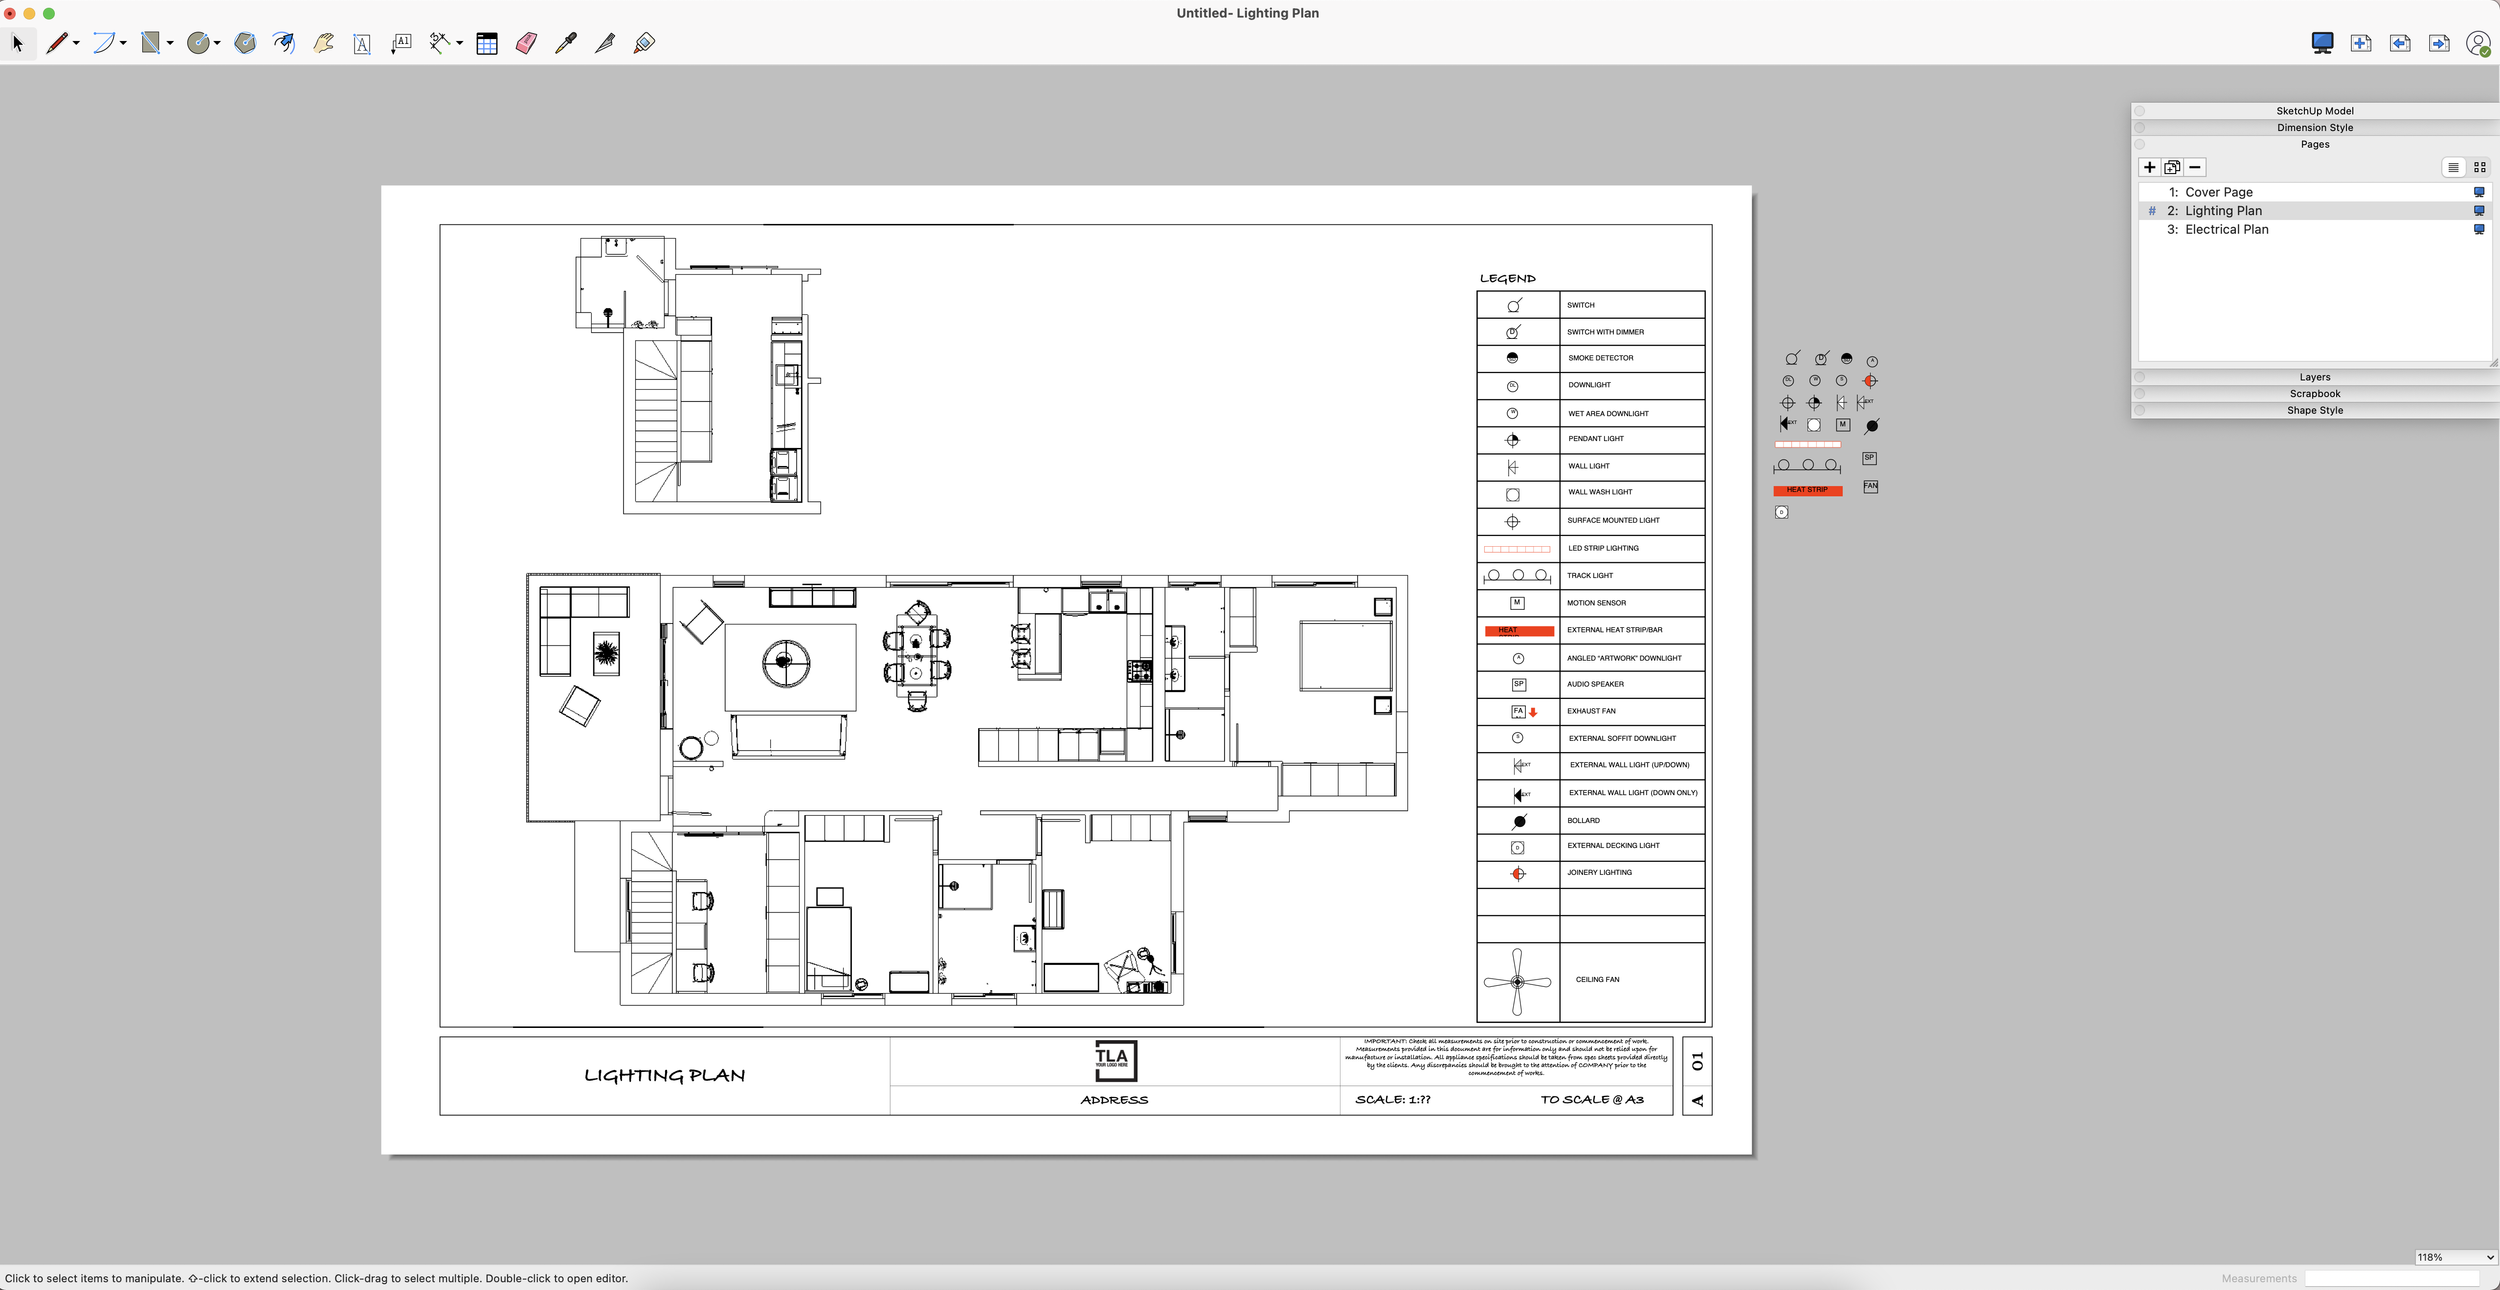
Step 3: Send to Layout
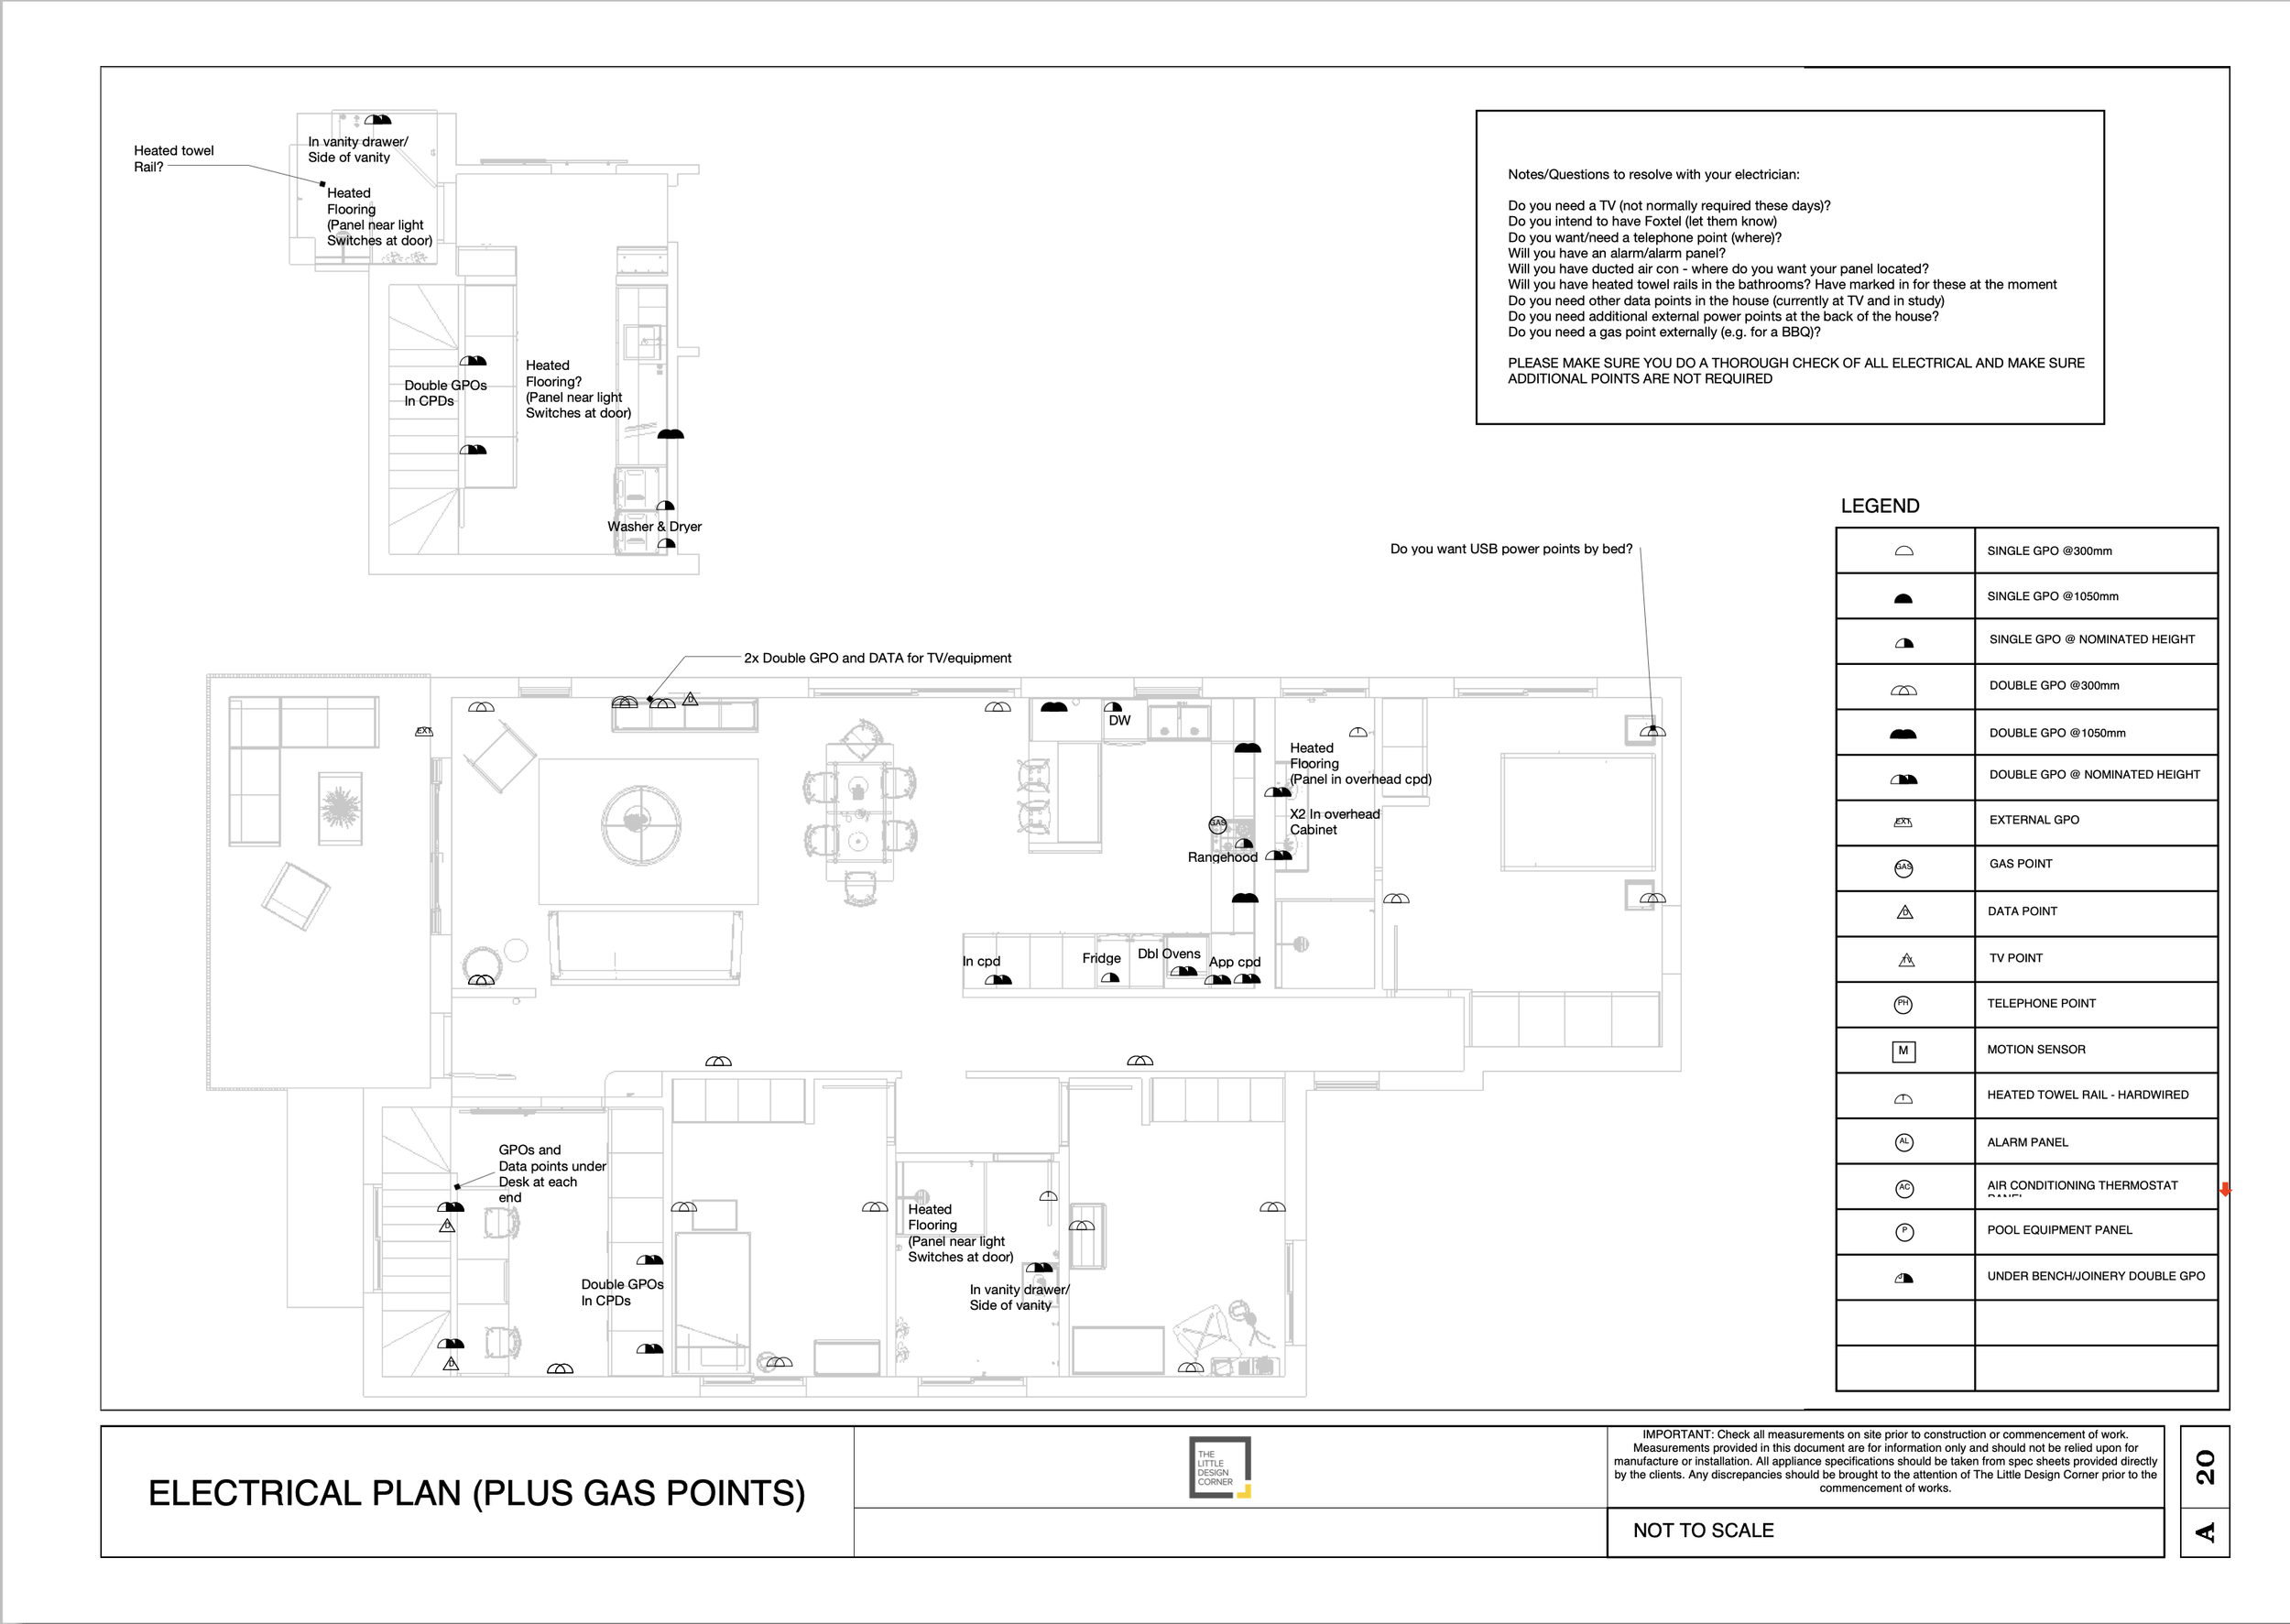
Send your plan to Layout. I have a template with my electrical/lighting plans already all set up and ready to go and this saves hours having to start plans from scratch each time.
My lighting and electrical templates (plus lots of other Layout templates) come free with my Layout (Intermediate) course - if you want a template you can use immediately!

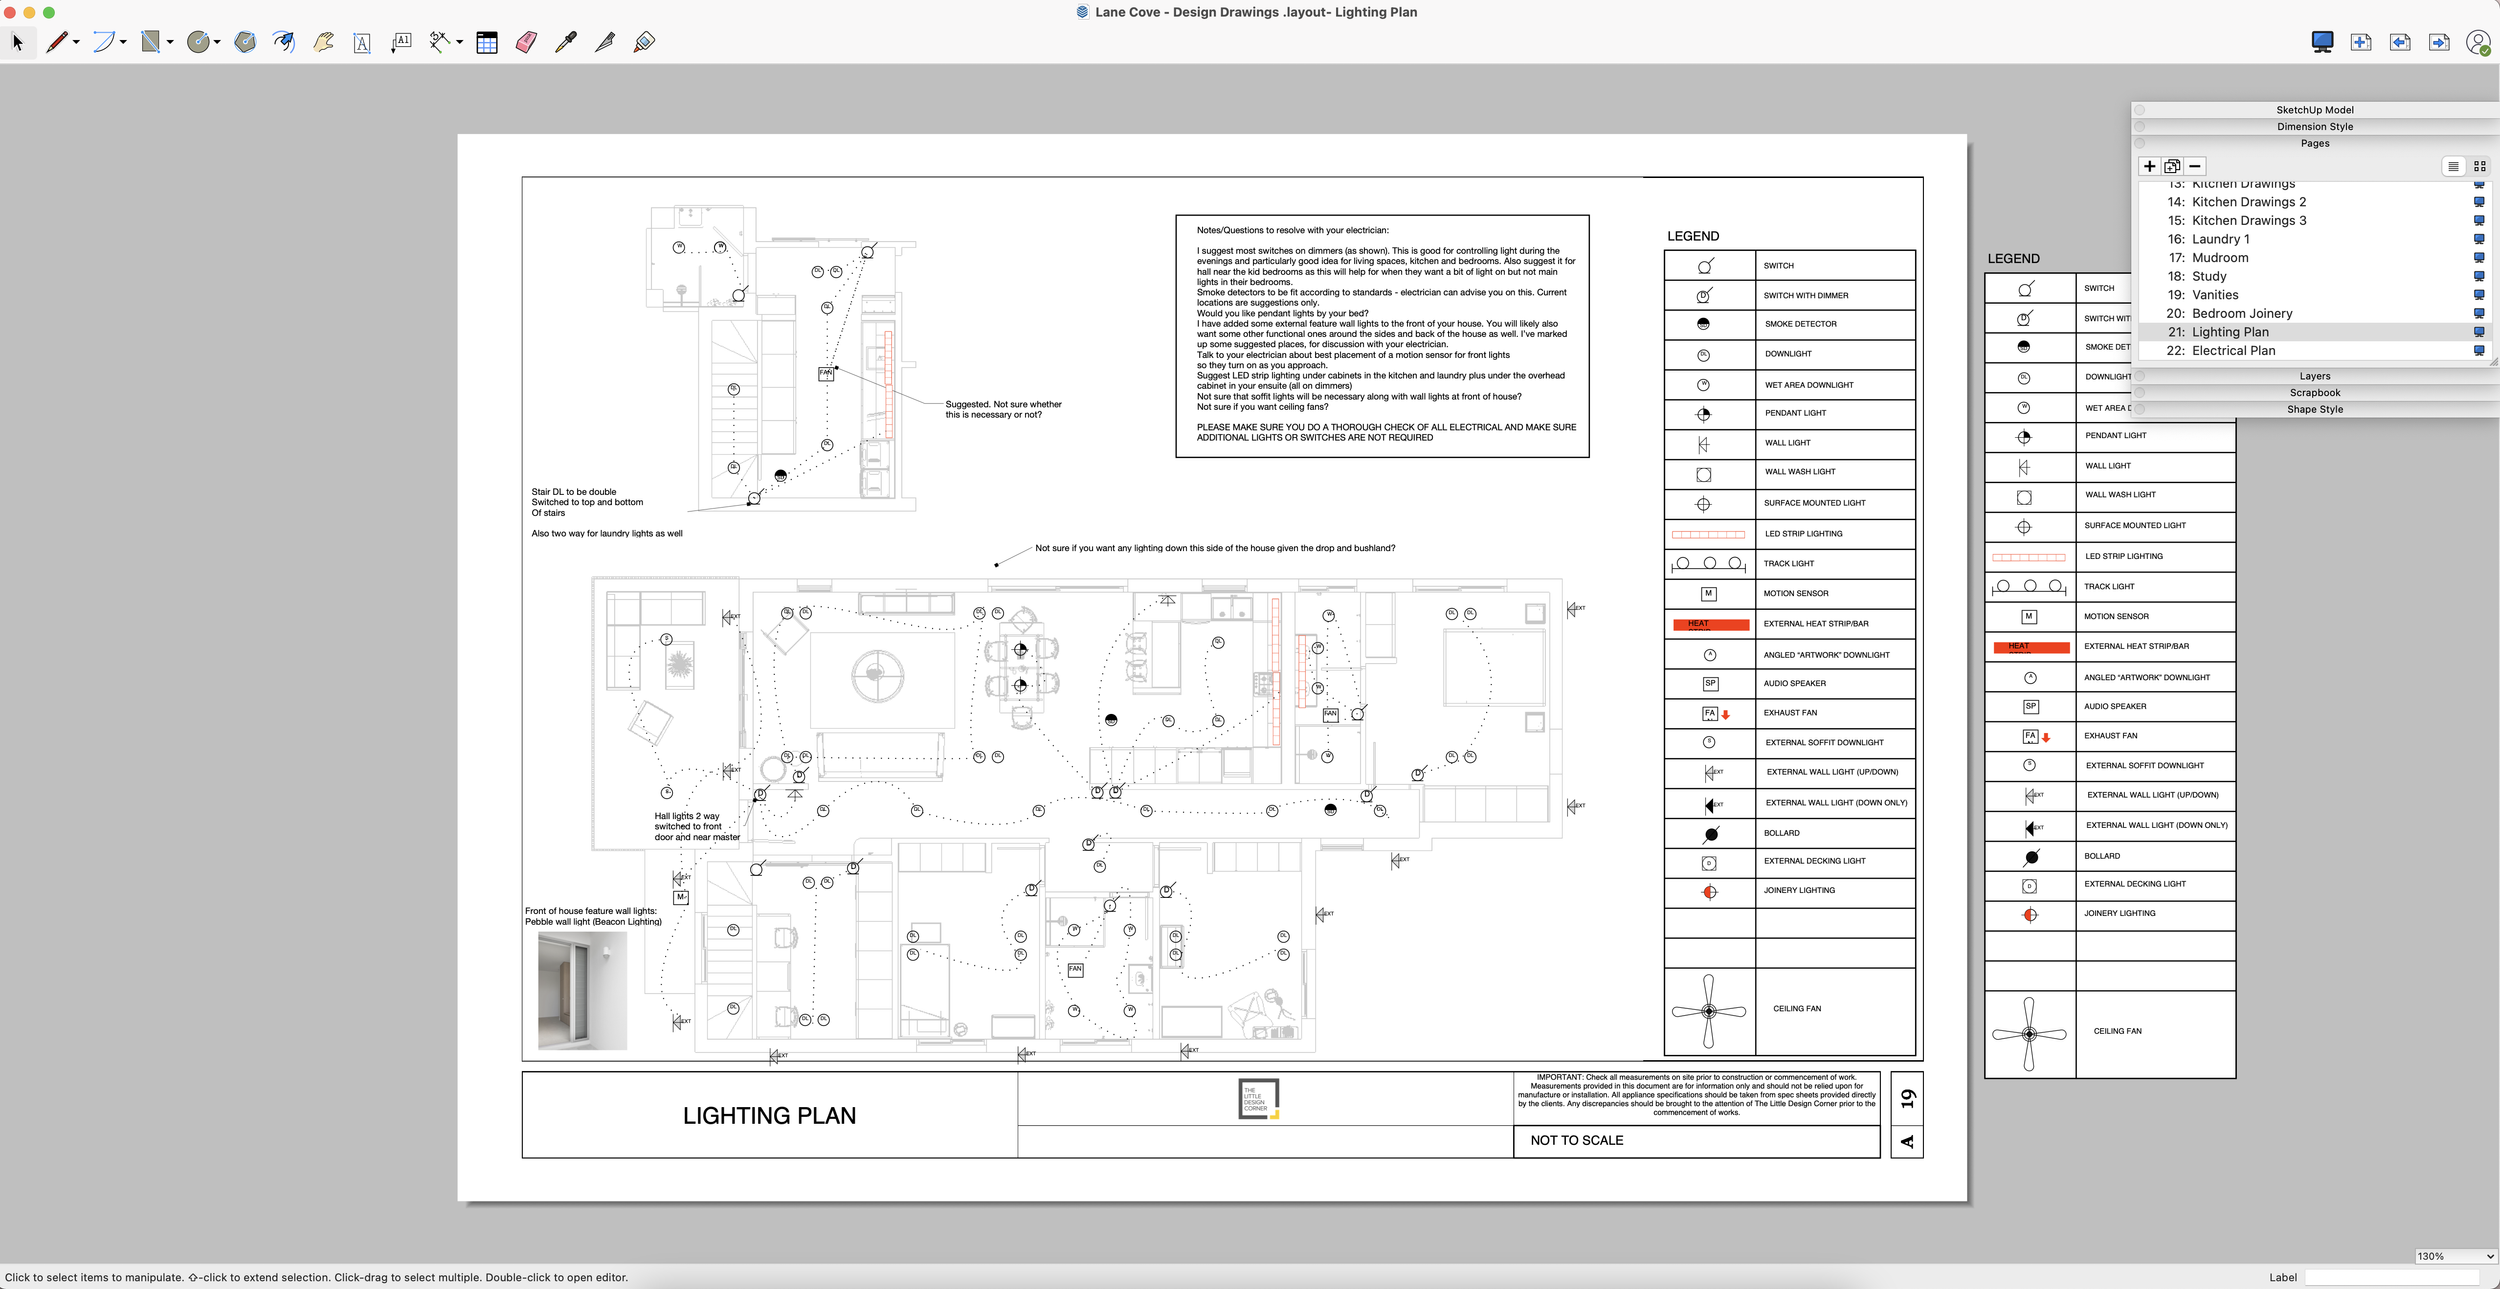
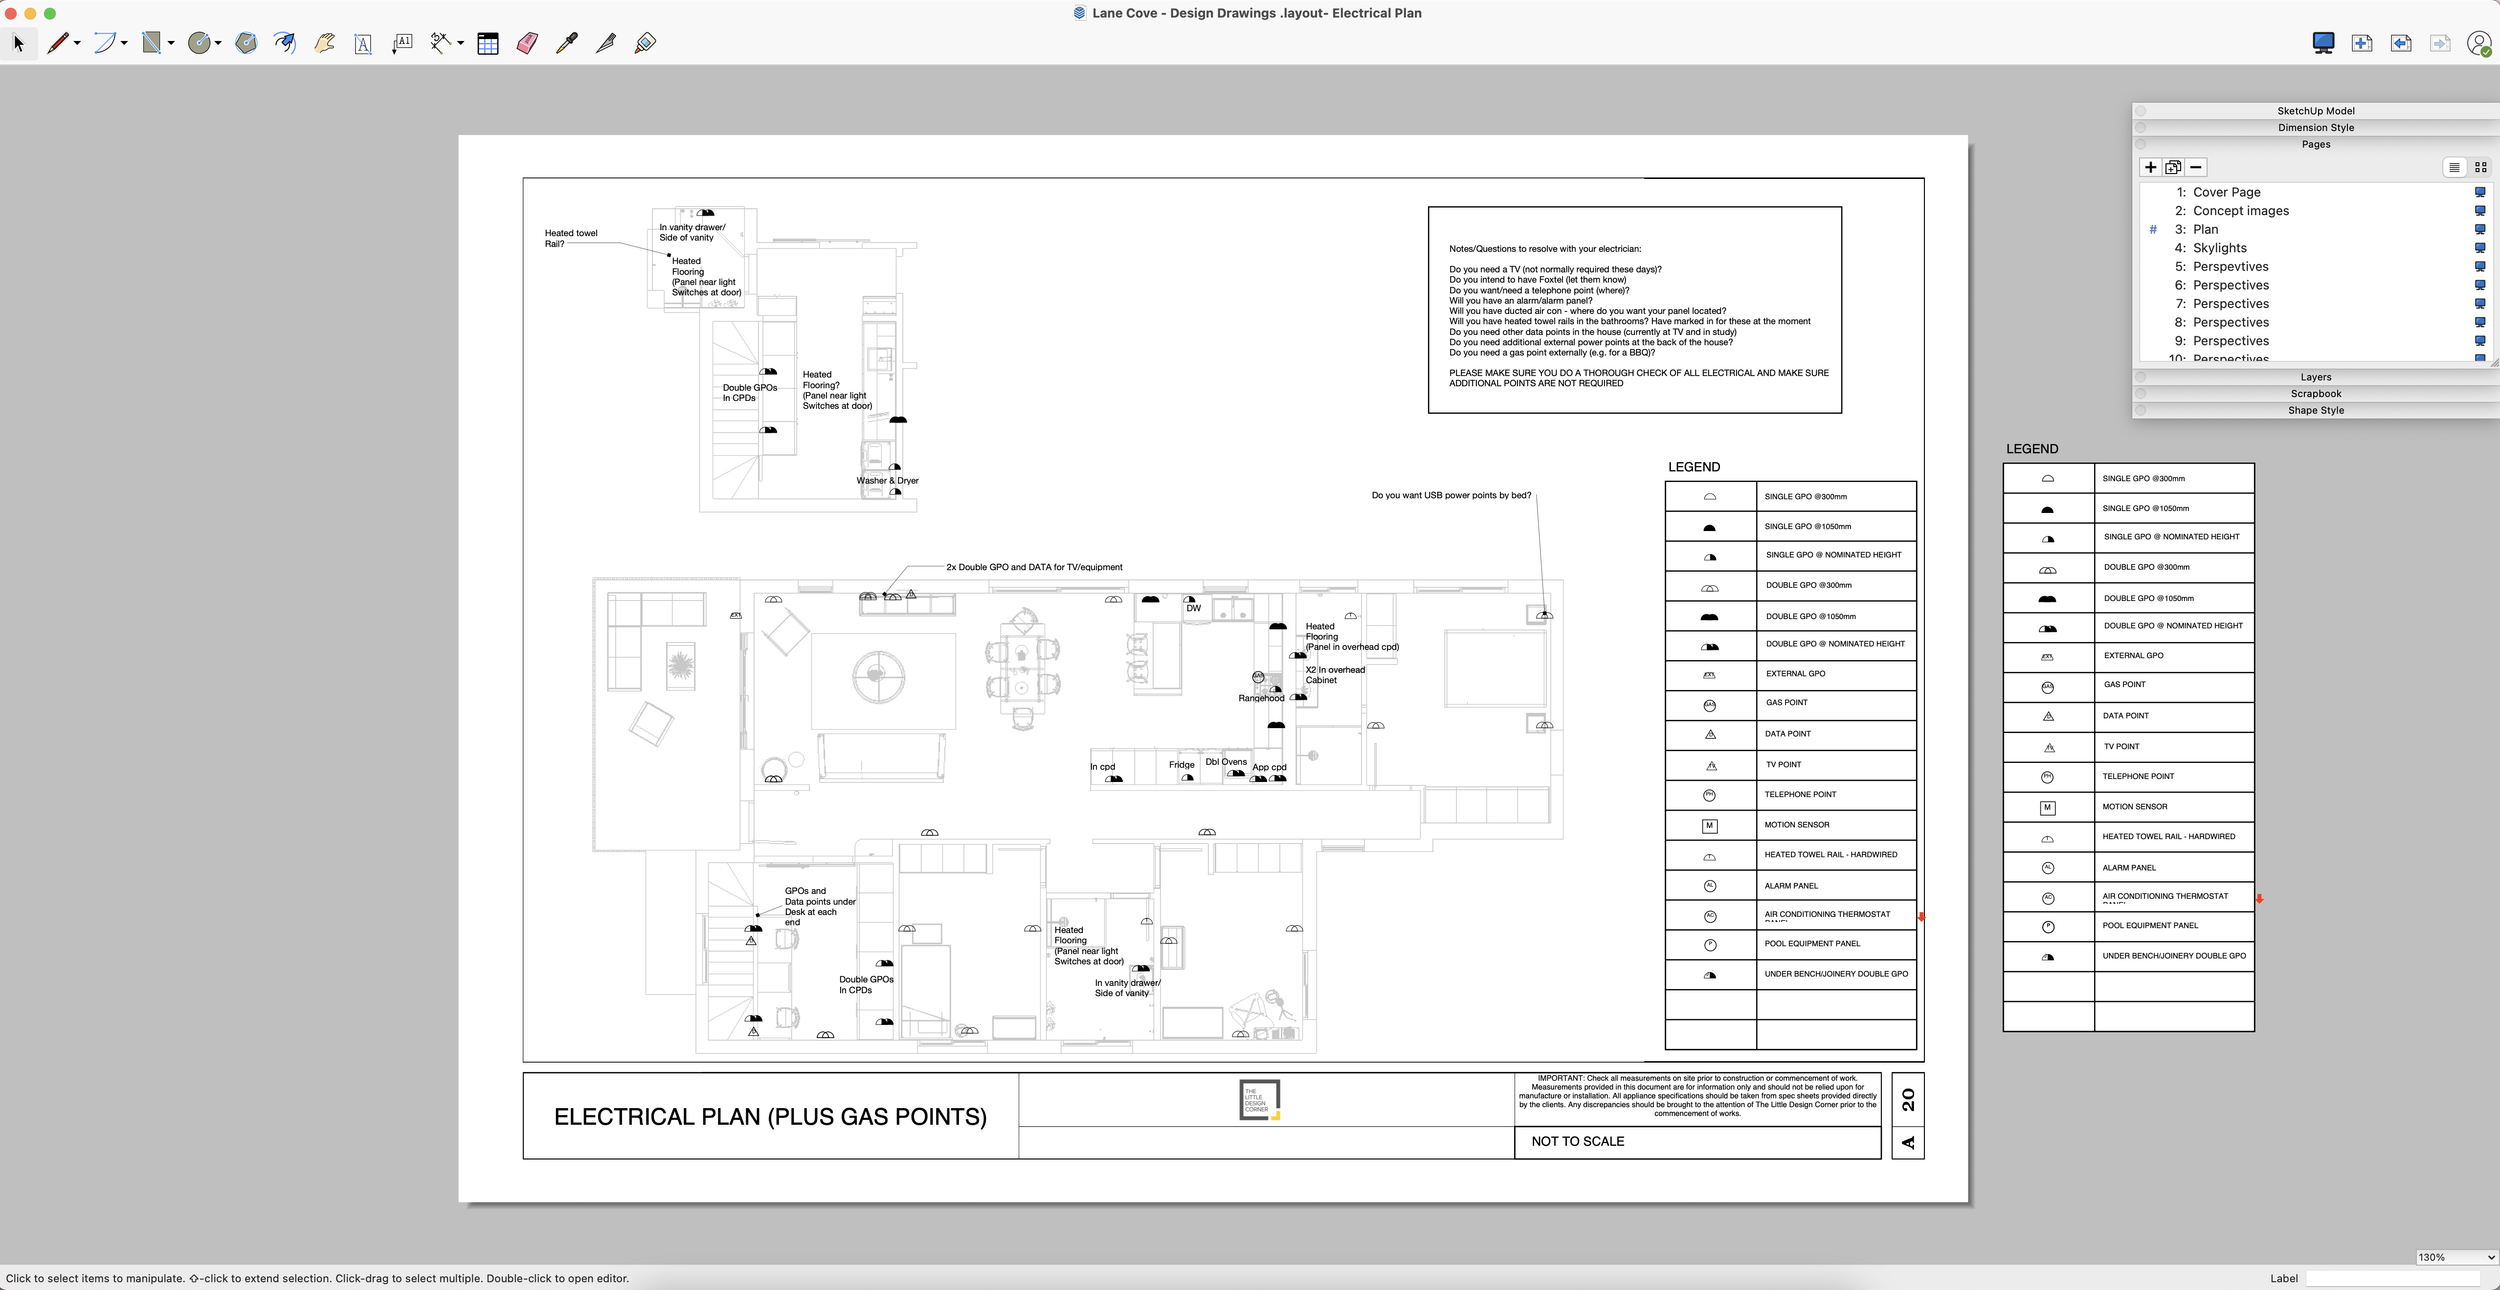
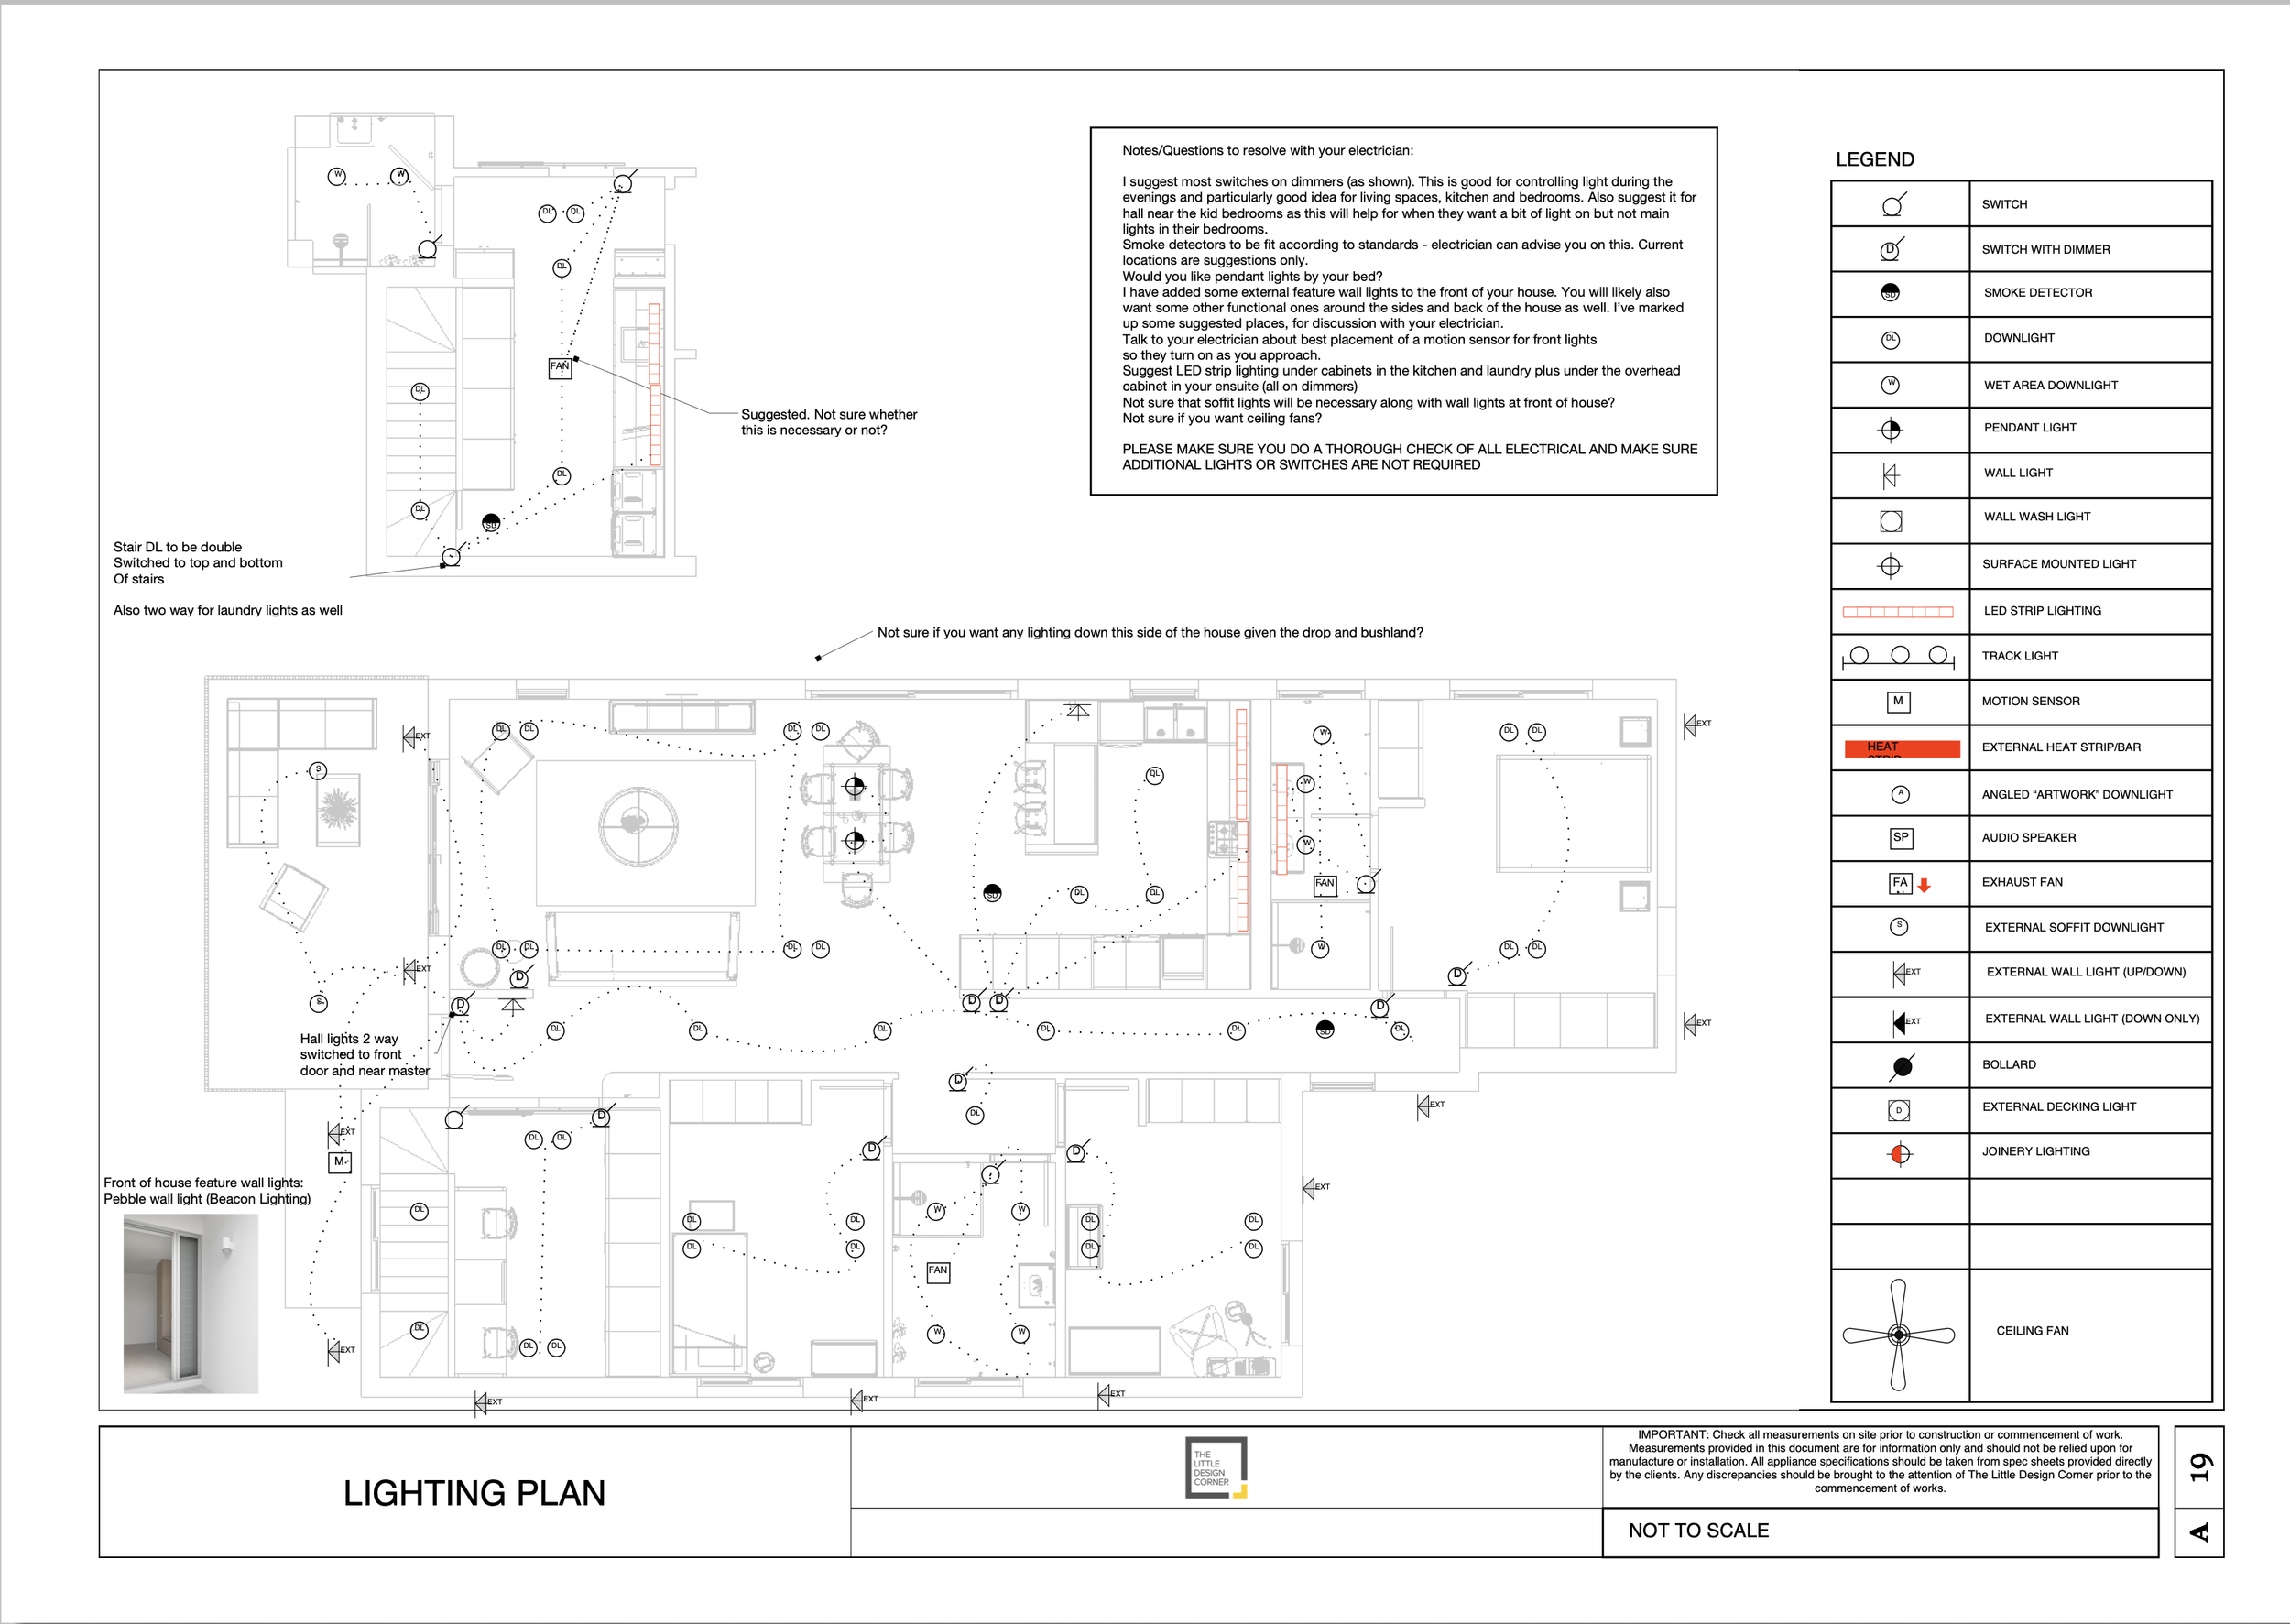
Step 4: Drag and drop your electrical/lighting symbols on to your plan
Use the key (included in my free templates or you create your own key/legend in your templates) and drag and drop the symbols on to your plan to show placement of lighting, electrical and other details
Below shows my full Layout workspace including my duplicated key/legend that I use to drag and drop in to the plan. I also have a scrapbook created in Layout for my lighting/electrical symbols and this is another easy way to drag/drop on to your plan. I teach both those methods in my intermediate course.
Use the line tool to then connect lighting strings together and to indicate switching
Finally, add in notes and call outs using text boxes and images (as you would like)
Step 5: Export
Once your plan is ready you can export to PDF and it’s now ready to share with your clients, trades/contractors or even to show your partner if you’re designing your own home! :)
If you would like to see more of this project including the full project documentation set that I ended up creating for my clients you can find that IN THIS BLOG POST.
Learn SketchUp with our fun online course for beginners…
If you want improve your work with design clients or you are about to start renovating or remodeling then you will love SketchUp.
With this software you can mock up an entire home in 2D (floor plans, joinery/millwork elevations, lighting and electrical plans and more) and 3D (renderings and perspective drawings) so you can picture exactly what it will look like when it is finished plus prepare your technical drawings for use with your clients, trades and contractors.
Learning SketchUp will save you time, money, mistakes and so much more! It is a well known piece of software in the interior design and architecture industries and will give you a solid technical drawing skill that will immediately upgrade the professionalism of the work you are doing.
I teach an online course for beginners that is focused specifically on using SketchUp for interior design purposes. We have had more than 10,000 students come through the course with so many fantastic projects designed and built!
We have all sorts of students in the course including designers and architects, cabinet makers, home renovators/remodelers, kitchen and bathroom designers, event planners, landscape designers and design enthusiasts.
To find out more about the courses we have on offer click the link below. And reach out if you have any questions I can help with :)
Enjoy the rest of your day!
Clare x
Dr Clare Le Roy