How to design a family mudroom
A mudroom is a functional luxury for families.
It’s a place for everyone to take off their shoes, put away their bags and belongings and store items you might need as you run out the door like hats, suncream, jackets and scarves.
Using photos from my Roseville project I thought I would give you some ideas about the elements I like to try and include in mudrooms I design.

1. Keep it close to the laundry and ideally a bathroom, if possible
If you are lucky enough to be designing a home from scratch then when you are space planning try and keep the mudroom area as close to the laundry as you can.
A great place for it is by the back door or straight off the garage, if you have an internal entry from your garage.
That way dirty sports clothes can be put straight in the wash as people arrive home, which saves time and mess going all the way in to the house (great if you have rugby playing boys like I do!).
For practical reasons if you can have a bathroom near this area that also helps as well. Not only for when people urgently need the loo when they get home but also for messy children to go straight in and wash off before stepping too far inside the rest of the house!
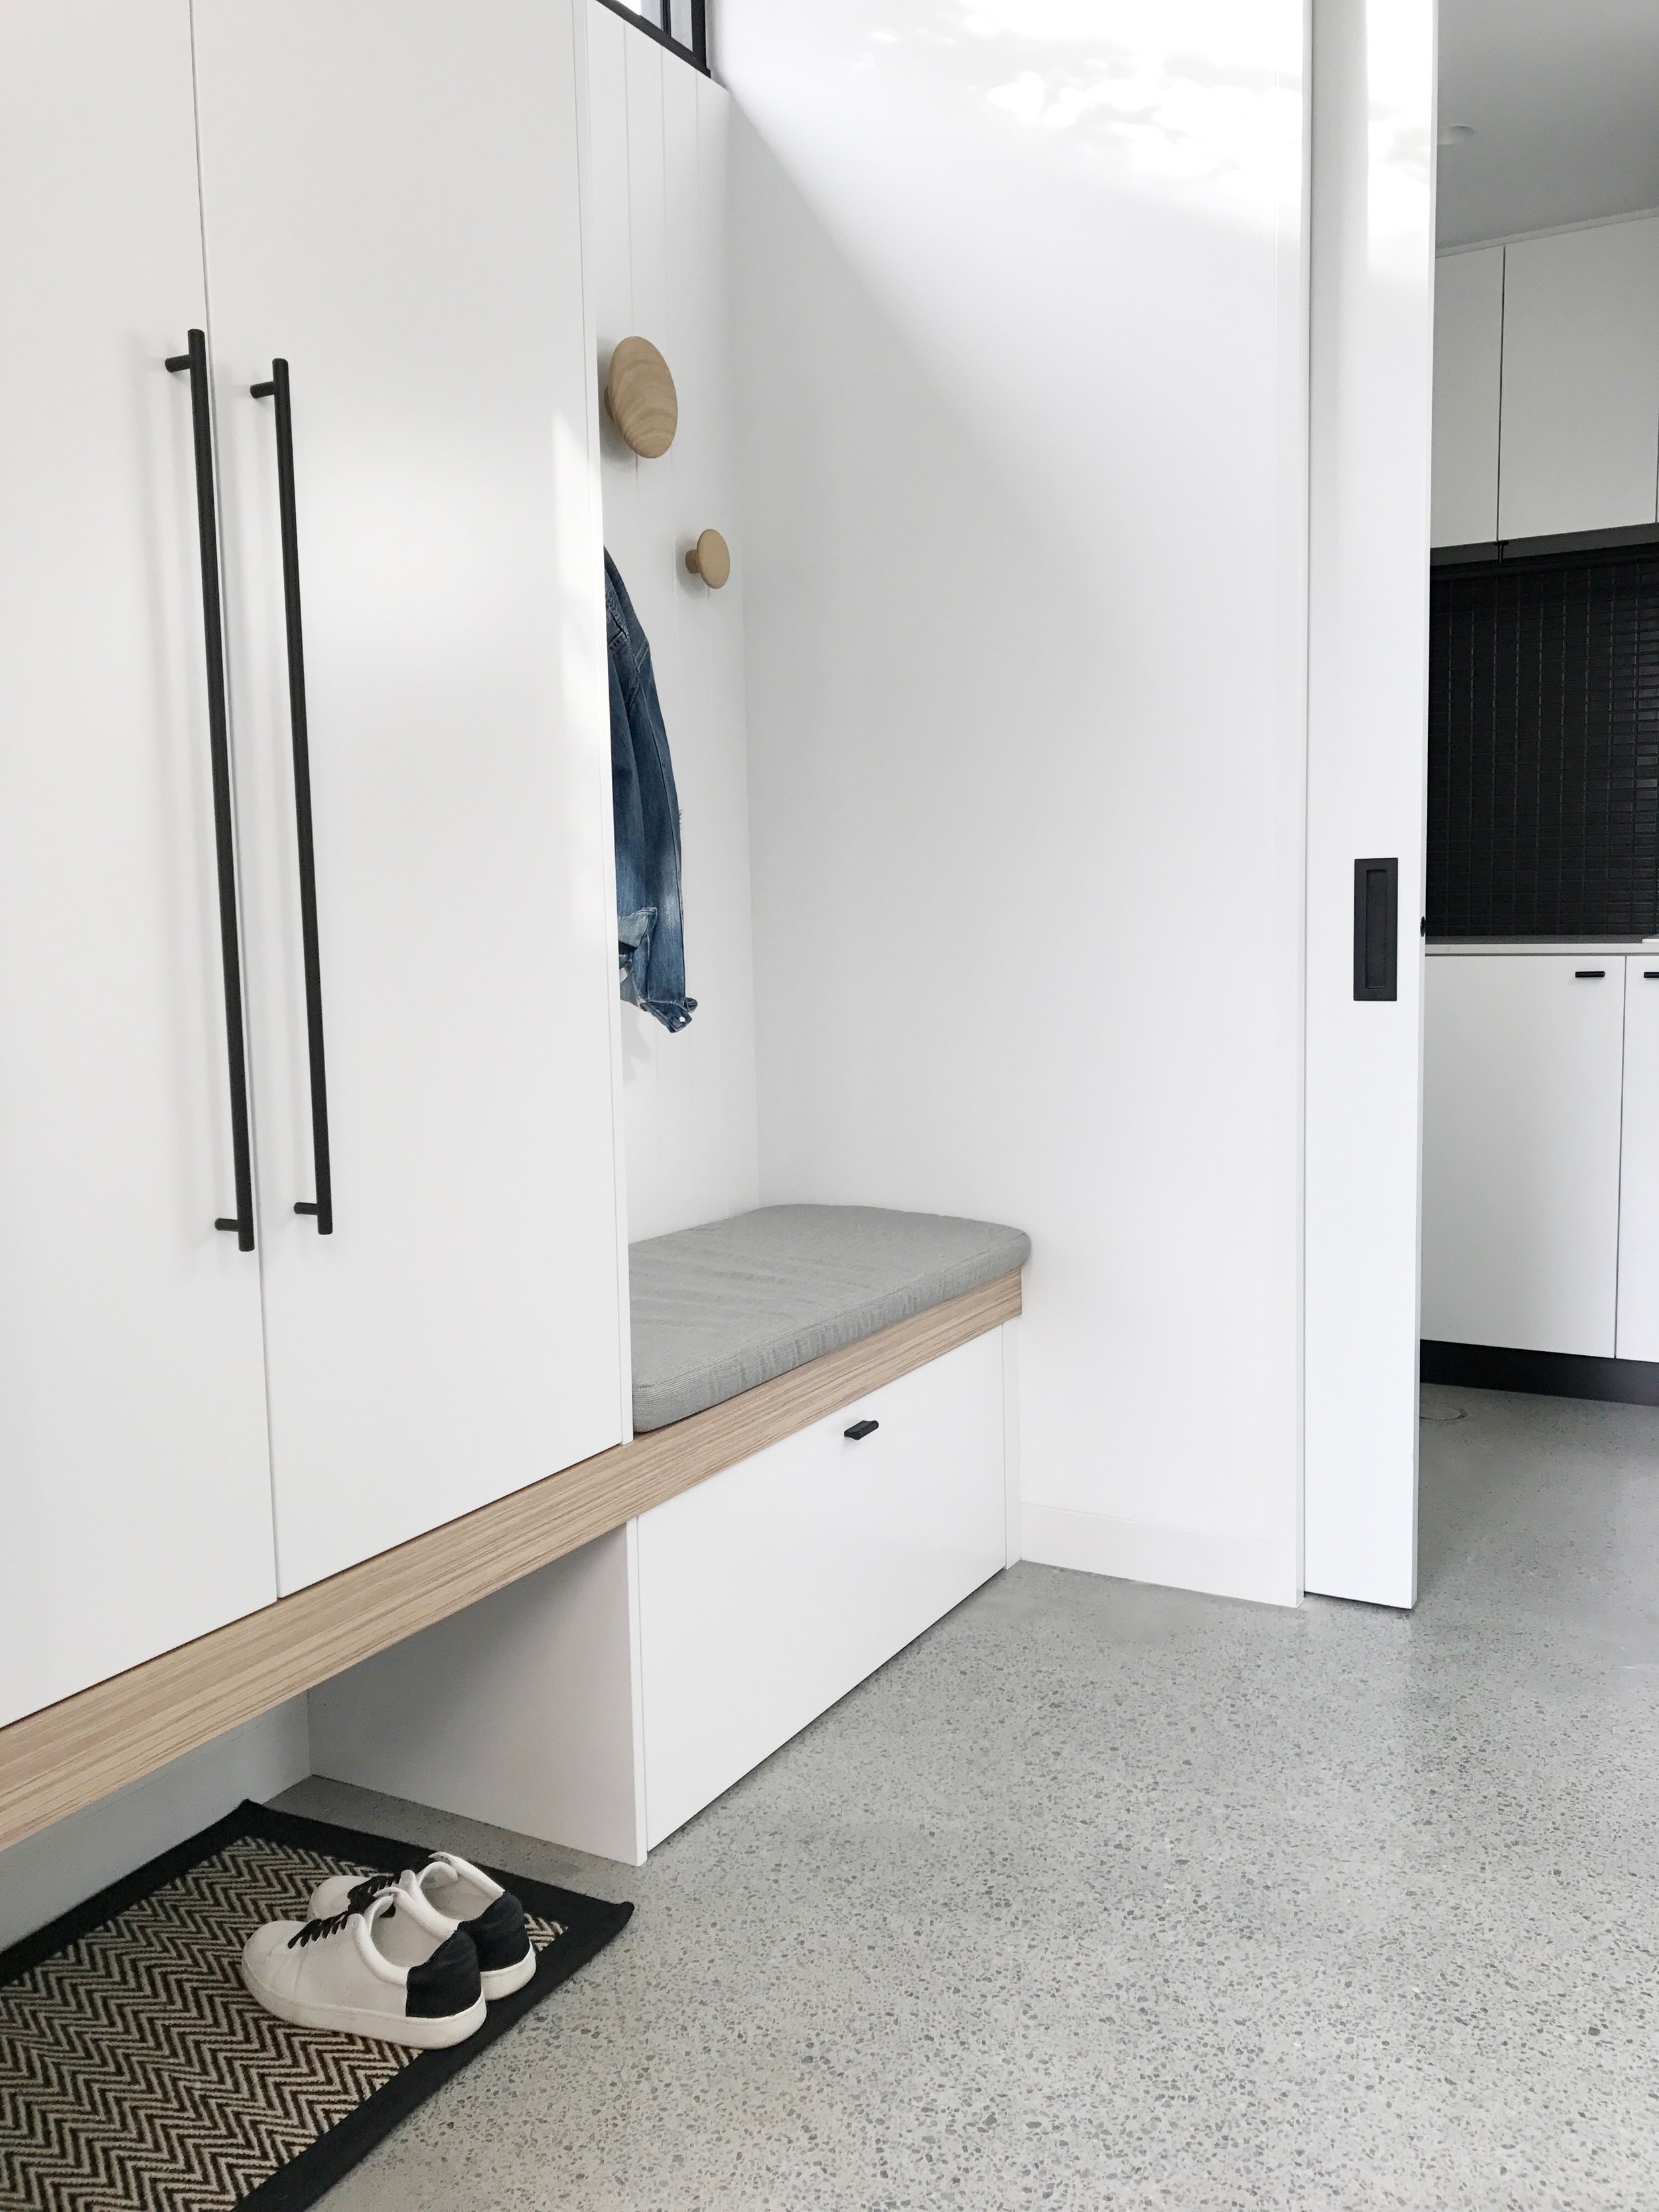
2. Include somewhere to sit and put on shoes
I always like to try and include as much sitting space as there is the room for so that more than one person can sit and put their shoes on at a time.
Unfortunately we didn’t have a huge amount of space in this project so there was really only room for this small seat - if I had more room I would definitely make this larger.

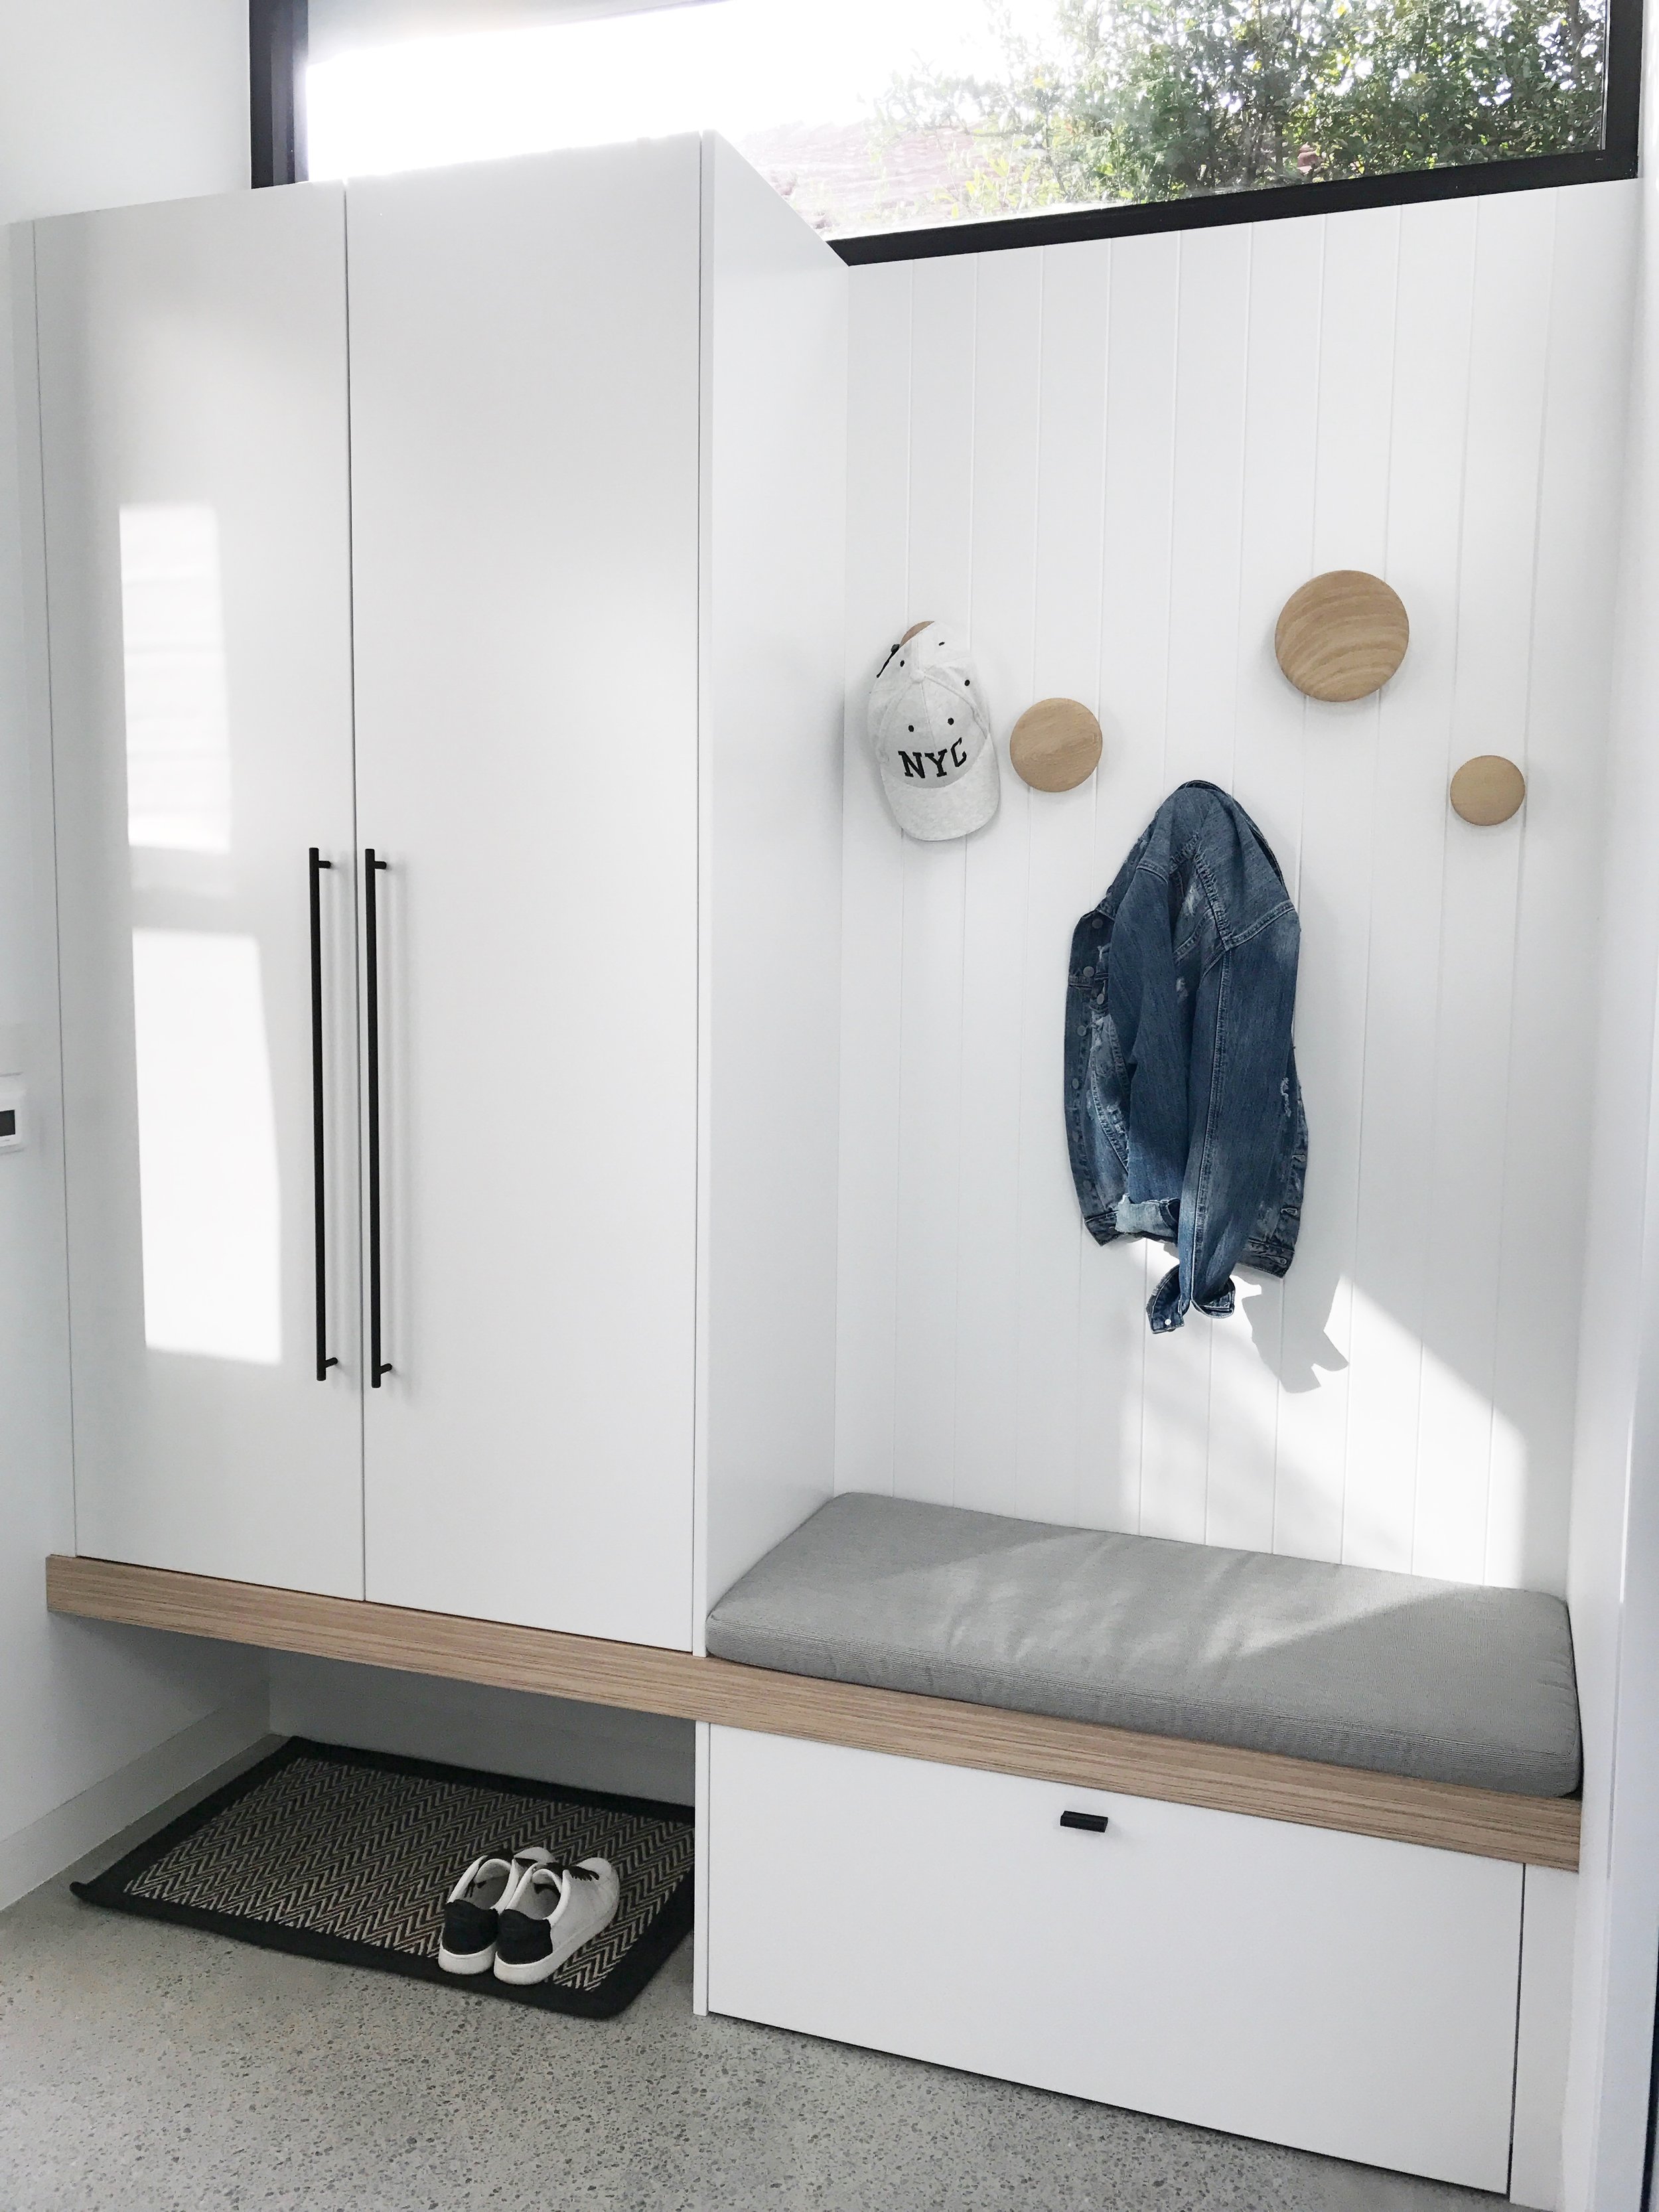
3. Have some hooks for hanging up coats and hats
As your hanging area will probably be on show, try and make this look attractive with some fun coat hooks like the ones I chose from Muuto for this space.
4. Include lots of shoe storage
I personally like to take shoes off at the door and then have a no-shoe policy in my house.
But this means that lots of shoe storage is needed in the mudroom. In this project I included a deep drawer for the bulk of the shoes and then also normally had a shoe rack under the cupboard (which I put away for the photos to make it look a bit neater!). This allowed everyone in the family to have about 3 pairs of their regularly used shoes near the door.
I think if I were designing this space again I would take the cupboard all the way to the floor or include a second draw under it so we had a bit more storage that was closed. Inevitably what used to happen is that everyone kicked their shoes off under the cupboard and so it looked quite messy.
5. Put in a notice board for school notes, artwork and other family information
This is a nice place to hang up art and awards for the kids but also a place to put up any timetables or a family calendar to keep everyone on top of what they are meant to be doing each day.
I liked how this was tucked around the corner of the kitchen so it was handy for day to day life but also not on display in the main living zone.
People always ask me where I got the felt boards from - here is the website.

6. Have a cupboard for kids (and partners!) to put away their bags and belongings
In my family each person was allocated a particular spot to put their bag away in the storage cupboard.
We all also each had a felt basket where we could keep things we needed but didn’t use every day. The boys kept their library bags, school notes, mouth guards for sport and other bits and pieces in here so they knew where it was.
My husband and I had our keys, extra sunglasses, headphones for exercise and things like that. Despite having this place to put them away, my husband’s keys and wallet mostly ended up on the kitchen bench :) - but every now and then, when I was really lucky, he would put them in his felt basket out of sight!! haha!
I also kept some of my own shoes in this cupboard as I needed more than 3 pairs ready at the door. Yes, I have a sneaker obsession!!

In this cupboard I also put a power point so we could charge iPads as well as the hand vacuum for little spills around the house. Suncream is also in here.
Overall this mudroom system worked really well for our family. School bags no longer just lay about in the kitchen or on bedroom floors and everyone knew where their things were if they were looking for them.
I had quite young kids when we lived in this house. Now they are older this storage cupboard wouldn’t be enough room for what we need these days.
WIth older children a mudroom would ideally have:
a ‘locker’ for each family member or at least each child - where they could store both school and sports bags plus hang up blazers and keep their school hats
more sitting room so the kids don’t fight when they are both sitting on the bench and touching elbows (eye roll!)
more shoe storage
If you aren't building from scratch like we did then there are often nooks around the home that could be turned in to a mudroom system like this. This might be under the stairs, near the front door (e.g. try putting together your own system using IKEA's Besta cabinets) or even allocate a space within your laundry.
I hope this has given you some ideas to try out at your place!
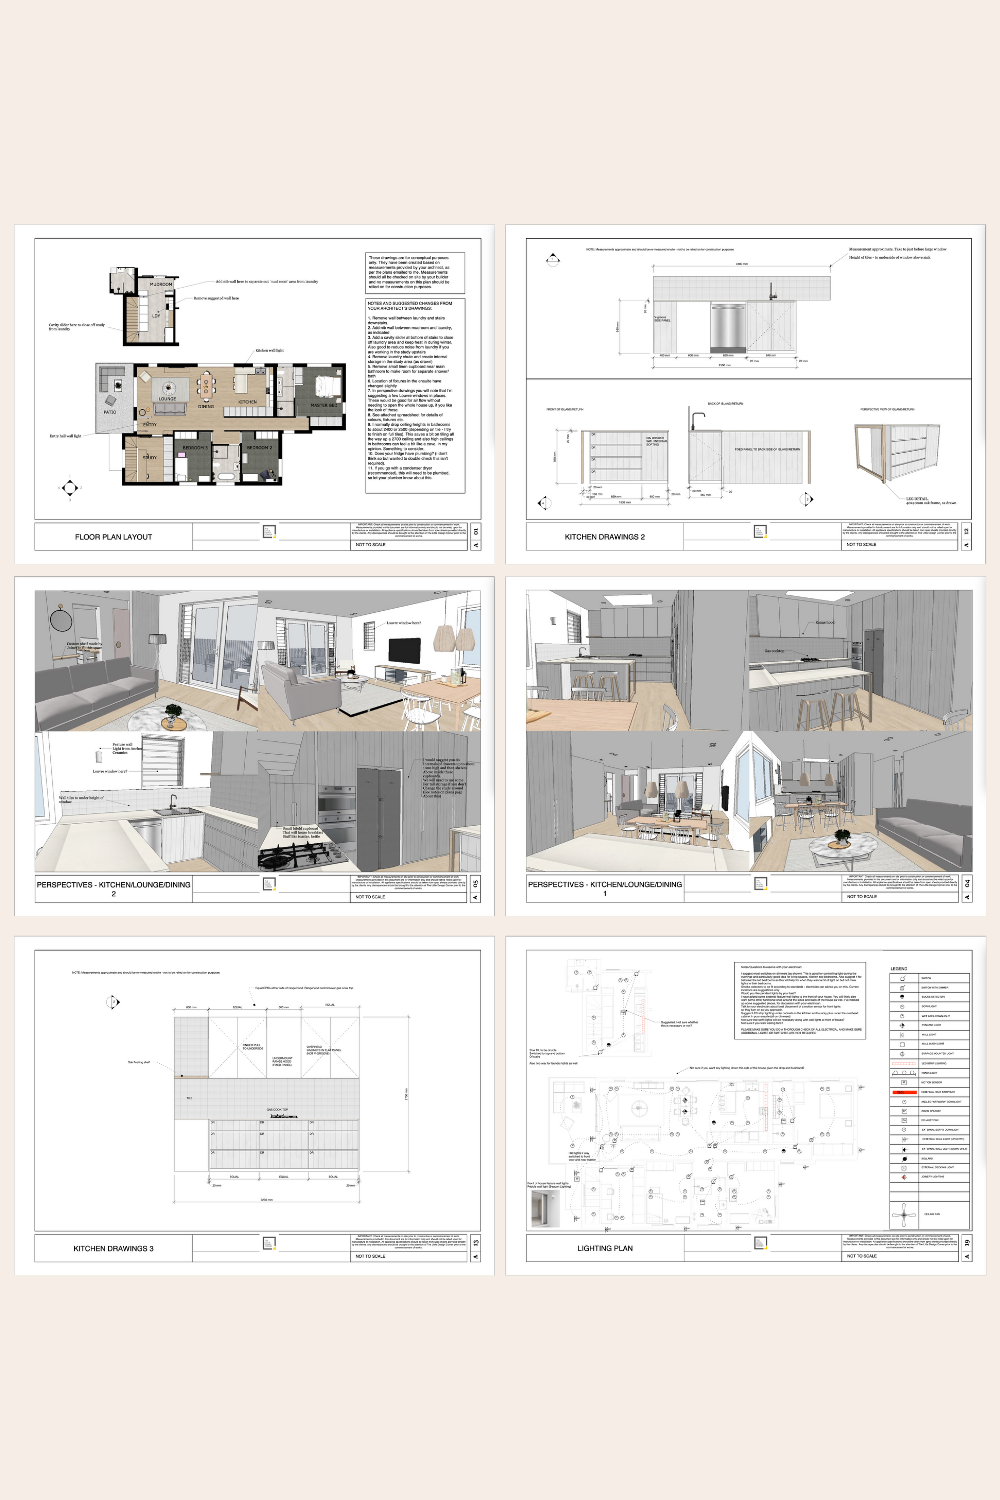
Design your mudroom in SketchUp with our fun online course for beginners…

If you want improve your work with design clients or you are about to start renovating or remodeling then you will love SketchUp.
With this software you can mock up an entire home in 2D (floor plans, joinery/millwork elevations, lighting and electrical plans and more) and 3D (renderings and perspective drawings) so you can picture exactly what it will look like when it is finished plus prepare your technical drawings for use with your clients, trades and contractors.
Learning SketchUp will save you time, money, mistakes and so much more! It is a well known piece of software in the interior design and architecture industries and will give you a solid technical drawing skill that will immediately upgrade the professionalism of the work you are doing.
I teach an online course for beginners that is focused specifically on using SketchUp for interior design purposes. We have had more than 10,000 students come through the course with so many fantastic projects designed and built!
We have all sorts of students in the course including designers and architects, cabinet makers, home renovators/remodelers, kitchen and bathroom designers, event planners, landscape designers and design enthusiasts.
To find out more about the courses we have on offer click the link below. And reach out if you have any questions I can help with :)
Enjoy the rest of your day!
Clare x